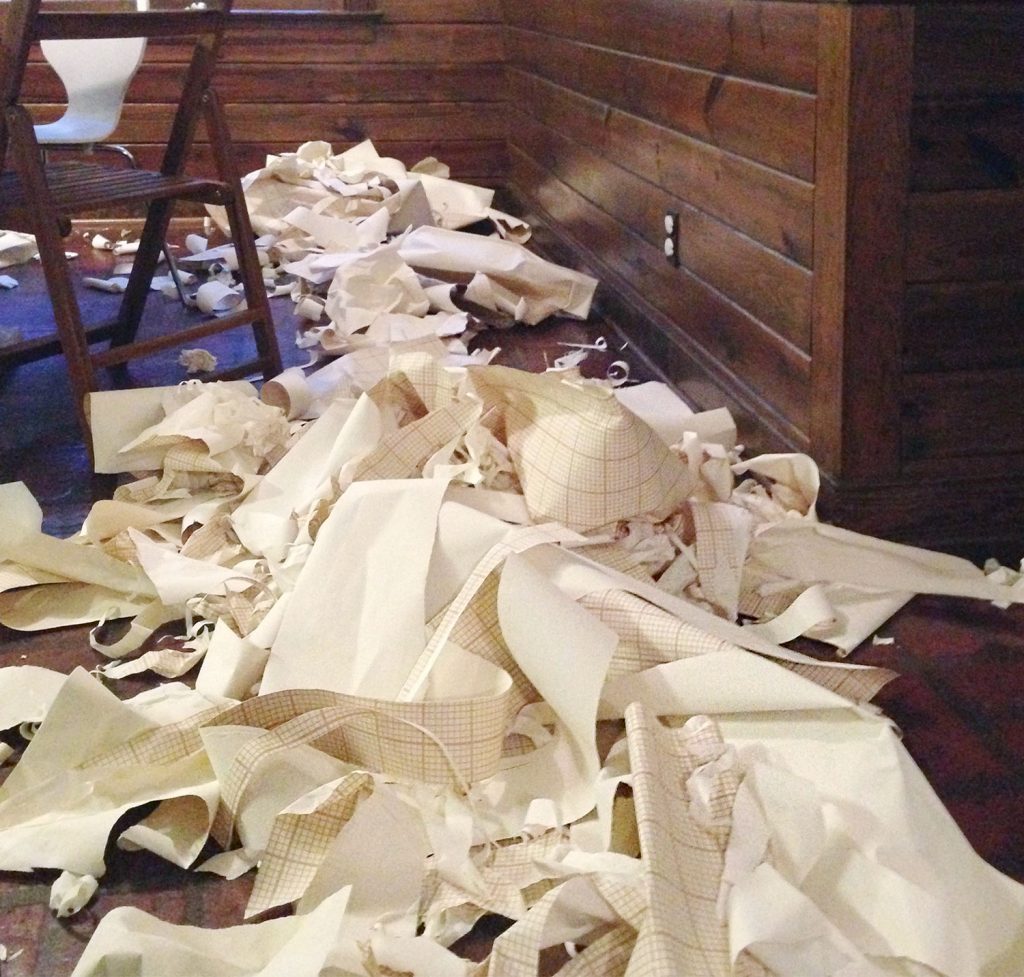
Wallpaper has made a big comeback as a trendy home design choice. But despite its resurgence, there are still plenty of us dealing with dingy, dated, or downright ugly old wallpaper we don’t want. In our old home, we had to remove wallpaper in so many rooms: the kitchen, the dining room, the foyer, and two different bathrooms! As we traveled from room to room removing wallpaper, we tested 4 different methods, and today we’ll share what we learned.
Removing wallpaper doesn’t require special tools or lots of money. It’s a totally doable project for any homeowner. However, it can be a tedious process that can take elbow grease and patience, depending on the size of your room and the stubbornness of your wallpaper. But having removed several rooms worth of decades-old wallpaper, we can confidently say it’s worth the effort!
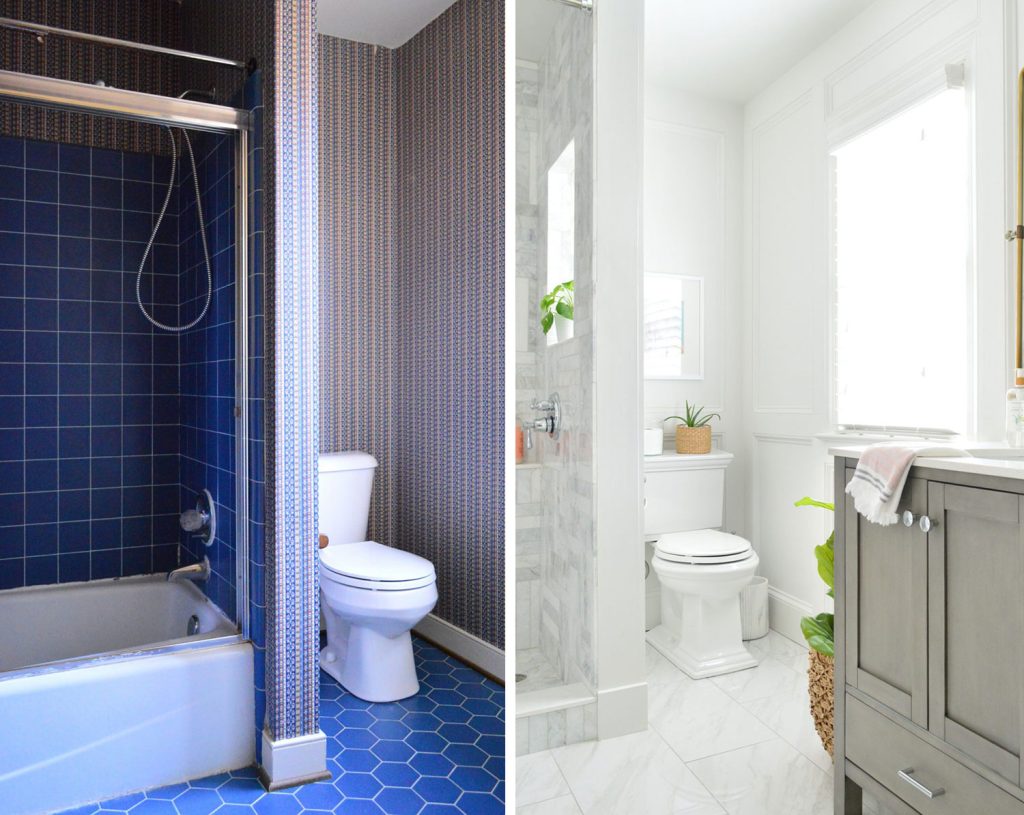
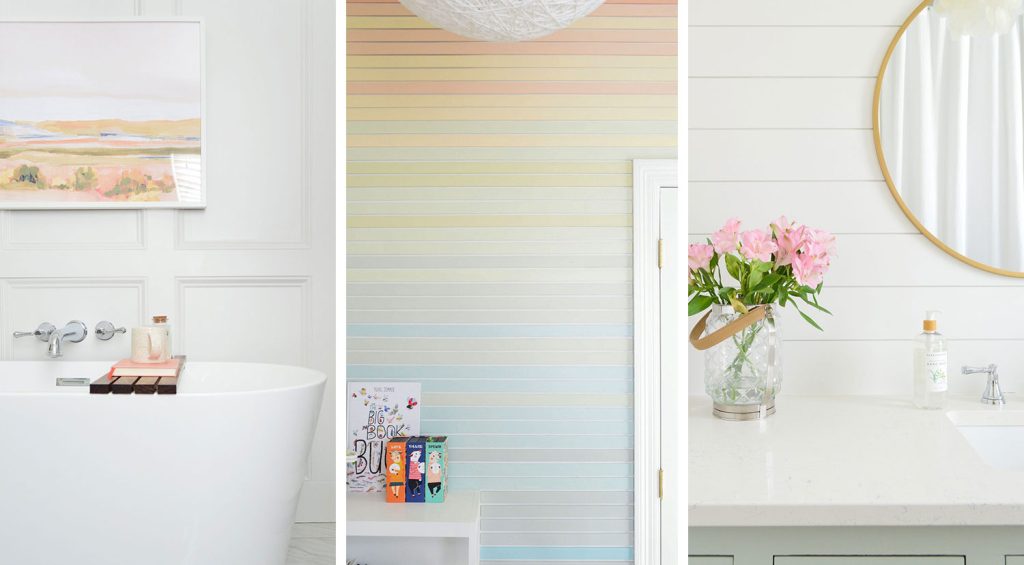
You can also check out more before and afters of our once-wallpapered rooms. Shown above is our old main bathroom that got quite the makeover.
Four Ways to Remove Wallpaper
Before we began, we crowd-sourced various methods to test out and report back on. We discovered some worked better than others, and some rooms responded differently to different techniques. That means there’s not one clear winner, but rather an assortment of good options at your disposal.
- Method #1 – Dry Stripping: Rip down sections of wallpaper without steaming or wetting the walls.
- Method #2 – Boiling Water: Wipe your wallpaper with hot or boiling water to loosen the glue.
- Method #3 – Stripping Solution: Spray the wallpaper with a DIY mixture of water, soap, or fabric softener.
- Method #4 – Steaming: Use a handheld steamer to loosen the wallpaper as you peel.
Be prepared to try multiple methods, since you never know which might be the secret weapon in your space. We found that we sometimes needed to combine them to finish the job.
Materials & Supplies Needed
Before you remove any wallpaper, we recommend having the following supplies on hand:
- Glass spray bottle or pump sprayer
- Large sponge
- Putty knife
- Utility knife
- Painter’s tape
- Plastic drop cloth
- Trash bags
- Paper towels
- Steamer (optional)
- Stripping solution (optional)
- Wallpaper scoring tool (optional)
- Wallpaper scraper (optional)
The “optional” supplies are the only ones you may not already have around the house. Scoring and scraping tools are inexpensive, but we didn’t find them helpful. You can read why below. Premixed stripping solutions are fine, but you can make your own with ingredients you probably already have around the house (we’ve included recipes further down in this post). A steamer is useful, but they can be expensive so don’t feel like you must purchase one.
A Note About Scoring
Many tutorials recommend using a scoring tool before spraying or steaming your wallpaper. It’s a simple, handheld device that you rub over your wall, creating small perforations in the paper. This allows your stripping liquid to reach the glue layer better.
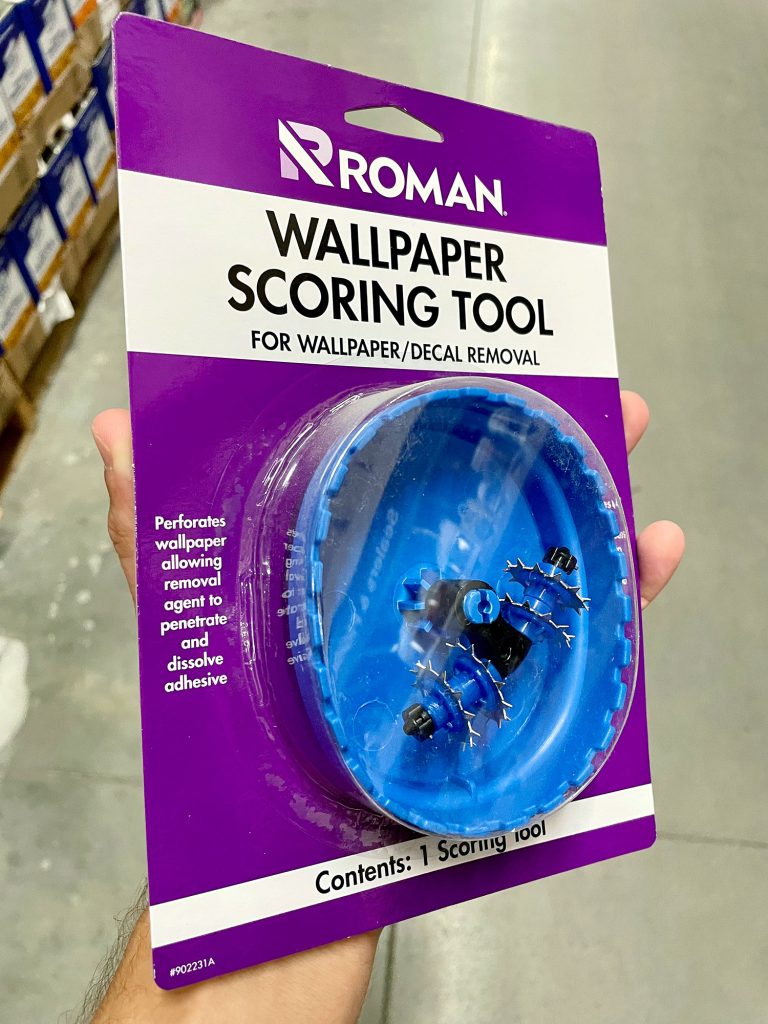
However, in our experience, scoring wallpaper is time-consuming, tiresome, and makes the project harder. We repeatedly found that our scored wallpaper pieces were more likely to come down in small, choppy bits, rather than large pieces. It only added time, mess, and frustration to our project. So we don’t personally recommend a scoring tool, but feel free to pick one up if you’d like to test it in your space.
Room Preparation
No matter what technique you use, you’ll want to take a few steps to prepare your room before removing wallpaper.
Move furniture, art, and decor away from walls: Much like when painting a room, remove large furniture or push it to the center of the room so you have a clear workspace in front of each wall. Remove any art or decor from the walls too.
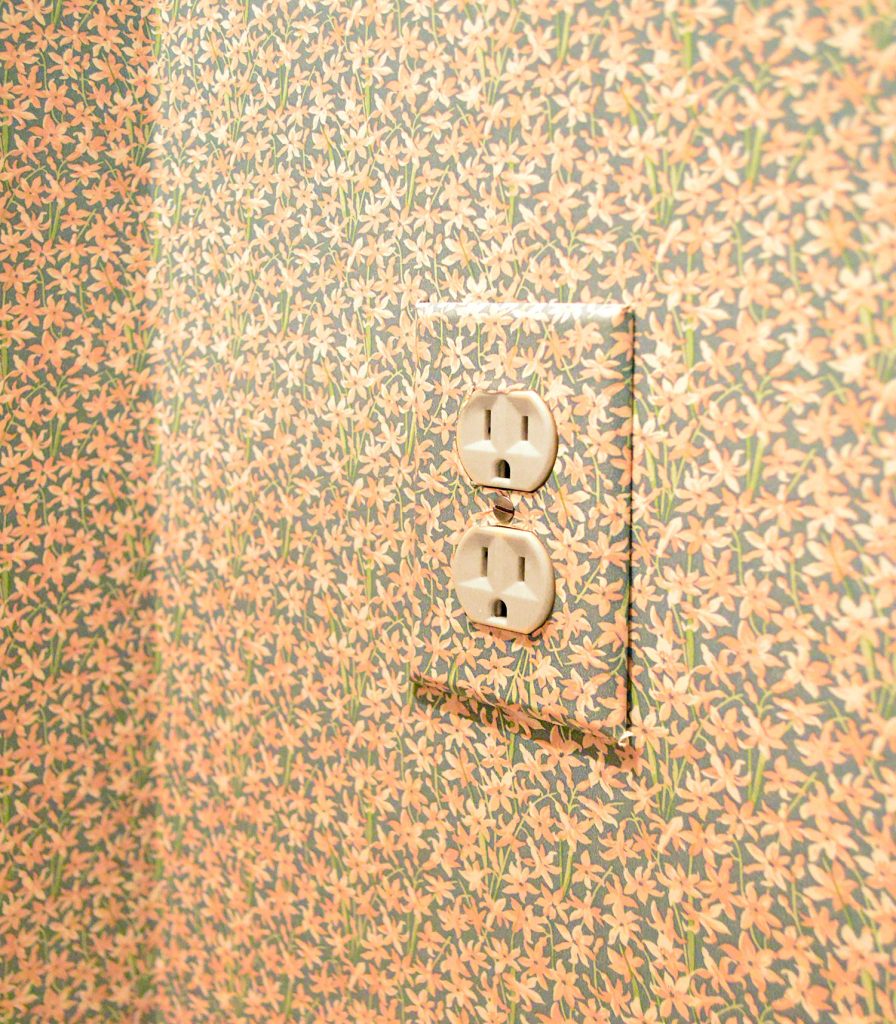
Remove switch plates and outlet covers: Unscrew electrical covers to access any wallpaper behind them. Our outlet covers were wallpapered themselves, so we had to take them off anyway!
Protect floors, furniture, and outlets from moisture: Your walls will be getting wet, so use plastic drop cloths to protect surfaces like floors or furniture. Use painter’s tape to seal outlets and light switches as well.
How Wallpaper Works
Before you begin removing wallpaper, it’s helpful to understand how it was likely installed. Most wallpapers are made of two layers. The top, decorative layer can be made from vinyl, bamboo, paper, or textiles. The underlayer is typically an adhesive paper or layer of glue. Most wallpaper removal methods rely on heating or dissolving this glue layer so the paper can be peeled away. Depending on the age and make of the wallpaper, the paper and glue layers may come off together or separately. Each layer may require a different removal technique.
If you are removing a newer wallpaper, it may be a the removable, peel-and-stick kind. These glue-free wallpapers became increasingly popular in the last 10-20 years. We’ve installed removable wallpaper and removable wall murals more than once! They act like giant stickers and many can be removed without much trouble. Just be prepared to take your time, since removable wallpapers sometimes peel the wall paint behind them (even though they call themselves removable).
Method #1: Dry Stripping
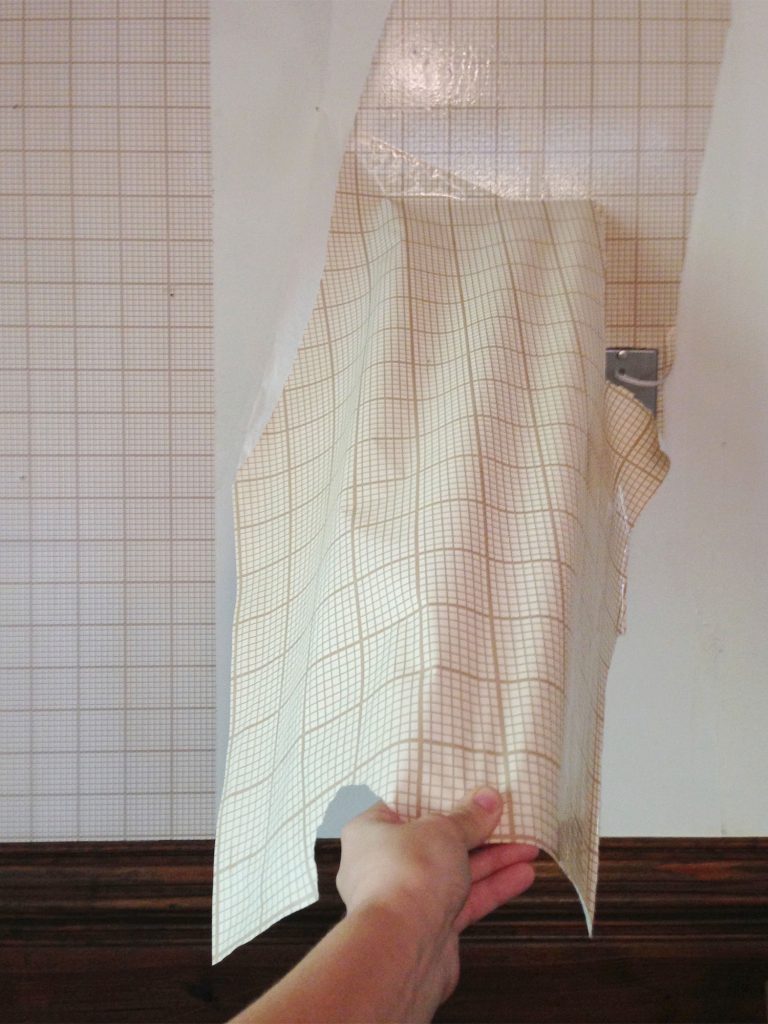
Before you break out any special supplies or spray, try tearing down a wallpaper panel or two by hand. Find a peeling corner or use a putty knife to pry some up at a seam. Once you’ve got a firm hold of the paper, pull slowly to see if any comes off. This may not work, but it’s worth a shot! Our wallpaper usually tore off in small strips, but in some spots, we got several full sheets to come down! It’s extremely satisfying.
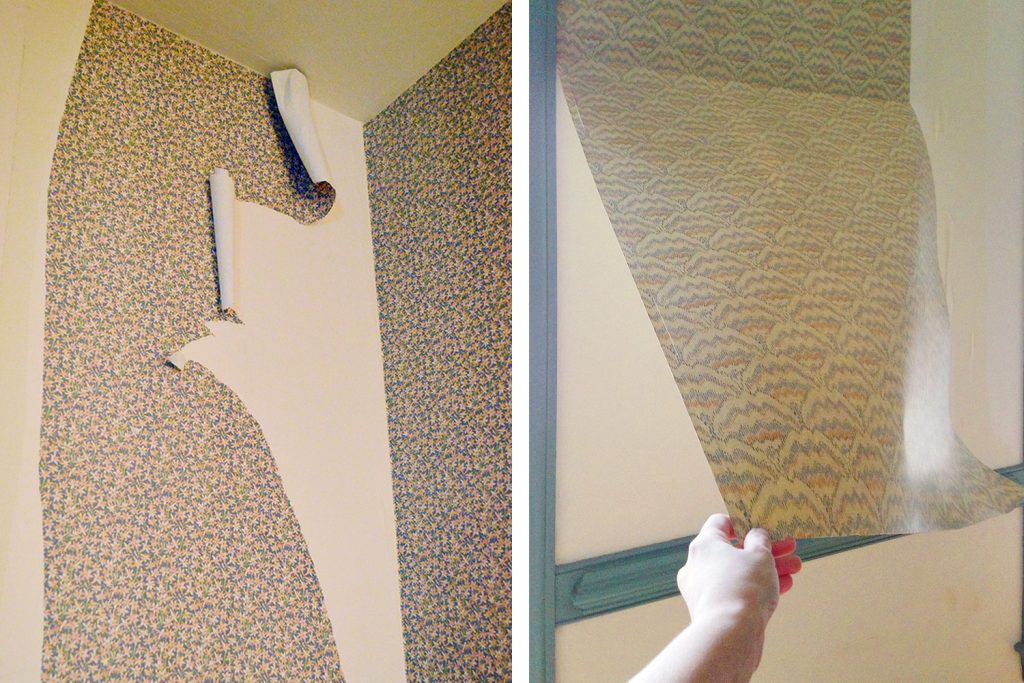
The success of this “dry stripping” method depends on the age of your wallpaper, how well it was installed, and where it is in your home. For instance, this worked especially well in our bathroom. Years of humidity had caused several areas to peel up already. Sherry even removed several panels while showering one day!
This technique is unlikely to finish the job, but it’s a great starting point. It may get you further along than you expect! But in most cases, you will still need to use one of the following methods to remove the glue layer.
Read our full post about using dry stripping to remove wallpaper.
Method #2: Hot Water
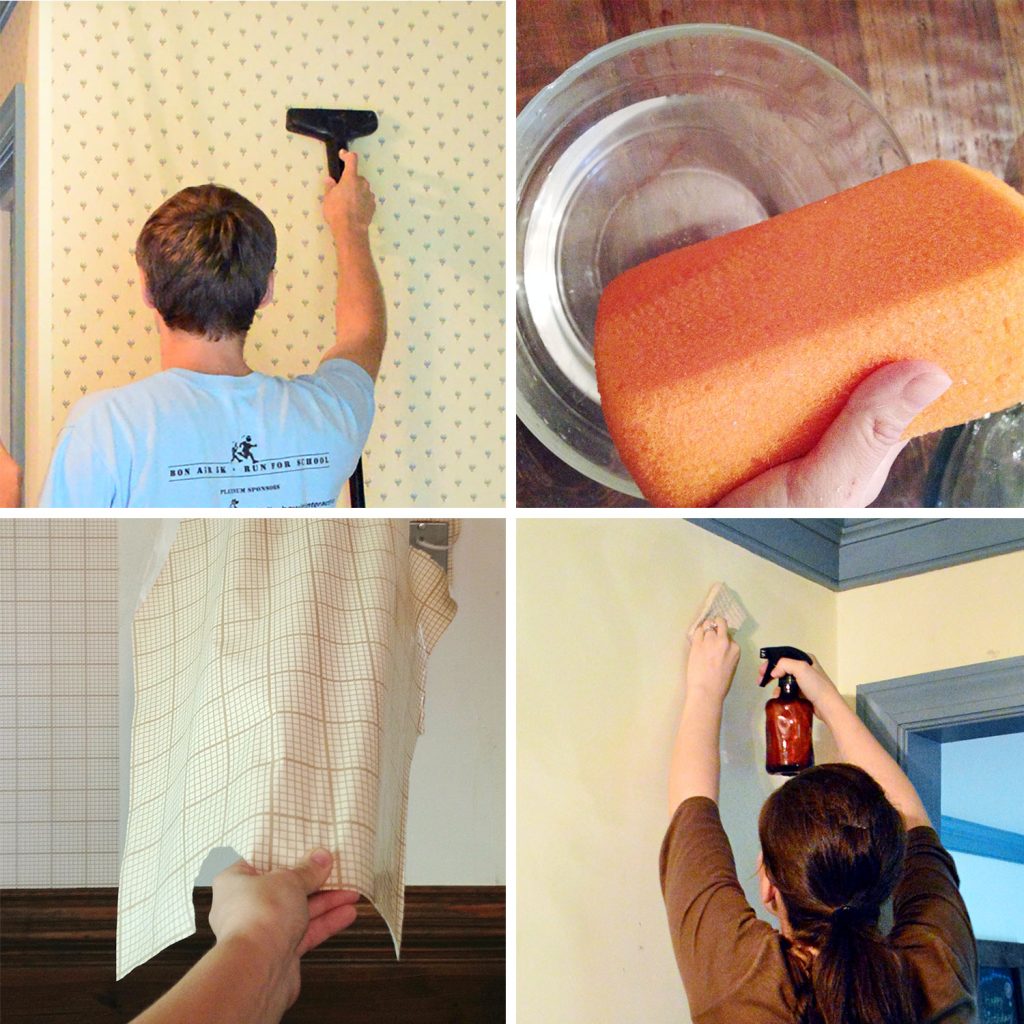
After peeling off as much as we could with the dry stripping method outlined above, next we tried spraying hot water onto the wallpaper. The hot water reactivates the glue, making it easier to remove the paper. The big advantage of this method is that it’s not expensive and calls for easy-to-find items (you don’t have to buy a steamer) and it’s simple (you don’t have to mix soaps or chemicals). It’s simply hot water in a spray bottle or dabbed on with a sponge!

When we first used the hot water method, we used a spray bottle filled with boiling water. That posed a few problems: the water warped the plastic bottle and it was so hot to hold we had to wear oven mitts. So the next time we just used hot water from the tap and a large sponge to apply it. It was much easier and produced similar results. You simply:
- Wet the wallpaper with a damp sponge dipped into a bowl of hot water
- Let it sit for 2-3 minutes
- Peel off by hand or with a putty knife
We recommend working in small sections so you can peel before each area dries or cools.
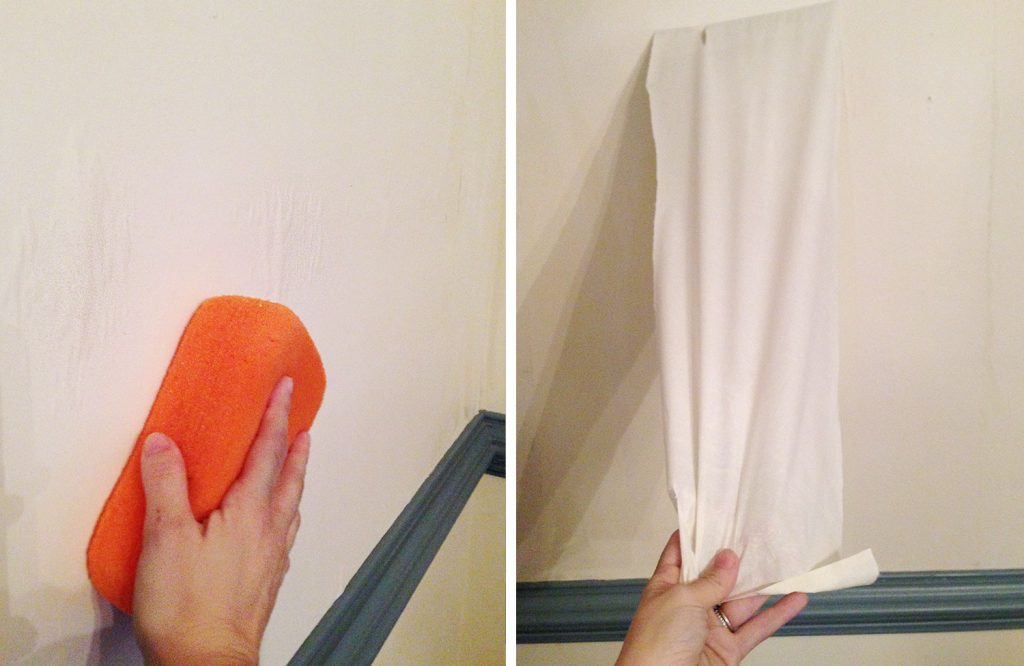
You can see in the photos above that this was especially good at removing the glue layer (see it bubbling above the sponge?) under the paper. Trust me, you do not want to peel the top part of your wallpaper and paint over the glue layer under it – it will never look right. You have to strip that off the wall too. Just be sure the sponge is damp, not soaking wet, and your floors and outlets are protected. The area will get wet!
Read our full post about using hot water to remove wallpaper.
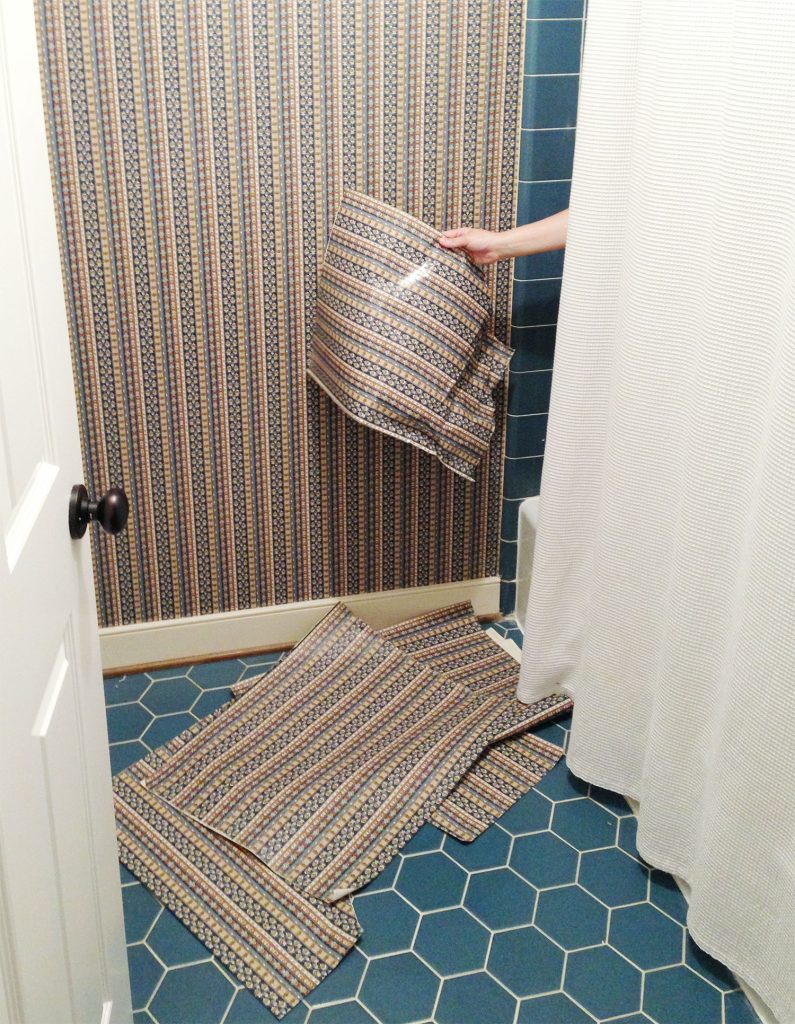
Method #3: Stripping Solution
You can also use a homemade or store-bought stripping solution to loosen the wallpaper glue. The homemade recipes aren’t complicated and use ingredients you likely already own. Here are a few options:
- Fabric softener + hot water
- Laundry detergent + hot water
- White vinegar + hot water
- Dish soap + hot water
For each solution, mix the two ingredients about 50/50 – maybe a little heavier on the water for the last two. The hot water helps reactivate the glue, while the detergents help dissolve it.
With a spray bottle or sponge, dampen your wallpaper with the solution and wait a couple of minutes to let it work its magic. If you are using a storebought stripper, follow the label instructions for how to apply. Then you can peel it by hand or with a small putty knife. Again, your paper may come off separately from the glue. We often had to go back around a second time, respray the glue, and remove it separately.
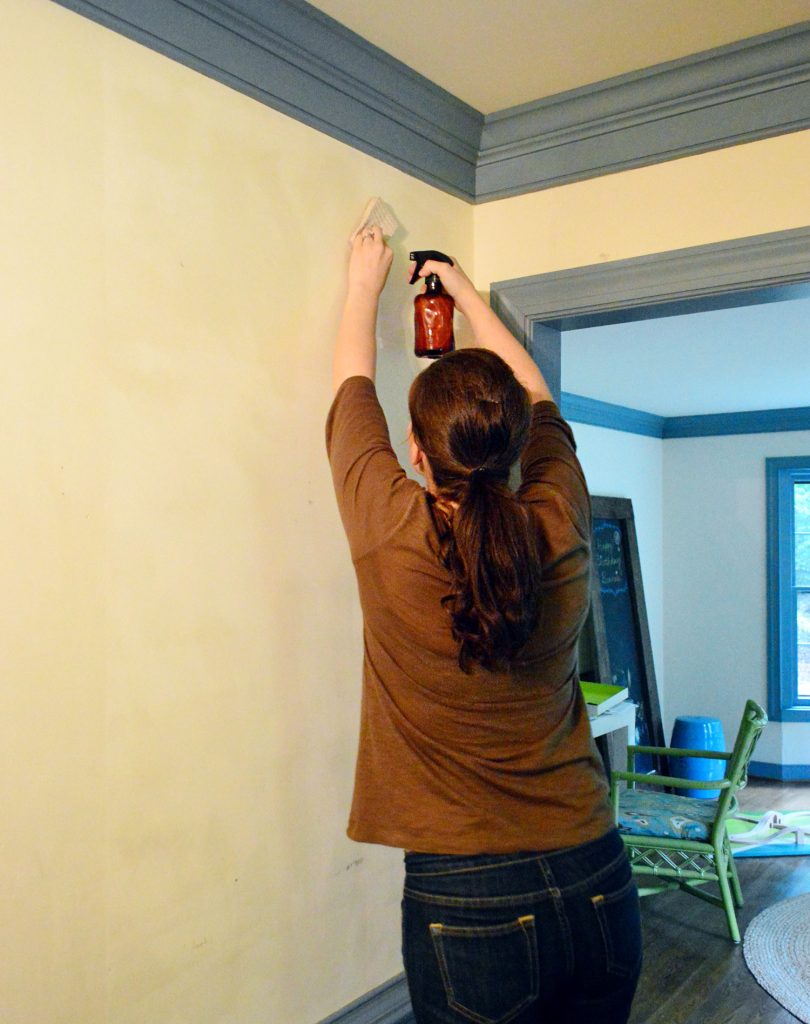
For small sections of glue, we also found that rubbing it with the rough side of a small, damp sponge helped get off little bits that were hard to see. They also sell wallpaper scrapers to help with this task, but we didn’t use one.
Read the full post about using homemade stripper to remove wallpaper.
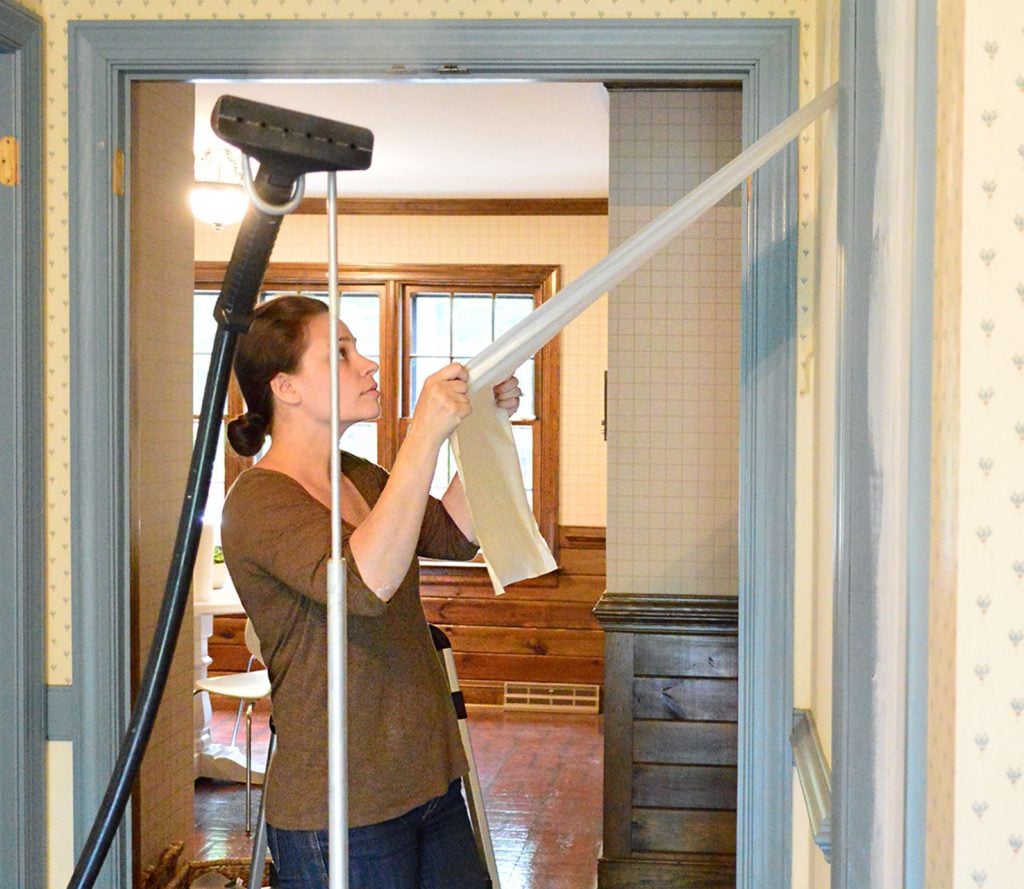
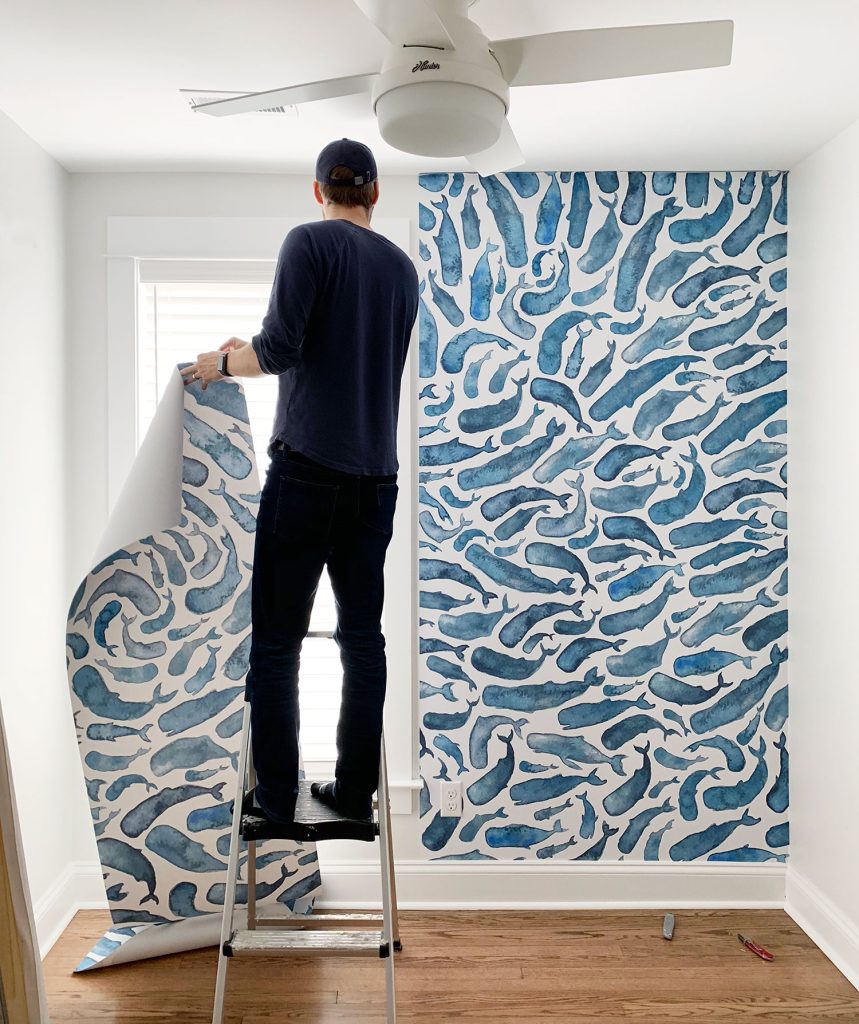
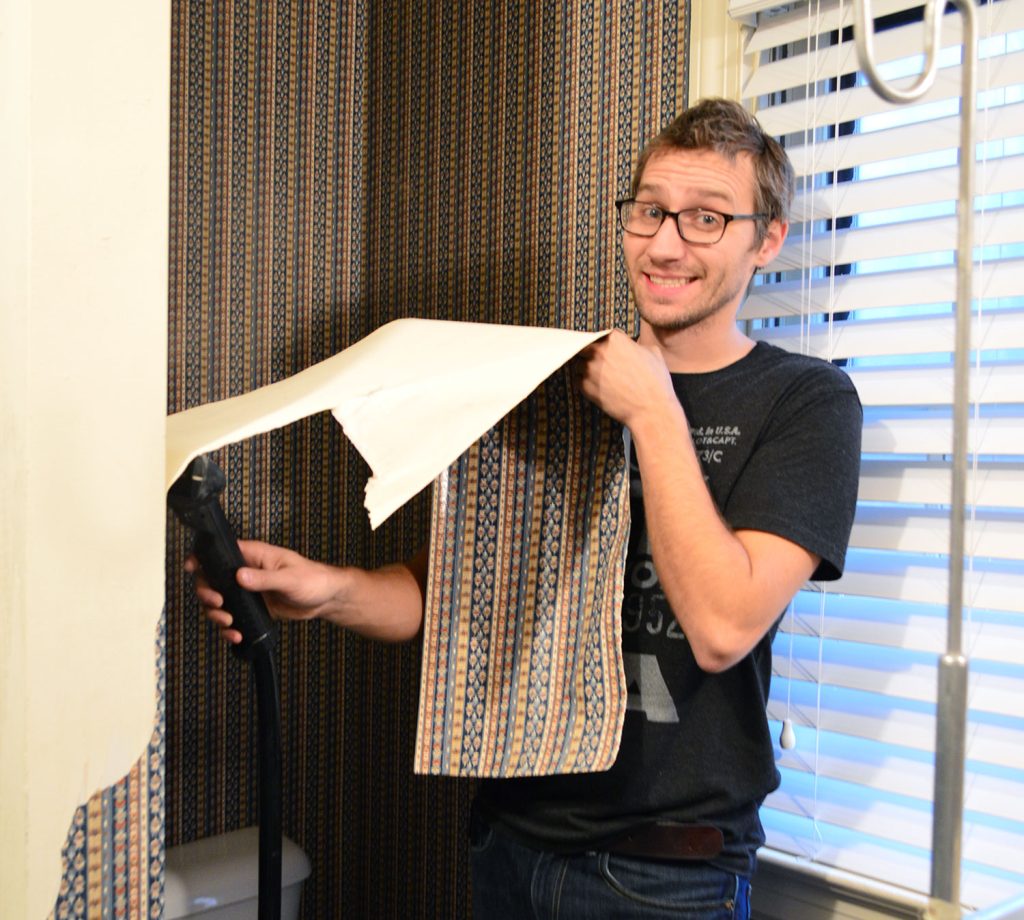
Method #4: Steaming
An electric steamer may seem like the perfect way to zoom through your wallpaper removal project. It can be, but it has a few drawbacks to consider.
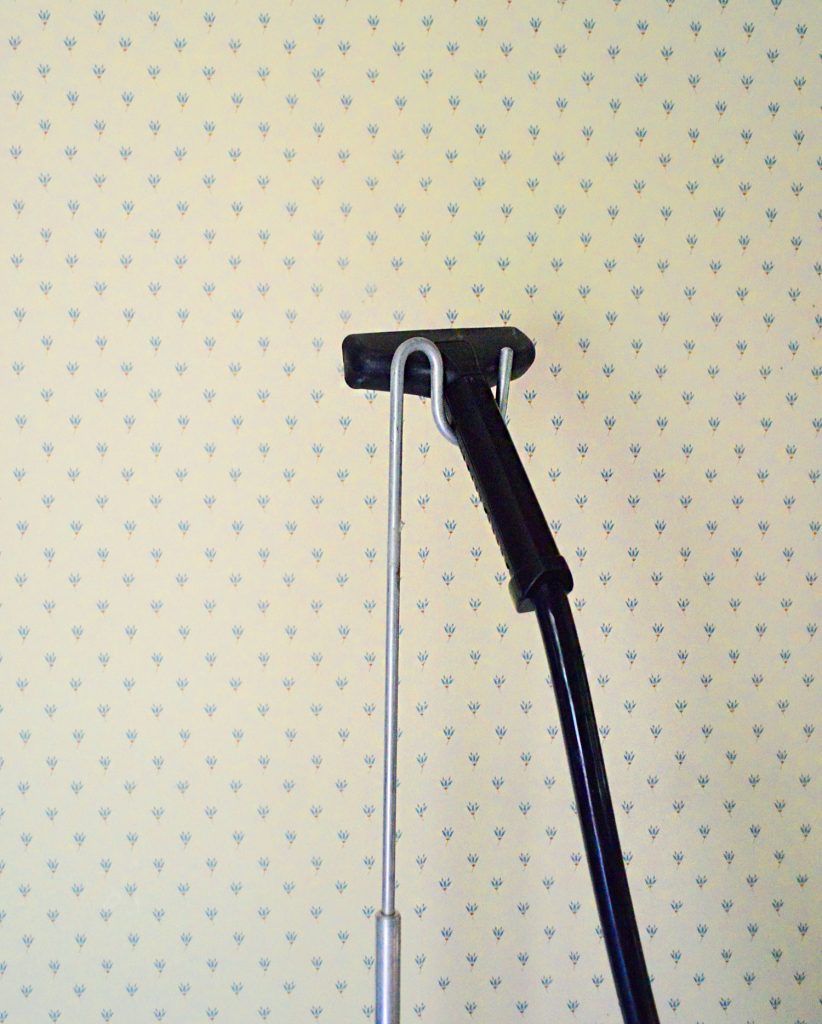
With an electric steamer, you blast hot steam right onto your wallpaper, loosening the glue much like the other methods. It can be faster, cleaner, and less cumbersome than the others because you can cover areas quickly. It may also be less physically taxing than spraying or scrubbing large walls. We found that the best method was a “peel as we steamed” technique, where we pulled on the paper as we moved the steamer down the wall.
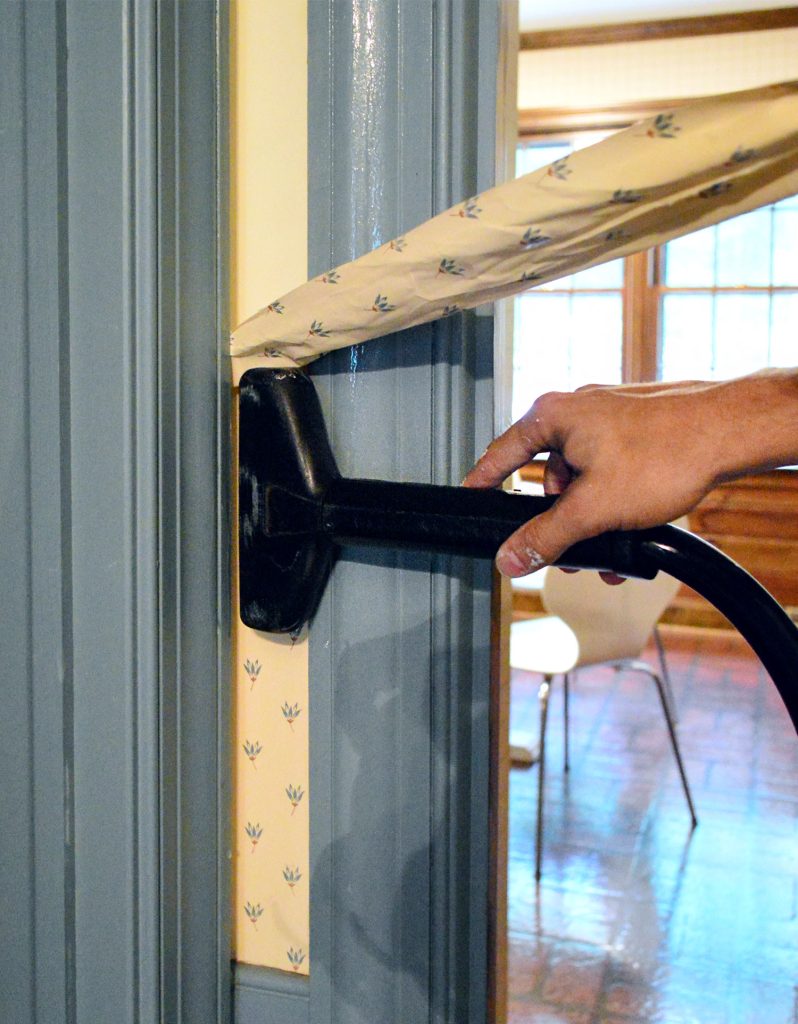
Steamers, however, can be expensive. A large, upright steamer can cost up to $250. We were lucky to borrow one from my sister. Smaller handheld steamers are cheaper (around $50 – $75) and you may already have one in your laundry room. However, the water reservoirs on these tend to be small and you may spend a lot of time refilling and waiting for it to heat up.
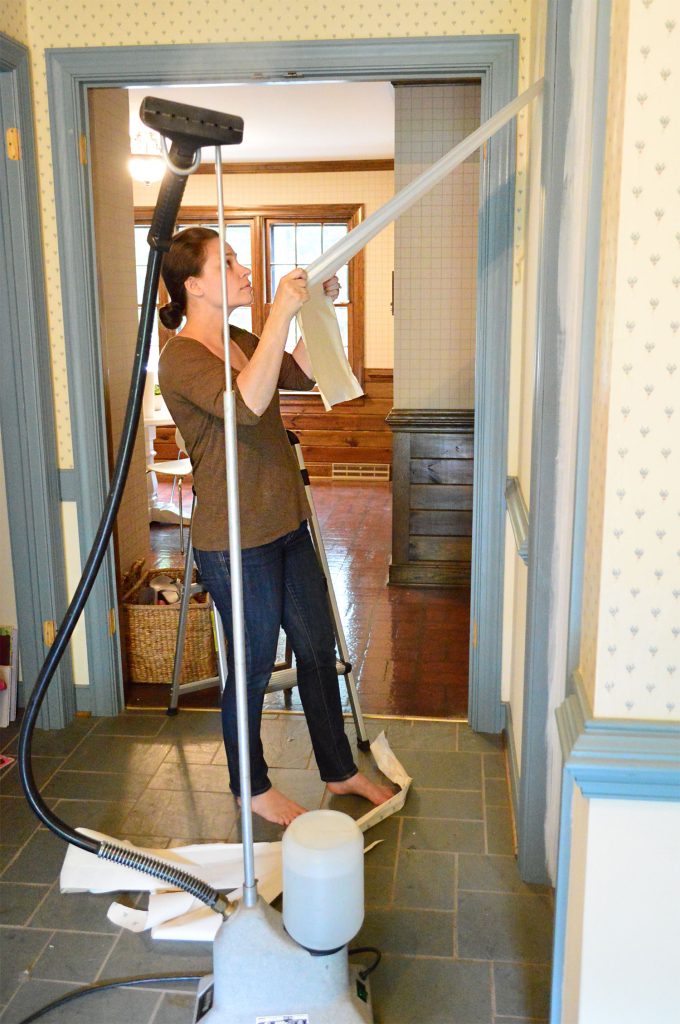
The large water tank and long hose on my sister’s steamer helped our project go fairly quickly. However, it wasn’t quite long enough to reach the upper areas of our room. This meant I had to hoist it in the air at some points, which got pretty tiring when the tank was full.
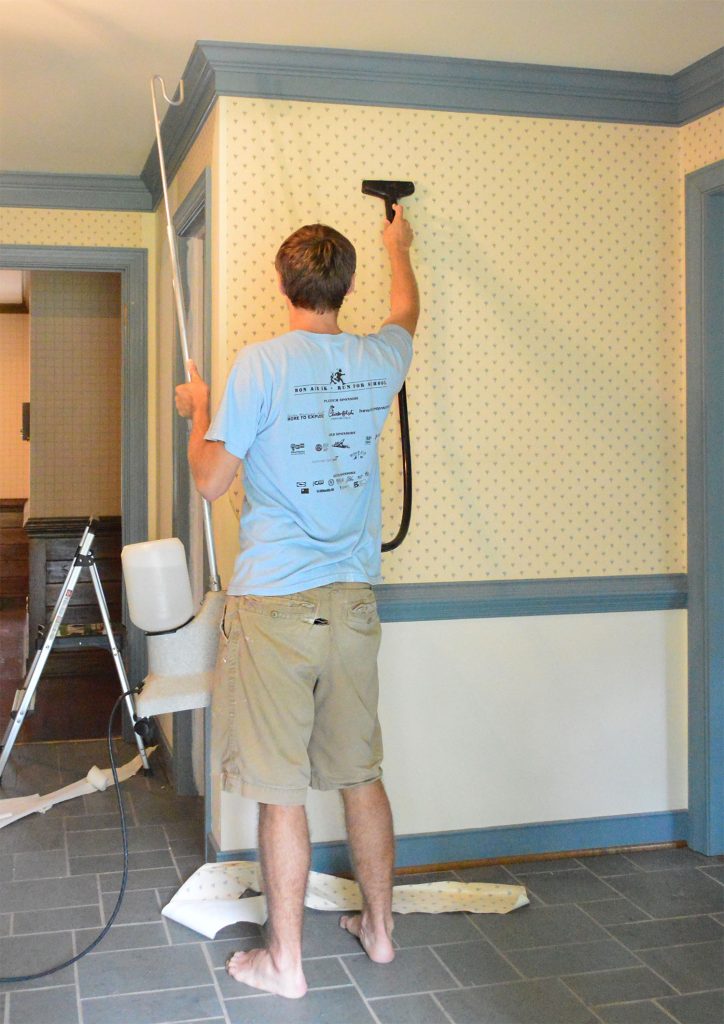
Overall, we found the steamer to be the fastest method – especially because it often took the paper and glue off together in one step. But it didn’t blow us away, so we still recommend the other methods if you don’t have easy access to a steamer.
Read our full post about using a steamer to remove wallpaper.
Other Wallpaper Removal Tips
No matter which method you choose to try, here are some general tips to keep in mind:
Take your time
We know you’re eager to banish this wallpaper from your home, but slow and steady wins this race. Give your hot water solution time to soak into the glue. Move carefully with your putty knife so you don’t stab the drywall. Peel your panels slowly so they don’t rip into a thousand annoying little pieces. Think of it almost like peeling a label or sticker off of a bottle.
Work in small sections
Focus on one or two panels at a time. You might think you’re being efficient steaming or spraying a whole wall, but some areas will begin to cool and dry by the time you get around to peeling them. You’ll end up wasting more time re-steaming or re-spraying them.
Manage your mess
You may find your floor quickly covered in wallpaper scraps and glue strips. Keep trash bags handy and clean up often so the glue doesn’t dry onto your floor.
Keep a utility knife nearby
Builders and DIYers sometimes hang wallpaper before adding trim, baseboard, wainscoting, or built-ins. If you find areas where your wallpaper goes under any molding, use a sharp utility knife to cut along the edge. We also found that a pair of tweezers can help remove small leftover bits.
Repairing Your Wall
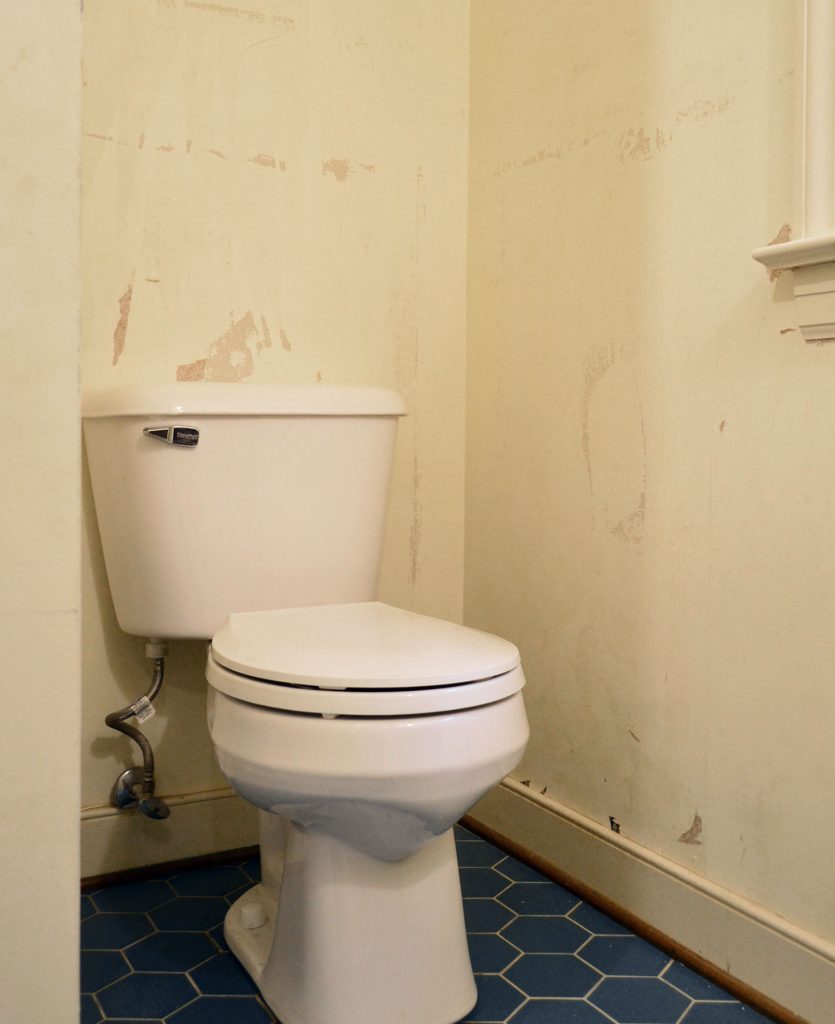
Even the most successful wallpaper removals can cause damage to your wall. The paint can peel off with the glue. Putty knives can gouge the sheetrock. Sometimes bits of drywall paper tear off too. Sometimes it’s very minor. Sometimes it’s a bloodbath, like what we were left with in one of our bathrooms (below). Don’t panic!
To fix these areas, use your putty knife to fill any dings, holes, or peeled patches with a thin layer of drywall spackle. Most of our wall damage felt like a shallow orange-peel texture, so spackle easily filled them for a smoother finish. Large areas of damage may require a thicker application of drywall mud or a full wall skimcoat.
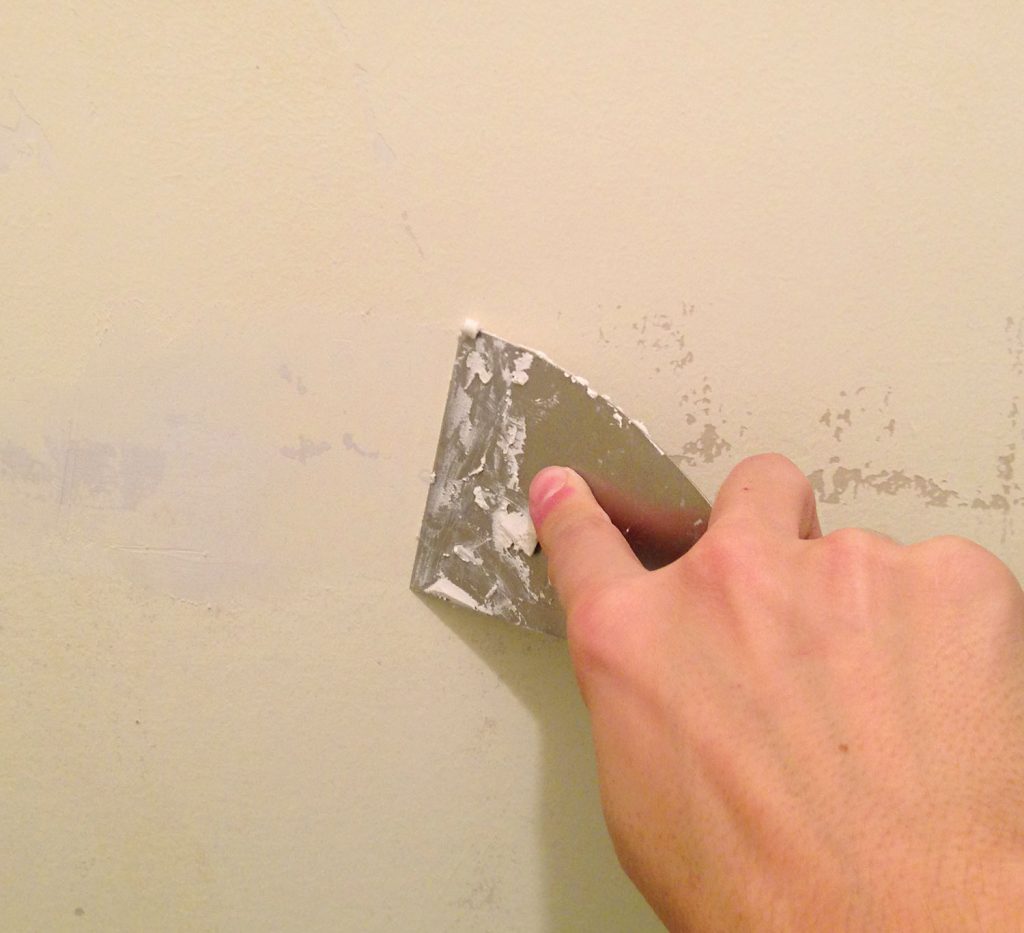
Once your spackle has dried, use a high-grit sanding block or palm sander to smooth these areas. You also may be able to skip spackle and simply sand your rough spots smooth. However you do it, we do recommend priming your walls before painting. Glue residue can cause paint to flash (appear shinier or duller in a few spots) if it’s not fully removed, so primer helps you achieve a more even paint finish.
You Removed Wallpaper. Now What?
You’ve successfully removed your wallpaper. Congrats! Here are some posts that might help you with what to do next. And yes, we really are suggesting putting wallpaper back up in one of them:
- How to Hang Peel & Stick Wallpaper
- How To Hang A Removable Wall Mural
- How To Paint A Wall Mural
- How To Add “Wallpaper” Using Fabric
- How To Install A Gradient Planked Wall
- How To Add Box Panel Board & Batten
- Paint It Our Favorite Greige or Favorite White
*This post contains affiliate links, so we may earn a small commission when you make a purchase through links on our site at no additional cost to you.
