Send out the ravens! (yes, that’s a Game of Thrones reference). Wallpaper stripping has commenced.
I was actually really excited to tackle the half bathroom’s wallpaper removal project, because I am a strange breed of human and that’s my idea of a good time. And since we have five rooms full of wallpaper (the foyer, the half bathroom, the kitchen, the dining room, and our bathroom), I decided that I would try a different removal method for each one and report back with the pros/cons about each approach as I went, all in the hopes of sussing out which ones bite the big one and which ones seem to work the best. I’m telling you guys, I’m like one of those people who works in “risk management” and gets their kicks watching paint dry. So hold onto your hats, it’s about to get crazy up in here.
My first step was to clear things out (the soap pump, mirror above the sink, toilet paper, etc). Just so I don’t have any accessories in the way of the serious peelage that I was about to dive into.
Then I removed the wall plates to free up some edges of the paper and hopefully make the removal process easier (there are two light switches and an outlet). I couldn’t help but marvel at the dedication that was once put into this wallpaper job – the outlets were papered and the flowers even matched up.
Next I boiled a pot of water on the stove, since the method I’m trying this time is intensely simple, but I’ve also heard that it works like gangbusters. Get ready for my method guys. Here it comes. Oh my gosh, it’s…. boiling water sprayed on the wall. That’s it. No scoring, no steamer, no spackle knife, no application with a weed sprayer, no fabric softener. While I’ve also heard awesome things about those methods, the simple boiling water applied with a spray bottle approach seemed like a good place to start. If it stunk, it was the smallest room (and if it straight up didn’t work I could abandon that method and move onto something else).
And speaking of moving onto something else, this approach almost went off the rails immediately? Why? Well, I had this vat of boiling water on the stove and I was holding my spray bottle thinking “how am I going to fill this without dripping hot water all over myself?” – seriously I stood there a solid minute wondering how I was going to avoid giving myself third degree burns filling the bottle. I stared at my ladle and thought “no way, that’s going to drip out all over my hands” and then finally slipped the empty capless spray bottle itself into the boiling water and used the ladle to hold it under the water. I heard that comforting glug-glug-glug sound as it filled itself up, which was music to my apparently burn-a-phobic mind. Then I used the same ladle that I had used to submerge it so it would fill itself up to fish out the bottle without touching the boiling water itself.
I used one of those silicone pot holder things to hold the bottle as it came out and then attempted to secure the top of the spray bottle and that’s when I realized – DUH! – that the bottle had warped from the boiling water…
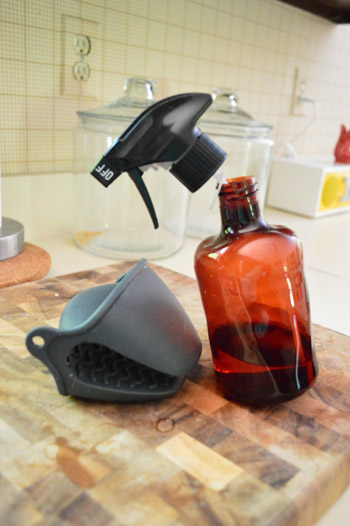
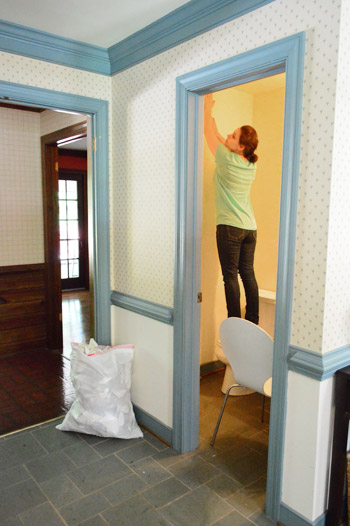
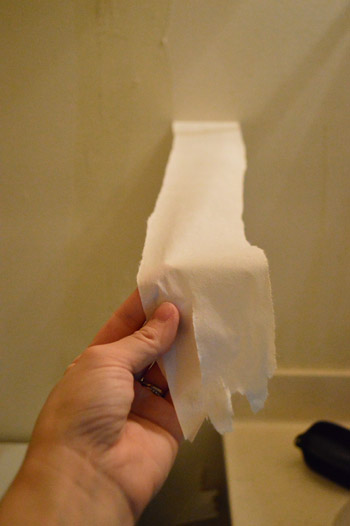
Guys, what was I thinking? I have no idea. I blame it on wallpaper-stripping-excitement. I was as wired as a kid hopped up on four boxes of Nerds. But I realized that the spray bottle still sprayed even without a perfectly shaped bottom or a perfectly attached nozzle, and in a very “the show must go on” moment I walked into the bathroom and just started spraying. Worked just fine.
What I learned:
- Spraying the entire room with boiling water and then attempting to peel the paper is a lot less effective than saturating small sections at a time (ex: half of one wall) and then peeling while the paper is still wet and loose. When I attempted to spray the whole room first (even a small room like a bathroom) by the time I got back to the first part I sprayed it was starting to dry and re-attaching itself to the wall. It came off much easier when I moved in smaller sections.
- Constantly spraying that bottle does get a little old (your wrist/forearm gets a little Jillian Michaels-ish workout) but it wasn’t bad enough that I cried or anything. I’ve heard that filling one of those plastic weed-spray containers from Home Depot gives your arm a huge break, so that might be helpful in a larger room, but I had such little wiggle room in the bathroom (there was a chair in there with me sometimes so I could reach a few high parts) that a big gallon sprayer would have cramped the room even more.
- I needed to use a silicone pot holder to hold the bottle the entire time I was spraying since the bottle itself was still really hot, but the super hot water really seemed to get the paper off the wall well, so it was worth it to bring the heat, so to speak.
- Almost all of the front of the wallpaper came off in the first round of spraying and peeling, which took about 1.5 hours. Then I re-sprayed the entire wall again since the backing/glue was still there in most places, and that came off in a second round of peeling, which took about 1.5 hours. So all told, it was about a three hour project from start to finish.
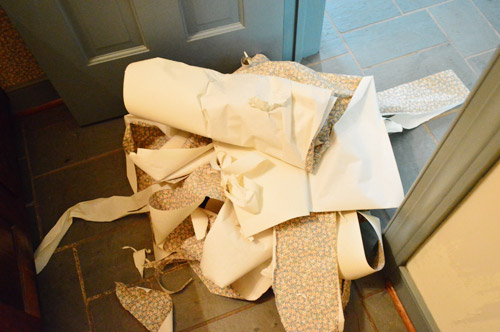
But when I was done I had a garbage bag full of wallpaper and white walls!
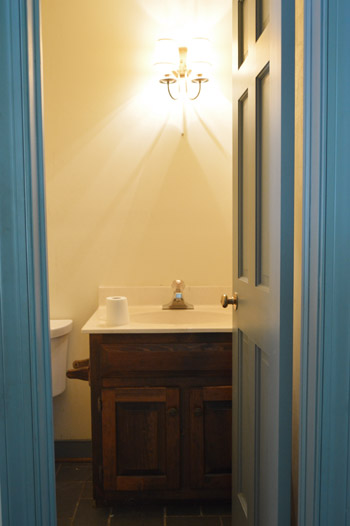
Glorious, glorious, de-flowered white walls.
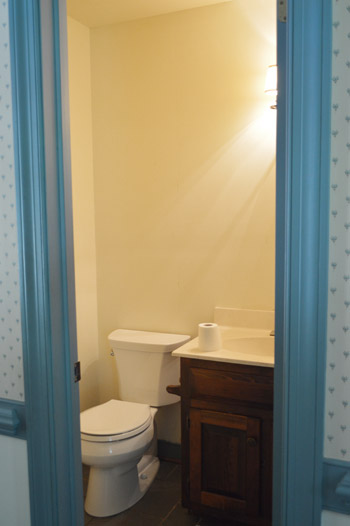
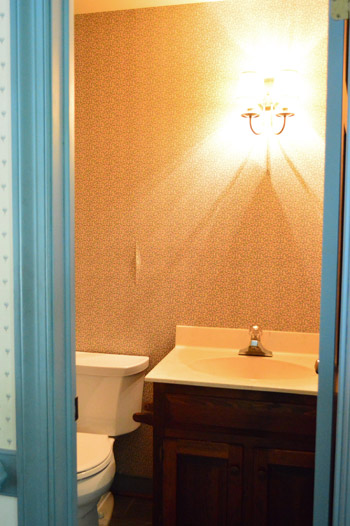
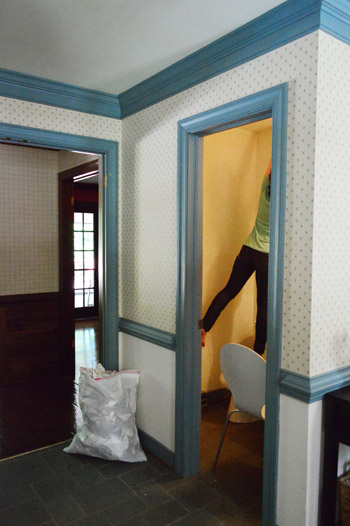
Which was definitely a welcome sight after seeing this for the last few weeks…
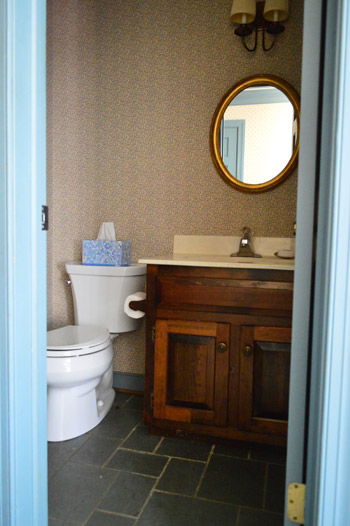
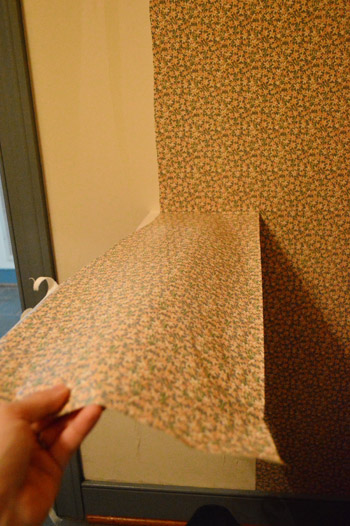
And now I can make loud proclamations, like “hear ye, hear ye, my house has four different types of wallpaper instead of five!” Not that I’m anti-wallpaper (I actually linked to a few options in this post that I’d love to see in here someday). Oh and I saved a small flowery wallpaper remnant from my removal process because I think it would be fun to frame little squares of each one of them somewhere – just for the memories. So… one room (and one wallpaper method removal) down, four to go…
Psst- OK, who’s watching Whodunnit? We saw the first episode last night and we’re hooked.

Victoria • Restoring our 1890 Victorian says
After scraping nearly ALL our ceilings, I credit swearing and irritation as the real trick.
Also, I will never buy another house with wallpaper. Ever.
YoungHouseLove says
Oh my gosh, ceilings are the worst. And irritation and swearing = hilarious.
xo
s
Shellie says
My fool proof method for getting an actual human being when stuck in a phone tree of a large company is swearing profusely while mashing on 0. I swear they can hear me and go “Ohh man, this lady means business”
YoungHouseLove says
Hahahaha!
xo
s
Melissa says
Shellie is so right! That is how I made to a live person and out of the maze that is press 1 for ___, press 2 for ____, press 3 for ____. They really don’t like the f-word.
Brittney Saffell says
haha! I completely agree with you Victoria! I (very painfully) scraped about five layers off every wall and ceiling downstairs in our 1900 mill house. It is AWFUL, and I think the swearing helps. It strikes fear in the wallpaper glue.
Sherry, so glad yours came down easy AND you managed to use boiling water without hurting yourself! :)
Taya says
Sweet! Good to know since I foresee some wallpaper removal in mine future!
Julie T says
So not that you could notice it before but that is a really nice vanity! Such an awesome little bonus hidden under those flowers.
Anele @ Success Along the Weigh says
Wow, you lucked out on that! I mean the cost of a spray bottle per room (or every other room) is a small price to pay to get all of that stuff off the walls. Can’t wait to see more!
Katie says
I’ve been waiting for these posts. When you said there was wallpaper in your house, I’ve been waiting to see how you remove it…now I need to wait 4 more times to see how the *best* way to do it is. We have wallpaper in our bathroom and I tried to get it off, but gave up until I read your posts, so now I will wait (impatiently?) until I can find out how to do it the best/easiest/most efficiently.
Also, I can’t believe how much more open your bathroom looks. I can’t wait to see until you start painting and making the house yours.
Annie says
Don’t get too excited, every room is different. It will depend on the wallpaper, the prepwork they did and the way they applied it. Especially whenthey didn’t prime and oaint over patches of spackle before papering. A better test of methods would be doing four walls of one room.
Most likely it will be a simple wet and scrape routine for the backing. Depending on the quality ofthe paper you’ll either be able to just peel the front layer off after wetting or have to score then wet then peel.
jennifer says
You are one crazy lady if you are excited about stripping wallpaper! It does feel so good when it is done, though, doesn’t it? I will anxiously await the project using your little pieces of wallpaper from all the rooms you strip. I did the same thing at my last house and then totally lost them. Whoops!
So, which room is next? Are you going to do one right after the other or give your peeling arm a rest?
YoungHouseLove says
I definitely plan to space them out, just so you guys don’t have to read a million wallpaper posts at a time, and so my arms can get a bit of rest. I’m torn between doing the master bath next or the foyer, so we’ll have to see how it goes…
xo
s
Candice says
I’m holding on to white subway tile being forever classic. It has to be. After installing it countertop to cabinet in our kitchen…it HAS to never go out of style. I’m not sure this is a project my husband will allow me to get sick of in a few years.
Jess @ Little House. Big Heart. says
I think a large part of how well the wallpaper comes off the wall is due to the quality of the paper as much as the removal technique. The cheap stuff tends to separate more than the good stuff.
Also, I wonder if in 20 years people will be looking at our design choices and shaking their head as much as we’re all shaking our heads at your blue trim and flowerdy wallpaper?
YoungHouseLove says
Oh yes, I keep thinking “will white subway tile be the green toilet of the 70s?” – haha!
xo
s
Martha says
I think I read some comment on Apartment Therapy–dark granite countertops will be the shag carpet of our generation. HA!
YoungHouseLove says
So funny! It should be really fun to see what ends up being “so 2010” someday!
xo
s
laura says
So true, some of the wallpaper in my house came off really easy, other spots required hours and hours of meticulous scraping…
Annie says
So true! No doubt our grandkids will be looking at stainless steel appliances, granite countertops and the abundant use of gray paint the same way our generation sees avocado/harvest gold appliances, gold speckled laminate countertops and flowery wallpaper!
Gretta says
They def. will be laughing at our choices! I predict that awful brown-beige and burgundy red you see in so many houses will be what dates places.
Kate S. says
I think another large part is due to what kind of surface it’s attached to – my house was built in ’88 and all the wallpaper was put on while the house was being built and nothing was primed in anyway – it was on the drywall! So every room had to be resurfaced since the removal tore through to the drywall ‘insides’ in many places. I am thrilled to see clean, white walls here under your wallpaper!
Marjorie says
Oh, Kate S., I’m so sorry. Our house is a billion years old (well, 100) and the people in the last several decades who “improved it,” did things like that. Misshapen drywall badly applied over uneven wall studs. When I peeled the paper off in the upstairs hall, I had to fill gaps with drywall compound before priming. In the living room, we removed 70s faux-wood paneling sheets that had been glued on with Liquid-Nails by an eight-year-old. That got the texture paint treatment for now (covers many sins), which I’m not a huge fan of but all the insulation and drywall has to go someday so its temporary. Sigh. (But it’s better than a $3000/mo mortgage, I think.) Sorry so long; felt good to rant.
Jackie says
Oh Sherry… Where was this post a month ago when I spent hours with my blow dryer peeling glue remnants off my walls?! (Hint to all DIYers… No, it’s not a miracle that your wallpaper just seems to come off without any resistance.)
I’m totally excited to see your other methods in action, though!
Amanda says
So glad I saw this today. Glad it is so simple (well almost except for the about the boiling water meets hands part). I would frame some of that wallpaper. It would work better than framing the wallpaper inspired carpeting that we pulled out of our house.
Katie says
Dang! I was pretty skeptical about the boiling water suggestion (it just sounded too easy), but it looks like it worked really well! The bathroom looks better already! I kind of wish I had some wallpaper to peel–it seems like it’d be fun…
-Katie at AdventuringAtHome
Elyse B says
When we removed the wallpaper from our hall bath we just used our room temperature bottle of water and vinegar (that’s what we use to clean a lot) and it worked probably as well as your boiling water it sounds like. So to anyone reading, you might want to just try room temperature water first before going to the trouble of boiling water?
Keisha says
Ditto. In our first house I just used a spray bottle with water and a wide plastic putty knife.
alisha says
I think a spray bottle of warm water was what my sister’s MIL used to removed the terrible wine bottle and grapes border around her dining room/kitchen area. It just pulled right off in almost one strip!
My sister was sooo bummed she waited 7 YEARS into living with it before trying to remove it…right before moving out *sigh*
Sarah | The Accidental Okie says
What a difference!
We had this gorgeous wallpaper in the breakfast nook of our house. It was mauve and powder blue with ducks who had bows around their necks. I mean, if I had a sample, I’d send it to you because it would probably match the wall paper in the rest of your house. I wasn’t quite as industrious as you, though. I just covered mine up with wainscoting.
Technically it’s still there…lurking, waiting for the moment when it comes back in style. Which hopefully is never.
Joanna says
You could use a cheap plastic funnel next time to avoid burning your hands. :)
YoungHouseLove says
So smart, if only we had one of those!
xo
s
Callie says
I was thinking you could heat up the bottle of water in the microwave – just screw the top on when you pull it out hot enough?
YoungHouseLove says
I think that could work too – although if it got too hot I think the bottle would melt in the microwave like it did in the pot!
xo
s
Elizabeth says
I would boil it in the microwave in a big pyrex measuring cup (I know they say that sometimes the glass can crack in the microwave, but I’ve never had that problem) and then pour it using that into my bottle. If I had wallpaper to strip. :)
Barbara says
That was my thought…for filling small openings with anything…FUNNEL. I use mine a lot.
Jen. says
Be careful about boiling water in the microwave:
http://www.snopes.com/science/microwave.asp
(It can get superheated and explosively boil when you move it or put something in it … the effect can be avoided by leaving a wooden spoon in water as you microwave it.)
Teresa @ wherelovemeetslife says
In the absence of a funnel, my mom has used the top piece to the coffee pot on more than one occassion. She had a coffee pot that just had a round plastic piece with a hole in the center.
And IKEA has some cheap cute funnels – cause you guys will surely be doing some shopping for the new place right?? right?? lol
YoungHouseLove says
Great tip!
xo
s
alisha says
I was thinking the same thing! Maybe even a utility funnel from the shop would work?
Heather says
Why not just boil the kettle? That was my first thought, quicker than boiling on the stove as well!
Joan says
Hi guys,
Has anyone else brought up boiling water in an electric kettle? That’s just about the easiest way to transfer hot water to your spray bottle.
(My family is in the coffee business, so boiling water, and it’s safe transfer, is a daily concern of ours.)
By the way, I’m so glad to finally have a useful tip for you — after all the good advice you have given me over the years. :) Not sure if there are heat-proof spray bottles out there, though…
Good luck with the other rooms!
~Joan
YoungHouseLove says
Oh yes, the kettle’s a popular suggestion. Don’t know why I didn’t think of it!
xo
s
Joan says
Glad the kettle is a popular suggestion! I forgot to mention that the longer-necked kettles give you better control when pouring.
YoungHouseLove says
Smart!
xo
s
Nicki says
Awesome! Love that you didn’t need chemicals for this one!
Heather W. says
Congrats Sherry!!! In my home I had wallpaper installed the same way over lightswitches and outlets etc. in 5 rooms in which 3 were my bathrooms. I have used the same method in all sprayer/hot water not even boiling and I am wallpaper free. I did try the fabric softner and it didn’t seem to help that much and just made a mess to clean up. Do you plan to address each room one at a time now or strip as your ready to decorate? Good Luck
YoungHouseLove says
I think I’ll give my arms a little break and maybe try to tackle one room every few weeks or so? I think my not-strict-at-all-goal is to have all of the wallpaper down within the next six months or so, but large rooms (like the kitchen and dining room) might have me crying for weeks over how long they take, so it could be an unrealistic guess…
xo
s
Sarah says
Looks amazing and LOVE the idea of little framed wallpaper samples mixed in the wall galleries you like to do!
Becca says
I apologize in advance for being a grammar nazi, but it should be “effective” not “affective” in your first bullet point.
I wish our wallpaper had come off so easily. Our walls have still not recovered. :(
YoungHouseLove says
Thanks Becca, all fixed!
xo
s
Anna says
So I am sure you will get many suggestions on this, but here is a thought on the boiling water transfer situation – You could boil water in the microwave in a glass measuring cup with a spout, and then pour directly into the bottle. Looking forward to hearing about the other methods!
YoungHouseLove says
SO SMART!
xo
s
Casey says
But beware! Water heated in the microwave heats unevenly and thus drops temperature quickly, so your magical boiling water powers won’t last very long if you do it that way.
Jeanna says
I tried heating up vinegar in the microwave when I first used the dawn/vinegar solution for cleaning my bathroom fixtures………….. the first plastic bottle I used (it was a kind of hard plastic just like Sherry used) did the same darn thing. Totally warped the bottom of the bottle. It worked fine anyway, but the next time I bought a different brand of bottle, and had a better result. :)
romy says
Please, be very careful if you boil water on the microwave, as it can explode once that has pass the boiling point!
Mythbusters proved it here:
http://www.youtube.com/watch?v=1_OXM4mr_i0
YoungHouseLove says
Eeks! I think the tea kettle might be best since that has a pouring spout but is still stove boiled (so it’ll stay hot longer and won’t explode…)
xo
s
Julia at Home on 129 Acres says
This is my go-to wall paper removal method, but I never go as far as boiling the water. I just run the tap as hot as I can get it and use that to fill my spray bottle. Boiling water sounds like more of a hazard and a hassle than necessary, IMO. I’ve found a scraper (or small drywall trowel is handy) as is a sponge to get off all of the last little bits of paper and glue (see my blog at http://homeon129acres.wordpress.com/2012/06/24/how-to-strip-wallpaper/.
Alivicwil says
Yes, Sherry!
Tea kettle was going to be my suggestion!’n
Katie says
I started removing wallpaper in a guest bedroom this weekend and using a steamer really got the wallpaper off (same concept, easier application as your method here), but we were left with a ton of glue. It was like we had to do the process twice. Once for wallpaper, once for glue. You didn’t have any glue issues?
YoungHouseLove says
Oh yes, if you read the bullets I had about 1.5 hours of peeling the front of the paper, and 1.5 hours of peeling the backing/glue off. So annoying, but worth it when it was done!
xo
s
Lesley says
You deflowered your washroom??? That sounds so….hysterically wrong.
YoungHouseLove says
But it felt so right…
xo
s
Rachel says
Haha!
alisha says
I wondered if anyone else found the idea of Sherry deflowering her first bathroom as amusing as I did! I giggled out loud.
KiwiKat says
See, when I saw the FB link, I got the stripper song running through my head (https://www.youtube.com/watch?v=twOUAUKurFw) and by the end of the posting was at Devo – you know, when a problem comes along, you must strip it!!!
The kettle seems like the easiest solution so far from what has been suggested….
Alison says
I am SO happy you are going to do a de-wallpapering series. We are about to close on our fixer upper with only two walls of wallpaper, but with the amount of de-wood paneling we will be doing, knowing the fastest way to get rid of the wall paper will be amazing! :)
Pauline says
This photo with the blue trim and partially visible wallpaper in the hallway brings back flashbacks. We had the identical wallpaper in our hallway and kitchen and half bath with the same color trim!!! Our home had wallpaper in every room, except the living room! Our house is now free of wallpaper! Used the rip and spray method and also the scoring and spray method. If I ever move it will be a house with no wallpaper.
Justynn @ Creative Life Antics says
Nice! I’m actually super excited to hear all the ways you try and which ways work the best. For some reason when they staged my home (it was the model unit?) they put wallpapers in the three baths, only. Which is the WORST place to put it. And it’s really ugly paper. So I’ve been contemplating how I want to remove it. I’ve tried the just ripping it off the wall way (which left a ton of patching), I’ve tried the scoring which also left patching, the goo-spray and trying to steam my bathroom up as much as possible.
Looking forward to seeing the rest and your recommendations!
And btw, how much are you already missing game of thrones?!
//Justynn
YoungHouseLove says
SO MUCH!
xo
s
Brit [House Updated] says
Waaay better! And glad to hear your technique worked. I tried removing wallpaper once and only once (60’s style brown and orange) but gave up and covered the area in beadboard instead! And thus began my hatred of wallpaper and love affair with beadboard.
sophie says
Stripping godawful wallpaper was the first thing we did when we moved into our current house. Our kids were happy to help (our youngest was just barely three at the time). We just used cold water in a spray bottle and it worked a treat. Used a plastic putty knife for stubborn sticky sections. A couple of hours and all that hideousness was gone. It had been there for over 25 years – it was obviously original to the house as there was plain unpainted drywall underneath it, complete with contractor pencil markings! We used the same method for some awful floral borders in two bedrooms as well. Kids found it to be as fun as we found it to be therapeutic.
YoungHouseLove says
Yes, ours was unpainted drywall as well (I could see pencil marks from the contractor too!). It was around 30 years old we believe (original to the house) so I’m crazy thankful it came off as well as it did!
xo
s
Saskia says
Looking forward to hear about the different techniques!! This will be so useful to know! as you always hear from various people how they do it, but to give it all a try!! good fun!
Nancy says
Looks great!
When you say “2nd round of peeling,” what does that mean? Did you use only your hands to do the peeling, or were there tools involved? Scrapers, putty knife, etc?
YoungHouseLove says
Yup, just my hands and a bottle of hot water (and a pot holder, haha) were involved here, so I just yanked like you see in the pics :)
xo
s
Kat says
Looking great!!!
I’ve taken down tons of wallpaper in our house! I usually just use 2 partswarm water (nuked for 1 min or so) and 1 part white vinegar (it helps with the adhesive). I am totally with you on trying to do it as chemical-free as possible!
Jennie says
Oh goodness, the house we are currently in had wallpaper in every single room except 2 of the bedrooms. And, get this, the kitchen was wallpapered with CONTACT PAPER! Talk about impossible to remove! Ugh, I’d rather not think back to those awful first weeks of home ownership, LOL!
YoungHouseLove says
YIKES!
xo
s
Wendy @ New Moms Talk says
The wrist/hand hurting thing is precisely why I always have a squeeze/squishy ball on hand when doing projects like this (or the time I had to scrape liquid nail off of a bulletin board at school).
Taking little breaks to rejuvenate the body can, for me, at times be a huge help though sometimes the mind just wants to go-go-go!
YoungHouseLove says
Love all the tips you guys!
xo
s
Amelia says
Ha! The house we moved into last summer was 1/2 wallpaper (and NOT the swanky kind, pretty sure that our previous homeowners and your previous homeowners would have been decorating BFFs)and I was freaked out by the boiling water as well. We decided to go ahead and shell out for one of the wall steamers (I think it was less than $50 at Lowes) because we had a number of large areas to do and then we set to work scoring and steaming. In hindsight, I’m a little bummed that I didn’t brave the boiling water, but I’ve actually been able to use the steamer to steam my clothes so it’s had a value add beyond just wallpaper. Annnnnd, I’m happy to report that we finally re-did our son’s room over the last couple of weeks and said buh-bye to the LAST of the wallpaper marathon in our house. YAY!
YoungHouseLove says
Oh yes, John’s sister has a steamer so I’d love to borrow that and test it out as my method in one of the bigger rooms!
xo
s
Eileen says
A tip on filling the spray bottle: instead of boiling water in a pot, boil it in a teakettle. Put the opened spray bottle in your sink. You should be able to aim the spout of the teakettle over the bottle spout and get most of it in.
YoungHouseLove says
So smart! I love how much more level headed you guys are about boiling water. I saw the giant pot of it on the stove and was all “now what…?”
xo
s
nicky says
Thank you! I read.the post and.the.comments.thinking have I missed something? Surely $herdog has a.kettle!
Nina (Hot Pink Pants from Atlanta) says
Instead of trying to funnel boiling water, what about sticking only the spray nozzle top into the kettle’s spout and spraying that way? I know your arms might get tired more quickly for the upper part of the wall, but might also keep you from breaking out in sweat thinking about getting burns from accidental exposure to the water?? And you can keep the water boiling longer! Just a thought…
YoungHouseLove says
Sounds like that would work too, although like you said it would be a bit heavier.
xo
s
Tara says
This is great! My parents house was also wall-papered to the extreme (it looks like your paper was done professionally, like theirs was, since the outlets are all lined up and everything – that’s apparently a pro technique and it is ALL OVER the ‘rents house, haha). Their bathroom is this crazy wild 90’s floral craziness. The fact that hot water will take it off might entice them to make it less crazy up in there!
ashlea says
Not that I want things to go bad for the wallpaper removing but I was seriously hoping for some serious problems under that wallpaper. So I will know what to do with the wall I took wallpaper down from. It’s a mess under there. I have no clue as what to do. It’s been wallpaperless for a year.
lisa says
If it’s damaged and you want to paint, you’ll want to have the wall “skimmed” with drywall mud. You can look it up on youtube. It’s not a huge deal. Good Luck!
Amelia R. says
Just a guess: the previous occupants wallpapered over bare drywall, and when you peeled off the paper, off came the drywall’s paper, too?
You need a little tub of of premixed lightweight spackle, a bigger bucket of drywall compound (a.k.a. sheetrock mud; a 5-lb bucket is enough for a whole room), a trough, and a spackle knife. You can find YouTube videos on how to spackle if you’ve never done it before.
Here’s a good one: http://www.youtube.com/watch?v=XYZ3ZtmdRoY
It happened in my kitchen, too. You are not alone.
Mary says
I was thinking the same thing! We took down wallpaper in our bathroom and the drywall paper got torn off in many places and the glue was impossible to get off. My husband just painted water-based Kilz over it and said it would be fine. That was a really bad idea because it just reactivated the glue. It has been a mess for over 3 years.
ashlea says
Thanks guys, I was looking into Gardz for torn drywall, etc. Found it online but not in stores. It seems the perfect solution. It said it would seal the glue from wallpaper etc. Has anyone used it?
YoungHouseLove says
Anyone have any experience with that?
xo
s
Rotem says
Took my a few seconds to understand what looks out-of-place in that first picture… Sherry, you’re wearing color! New house + summertime must equal excited, colorful happiness!
That bathroom looks great! We’re you able to remove the wallpaper from the switch plates as well, or will those need to be replaced?
Rotem
YoungHouseLove says
Those will just be replaced since they were off-white paper-covered ones, and new white ones are so cheap at HD.
xo
s
Emily says
My aunt is like you and loves peeling off wallpaper. She was really bummed we didn’t have any for her to take down when we repainted our whole house, including our bathroom.
http://lovepastatoolbelt.com/?p=399
Candice says
Save a tiny piece for Clara’s doll house! Maybe she’ll want to ‘redecorate’ it one day in this very vintagey pattern. (My dad wallpapered the dollhouse he built for my sister & I.)
YoungHouseLove says
Fun!
xo
s
Liz says
So exciting! The bathroom looks 100% better already, and much bigger!
Susan (Between Naps on the Porch) says
Sherry, if you give up on the boiling water method, Safe and Simple is what the professionals use…and no, I don’t have any affiliation with them. It’s just awesome and works great.
YoungHouseLove says
Thanks for all the tips guys!
xo
s
Linda says
I removed 5 rooms of wallpaper in my present home and what I found worked was just plain water in a spray bottle and a putty knife and worked with tiny sections. Seemed the previous owners didn’t use wallpaper sizing so it was very tricky to get off. Had to get one layer off and then the other. Tried all the store bought solutions and fabric softeners, etc. Have one of those fancy wall paper steamers that drips down your arm but this worked best for me. Good luck!
Rebecca says
We wanted to save a bit of the wallpaper border we removed from our bathroom in our first place (it was purple with frogs and lily pads) but in the wall paper removal excitement we forgot. Bummer. But it will forever live on in pictures I guess.
lisa says
If the paper came off that easily, it was probably applied professionally and the walls were prepared before papering. If you get to a room where the paper comes off in quarter-size pieces, get the Wallwik kit. It’s a kit of fabric sheets that you apply directly on the wallpaper and spray with solution. It helps keep the paper wet until the glue-eater has a chance to soak through. You’ll thank me :)
YoungHouseLove says
Great tip!
xo
s
Ellen says
Thanks, Lisa. I do SO need to try Wallwik!! Places like HD & Lowes?
Is it a special kind of fabric, or would any fabric do?
Anjuli says
I think it is worth mentioning that wallpaper removal from a plastered surface is easier than wallpaper removal that was attached directly to dry wall. I had both surfaces behind the wall paper in my kitchen, and wallpaper on drywall is a level of hell that no one wants to deal with no matter the method of removal that is used.
YoungHouseLove says
Oh no! Our walls are actually drywall (this house is a late 70s/early 80s house) so I have also heard how much glue was use matters (if it was over-applied it can be a nightmare!).
xo
s
Cory says
Looks great! I had to laugh at your “hear ye, hear ye!”. My daughters favorite potty training book was The Princess and The Potty, in which the little princess declares, “Hear ye, Hear ye, I have to pee pee- seems fitting for a bathroom post:)
YoungHouseLove says
Haha!
xo
s
Laura says
Weird question: are your jeans from Old Navy? They’re so cute, and I hate jean shopping :P thanks :)
YoungHouseLove says
Gap skinnies. They’re the best.
xo
s
Sherry@The Impatient Remodelers says
What fun!! Not!!
Reminds me of our second house…Wallpaper everywhere. One kind on top of the chair rail and another below. Plus a border….ugh!!
I don’t even remember exactly how we got it off (I think my brain suppressed that). But I think it was the fabric softener and water in a spray bottle trick.
Our “new” house came with popcorn ceilings that we intended to spray and scrape off….no such luck. They had been sealed on and are never coming off.
Amy says
I totally heard “the show must go on” from Moulin Rouge during this post.
YoungHouseLove says
OOooonnnnn with the SHOOOOOOOW!
xo
s
djs says
Looks fabulous! I stripped wall paper off our old house, (4500 SF of house). In every room, all original to the 50’s vintage structure.
Paper on the ceilings and even the floor in the powder room (yes-powder room) Tried every method too. Steamer – unbelievably messy-soaks the floor and many towels and slow, chemicals, hot water, etc… The hot water, let it soak and soften worked the best. On large walls, hot, soapy water in a bucket – sponged on was easiest. Of course this doesn’t work on vinyl paper, but that top layer of plastic will often peel right off (strippable they call it – ha) then you only have the paper backing that comes off like a dream! Tip: scrub off the remaining paste while it is soft.
Good luck on the rest of your project. Stripping paper is soooo satisfying!!!
Kaely says
How is the texture of the wall now that you’ve taken the paper down? Most of our house had wallpaper when we bought it and some rooms we had to totally re-texture the walls after the awful paper came down (taking down grass cloth is the worst, worst worst!)
YoungHouseLove says
We have flat walls (not textured) and they’re still nice and flat so I think I’ll just wipe them down (maybe with a magic eraser to get any errant glue or bumps off) and they’re ready for paint (or more wallpaper, haha!).
xo
s
LauraC says
Do you think you’ll prime? When we took off our wallpaper, we used oil-based primer before putting on latex paint (thanks to your blog, I knew that would work) I just wanted to make sure the stink and any errant glue wouldn’t bleed through the new paint.
YoungHouseLove says
Really smart! I think we will, unless we re-wallpaper instead of painting!
xo
s
Beth says
If any of your future methods involve boiling water, you might want to use your tea kettle to boil the water. It would be much easier to pour into the spray bottle.
But lookin good!
YoungHouseLove says
So smart.
xo
s