Painting your cabinets is a perfect way to makeover a dated kitchen without splurging on a big renovation. It doesn’t cost much and, with the proper preparation, your paint job will look great and last a long time. We’ve used the tutorial outlined below to paint cabinets in 4 separate kitchens (not to mention cabinets in other rooms too) so we’re confident it’s a DIY project that will work for you. Follow along below!

The kitchen featured in this tutorial is from our second house which had solid oak cabinets throughout (along with wood paneling!). So while steps focus specifically on painting wood cabinets, the process is similar for any cabinet material. You can also refer to our tutorials about painting already-painted cabinets and painting Ikea cabinets.
Steps To Painting Cabinets
Here is a brief overview of how to paint your kitchen cabinets. The process takes time, patience, and a little bit of elbow grease – but nothing is especially complicated or tiring. At worst, it’s just a bit repetitive – especially if you a big kitchen.
- Remove cabinet doors and hardware
- Patch cracks and holes (optional)
- Lightly sand all surfaces
- Apply a liquid deglosser
- Prime one coat
- Paint two coats
- Rehang cabinet doors
- Reinstall cabinet hardware
This project can be completed by one person but may go faster with help. Proper surface preparation is the key to success here, so don’t rush steps 2-5.
The overall time lime depends on the size of your kitchen, but even painting a small kitchen will span several days due to drying and curing time between coats. You also want to make sure you have ample space to spread out your cabinet doors, like in a garage or spare room.
How To Paint Cabinets Video Overview
You can see these steps in motion by watching the detailed video below. To view an abbreviated version of this process, you can see a quick version of painting cabinets on YouTube.
Note: You can also watch the video above on YouTube.
Supplies Needed To Paint Cabinets
The materials you’ll need to paint your kitchen cabinets aren’t much different from other painting projects. So you may have many of these supplies already on hand.
- Primer
- Paint (we recommend satin or semi-gloss finish)
- Small 4? or 6? foam rollers
- Roller trays
- Short, angled paint brush
- Drop cloths
- Painter’s tape
- Painter stands or tripods
- Electric sander & sandpaper
- Electric drill & driver
- Liquid deglosser
- Wood filler (optional)
- Putty knife (optional)
You could use a paint sprayer for this project, but we don’t feel it’s necessary. If you already own a paint sprayer and are comfortable using it, go for it. It can save time. But we’ve never regretted painting by hand instead.
What paint should I use to paint my cabinets?
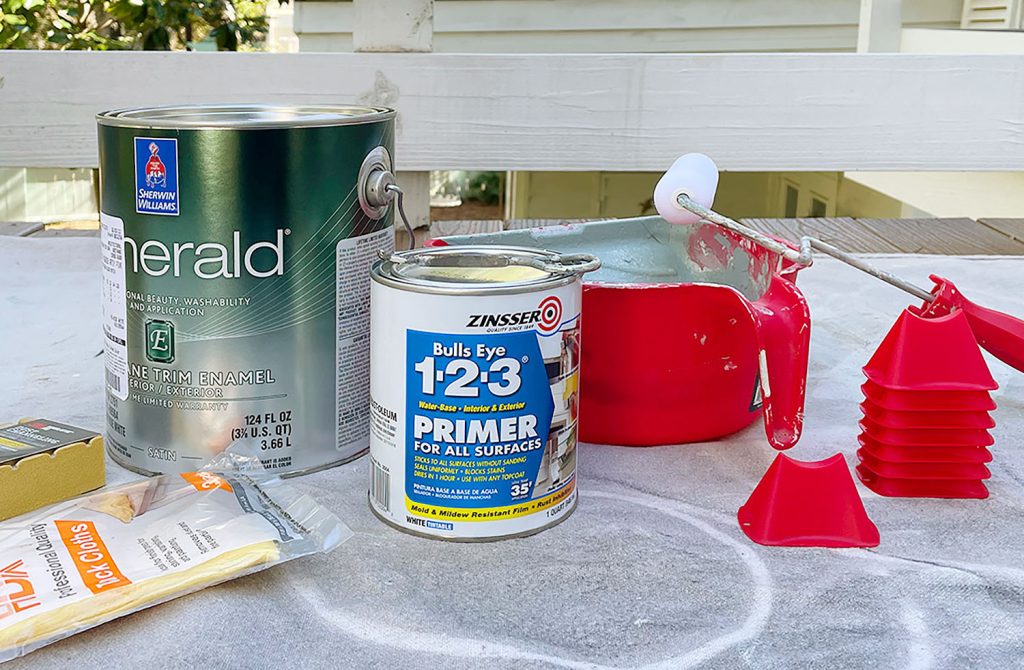
Water-based, latex paints formulated for cabinets or trim are best for painting kitchen cabinets. Oil-based paints used to be recommended, but are not necessary or practical for a DIYer. They are smelly, difficult to clean up, and can yellow over time. Also, water-based paints have come a long way and offer a similarly smooth and durable finish. Our favorite cabinet paints are Sherwin-Williams Emerald Urethane Trim Enamel and Benjamin Moore Advance. If you prefer a different brand, consult the paint desk expert for the best formula for your job. Buy the highest quality paint your budget allows.
Step 1: Remove cabinet doors & hardware
Carefully unscrew all cabinet doors from the frames using an electric driver. Remove existing hinges, knobs, pulls, or other hardware. If you are reusing this hardware, be sure to collect it in a bag or box for later. You may also want to label each door with painter’s tape (I.e. “lower left stove cabinet”) to help avoid confusion during reassambly.

You will also need to slide out any drawers from the frames. If possible, unscrew the drawer front from the box. You may also need to empty some drawers and cabinets. We don’t typically paint the inside of the cabinets, so most things can stay in place while you work. But take care to cover or temporarily move items while you sand, to keep them from getting dusty.
Step 2: Patch cracks and holes (optional)
You can skip this step if your cabinets are in good condition and you’re reusing the existing hardware placement. For our cabinets, however, we planned to swap the existing single-hole knobs for two-hole pulls. The existing hole was in the wrong place, so we used wood filler to patch all of the existing hardware holes before proceeding. We were also changes the hinges, so we patches the holes for those too on both the doors and frames.
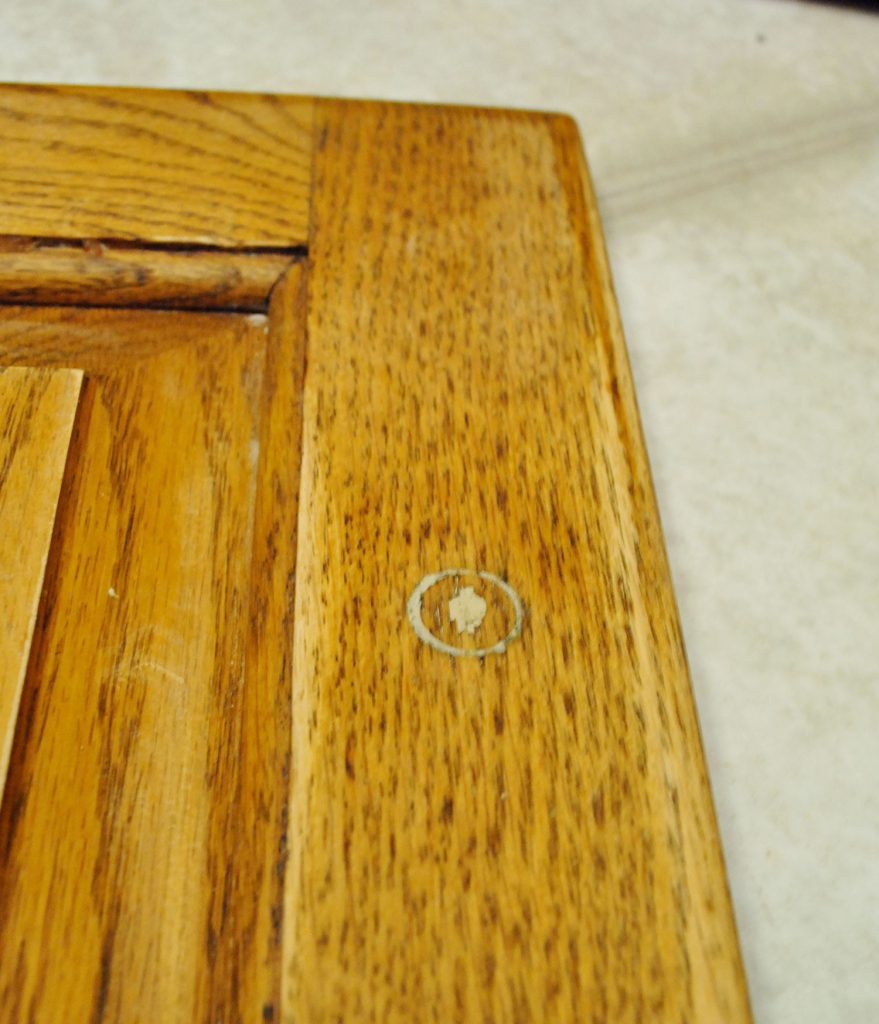
To apply the wood filler, use a putty knife to push it into the hole and smooth it. Once dried, sand off the excess. You may need to do a second coat, since it may shrink slightly as it dries.
Step 3: Lightly sand all surfaces
Prepping your wood cabinets for paint is the MOST IMPORTANT step if you want a long-lasting, durable result. Skipping the next few steps puts your paint job at risk of scratching or rubbing off, especially in high-traffic areas. So while this part is probably the most labor-intensive, please don’t shortchange it! We also have more detail in a dedicated post about prepping cabinets for paint. Here is an overview:
Use an electric sander and medium-grit sandpaper (like 120) to lightly sand every surface you will be painting. This means doors, drawer fronts, faces of cabinets, sides of cabinets, etc. You do NOT need to remove all of the existing finish. The goal is NOT to get it back to raw wood (although that it is okay). The goal is simply to rough up the surface enough to help primer and paint bond to it. You may need to hand sand small corners and nooks.
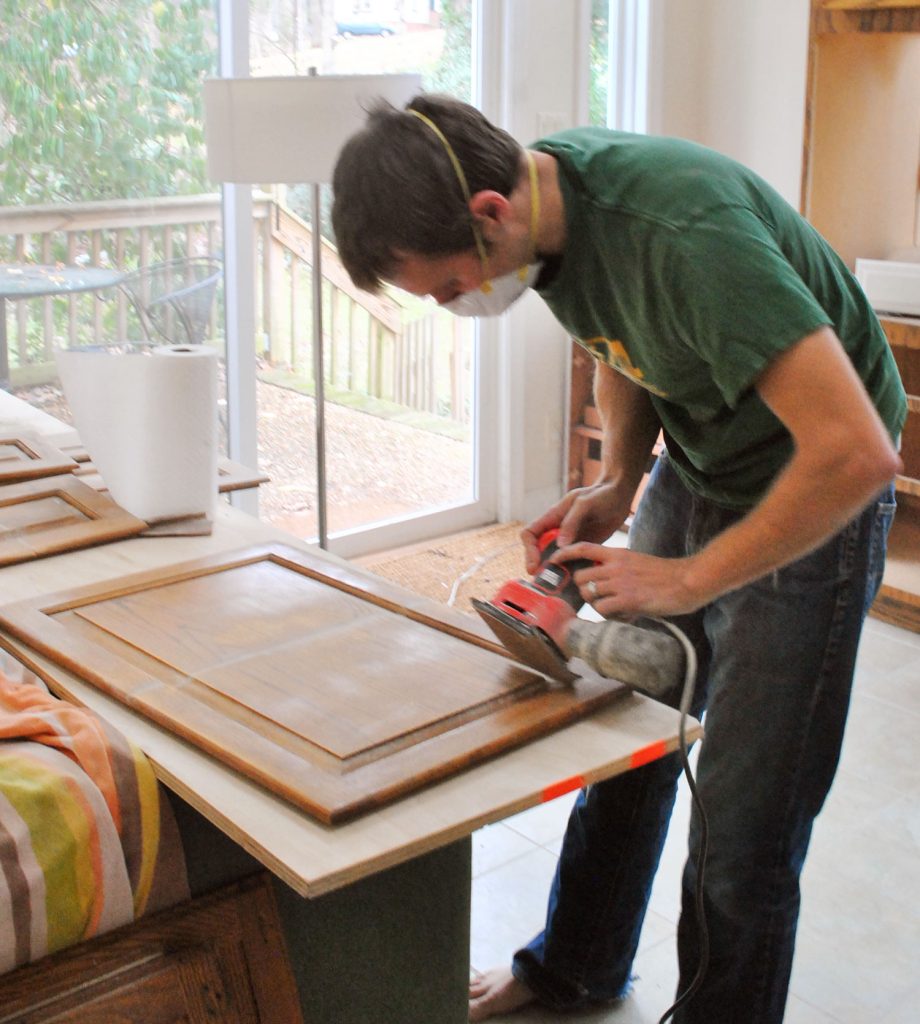
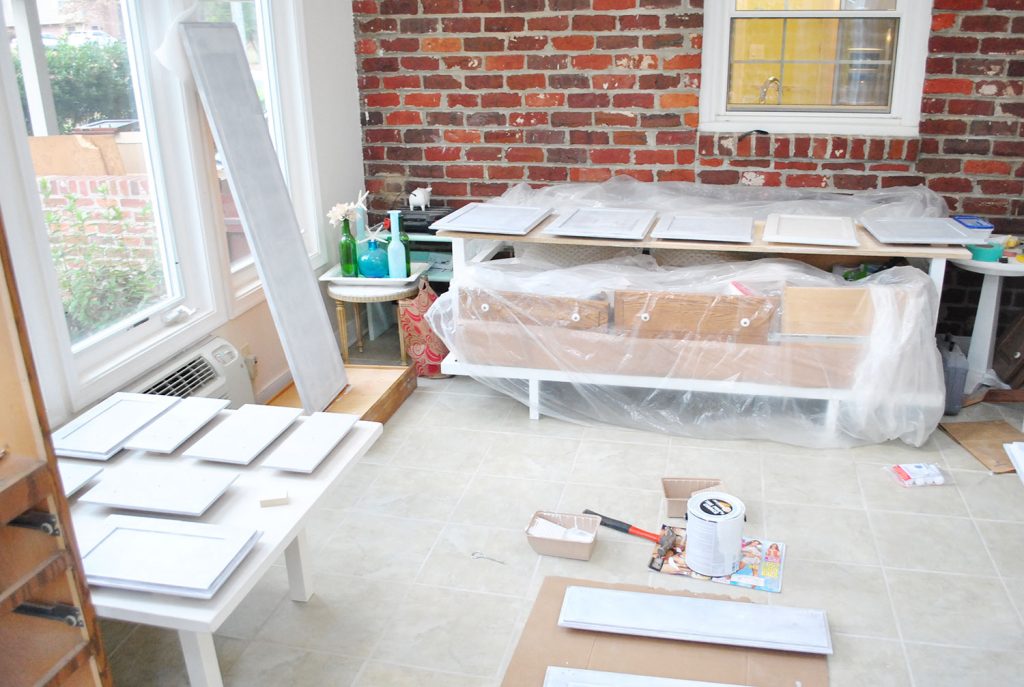
This process will be dusty, so try to do it outside or in a well-ventilated space (we did most of ours in our sunroom, above). When it comes time to sand the frames in place, cover items in your kitchen as needed to keep sanding dust from getting everywhere. After you’re done sanding, wipe your cabinets clean using a tack cloth.
Step 4: Apply a Liquid Deglosser
Liquid deglosser (sometimes called “liquid sandpaper”) helps etch the surface of your cabinets & frames, helping ensure a strong bond with the paint. Krud Kutter Gloss Off is our preferred deglosser. The one pictured below is difficult to find.
Some people use a liquid deglosser in place of sanding, but for wood cabinets we recommend doing both to be safe. It also helps remove any built-up grease or oil residue you may have missed while sanding, especially in nooks and crannies. You may also have heard of using a chemical called TSP (trisodium phosphate) instead. However, TSP is more of a cleaner than a deglosser, so we don’t recommend it.
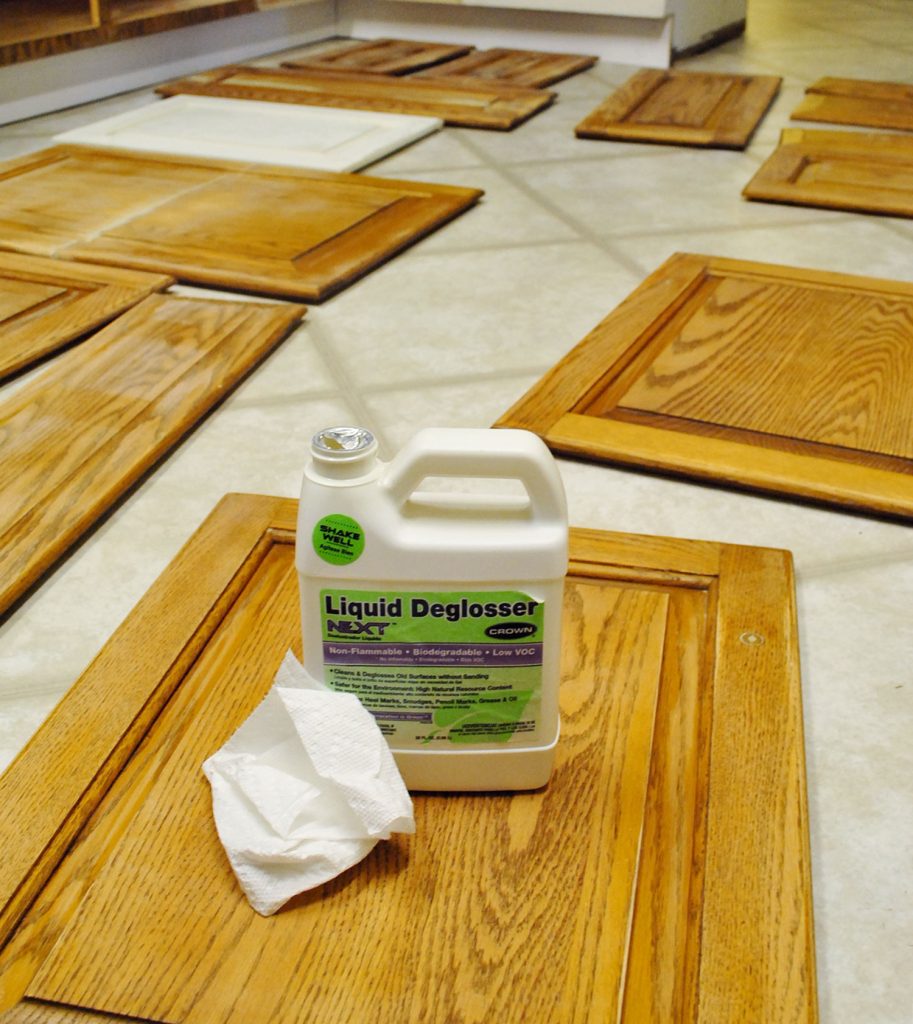
You can apply it with a rag or paper towel or put it in a spray bottle. It doesn’t need to be rinsed or wiped off. Just give it a few minutes to soak in. We sometimes do two applications to be safe.
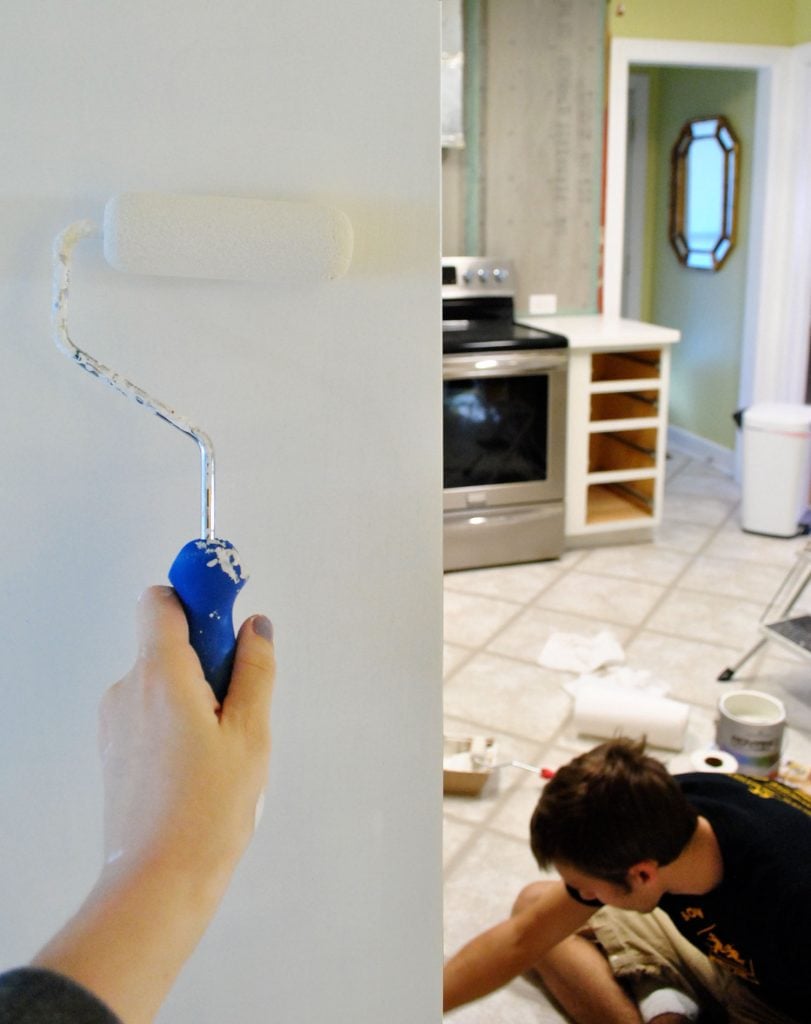
Step 5: Prime One Coat
The last prep step before painting is priming! Primer is a critical element to good coverage and a long-lasting finish. Do not skip it! We like a Zinsser all-surface primer. It can be used off-the-shelf if you are painting your cabinets white or another light color. For darker or more saturated paints, consider having your primer tinted to match.
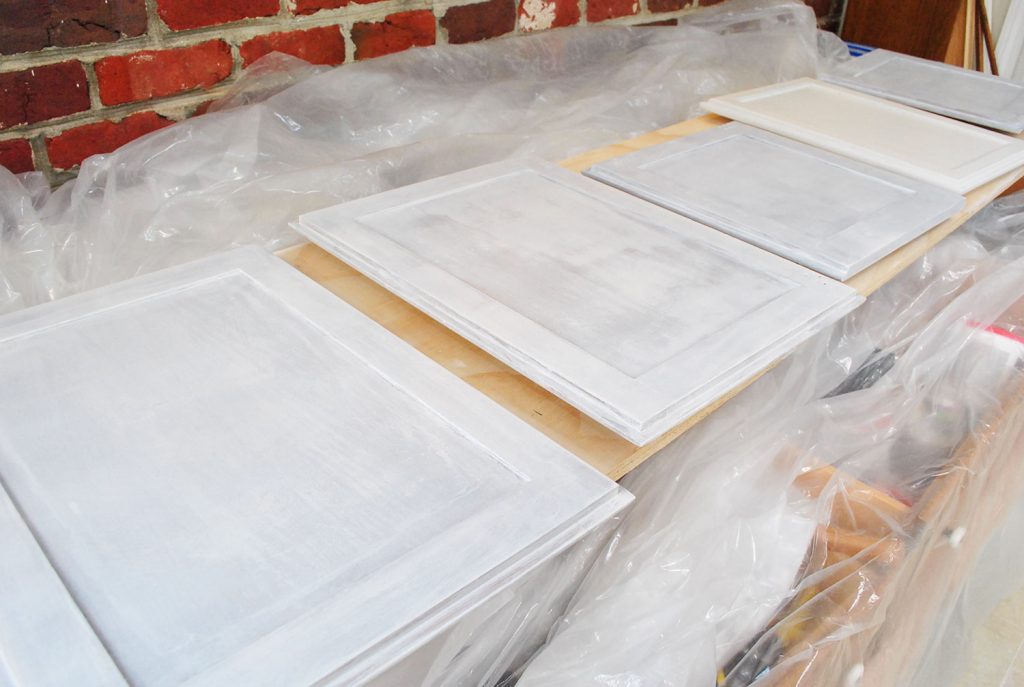
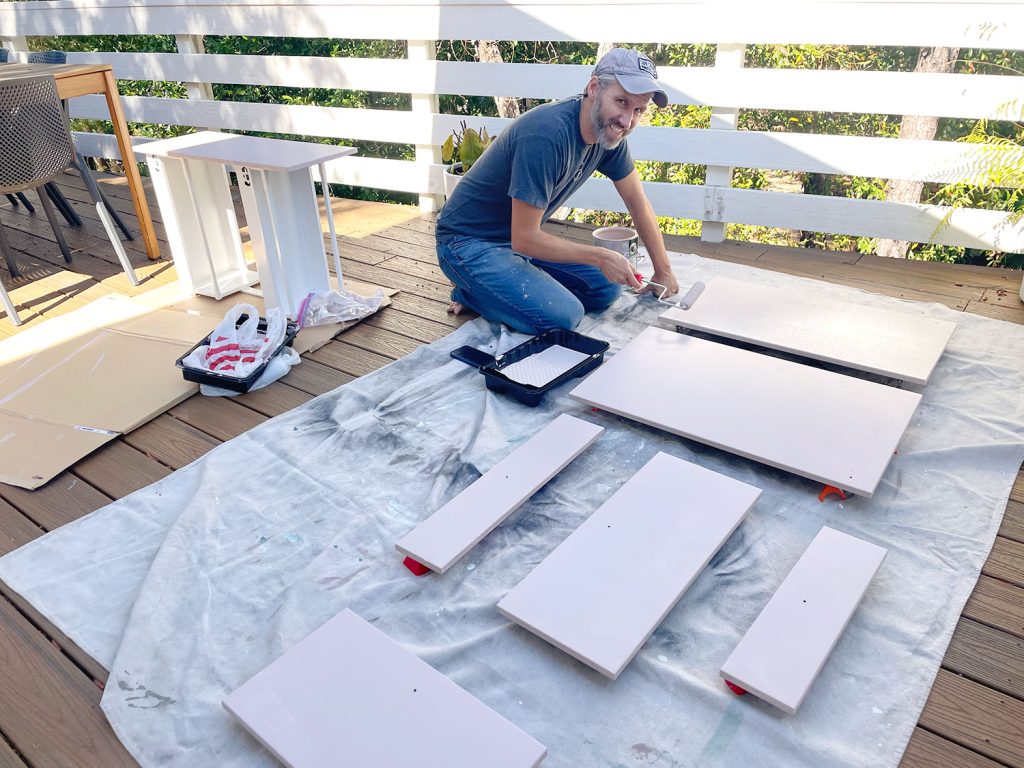
As you can see above, you’re not going for perfect coverage. Primer will be splotchy as it dries. This is okay. The main goal is to get a thin, smooth, and even coat. To do this, we recommend (1) using an angled paintbrush to get into edges or corners, then (2) using a small foam roller to remove brush strokes and coat the large, flat surfaces. Go slow and watch for drips along edges!
We suggest propping your doors off the ground with painter stands to make priming and painting easier. And if you’re painting both sides of your doors (which we think you should!) we’ve developed a specific order that helps minimize marks or dings on your freshly painted doors. It requires a bit of patience as you wait for one side to fully dry before flipping it over to do the other.
Don’t forget to do your cabinet frames and boxes too! You may want to use painter’s tape and drop cloths to protect walls, floors, appliances, and countertops.
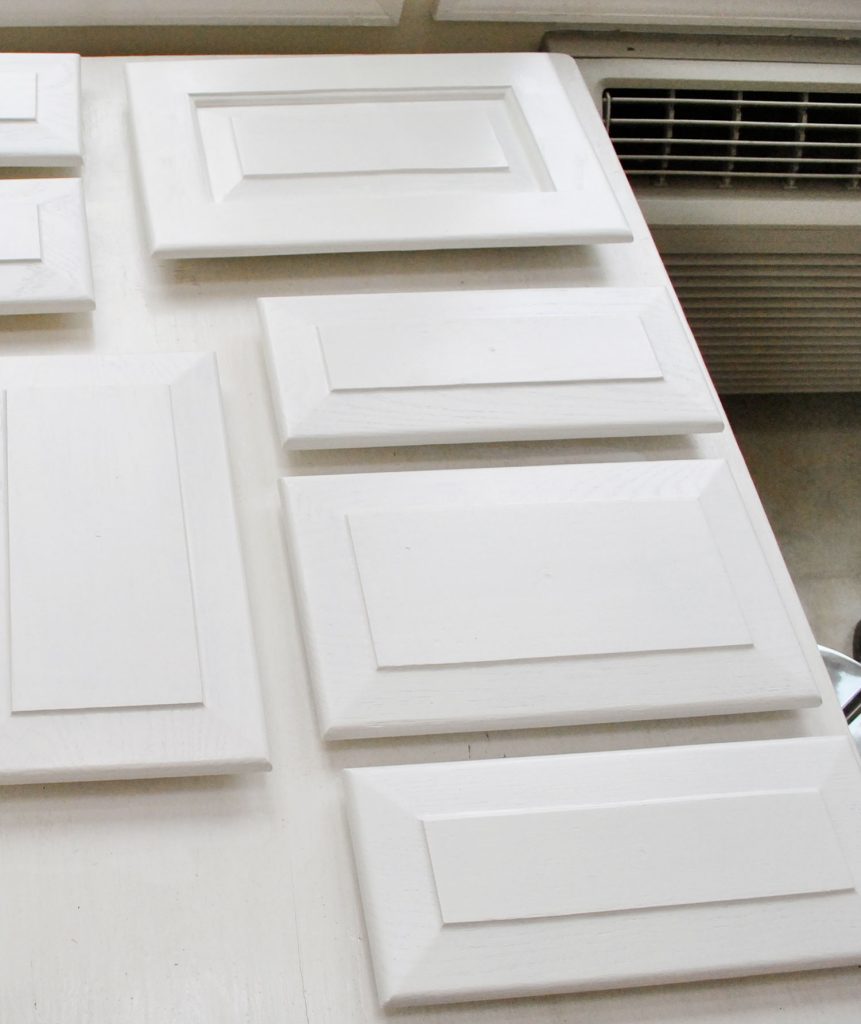
Step 5: Paint Two Coats
Once your primer coat has fully dried and cured (see the manufacturer’s instructions on the can for specific times), you may repeat this process with your chosen paint. We used the color Benjamin Moore Cloud Cover. Again, use a combination of a brush and foam rollers to get a smooth finish. The paint may look slightly textured from the foam roller, but it will even out as it dries. Just remember: your main goal is thin & even coats without drips!
As a rule of thumb, we do two coats of paint for any painting project. But it’s especially important with painting cabinets. More thin layers is stronger and less prone to scratches than one thick layer. Just be sure to allow enough dry time between coats before touching or recoating.
This part should be super satisfying. You’re finally seeing your hard work pay off and your vision come to life!
Step 7: Rehang cabinet doors
Once everything has fully dried, you can reassemble your kitchen. Screw hinges back on. Slide drawers back in place. You can even put things back in your cabinets.
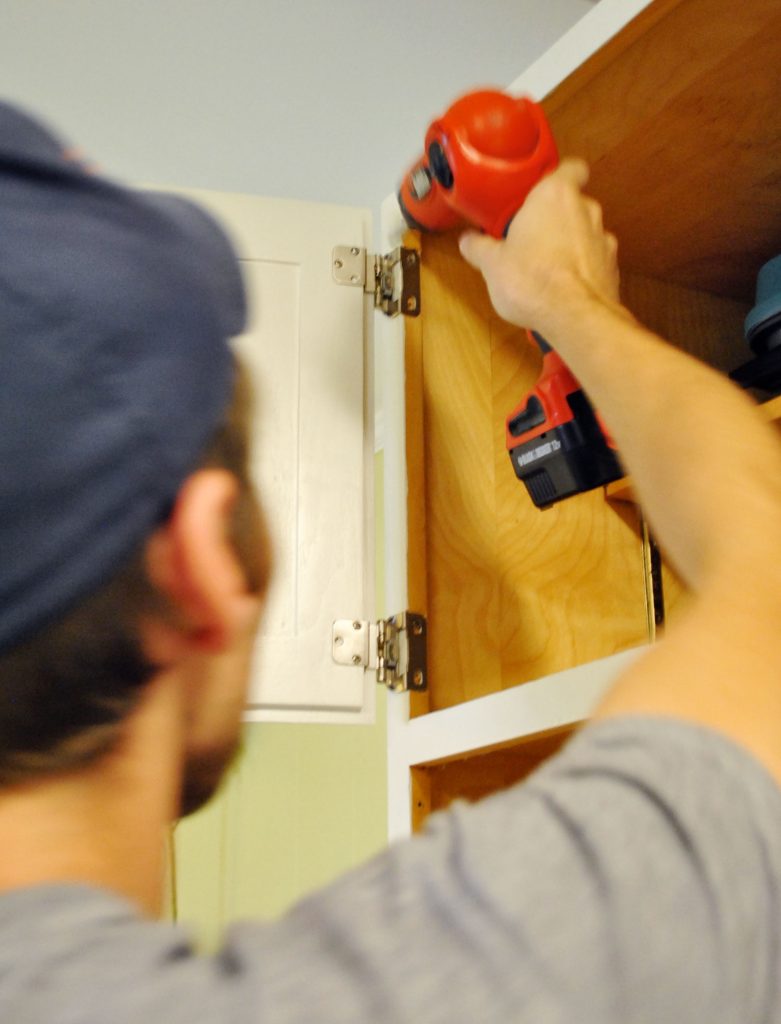
Things might get banged around in this process, so we often like to give our paint an extra day to cure before beginning. You’d hate to scuff up or scratch off the fresh paint right away!
Step 8: Reinstall cabinet hardware
At the same time, you can all reattached your cabinet knobs or pulls. However, this will be a bit more involve if you – like us – filled all of the old holes and need to make new ones.
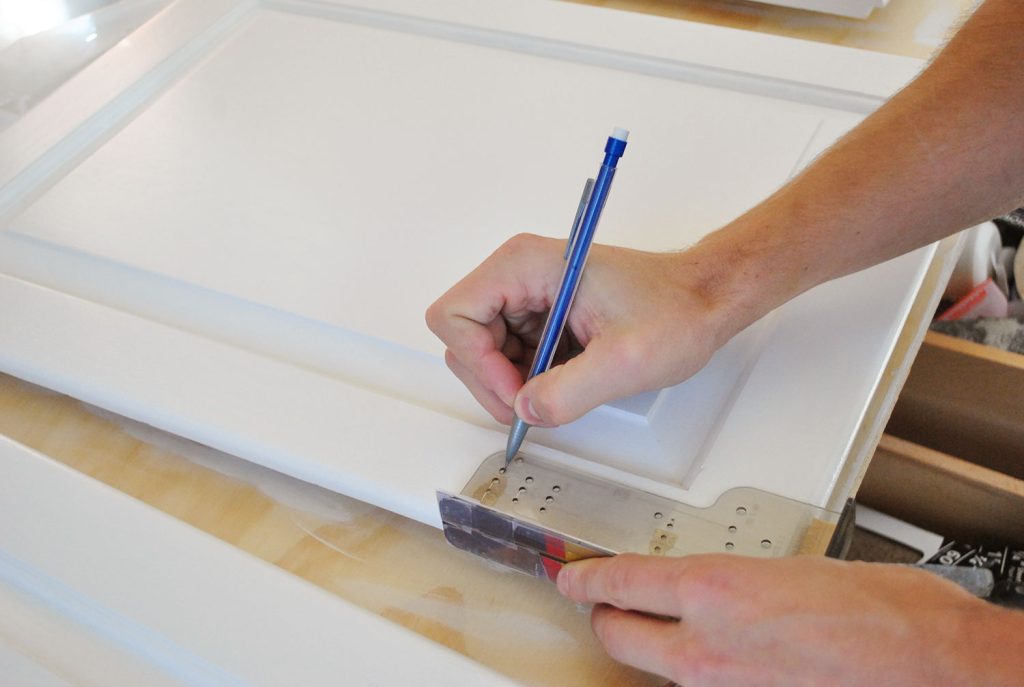
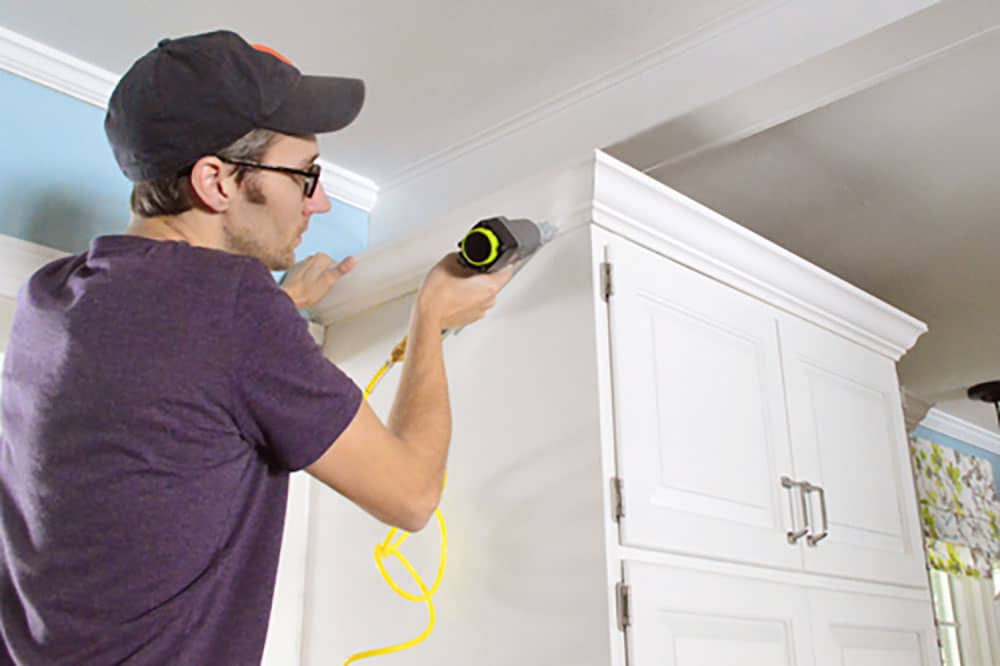
We have an entire post – with video! – dedicated to how to install cabinet hardware that will help you do this with precision and speed. But as you can see above, we highly recommend purchasing a hardware template for this step.
How long does it take to paint kitchen cabinets?
Painting these kitchen cabinets took us 15 days to complete. A lot of that time, however, was waiting for things to dry and cure. They were not 15 days of straight work! So while this isn’t a project you should expect to knock out in a weekend, it’s also not something you need to take 2 weeks off of work to complete. It can easily be done on nights and weekends, like we did. We even had a toddler at the time!
How much does painting cabinets cost?
Painting kitchen cabinets yourself is very affordable, especially compared to the alternative of hiring it out OR replacing your cabinets entirely. We completed this project in 2012 for just $300 and half was for new hinges and pulls. So if you are reusing your hardware, you can expect to spend even less. Here is a rough estimate of what you might spend to paint kitchen cabinets.
- Sandpaper: $10
- Liquid deglosser: $10
- Primer, 1 gallon: $30
- Paint, 1 gallon: $80 – $120
- Paint supplies (roller, brush, trays, etc): $40 – $60
- TOTAL COST: $170 – $230
If you don’t already own an electric sander or drill, those may cost you about $50 each. You can complete those tasks by hand to keep your budget down, but it will significantly increase your time and effort.
Other Cabinet Painting FAQs
Here are some other frequently asked questions about painting kitchen cabinets:
Do I need to apply a sealer or topcoat?
No, you do not need to apply a sealer, varnish, or polyurethane to your painted cabinets. Paints, especially those formulated for cabinets or trim, don’t require a protective topcoat. In fact, applying one could cause your color to yellow.
What finish paint should I use on cabinets?
We recommend using a satin or semi-gloss paint for a hard, wipeable finish on cabinets. Gloss or high-gloss paint can offer a sleek, modern look with high shine, but should be applied professionally with a paint sprayer to avoid brush or roller strokes. Matte, flat, or eggshell finishes will be harder to wipe clean.
What color should I paint my cabinets?
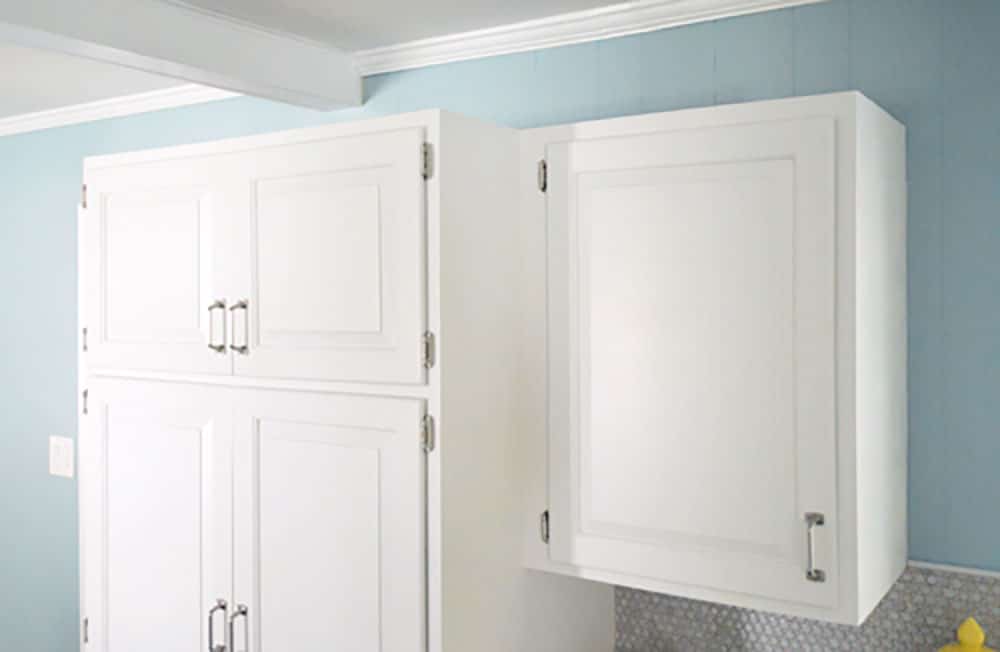
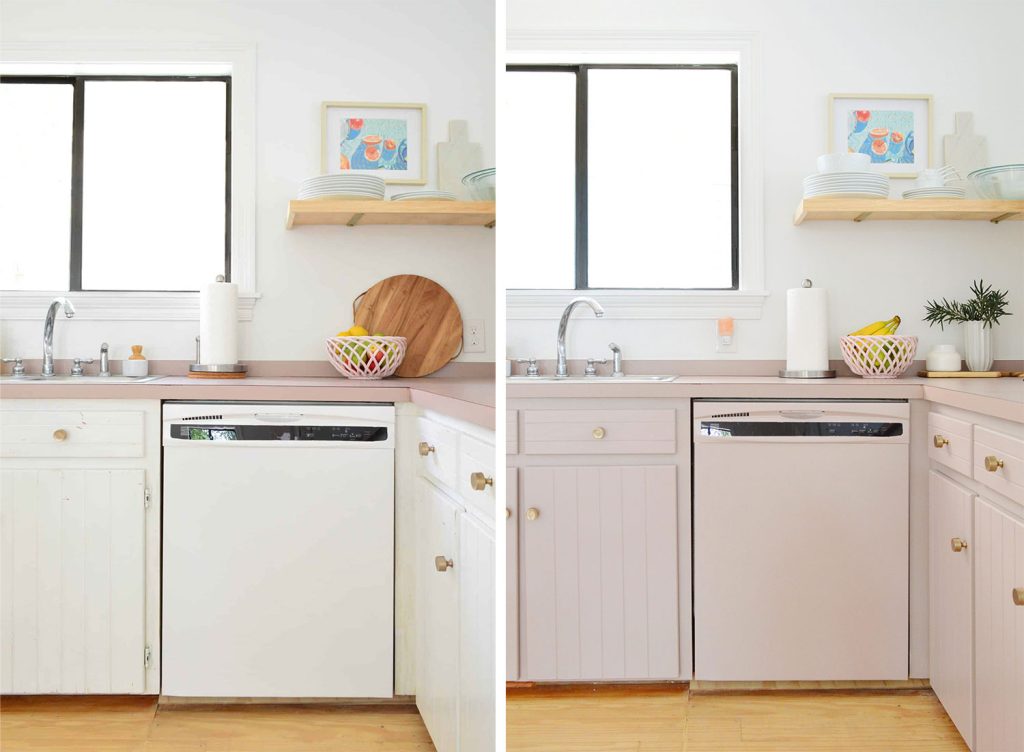
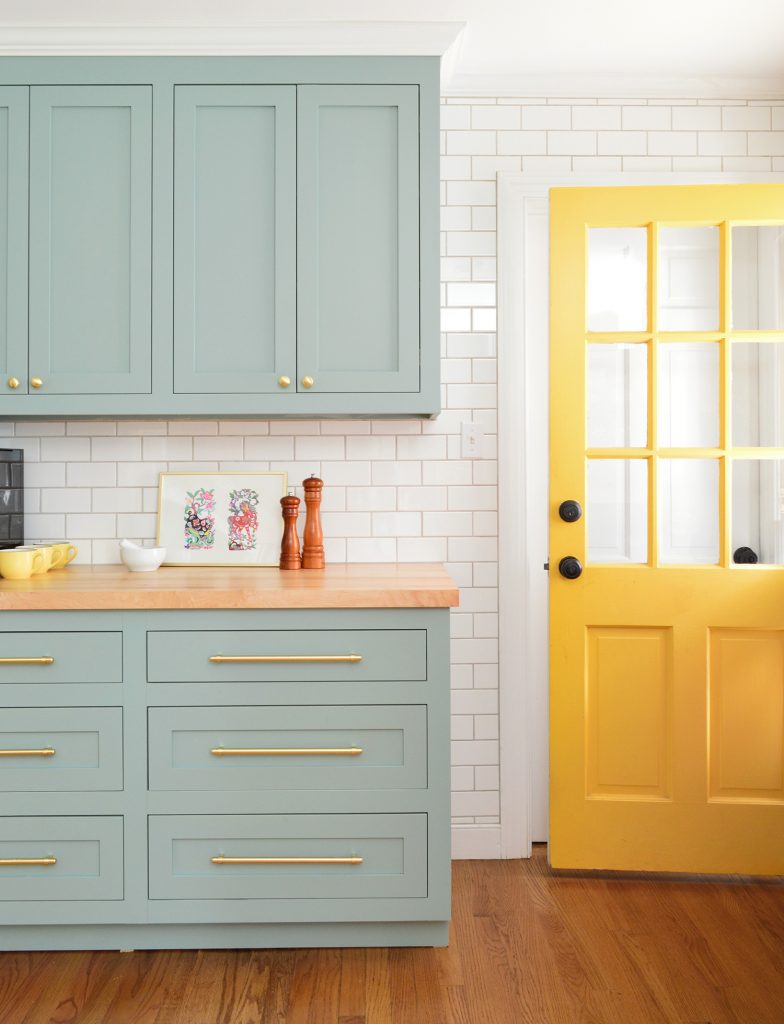
There is no limit to the colors you can paint kitchen cabinets! We love classic white cabinets, but colorful cabinets have also been trending lately – like our current cabinets (Artsy Pink by Sherwin-Williams) or our friends’ painted cabinets below (Halcyon Green by Sherwin-Williams).
We always recommend testing any color before proceeding. Colors often appear brighter or more saturated than they seem on a small swatch. Whites also can appear stark or cold, so we recommend something with subtle yellow or gray. Any of these expert’s favorite white paints work well on cabinets.
More Kitchen Cabinet Projects
Looking for other budget-friendly ways to update your kitchen? Here are some other projects you might be interested in:
- How to Add Crown Molding To Cabinets
- How to Properly Prep Cabinets For Paint
- How To Paint Ikea Cabinets
- How to Install Kitchen Hardware
- Organizing a Small Kitchen
- Installing Hidden Ginges on Old Cabinets
- Staining Wood Cabinets Darker without Sanding
Update: Our painted cabinets are still holding up great. Check out a little update post here.
*This post contains affiliate links, so we may earn a small commission when you make a purchase through links on our site at no additional cost to you.

Mel says
Beautiful! Congrats on the huge step!
Stephanie N says
So nice!
I have talked about painting my kitchen for over a year. But my cabinets are some sort of laminate over pressboard, ie cheap and nasty. But I tried it out on a sample and not bad! I was wondering about the front and back and how not to get marks, so thanks for sharing!!!!
YoungHouseLove says
Good luck!!
xo,
s
Sarah says
Love it! So pretty! I have to laugh honestly. When my husband and I were going to paint ours white, and the walls green, I saw what you guys were doing I was like “I can’t believe it, they have green and white too” We must just like white and green kitchens haha ;)
Check it out – http://ssimplyme.com/2012/01/04/im-dreaming-of-a-white-kitchen/
It’s not completely done, but getting there. White feels SO much cleaner!! :)
Sarah says
try this link. http://ssimplyme.com/2012/01/05/im-dreaming-of-a-white-kitchen/ oops
YoungHouseLove says
Wow- so pretty!
xo,
s
Shirley says
Amazing, just amazing. I am in awe of your talents. You have inspired many to realize their dreams on a budget!..Bravo!
Emily says
I’m just curious if you were dealing with ALL real wood, or if you had any fake veneer side panels, like we do. Our cabinets are that cheap builder-standard oak, and some areas appear to have what almost looks like a big sticker covering particle board of some sort. I would love to paint the cabinets white, but I’m nervous about those fake side panels.
So I’m wondering if you’ve ever come across this and what your solution was :)
YoungHouseLove says
Hmm, we had all solid wood cabs and sides but I would imagine any sort of panel of veneer or pressed wood should take primer and paint well if you gently sand and degloss and use high quality paint/primer. Good luck!
xo,
s
Karissa says
Emily, we have exactly what you do and priming and painting the side panels worked great. We ended up using wood filler on all of the oak door fronts and backs (to get rid of wood grain), but with the side panels, it wasn’t necessary and they came out with a very smooth finish.
Good luck!
Sara says
It’s so amazing that you two can look at a room like the “before” picture and visualize “after.” So many people can’t see past the surface when they buy a house, and they end up passing up something that could be fabulous just because it had dark paneling. Kudos to you for having that vision and making it a reality!
Catherine says
Nice work!
Having just painted my cabinets too I know how much patience and time this takes. Question – even after letting your paint cure for a few days, do you guys ever run into the paint getting scraped/knicked off? I used primer and Benj. Moore paint, allowed the drawers to cure for a week, and there is still the small occasional chip that I’ll need to touch up. Has this happened to you? How would you fix it? Thanks! Can’t wait for the floor to go down.
YoungHouseLove says
We haven’t had any issues with that- hmm, I’m not sure what you could do. Maybe bring the chipped door or drawer to a Ben Moore store and ask what they recommend? They might have some secret to level things out with a topcoat or something.
xo,
s
Meghan says
I love your blog. It might be the best 2 minutes (or in the case of this post, best 10 minutes) of my work day :) Your kitchen renovations could not come at a better time for me, as I’m beginning the the process of planning for my own kitchen renovation/update which (thanks to you guys) will include painting my existing oak cabinets. I apologize if I missed this in the comment section but I was wondering:
How did you decide to paint with a brush and roller vs. purchasing a sprayer that connects to an air compressor (lord knows you guys do enough painting)?
YoungHouseLove says
Haha- we just like the control of a roller and brush and have always been happy with the results. Worrying about drips from a sprayer or having to clean it feel higher maintenance to us (probably just a go-with-what-you-know thing, because lots of folks love a sprayer!)
xo,
s
Michele says
A-M-A-Z-I-N-G transformation — even with the cement board on the walls instead of the backsplash. What a transformation!
Debra says
Looks Great! What a huge difference. Congrats! Can’t wait to see it with the backsplash!
Wom Mom Ethne says
Superb. I think you should forever memorialize your old eyeball kitchen by hanging a little pic of the eyeballs and faces you photoshopped above (and way back in its original post) in your wall of photos. ~Ethne
YoungHouseLove says
Hahaha, that’s actually hilarious and quite possible…
xo,
s
Jazmin says
THANK YOU!!!!! THAT VIDEO IS WHAT I NEEDED TO SEE! i have ruined many small projects, because I didn’t really know all the steps! I now feel like I can do my kitchen!!!
Jazmin
YoungHouseLove says
So glad!!
xo,
s
Meg Smith says
It looks amazing, guys! Love the heart pride after a job well done. Don’t you? Like inner beamingness!
Violets and Cardamom says
Wow!! It is looking so lovely! I can’t wait to see it when you have the dark colored cork floors in!
Morgan says
Just gorgeous. When I feel frustrated because painting a room takes me forever to get crisp and smooth and “TA-DA” worthy, I imagine my painfully-slow painting is just me loving every last square inch of our home. Like, man. I KNOW this corner of the room now! You guys certainly deserve to feel that way about your cabinets, frontwards, backwards, inside-out, and upside-down. Congrats, guys. You earned it!
Amy Dash says
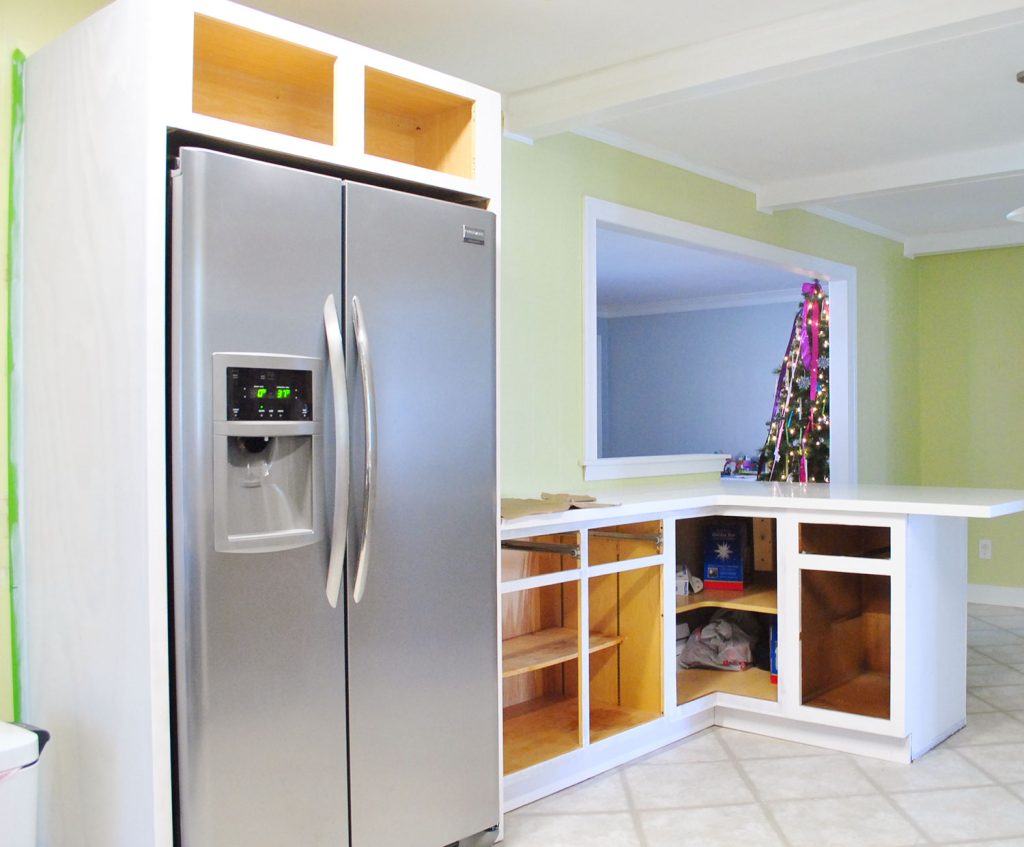
Wow, the cabinets look brand new! Can’t wait for more photos of the finished project from different angles. I noticed you used the same photo (2nd one posted) four times in this post, at first I thought my page was loaded funny!
YoungHouseLove says
Haha- I just love the full shot so much! Walking in from that hallway and seeing it from that direction is the best! I’m sure as we tile the backsplash and tackle everything else on the list there will be tons more photos/angles for ya!
xo,
s
Becca says
This looks lovely – congratulations!
eileen marie says
I seldom comment anymore (trying to help you with that balance thing -less comments to read!), but I wanted to offer you a sincere thank you for this! A lot of the houses we have looked at in Evanston (home of Northwestern U!) have grotty old kitchens, and IF we move, we might have to paint cabinets, and so will reference this uber-helpful post.
Also, congrats!! You have gotten me so excited to see the rest of the makeover after having seen the amazing transformation so far from the changes you have made! It took me until the end of the post to come around on the hardware -love it.
Sarah says
So excited to see all this progress on the kitchen. Not gonna lie– it’s always my favorite room to see being made over! Just one question, did you guys ever pin down what you were going to do to the back of the island? I think I remember you considering adding some sort of accent? Can’t remember what post this was in or the details! Good luck!
YoungHouseLove says
We’re waiting to see how the room comes together (ex: if the wall of backsplash should be the only focal point, etc) and then we’ll make the call!
xo,
s
threadbndr says
That’s an AMAZING change.
I’ll eventually be doing my kitchen cabinets. I was NOT looking forward to doing the insides, but now that I’ve seen yours, I really like the natural wood interiors! I’m much more comfortable with the idea of painting now, thanks to your tutorials. I also am glad that I have totally flat door/drawer fronts, and will be reusing the existing vintage knobs – less putty!.
The kitchen probably won’t be this year – this is the year of decluttering and doing bedroom painting x 2. But it’s on the list!
YoungHouseLove says
So glad to help! Good luck with everything!
xo,
s
Ann says
It looks like another room!
Ashley says
What an inspiring post!! We’ve been working on our kitchen for a while now. It all started a few Thanksgivings ago, when I went to put my 14 pound turkey in the built-in oven in my “new to me” house and it wouldn’t fit!! I had to cook it on my gas grill that year! So fast-forward to now and my dad has been helping us DIY a kitchen remodel – moving some cabinets, adding a regular range, and even moving the fridge location. We are now to the point of painting the oak cabinets and I have been anxiously watching your progress for tips.
I purchased the Smart Prime (had to go to Richmond to get it!), and tried a bit on an extra door. After it dried, I tried the scratch test and the primer scratched off easily. I’m concerned about the durability of the finished product. Did you all do a “scratch test”?
YoungHouseLove says
Hmm, did you sand and degloss first? That might help! Also a lot of primers are “open” for a while (3-4 days, which is when you need to apply the paint) and then they become “closed” meaning that’s when they really do the bond/cure thing (while the paint is on them to hold them super strong) so maybe the scratch test doesn’t work when it’s still open, but once you paint and give it a few days it’ll close! Ours definitely don’t scratch off! We have already been manhandling them!
xo,
s
Hesper says
Gorgeous! I have been wanting to do this for like 4 years. I have just emailed this to my hubbby. Maybe I can get him to agree to start the project as a V-day present! lol
Emily says
Looks incredible! We’re getting ready to paint our cabinets white, lay ceramic tile and replace our appliances as well! And I might be petitioning the hubby for new counters and backsplash…. we’ll see how that goes! Either way, I’m dying to get to it so I can submit a reader re-design :D
ScullyPA says
Wow that is so fabulous! I am currently painting our bathroom vanities, and that tip about painting the back first would have come in handy. :( Like you, I didn’t feel that replacing solid wood vanities made much sense, so was inspired to try painting them. I did the same thing, choosing not to paint the insides, but for me it was sheer laziness and because I used a dark brown, I thought that might make it like a cave to find things inside.
I REALLY think that the bar stools need to be some sort of funky color now, for pop. That would be fun in there!
Whitney says
OK, I love it but I have to ask you a crazy question about small details. :)
When you take the cabinet doors off the hinges, did you putty in those holes, too? And the re-install the hinges? Or do you use the existing holes?
Thanks for you great ideas and inspiration!
YoungHouseLove says
We checked that the new hinges matched up with the old holes (they didn’t) so we puttied the old ones, sanded, and John drilled new hinge holes before we painted. They still worked when everything cured up so we were all set!
xo,
s
Patti says
beauty.full!
Sharee A. says
AMAZING! And you’re home improvement show airs when? :-)
Jake Johnson says
Beautiful!
Claire @ Claire K Creations says
It looks amazing. You guys have done the most amazing job!
Elizabeth says
Wow, it’s so amazing how much brighter it looks with the white cabinets!
Melanie says
Everything looks amazing! Can’t wait to see the finished kitchen.
Is the paint/primer you used an oil based or latex?
-Melanie
YoungHouseLove says
Everything oil-based is high-VOC but companies are coming up with things that are called aklyd based, which is this magical stuff that has the durability and smoothness of oil without being as stinky (or taking as long to dry). So our paint was aklyd based, and I think the primer was too! Hope it helps!
xo,
s
Marybeth says
I just did cork floors on my enclosed porch that I got from lumber liquidators. love them. when you get yours order a few extra panels. it takes a little practice. I found that tapping on one side gently once or twice, then on the other, and alternating sides repeatedly until it’s in, gets a better result than whacking too hard on one side too many times. it is too easy to dent it that way.
YoungHouseLove says
Thanks so much for the tip!
xo,
s
Jan says
Amazing, just amazing!!! Can’t wait to see it all completed.
Kristina Dousharm says
What I find so inspiring about you guys is that you always seem to embrace and still enjoy your house in whatever stage it is in… the nice decorative jars on the counter in front of the tile backer board wall… I LOVE this. Still home sweet home, even under construction.
Hank says
Did you paint the side of the drawers or just the fronts?
Looks great as always.
YoungHouseLove says
Hi Hanks,
Just the fronts (and backs of the fronts) but not the sides this time.
-John
Denise says
Amazing before & after! A growth chart came to mind for the side of the pantry cabinet. And doesn’t Clara love measuring tapes! http://www.etsy.com/listing/89278576/the-brimfield-growth-chart?ref=v1_other_2
YoungHouseLove says
Oh yes we have plans for the side of that fridge! Will keep ya posted!
xo,
s
Marie says
What a transformation – well done guys! You must be exhausted, I hope you had a nice rest and took it easy after getting your manuscript in.
Quick question – You have lots of open doorways in your house – do you find that this makes the house harder to heat? We are considering making the knocking the wall between our living room and kitchen/dining but the chilliness factor is causing a bit of doubt.
YoungHouseLove says
It doesn’t seem to make it harder – we have better flow now so I’d say that air (heated or cooled) travels more easily now. Hope it helps!
xo,
s
Marie says
Thanks Sherry!
Oh to need cooled air! Not something we even think of here in Ireland : )
YoungHouseLove says
Haha- we hear it’s gorgeous there!
xo,
s
Shanna says
Super crazy gorgeous. Well done! One of my favorite parts of this is that John was able to create those new doors out of the old ones. I just think that is seriously inspiring, especially since they are so seamless. I can’t wait to see what is next!
Paige says
Eeeekkkkk!!!!! I was so excited to see this. Amazing! You guys rock. Can’t wait to see the rest, like the rest of us!!!
Emilie says
WOW! You two did an amazing job! What a transformation! It looks so fresh and light, compared to being so dark before. Great, great job you guys!
Melissa says
“And the fact that we can put her to bed at 7:30 and hammer away from 8 o-clock on is pretty darn awesome.”
that’s what she said. :-D
YoungHouseLove says
Haha, ya got me.
xo,
s
Katelyn says
It looks amazing…You guys are such an inspiration!We just moved into a house with brand new white appliance and are thinking about painting our cabinets a shade of gray. How do you guys feel about gray kitchen cabinets?
YoungHouseLove says
Gorgeous!
xo,
s
Kelly (Kelly is Inspired) says
Looks Fabulous! My question for you is, Does Benjamin Moore Advance Satin feel smooth to the touch? I just finished painting my kitchen Island with Valspar satin and while the finish looks great, it feels kind of rough to the touch. I think it will bother me in the long run… Just wondering if I should have used BM Paint instead.
YoungHouseLove says
Oh yes, it’s smooth. Some of that might have to do with prep of course (sanding, etc) but the paint has a nice factory-finish when it’s dry!
xo,
s
Kara says
I am so addicted to this post. I keep coming back just to look at all the clean, bright awesomeness. It’s a job very, very well done.
Apropos of absolutely nothing, how has Karl held up? I’m on the market for a sectional but I have reservations about the long-term quality of Ikea furniture.
YoungHouseLove says
Karl’s awesome! No complaints at all!
xo,
s
gcarron says
love the cabinets
Renee says
Question: on the inside corner cabinet doors (where one has a handle and the other does not) did you cut a notch for your fingers in the top of the cabinet door that doesn’t have a handle?
And I may have missed that some where – my self-diagnosed A.D.D. sometimes kicks in, and I miss things!
YoungHouseLove says
That one’s easy to pull open once you open the other one. Once the one with the handle is pulled open you can grab the second door from behind and pull it open. Hope that makes sense!
xo,
s
Maya says
Fabulous! They look terrific and that’s such a great kitchen transformation already. And I’m so glad you gave info on how to use the installation template for the hardware. We painted our cabinets a bit ago and installed the hinges, but haven’t had time to finish with the pulls/knobs (at least in part because I’m dreading making a mistake drilling into them!). Three cheers for your tutorials!!!
Kayla says
definitely the step with the most impact… it looks great! the video is actually extremely helpful by the way – thank you for making it!
YoungHouseLove says
You’re welcome! Glad to help.
xo,
s
Coletta (rhymes With Velveeta) says
love the cabinets but hate the wasted space in front of the fireplace. Are you going to put in a small round dining table in that area?
YoungHouseLove says
We have the peninsula and a giant table that seats 8 in the adjoined dining room so a small sitting area in front of the fireplace works best for our family! We do lots of reading to Clara and playing on the rug in that cozy corner.
xo,
s