Painting your cabinets is a perfect way to makeover a dated kitchen without splurging on a big renovation. It doesn’t cost much and, with the proper preparation, your paint job will look great and last a long time. We’ve used the tutorial outlined below to paint cabinets in 4 separate kitchens (not to mention cabinets in other rooms too) so we’re confident it’s a DIY project that will work for you. Follow along below!

The kitchen featured in this tutorial is from our second house which had solid oak cabinets throughout (along with wood paneling!). So while steps focus specifically on painting wood cabinets, the process is similar for any cabinet material. You can also refer to our tutorials about painting already-painted cabinets and painting Ikea cabinets.
Steps To Painting Cabinets
Here is a brief overview of how to paint your kitchen cabinets. The process takes time, patience, and a little bit of elbow grease – but nothing is especially complicated or tiring. At worst, it’s just a bit repetitive – especially if you a big kitchen.
- Remove cabinet doors and hardware
- Patch cracks and holes (optional)
- Lightly sand all surfaces
- Apply a liquid deglosser
- Prime one coat
- Paint two coats
- Rehang cabinet doors
- Reinstall cabinet hardware
This project can be completed by one person but may go faster with help. Proper surface preparation is the key to success here, so don’t rush steps 2-5.
The overall time lime depends on the size of your kitchen, but even painting a small kitchen will span several days due to drying and curing time between coats. You also want to make sure you have ample space to spread out your cabinet doors, like in a garage or spare room.
How To Paint Cabinets Video Overview
You can see these steps in motion by watching the detailed video below. To view an abbreviated version of this process, you can see a quick version of painting cabinets on YouTube.
Note: You can also watch the video above on YouTube.
Supplies Needed To Paint Cabinets
The materials you’ll need to paint your kitchen cabinets aren’t much different from other painting projects. So you may have many of these supplies already on hand.
- Primer
- Paint (we recommend satin or semi-gloss finish)
- Small 4? or 6? foam rollers
- Roller trays
- Short, angled paint brush
- Drop cloths
- Painter’s tape
- Painter stands or tripods
- Electric sander & sandpaper
- Electric drill & driver
- Liquid deglosser
- Wood filler (optional)
- Putty knife (optional)
You could use a paint sprayer for this project, but we don’t feel it’s necessary. If you already own a paint sprayer and are comfortable using it, go for it. It can save time. But we’ve never regretted painting by hand instead.
What paint should I use to paint my cabinets?
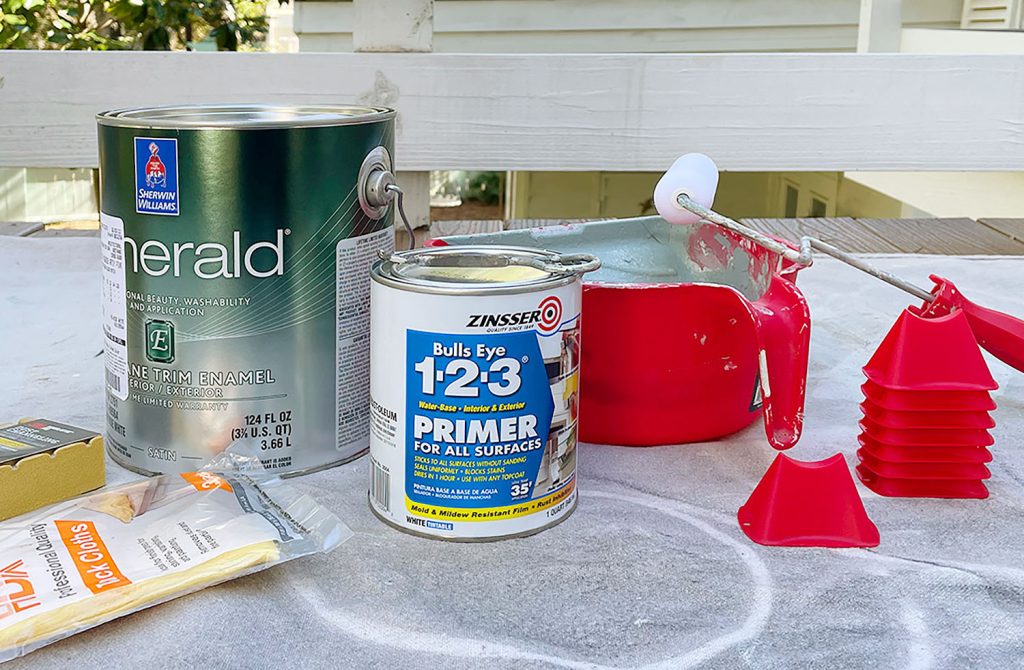
Water-based, latex paints formulated for cabinets or trim are best for painting kitchen cabinets. Oil-based paints used to be recommended, but are not necessary or practical for a DIYer. They are smelly, difficult to clean up, and can yellow over time. Also, water-based paints have come a long way and offer a similarly smooth and durable finish. Our favorite cabinet paints are Sherwin-Williams Emerald Urethane Trim Enamel and Benjamin Moore Advance. If you prefer a different brand, consult the paint desk expert for the best formula for your job. Buy the highest quality paint your budget allows.
Step 1: Remove cabinet doors & hardware
Carefully unscrew all cabinet doors from the frames using an electric driver. Remove existing hinges, knobs, pulls, or other hardware. If you are reusing this hardware, be sure to collect it in a bag or box for later. You may also want to label each door with painter’s tape (I.e. “lower left stove cabinet”) to help avoid confusion during reassambly.

You will also need to slide out any drawers from the frames. If possible, unscrew the drawer front from the box. You may also need to empty some drawers and cabinets. We don’t typically paint the inside of the cabinets, so most things can stay in place while you work. But take care to cover or temporarily move items while you sand, to keep them from getting dusty.
Step 2: Patch cracks and holes (optional)
You can skip this step if your cabinets are in good condition and you’re reusing the existing hardware placement. For our cabinets, however, we planned to swap the existing single-hole knobs for two-hole pulls. The existing hole was in the wrong place, so we used wood filler to patch all of the existing hardware holes before proceeding. We were also changes the hinges, so we patches the holes for those too on both the doors and frames.
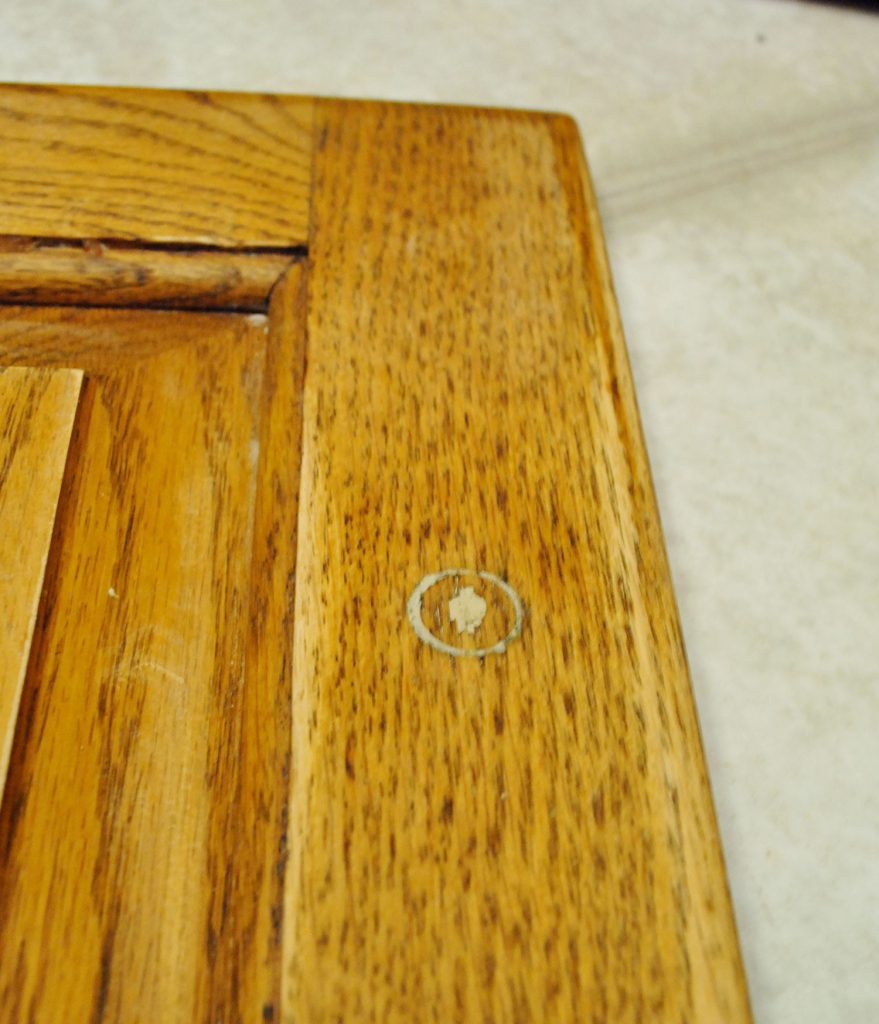
To apply the wood filler, use a putty knife to push it into the hole and smooth it. Once dried, sand off the excess. You may need to do a second coat, since it may shrink slightly as it dries.
Step 3: Lightly sand all surfaces
Prepping your wood cabinets for paint is the MOST IMPORTANT step if you want a long-lasting, durable result. Skipping the next few steps puts your paint job at risk of scratching or rubbing off, especially in high-traffic areas. So while this part is probably the most labor-intensive, please don’t shortchange it! We also have more detail in a dedicated post about prepping cabinets for paint. Here is an overview:
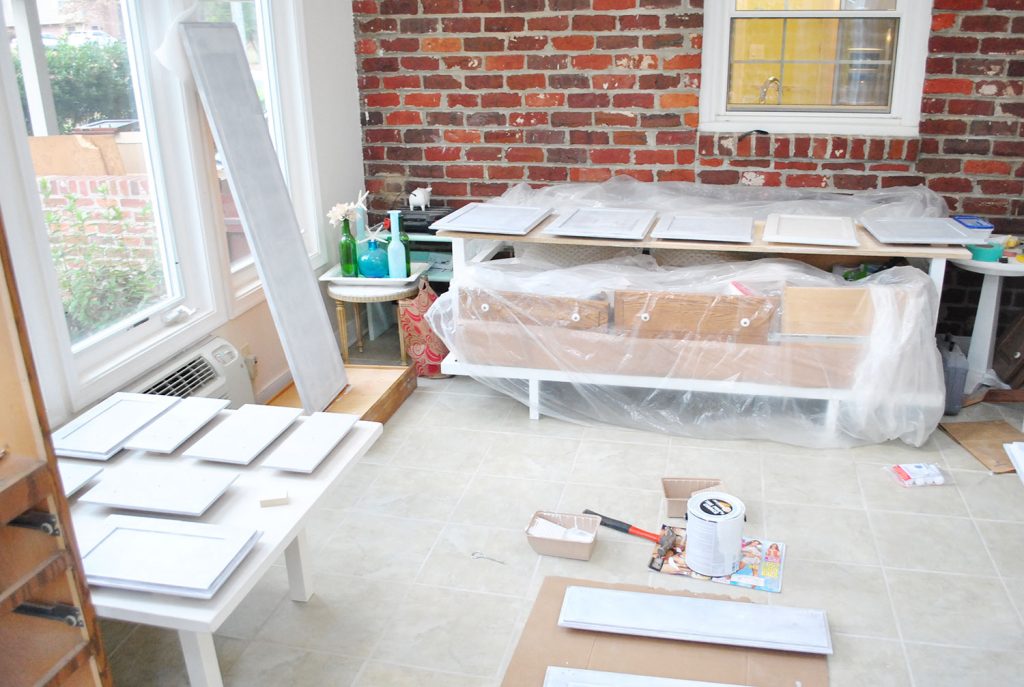
Use an electric sander and medium-grit sandpaper (like 120) to lightly sand every surface you will be painting. This means doors, drawer fronts, faces of cabinets, sides of cabinets, etc. You do NOT need to remove all of the existing finish. The goal is NOT to get it back to raw wood (although that it is okay). The goal is simply to rough up the surface enough to help primer and paint bond to it. You may need to hand sand small corners and nooks.
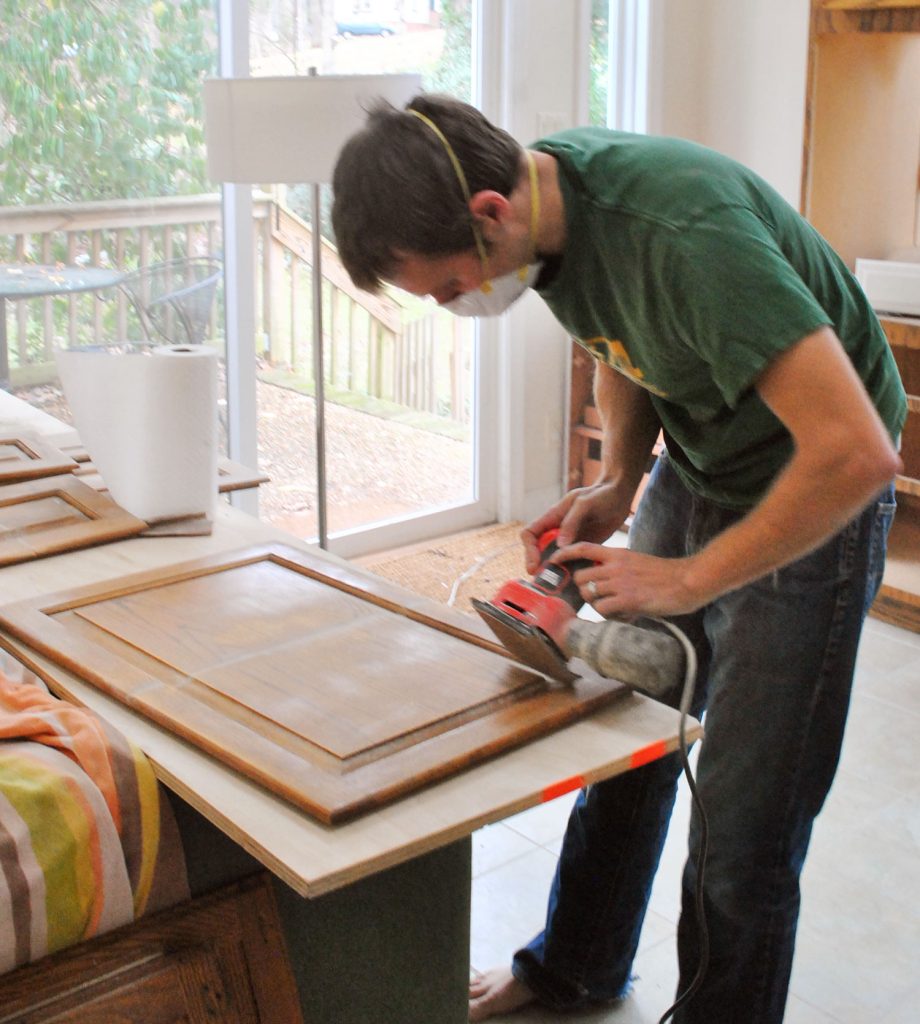
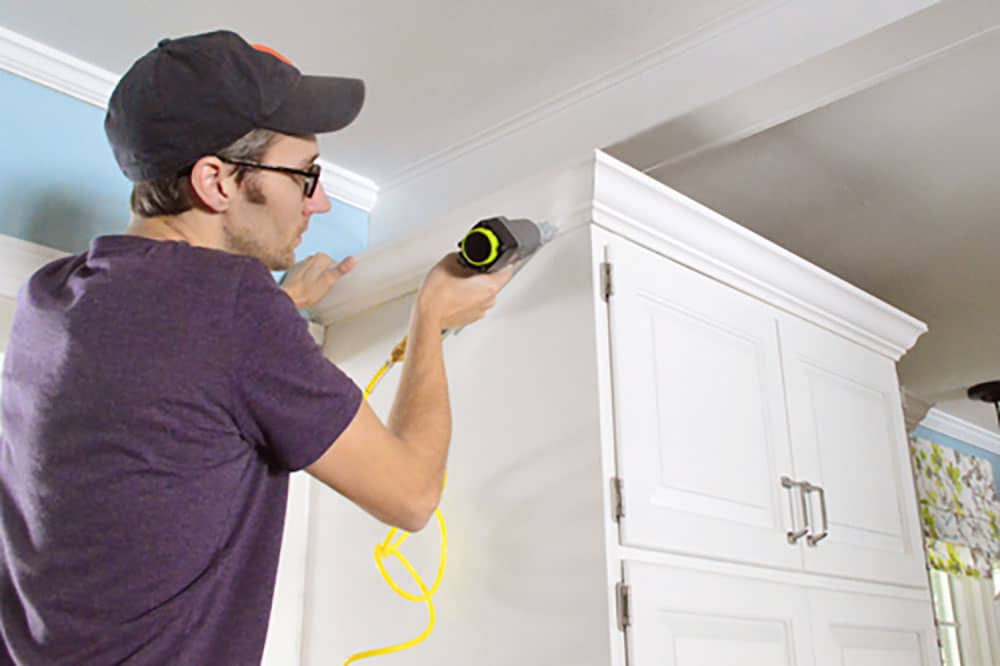
This process will be dusty, so try to do it outside or in a well-ventilated space (we did most of ours in our sunroom, above). When it comes time to sand the frames in place, cover items in your kitchen as needed to keep sanding dust from getting everywhere. After you’re done sanding, wipe your cabinets clean using a tack cloth.
Step 4: Apply a Liquid Deglosser
Liquid deglosser (sometimes called “liquid sandpaper”) helps etch the surface of your cabinets & frames, helping ensure a strong bond with the paint. Krud Kutter Gloss Off is our preferred deglosser. The one pictured below is difficult to find.
Some people use a liquid deglosser in place of sanding, but for wood cabinets we recommend doing both to be safe. It also helps remove any built-up grease or oil residue you may have missed while sanding, especially in nooks and crannies. You may also have heard of using a chemical called TSP (trisodium phosphate) instead. However, TSP is more of a cleaner than a deglosser, so we don’t recommend it.
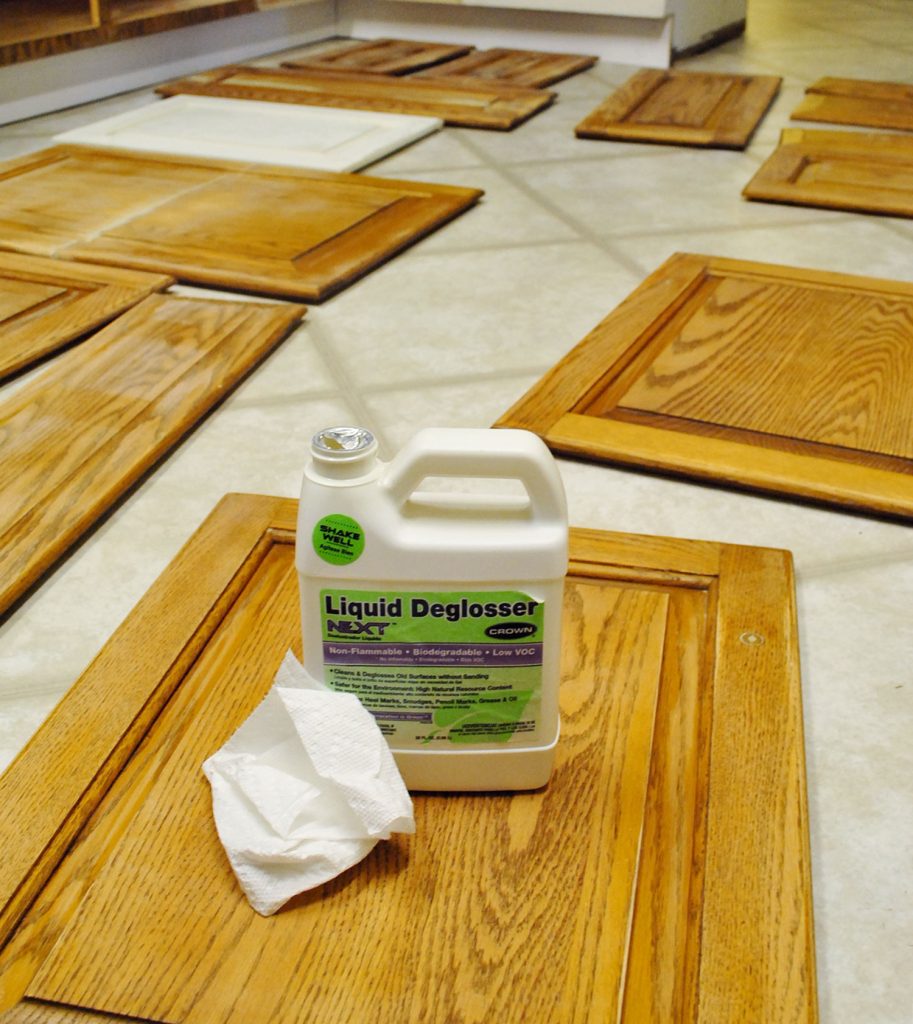
You can apply it with a rag or paper towel or put it in a spray bottle. It doesn’t need to be rinsed or wiped off. Just give it a few minutes to soak in. We sometimes do two applications to be safe.
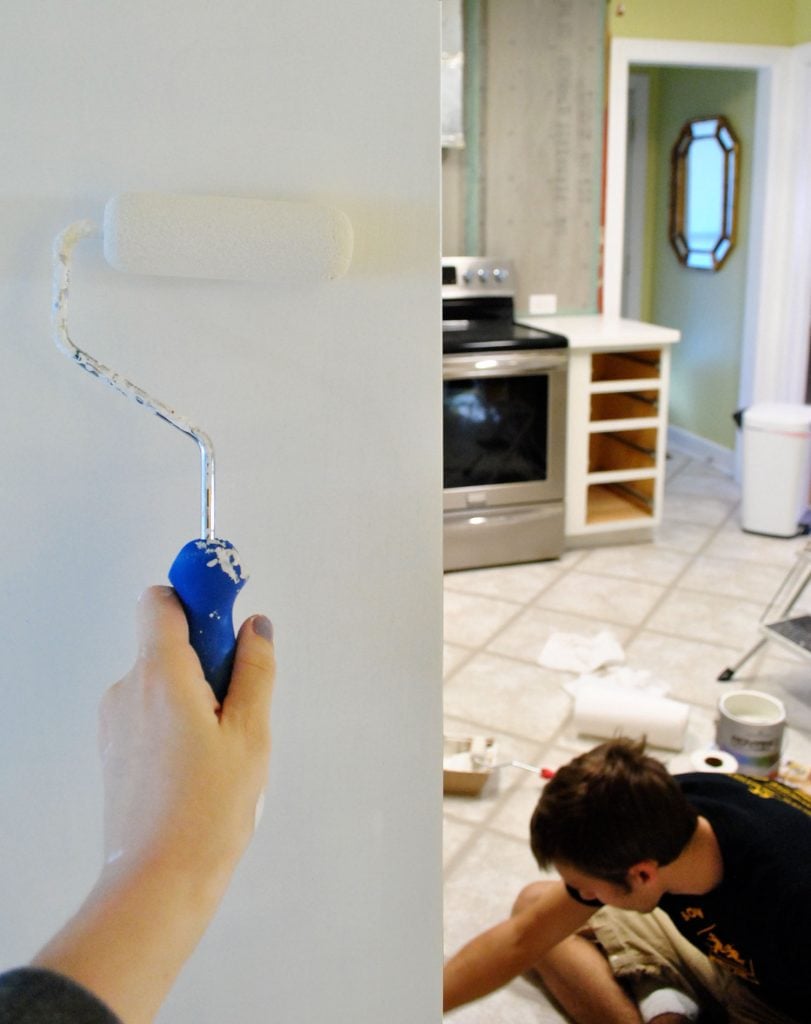
Step 5: Prime One Coat
The last prep step before painting is priming! Primer is a critical element to good coverage and a long-lasting finish. Do not skip it! We like a Zinsser all-surface primer. It can be used off-the-shelf if you are painting your cabinets white or another light color. For darker or more saturated paints, consider having your primer tinted to match.
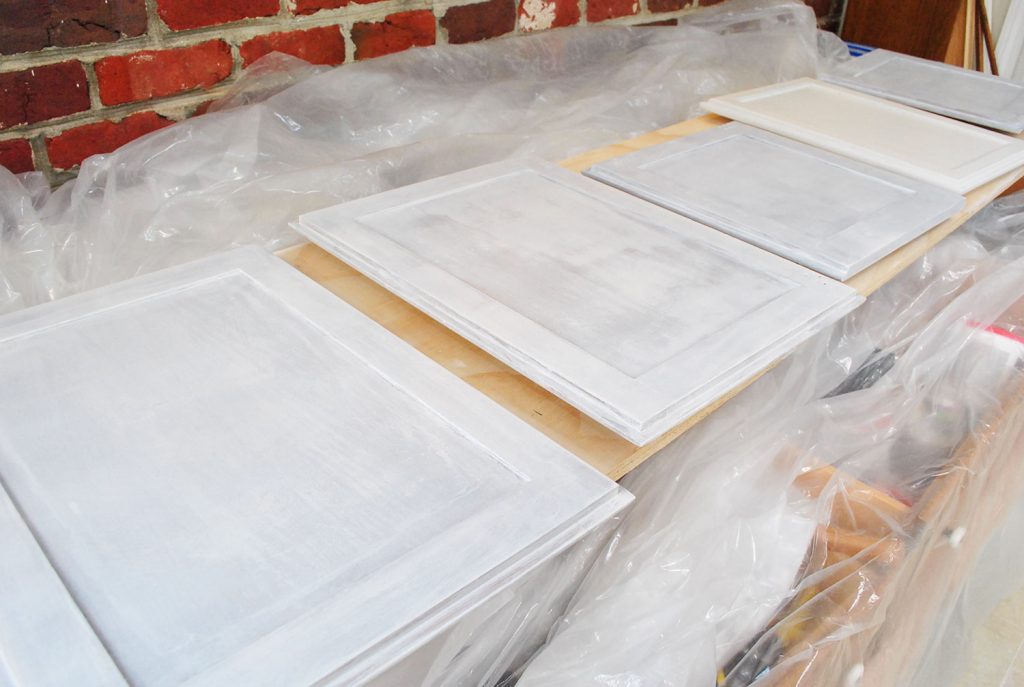
As you can see above, you’re not going for perfect coverage. Primer will be splotchy as it dries. This is okay. The main goal is to get a thin, smooth, and even coat. To do this, we recommend (1) using an angled paintbrush to get into edges or corners, then (2) using a small foam roller to remove brush strokes and coat the large, flat surfaces. Go slow and watch for drips along edges!
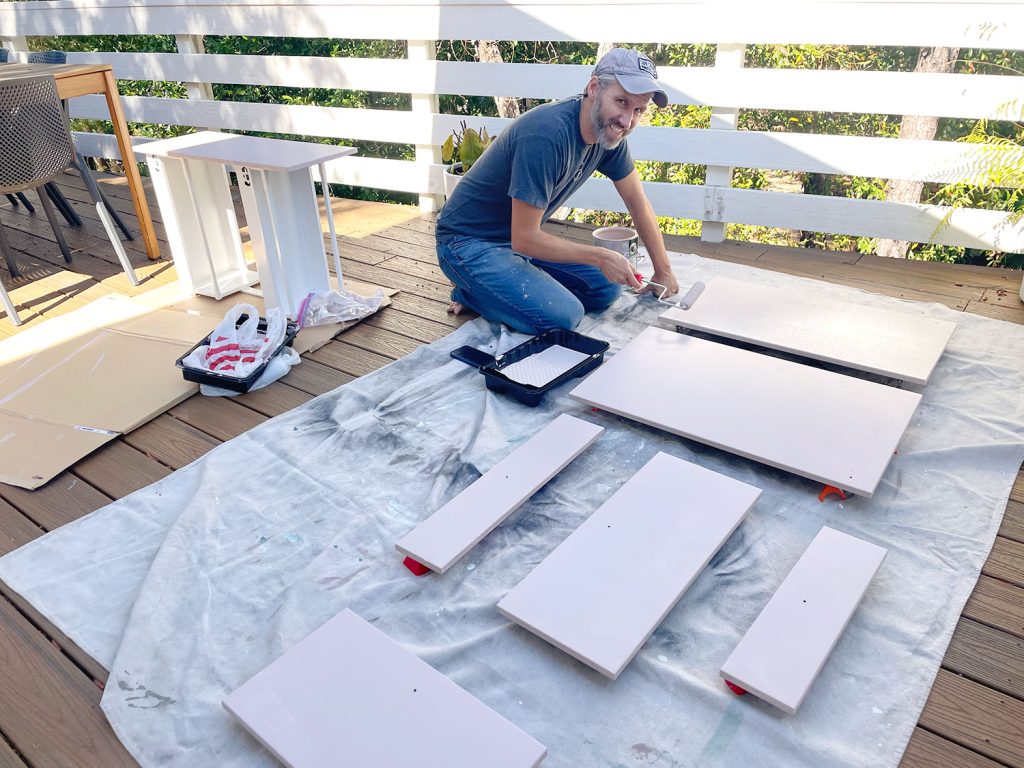
We suggest propping your doors off the ground with painter stands to make priming and painting easier. And if you’re painting both sides of your doors (which we think you should!) we’ve developed a specific order that helps minimize marks or dings on your freshly painted doors. It requires a bit of patience as you wait for one side to fully dry before flipping it over to do the other.
Don’t forget to do your cabinet frames and boxes too! You may want to use painter’s tape and drop cloths to protect walls, floors, appliances, and countertops.
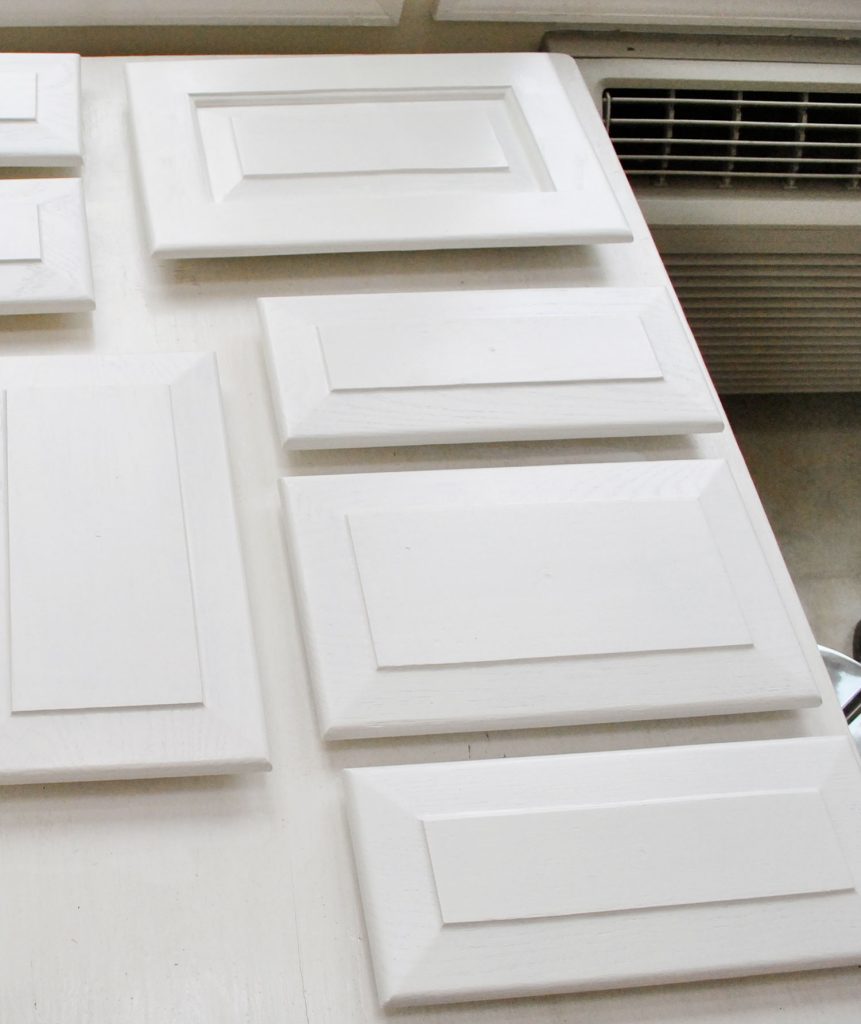
Step 5: Paint Two Coats
Once your primer coat has fully dried and cured (see the manufacturer’s instructions on the can for specific times), you may repeat this process with your chosen paint. We used the color Benjamin Moore Cloud Cover. Again, use a combination of a brush and foam rollers to get a smooth finish. The paint may look slightly textured from the foam roller, but it will even out as it dries. Just remember: your main goal is thin & even coats without drips!
As a rule of thumb, we do two coats of paint for any painting project. But it’s especially important with painting cabinets. More thin layers is stronger and less prone to scratches than one thick layer. Just be sure to allow enough dry time between coats before touching or recoating.
This part should be super satisfying. You’re finally seeing your hard work pay off and your vision come to life!
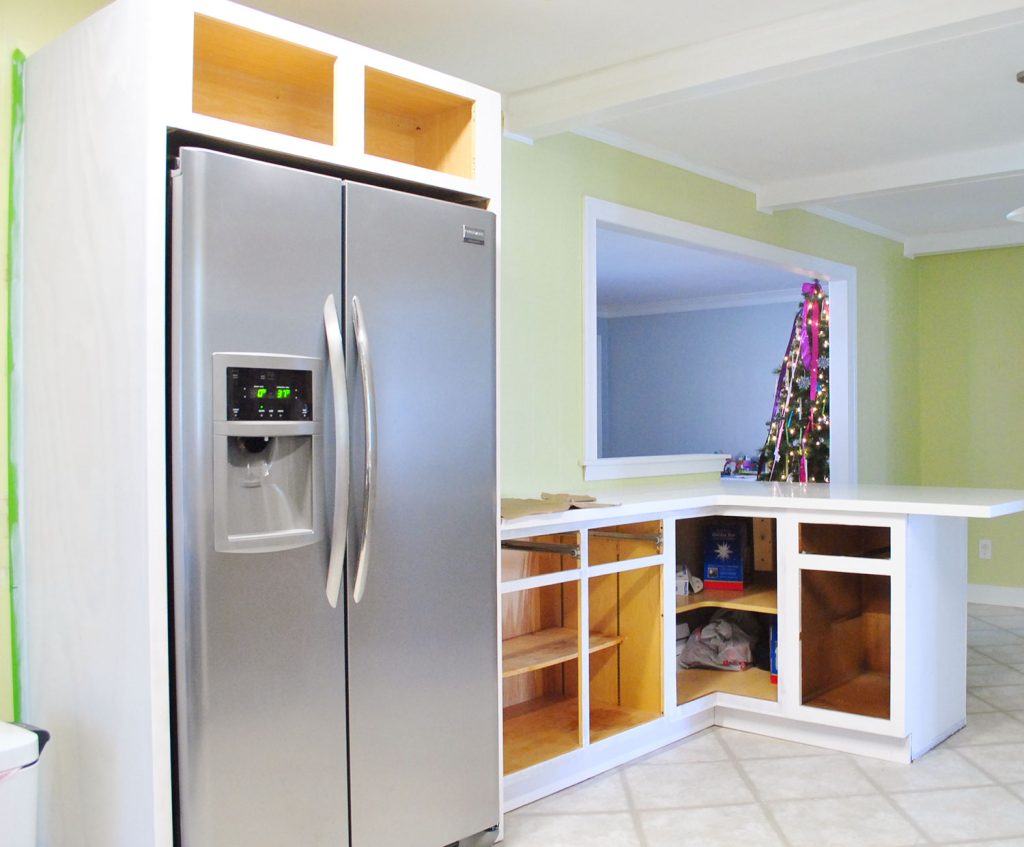
Step 7: Rehang cabinet doors
Once everything has fully dried, you can reassemble your kitchen. Screw hinges back on. Slide drawers back in place. You can even put things back in your cabinets.
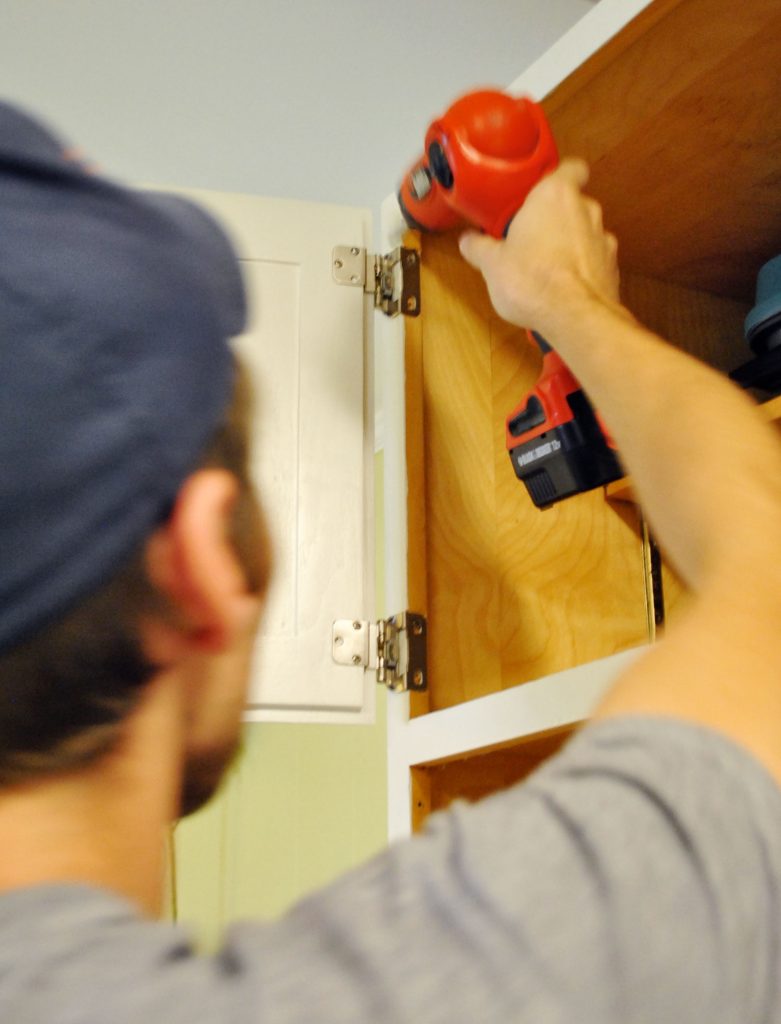
Things might get banged around in this process, so we often like to give our paint an extra day to cure before beginning. You’d hate to scuff up or scratch off the fresh paint right away!
Step 8: Reinstall cabinet hardware
At the same time, you can all reattached your cabinet knobs or pulls. However, this will be a bit more involve if you – like us – filled all of the old holes and need to make new ones.
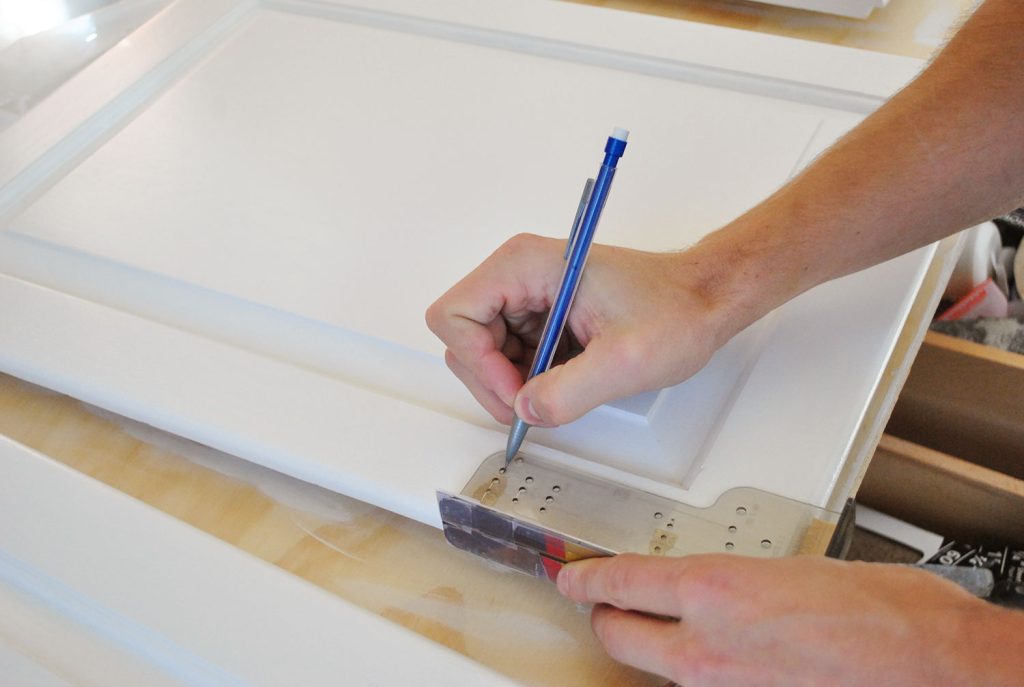
We have an entire post – with video! – dedicated to how to install cabinet hardware that will help you do this with precision and speed. But as you can see above, we highly recommend purchasing a hardware template for this step.
How long does it take to paint kitchen cabinets?
Painting these kitchen cabinets took us 15 days to complete. A lot of that time, however, was waiting for things to dry and cure. They were not 15 days of straight work! So while this isn’t a project you should expect to knock out in a weekend, it’s also not something you need to take 2 weeks off of work to complete. It can easily be done on nights and weekends, like we did. We even had a toddler at the time!
How much does painting cabinets cost?
Painting kitchen cabinets yourself is very affordable, especially compared to the alternative of hiring it out OR replacing your cabinets entirely. We completed this project in 2012 for just $300 and half was for new hinges and pulls. So if you are reusing your hardware, you can expect to spend even less. Here is a rough estimate of what you might spend to paint kitchen cabinets.
- Sandpaper: $10
- Liquid deglosser: $10
- Primer, 1 gallon: $30
- Paint, 1 gallon: $80 – $120
- Paint supplies (roller, brush, trays, etc): $40 – $60
- TOTAL COST: $170 – $230
If you don’t already own an electric sander or drill, those may cost you about $50 each. You can complete those tasks by hand to keep your budget down, but it will significantly increase your time and effort.
Other Cabinet Painting FAQs
Here are some other frequently asked questions about painting kitchen cabinets:
Do I need to apply a sealer or topcoat?
No, you do not need to apply a sealer, varnish, or polyurethane to your painted cabinets. Paints, especially those formulated for cabinets or trim, don’t require a protective topcoat. In fact, applying one could cause your color to yellow.
What finish paint should I use on cabinets?
We recommend using a satin or semi-gloss paint for a hard, wipeable finish on cabinets. Gloss or high-gloss paint can offer a sleek, modern look with high shine, but should be applied professionally with a paint sprayer to avoid brush or roller strokes. Matte, flat, or eggshell finishes will be harder to wipe clean.
What color should I paint my cabinets?
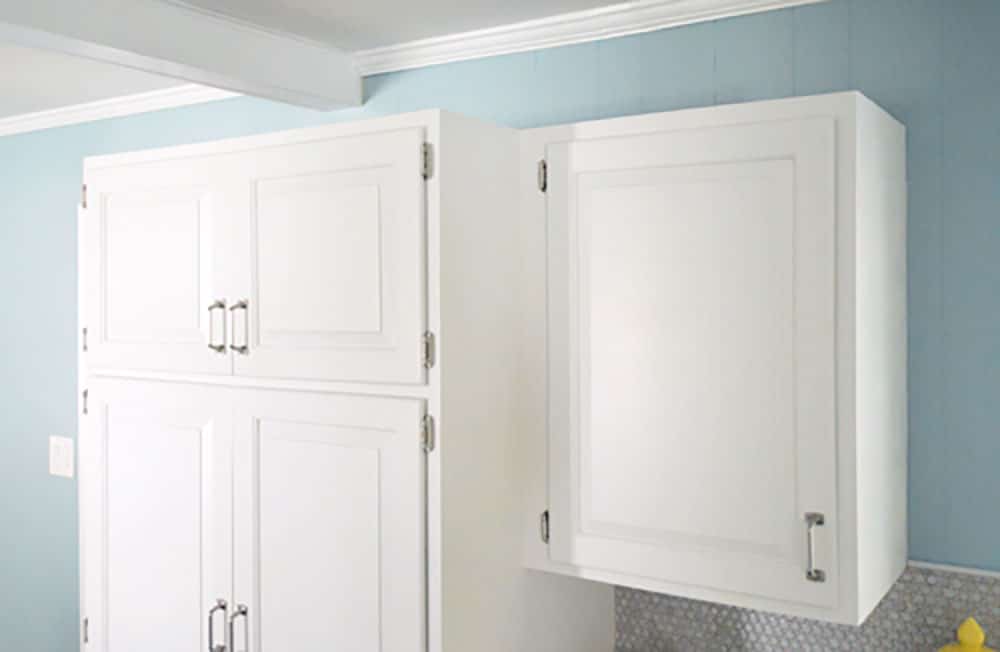
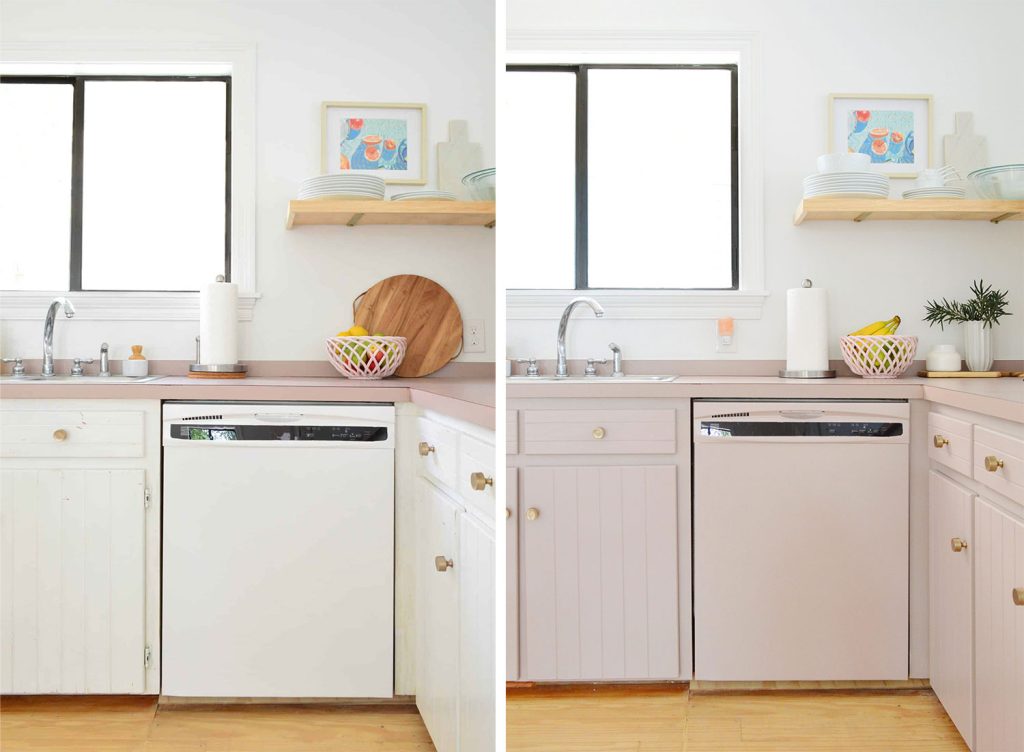
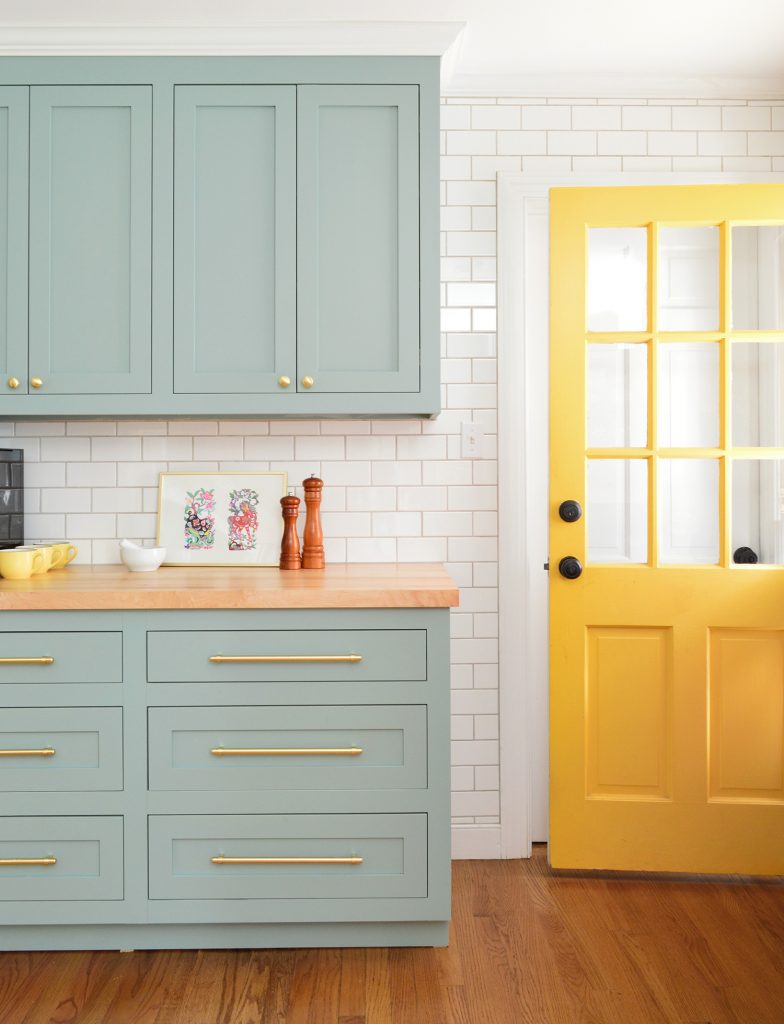
There is no limit to the colors you can paint kitchen cabinets! We love classic white cabinets, but colorful cabinets have also been trending lately – like our current cabinets (Artsy Pink by Sherwin-Williams) or our friends’ painted cabinets below (Halcyon Green by Sherwin-Williams).
We always recommend testing any color before proceeding. Colors often appear brighter or more saturated than they seem on a small swatch. Whites also can appear stark or cold, so we recommend something with subtle yellow or gray. Any of these expert’s favorite white paints work well on cabinets.
More Kitchen Cabinet Projects
Looking for other budget-friendly ways to update your kitchen? Here are some other projects you might be interested in:
- How to Add Crown Molding To Cabinets
- How to Properly Prep Cabinets For Paint
- How To Paint Ikea Cabinets
- How to Install Kitchen Hardware
- Organizing a Small Kitchen
- Installing Hidden Ginges on Old Cabinets
- Staining Wood Cabinets Darker without Sanding
Update: Our painted cabinets are still holding up great. Check out a little update post here.
*This post contains affiliate links, so we may earn a small commission when you make a purchase through links on our site at no additional cost to you.

Catherine M. says
Beautiful!! Did you guys buy a new tea kettle to match the new white decor? Or were you able to DIY the blue into white?
Congrats!
YoungHouseLove says
LOL. We’re not that hardcore – it was a new purchase. :)
-John
Harmony says
The change here is incredible! It truly doesn’t look like the same house. I am blown away, I know the change would be massive, but the before and after pictures give me chills. May I say I am in awe of your vision and hope you enjoy it once its all said and done. Just… wow.
Leilani says
It looks incredible! It has been so exciting to watch the progress and I can’t wait to see when the flooring goes in and the tile backsplash- c’mon work faster!! Kidding :). You are very inspirational!
Erin says
I was checking often to see this post! Looks so good you guys :) My husband and I have been slowly upgrading our house and kitchen bit by bit and I think because we’re between having kids that I want to tackle painting our cabinets this summer before we TTC again. I cannot tell you how helpful your step by step directions and product recs are going to help us. We may be able to come down to Portland for your home show visit too, so if we see you we’ll say hi! (and probably ask you a few questions on this very subject)
Kelly McK says
OMG John and Sherry this is INCREDIBLE!! Thank you so much for taking the time to let us into your lives for this process- what an incredible transformation!! Love it, love it, love it.
PS All your tips and tricks are so helpful, and easy to follow!
Elizabeth says
The post we’ve all been waiting for!!! The kitchen looks fantastic!
Angela @ Happy Fit Mama says
WOW, looks fabulous! One of our goals this year is to paint our kitchen cabinets. Thanks for the tutorial! You two are proof that a marriage can survive renovating!
Kath says
I LOVE WHITE!!
Kathy says
It’s amazing how bright it is–and you haven’t even put any new lighting in yet! You may have mentioned it before, but what style of lighting are you leaning towards?
YoungHouseLove says
We’re planning to do some can lights for general lighting, plus some pendants over the peninsula.
-John
Sarah says
I apologize if someone has already asked this, but where is the outlet for the vent over your stove? Does it terminate on an outer wall or in the attic? Thanks!
YoungHouseLove says
Hi Sarah, It goes up through the attic.
-John
statia says
You’re hysterical. The faux practice painting, while highly amusing, is probably the smartest tip. And also, I can’t even tell you my love for Benjamin Moore. I love that paint almost as much as my children. Though, I will say, that the Advance doesn’t really do all that well on laminate. Or I missed a step somewhere.
Tania says
Love! It looks beautiful and I love the citrus mixed with the white.
Robin says
It looks AMAZING! And yay for balance! You deserve it!
Kristie says
So I clicked on the source link for your drawer and door hardware. Is it wrong that I just want to sing “My knobs. My knobs. My lovely kitchen knobs” to the tune of Black Eyed Peas’ “My Humps”?
Seriously though- your work is sheer awesomeness! xoxo
YoungHouseLove says
REMIX!
-John
mallory says
Just realized I have the same ugly knobs in my kitchen. ugh!! Now they are watching me!!
YoungHouseLove says
Haha- tell them we say hi!
xo,
s
Zoe says
looks great! well done.
Just wondering if you are going to change the flurescent lights? Every time I see the long shot of the kitchen my eye is drawn to those lights and I am really wondering if you have a nice new (or re-styled) plan for lighting comming up?
YoungHouseLove says
Yep, we’re planning to replace those guys with some can lights soon!
-John
Kacie says
It looks so great. What awesome progress! Nice job.
Kacie
http://www.acollectionofpassions.com/
Sandra says
How did you keep which door goes with which cab straight? Sorry if you already answered this question, I didn’t backread comments.
YoungHouseLove says
This fortunately wasn’t a challenge for us because all of our cabinets were so uniquely shaped that there was no mistaking what went where. But we did lay them out in the sunroom in a certain order to make it easier on us!
-John
becah says
love love love the cabinets! i’m about to embark on a similar (okay, the same) project and a quick jaunt over to amazon left me stymied about the wood filler. i think they’ve re-named it? or does home depot carry an elmer’s line that’s special? any clues if the carpenter’s filler is the same stuff (you know, since carpenters are professionals and all…)?
http://www.amazon.com/s/ref=nb_sb_noss?url=search-alias%3Daps&field-keywords=elmer+wood+filler&x=0&y=0
anyway, amazing and inspiring! can’t wait to brighten up my kitchen!!
YoungHouseLove says
I think Home Depot just carries the stuff we mentioned so maybe get it there? We just got it a few weeks ago so they still sell it!
xo,
s
Rebecca of Beck's Chic Life says
It looks amazing!!! You must be so excited every time you walk into that space! All of that hard work, but now reward forever! Great way to bring in the New Year!
Kacey says
You all had me at hello. Your work is fantastic and I am constantly in awe of what you’re doing in your home. There’s no way that I would’ve looked at your original kitchen and seen the amazing possibilities that y’all did. Keep the inspiration/motivation coming!
Melissa says
Congrats you guys! Looks amazing and must feel great to have that huge part of the project behind you! At least you’ve done a lot of the prep for the other parts so it won’t be that bad. My hubs built our stove hood and we love it but the angles made it a bit challenging! Good luck!
Nicole says
What a transformation. Congrats, you two. And to think, the room isn’t even finished yet!
Marcie says
Hi Sherry and John,
First of all, congratulations on the amazing transformation! White cabinets are the bomb, right? I do have a question for you about your paint selection. I’m planning to paint kitchen cabinets too, and the salespeople at the local Benjamin Moore store tried to steer me toward their Satin Impervo line – they said that it has many of the qualities of oil paint (like self-leveling), but is a regular water-based enamel. So it’s highly recommended for cabinets. Did you consider that paint too? If so, what made you choose the Advance instead? Thanks!
YoungHouseLove says
Oh yes, we heard great things about Impervo and you probably can’t go wrong with either! We just met two actual pro cabinet painters and they both said they used Advance so we went for it!
xo,
s
Steph Stimson says
Feel like I’ve been waiting for this moment FOREVER! lol And I don’t even live there! Looks awesome, love the slight off white/grey color with those “gawjus” white countertops. Cannot wait to see the rest of the reno’s appear on my screen!!!!
Jen says
you guys did a fantastic job! i hope you guys stay in this house a long time to enjoy it and clara can reap the benefits of her parents ?
congrats on the amazing transformation that looks seamless & flawless.
jen
http://www.fauxtreschic.blogspot.com
Joy Franks says
Fabulous! Gorgeous! Can’t wait to see the backsplash next!
Casey Cope says
I’ve been reading posts for several months but just recently started skimming comments (knowing I can get extra info there and I’m nosy). I just want to say it’s a testament to your character that you repeat yourself with patience, truly enjoy seeing work of other readers linked on their blogs, follow up on research from unsolicited advice, and respond kindly to criticism. I think there’s many reasons you have loyal following (creative ideas, clean code, consistent post times, etc), but I think a chief reason is you’re people we want to cheer for: sweet, likeable, and gracious. So simply put, thanks for being you.
YoungHouseLove says
Aw Casey, that is so sweet of you to say. Thanks so much!
xo,
s
Brandi says
It looks incredible!!
Caitlin says
I’m trying to decide between staining and painting my kitchen cabinets. I like the look of wood grain, but the light oak color doesn’t seem to mesh with the color scheme in my kitchen. On one hand painting would probably be easier (I’m thinking a light gray would be perfect), but I think I would prefer to have the cabinets stained gray.
Jennifer B. says
All those beautiful close-ups! What sexy cabinets! My oak cabinets are totes jeal of your cabinets’ new facelift! ;)
Jennifer B.
Jennifer B. says
P.S. I’m guessing $her-dog must be working on a crafty project. I don’t usually see John comment this much! ;)
YoungHouseLove says
We were taking turns between book manuscript editing. Not sure that counts as a craft project, unfortunately. :)
-John
melody says
Wow! That looks amazing. I am so impressed with the way you were able to reuse all of those old cabinets.
Stacey says
Looking at those before and after pics dare I say this is your most dramatic transformation to date? Well done – your kitchen is magnificent! And thank you for the breakdown – I will be revisiting these posts when I tackle the gross pine vanity in my bathroom. I have before and after pics of my laundry makeover (inspired by ‘Spin City’) and was wondering which would be the best way to get them to you? Facebook?
YoungHouseLove says
You got it! You can upload them to share on Facebook. Looking forward to spotting them over there soon!
-John
Joe Adelaide says
Just Fab you all must be so proud and pleased, cant wait to see the floors in and all the little warm delicate touches that are so much fun to add at the end.
Kaytie @ GardenKitchenHome says
Hooooray! Congrats, guys!
A couple thoughts:
1.) If this DIY blog thing doesn’t work out for you, you might have a career in cartoon faces. Loved the old cabinet hardware once there were faces to go with the googley eyes.
2.) Beautiful work!!!
3.) The cabinets look seamless from here in Philly.
4.) BEAUTIFUL WORK!!!
Jessica says
It looks fantastic, I love how you tried to re-use and re-purpose as much as the old kitchen as possible. Very eco-friendly :)
Johanna says
I really had to tilt my laptop screen to be able to see the join mark on the cabinet.
Definitely bookmarking this (and the future completed kitchen blog post) to show my sister-in-law. The house she is looking at buying has two dungeon rooms exactly like your kitchen.
Can’t wait to pull out the inside-out jammies and paint :D
Karla says
That is a million, no a billion times better!!! You must be so happy with it!!!
Jenn Ski says
I love that feeling… The…
I can’t believe we did this and it looks amazing feeling!
jen says
Way too lovely, Sherry! The cabinets and the walls are just sooooo amazing! I’m planning to redecorate our living room when I resigned form work, so wish me luck! :)
Julie says
THANK YOU! This is precisely my 1st project for the new year and I’ve been collecting tutorials/ ideas. Now I am scrapping all of those and am simply going to follow yours (right down to the color!).
Fran Short says
Looks great —-can’t wait for the penny tile. I love the light color floor —-hard to picture dark (just my 2 cents)
Allison says
I have to tell you that I absolutely love your blog!! You have inspired me to do some much needed work on my own house. I was slacking and making excuses because I’m pregnant and already have a 3 year old, just never thought I had time.
My husband and I have already started on our hideous basement.!!
Katie says
Thanks for the followup on the Rustoleum Transformations kits question. I also thought those kits seemed a little too good to be true with skipping sanding, etc. I think your “method” sounds pretty thorough and should hold up for years. It looks spectacular guys! And low VOC is a great plus with little kids around.
Magdalene says
Inspirational. Love your transformation of the kitchen. Now, I have all the right information to start our cabinets.
Congrats!! Bless you.
Anna says
Alleluia! The cabinets look fabulous! well done you two. Finishing the cabinets and a book manuscript in one week is a huge achievement! That champagne better be chillin’ ;)
tjack says
So I’ve been looking through your kitchen archives and saw y’alls old kitchen. Your old kitchen was so cute.
Then I started noticing the similarities between your old and new kitchens.
Steel appliances, white cabinets, open shelving, light countertops, dark floors…the color scheme is basically the same.
Actually the backsplash and stool chairs have to be the most different things in the space. I am really excited to see the backsplash go in.
So my question is, are you trying to recreate your old kitchen? Or maybe you weren’t even aware that so many things were so similar. Either way they both look good.
YoungHouseLove says
We definitely know we’re a lot of the same finishes because they’re what we like, and it felt silly to do something different just for different’s sake. Also, stainless appliances + white cabinets + light counters + dark floors are such a classic combination it just kinda fit. But we are excited for lots of the new things like layout (never had a peninsula before!), backsplash, open shelves (or last kitchen just had one glass fronted cabinet, but no true open shelves), and new materials (Corian counters and cork floors). So we’re definitely not trying to recreate our old kitchen, just borrow the things we loved most from it.
-John
Emma E says
I love the video. I want to paint my cabinets, this was the perfect help! Thanks. Your kitchen is looking better and better.
Leanne says
you guys need to invest in a spray gun and air compressor. I did this a couple of years ago. (my home was my grandparents, had that orangey-stain wood cabinets) and (With help from my dad) we primed and painted the cabinet doors. This process makes it flawless! Like painting a car. Just spray, dry and flip…. repeat. I had about 25+ cabinets to do, so this was a lifesaver! (i will admit the compressor is a little scarey to me, but i haven’t learned too much about it. I’m sure it isnt rocket science :))
Laura says
I love the new look!!! White kitchen lover here. You guys have incredible vision because there’s no way I would have bought that house with it’s dark depressing wood paneled kitchen.
Laura says
*its*