Back when we admitted to putting up our Christmas tree before Thanksgiving (oh the shame) a bunch of you asked if Clara was getting a special “First Christmas” ornament. Well, we finally got around to DIYing one right before moving boxes took over our house (at which point we got so caught up in packing that we neglected to write this post, which is why it’s getting posted about a week after our tree came down). Oops.
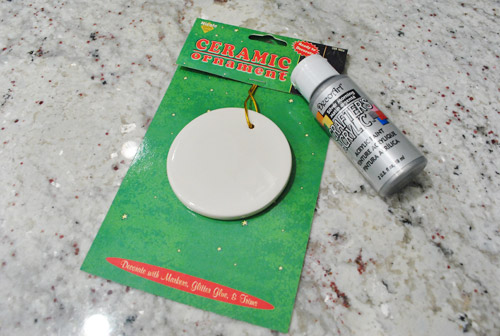
Anyway we decided to make something silver so it would have a good chance of matching our tree for years to come (we tend to use some element of silver since we have so many silver ornaments and you know we like to use what we’ve got). But of course we wanted it to be distinctly Clara circa 2010, so it would feel as special and customized as possible. So at the craft store (Ben Franklin) we grabbed this plain white ceramic ornament for just a buck and some 50 cent silver acrylic paint. Well, the real story is that we actually bought two ornaments in case the first one didn’t work out. They only cost a buck, after all. And we’re paranoid like that.
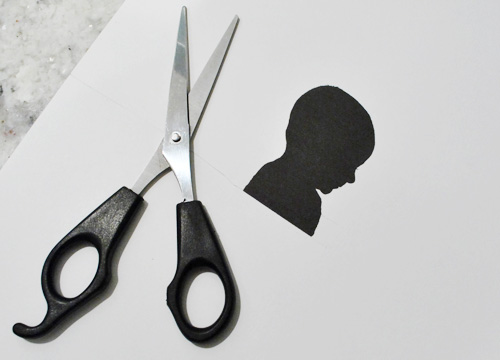
The plan was to create a silver backdrop onto which we could Mod Podge a scaled down version of Clara’s baby silhouette. That way we’d get something that definitely says “baby” but also creates a silhouette theme that we can carry on year-after-year if we’d like. It’ll be sweet to see how much she has grown and changed (here’s hoping she decides to grow hair one of these years). And since I still had the digital file of her silhouette from this project we just resized it, printed it, and started cutting. Sidenote: those are the haircutting scissors Sherry got from CVS a million years ago that she also uses to cut my hair. But I guess they’re better than a Flowbee.
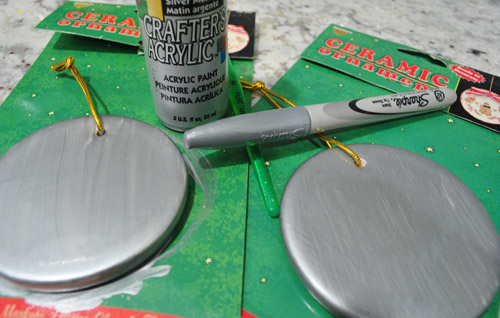
When it came to painting the silver backdrop, my hairdresser wife noticed that it was a bit streakier than she’d like. So she figured she’d give the metallic Sharpie that we had in our junk drawer (which has since been packed up- yessssss) a try on the back-up ornament. Good call lady wife. It wasn’t much less streaky, but we later learned that the dried acrylic paint just peeled right off the ornament in one puffy-paint-esque blob. Duh. The lesson? Metallic sharpie grabs glossy ceramic far better than peelable acrylic paint. And a second “coat” of Sharpie about three hours later leaves it looking pretty seamless. So use that if you’re going to DIY one of these baby headed ornaments for yourself.
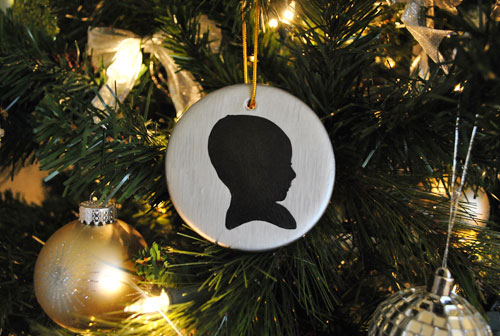
Anyway, after Sharpie-ing both sides of the ceramic ornament for a shiny silver coin-like finish, we placed Clara’s cutout silhouette in the middle of one side and glued it in place using Aileen’s Tacky Glue (being careful not to let too much squeeze out the sides onto the silver part – if any did we quickly wiped it). After the glue dried, Sherry got her Mod Podge on (covering the entire surface of the black paper silhouette with a few thin and even coats so it was a bit more sealed and protected for the long haul). The result was nothing short of charming. Especially for an under $2.50 project.
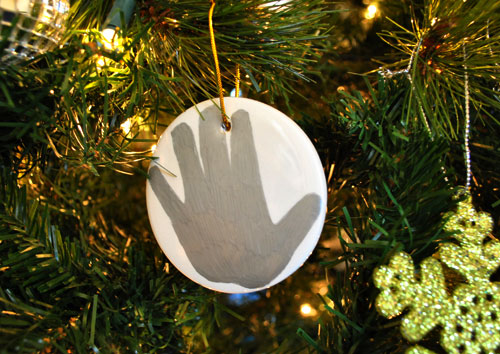
Oh, and we also wrote “Clara’s 1st Christmas, 2010” in small handwriting with a black Sharpie on the back. But our marker fun didn’t stop there. Since our spare ornament was now peeled of its paint (it really did cleanly peel off just like puffy paint) we were able to start from scratch and create an alternate version featuring Clara’s hand-print (which we got by tracing her hand on paper, cutting it out, and using it as a stencil to trace the outline right onto the ornament with silver Sharpie). Then we filled it in. I love how her hand just fits. We probably can’t do this one from year to year unless we hunt down some bigger ornaments, but she’ll totally get a kick out of knowing that her hand was once that small.
So that’s how Clara’s first Chirstmas was officially represented on our tree in two fun DIY ways (at least for a few days before we packed everything up). But here’s hoping they make an encore appearance at the new house when we do some quick & dirty Christmas decorating over there. Have you guys DIYed any ornaments? I should mention that Sherry wanted to shove a pink baby sock into one of those round glass ornaments with removable tops to create a third Clara themed ornament but I thought that was weird. So I’d love to know if anyone else out there has tastefully created a baby sock ornament that they’d like to share. I might just change my tune.
Psst- Check out some other ornaments we DIYed a few years back here and here.
Update: You can check out all of our favorite holiday decor finds here – many of which are under $15!

Danielle says
What a fabulous idea and so simple! I’m doing a giveaway of my own handbuilt pottery today, if you’re interested! Some of the pieces would go in your home very well :)!
Amber says
So of course I had to click on the link to see what a Flowbee was… I almost blew my YHL reading cover when I saw it. Definitely a LOL.
Thats why I <3 YHL!
Snickrsnack Katie says
I love it! I think you should recreate this every year with her silhouette!!!
Kate Burdick says
Go for sock! She are you guys will never believe her foot was so small! :)
Audrey says
I plan on making Claire’s first ornament using salt dough to make her hand print. Love the silhouette though!
Sarah B says
I love these!! I love how the silhouette turned out… and that Clara’s hand fits so perfectly! I’m going to have to save this idea for when I have my own someday-children. (Hm or maybe I can figure out a way to do it with my critters??)
PS. My Uncle uses a Flowbee!! No joke!
Jenn L @ Peas and Crayons says
awwwwwww look at that tiny hand!!! Super cute idea, as always guys! Silver sharpies…and sharpies of all kinds are a total lifesaver! I once used a black sharpie to fix a scuff in my pumps. shhhhh!
xoXOxo
Jenn @ Peas & Crayons
Lonely Wife Project says
I say Burger should get one too ;)
Skooks says
1) Thank you for bringing the Flowbee back into my brain. I completely forgot about that thing and it definitely made me LOL. For reals.
2) The sock idea is cute. But I’m also a mom. And I’m really sentimental. So it may seem weird to you now because Clara is still wee, but when she’s older (and bigger) you’re going to “AWWWW” over that little sock in a glass ball.
:)
Annalea says
I think a pink baby sock in a clear ornament would be adorable! (Especially if it was a hand-knit sock–but that’s just me. ;o)
Here’s to a smooth closing on Saturday!
Kristen says
So cute! Love the silhouette… I did these for Christmas one year–attached with a big bow to presents as bling.
FYI, most craft stores sell paint specifically for ceramics. Pricier than acrylic, but you wouldn’t need much if you’re just going the silver/black route. Might be something to look into if you make it an annual DIY.
Cheryl says
Back in the day, I bought clear tree bulbs and every single year, painted pictures or phrases of my son’s life that year on them. Of course, I’d paint the year on it also. His interests, the high school, his growing passion about web sites and tech languages to code stuff, the 2001 year has a painted picture of this home and a car driving to the college. I spent much time designing and painting them. Put them all carefully in an egg carton to keep. Now he’s married and living several states away. People might think he’s a Big Shot in the tech world and he might be the speaker at conferences all over the place, but I’m his momma and I know what decorations they really have on that tree.
Emily says
I LOVE ornaments! It turned out very well.
For Carrie (I think) who was looking for a meaningful first Christmas ornament suggestion: What about taking something from your wedding or something that is meaningful to the both of you? A friend of mine had these delicate cookie cutters as her wedding gifts set at each table. A left-over tiny heart cookie cutter with a bit of pretty ribbon through it would have looked so cute on a tree. So I guess I’m suggesting repurposing something that wasn’t intended to be an ornament but making it one…
Janie says
It’s a gorgeous ornament, but her preschool teacher won’t be so thoughtful of your colour scheme next year when she makes ornaments there. That’s the joy of kids, christmas becomes abotu making it magical for them, not you.
YoungHouseLove says
We look forward to the days of a colorful spaghetti-garland and bright play-doh colored kid-made ornaments!
xo,
s
Jennifer S. says
I like the idea of a handprint ornament. As a mother to five children, plus a babysitter to three more, I have made my share of handprint items. We bring them out every year and the grown kids laugh at them. My favorite handprint item is made on a 4×6 canvas panel, or one of similar size. I painted the background one Christmas color (green, red, silver, etc.) and painted the hand of the baby/toddler a different Christmas color and carefully placed the child’s hand on the canvas, which left an awesome and authentic handprint.
Jen says
I love the ornaments! It will be so fun for you all to have a real reminder of how Clara’s silhouette changes over the years. And I never would have thought about using a metallic Sharpie to color the ornaments. Genius! Hope all of you have a great Christmas!!
Claudie says
I remember growing up and our tree was full of ornaments that were handmade and we’d had forever. Going through all of those ornaments every year when we put the tree up was probably my favorite part about decorating for Christmas. Our tree didn’t have a theme really, other than one that told a story of a mishmash of ornaments! I love a good theme, but I also want a tree that tells a story.
That’s why I got my husband involved and we made a keepsake ornament this year. We basically used a large clear ornament, some cardstock, a pen, and some yarn and got to work. We each came up with 4 things that we really appreciated about the other person over this past year and we wrote them on the strips of cardstock.
You can see it here: http://www.flickr.com/photos/50390936@N06/5247339206/
and here: http://www.flickr.com/photos/50390936@N06/5247339204/
Elizabeth says
My dad uses the Flobee on himself. He used it on my wedding day and had a crooked line of hair at the nap of his neck. He even made my cousin, a bridesmaid, trim his ear hair with one of the Flobee attachments. What a trooper! Oh well, what are relatives for?
Stacey says
Very cute! I made hand-print “ornaments” w/ my first son, only they were about the size of a cd and clear glass, so more like something you might hang in a window. Anyway, my point is, mine still hangs in my kitchen and whenever my now 5’5″, 11 yr. old saunters in wearing his size 11.5 sneakers, I can’t help but glance at that tiny hand print and be amazed at how quickly the time has passed.
Oh, and my hubby would TOTALLY use a flowbee on himself and our two boys…which is precisely why we’ll NEVER own one! ;o)
Megan S says
Adorable! Quick question, and I may have missed this in the post, but was the silhouette printed on cardstock?
Thanks a bunch :)
YoungHouseLove says
Oh yes, we printed it on card stock! We’ll have to add that detail.
xo,
s
Sheri says
Putting a pink baby sock in a clear ornament is nowhere near as weird as an ex-boyfriend’s family who had a cat hair ornament on their tree. Yep. A big ball of cat hair hung on the tree. It was a wee bit disgusting. Don’t even get me started on how the litter box was in the kitchen next to the table. You know, where people eat. It gives me the shudders just thinking about it. Blech.
LauraC says
I think you should make a “our first home” ornament to go with the Clara ornament. I’m thinking a silhouette of the house (or a line drawing so you can see the details) and on the back write the years you were at this house!
It’s funny, because I got an ornament kit when our daughter was born to make a hand-print for her first Christmas. Well, I was intimidated with all the powders for the plaster, plus, as you said, you need more than two hands and hubby was deployed. So it never got made and now as a 3-year old she’s outgrown it. But, it won’t go to waste now because I will use it for her baby brother this year. He’s 8 months tomorrow!
YoungHouseLove says
Love that idea! I hope we have a moment to make a first house ornament in this place’s honor!
xo,
s
Lisa W says
I had to laugh at your experience with the acrylic paint. For some reason I thought it would work using it to paint the bottom of my boys’ feet and then having them step on sheets of Shrinky Dink paper. I put them in the oven and it peeled off completely! Lesson learned, trace the foot or hand and color with colored pencils.
rachel says
one year, my mama gave all us girls ornaments made out of our mobile that hung above our cribs. noting like a 1970’s retro plastic pig to bring ya back!!!
Cara C. says
so inpsiring! i’m scheduling a trip to michael’s now…
Katie Weimer says
I loved this idea so much, I decided it would be a great gift idea to gift to the new mommy and daddy/grandparents of my 5 month old nephew…..but I went to Michaels today (I think that’s where you said you got it) and searched the whole store but couldn’t find a round ceramic ornament. They had other shapes, but I worry his growing hand won’t fit. Any suggestions on where else I could try to find them? I also tried Joann’s.
YoungHouseLove says
Hey Katie,
So sorry you’re having a hard time tracking one down. We actually remembered we found ours at Ben Franklin (don’t know if you have those out your way but it’s worth a shot). The other place you might want to look is one of those pottery painting places. They might have ceramic ready-to-paint ornaments that you might be able to buy without painting (and use them for this instead). Good luck!
xo,
s
Paula/adhocmom says
Cute! We had June’s done by this rather freaky artist on our non-disney trip to disney (got super cheap last minute package trip to fancy resort but saw no reason to bother dragging out two year old to crazy pricey theme parks). It was a pool side only trip. . . and one visit to the very odd but fun “downtown disney.”
Nik says
Good morning YHL-
My husband and I will be celebrating our baby boy’s first Christmas this year (he was born in June). I just wanted to share the Christmas tradition we will be starting with him. My husband suggested that we write our son a letter as a gift and I took it one step further. We are each going to write our little guy a letter in a journal and then give it to him as a gift. Then, each Christmas, we will write another letter and so on every year. I just thought it would be a nice way to put in writing how grateful we are to have him in our lives and to remember our favorite moments from each year…and eventually he will have a whole book full of loving words to remind him of how wonderful he is and how much we love and appreciate him. Have a very Merry Christmas and enjoy that sweet little Clara. I know we are loving our Eli.
Eileen says
I think you could start an entire thread on uses for Sharpies… I used my silver Sharpie to sign my Christmas photo cards & touch up the bumper of my silver car, where the snow shovel scratched it. You can use metallic Sharpie’s to stencil your wall, touch up picture frames, belts, shoes, etc. The ornament is a wonderful keepsake that you can continue for many years.
amanda says
I love your baby ideas! I’m writing all these down to do when my sisters have kids! They will make great little gifts!
Gretchen says
So I’m super jealous you guys have a Ben Franklin’s in your town. They went out of business years ago in my city and I cannot find this plain ceramic ornament anywhere. I wanted to do this project for all the grandma’s/great grandma’s and godmother of my little girl but have resorted to making the ornaments from clay. It’s no big deal except I’m in school currently so I would’ve much preferred buying them. Oh well! Great job, guys! Good luck with your move!
YoungHouseLove says
We LOVE the clay idea. Way to be resourceful! Maybe you can google “blank white ceramic ornament” or “round DIY ceramic ornament” and turn some up that you can order online if you’re sick of making them? If only Ben Franklin had an online store!
xo,
s
Becky says
I made the CUTEST ornaments from my babies socks for the extended family tree (which is at my cousin’s house, unfortunately, and thus, no picture…). First, I made one of their white socks into a little stuffed snowman (it made about a two snowball tall snowman). Use whatever cute embellishments you would like for the face (I used a little bead and puffy paint)… and then I used one of their little colored socks to make a winter snow hat for the snowman. For my son I also used a strip of a too small baby t-shirt to make a scarf.
It may not sound like much, but OH MY GOSH… adorable. Plus, it’s the itty bitty sock!!! I mean FOR REAL.
YoungHouseLove says
Sounds adorable!
xo,
s
Kristi says
You two are just faboo~ I keep snagging and tweaking your ideas for my new little one, so THANK YOU for all of the tutorials! I’m about to attempt our own silhouette and then a handprint ornament~had to search your archives for the how-to scoop one more time! We’ll see how crafty (insert Beastie Boys lyric here…) he is tomorrow with acrylic paint and a big red ball ornament!
Happy holidays! Enjoy Clara’s first Christmas in your new home! :)
Raquel says
Just saw these painted glass pine cones and it reminded me of Sherry’s fondness for ceramics. Even though these aren’t ceramic, I thought it was a cute possible holiday project for next year, since I’m sure you have your hands full right now. I really love the inexpensive tip above for the sihlouette ornament also!
http://chezlarsson.com/myblog/2010/12/painted-glass-pine-cones.html
YoungHouseLove says
LOVE THOSE! Chez Larsson is one of our favorite blogs!
xo,
s
Nicole says
I made a silhouette ornament for my friend of her dog! I linked your blog, as well. Thanks for the inspiration!
http://nicolescraftingadventure.blogspot.com/2010/12/handmade-christmas-gifts-part-1.html
YoungHouseLove says
Cute! Thanks for sharing the link!
xo,
s
danielle f says
I used this as inspiration to come up with our own first baby ornament for our son, Elden :)
http://www.youngnotpowerless.com/2012/12/diy-babys-first-christmas-ornament.html
YoungHouseLove says
So cute!!
xo
s