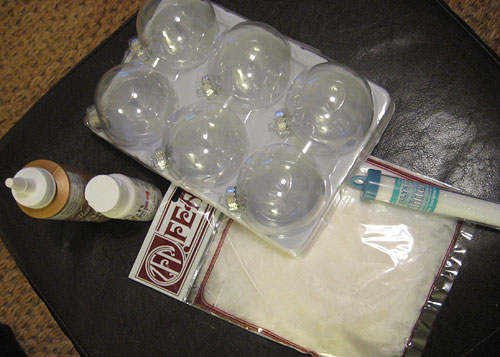
We’re so caught up in the Christmas spirit that we decided to try our hand at creating a few custom ornaments this year. Ornament decorating can be as complicated as you make it, but of course we wanted to tackle something easy and super cheap so we headed over to Michael’s and grabbed a six pack of empty glass ornaments ($2.49), some white glitter ($1.30), and a bag of feathers ($2.49). Then we pulled out our craft glue and got down to business.

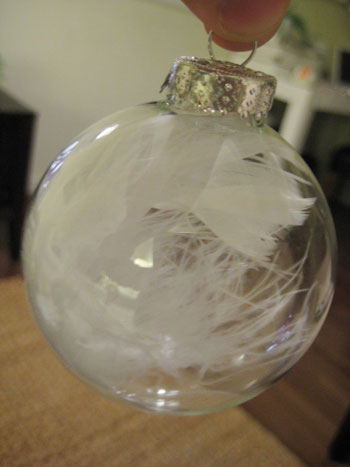
It was really more of a trial and error process. We originally planned to stuff some of the ornaments chock full of feathers but realized less is more once we saw how sweet and simple one fluffy feather looked inside the glass orb (the silver top slips off for easy ornament filling). The result is delicate and delightful. And definitely worth the $1.04 per ornament that we spent.

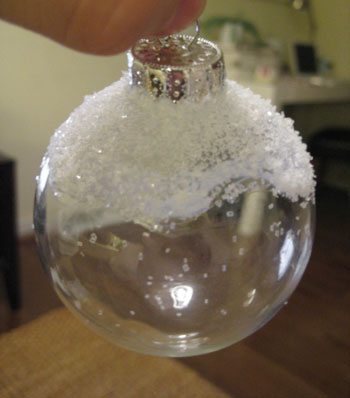
We also used a q-tip to spread craft glue around the top of a few other ornaments, which we then coated in sparkling white glitter for that fresh & fluffy snow look that’s charming and kinda expensive looking actually:

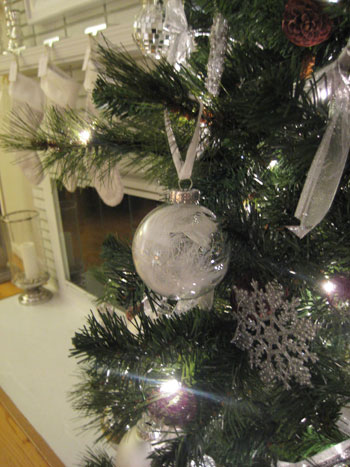
The finishing touch was to use some thin white ribbon that we already had around the house to create classy little loops to hang each ornament from the tree with style. They actually look so elegant that we’re debating eliminating green wire ornament hangers altogether and adding thin white ribbon to each and every ornament on the tree. It really elevates them in a you’d-think-they-were-a-splurge-but-they-were-really-a-steal way.

So how do we like our feathered and glittered creations? They’re our new favorite ornaments! Not only because we made them ourselves, but because they actually look better than most of our store bought ones. And the entire project took just fifteen minutes and only cost a little over $5. Score! This whole ornament making thing just might become a family tradition…
Do you guys have any DIY ornament crafts that you happily take on each December? From cookie ornaments and popcorn garland to painted ceramic and felt creations, we’d love to know what you guys throw together when the Christmas spirit moves you.
Update: You can check out all of our favorite holiday decor finds here – many of which are under $15!

Heather says
The feather ones are amazing!! SO beautiful and elegant. The glitter ones are pretty too but there’s an anti glitter rule in my house because a little bit of glitter goes a long way and I find Christmas glitter in the spring time.
Nicely done S
Laura says
I’ve done something similar on my tree with the same empty glass oraments. You can actually carefully remove the top and pour acrylic craft paint into the interior and swish it around. It looks especially nice with a combo of colours like white/silver… Just make sure to let one colour dry before you apply the second one.
Cara Beth Buie says
Love this idea! And I’ve done the paint inside the ornaments! Both are cute!
laurel says
i think im gonna have to try that feather one but with red feathers!
christy says
We made ornaments the other weekend and there is now a no glitter rule in our house! ha But the cutest ones were strips of paper I cut and ran scissors along the strip to make it curly and put inside the clear ornament. It took some time and lots of strips but they are sooo pretty!
Katie says
I always plant narcissus bulbs (like you showed everyone!!). I buy cheap clear glasses, fill em up with tiny pebbles, stick a bulb on top and watch them grow! I usually tie a beautiful ribbon or some raffia around the glass and take them as hostess gifts to holiday parties. All in all, each little live gift costs less than $1!!
Jenny says
These are beautiful. I am almost always disenchanted with what stores offer, and these are a great fresh take!
Good job!
Molly says
We bought those clear ornaments last year and then stenciled a monogram on the front and gave a set of 4 out as gifts to our friends.
Rachel says
Over the weekend I made a Christmas wreath of glass silver tree balls!
Beth says
You can also spray adhesive to the inside of those clear ornaments and dump glitter into the inside. Then you swish it around in there until the whole inside is coated, and voila, a glitter encrusted ball that doesn’t get all over the place. They are beautiful in silver and turquoise.
michelle says
I actually own extremely similar ornaments so I think you did a great job. changing the hangers to white ribbons sounds like something i might also be doing this year. my boyfriend will just love you for that idea :)
Jen@OurDailyBigTop says
They look fantastic. My little girl (age 5) loves crafts and made these angels last week. So easy and cute!
KK says
Love the feathers! Great idea!
My most FAVORITE ornaments are the ones my husband’s niece made us using those do-it-yourself ornaments. She printed photos of us in the snow on clear paper and then cut the photos into circles and put them inside the ornaments.
LayersofMeaning says
LOVE IT!
I’m going to try this idea this weekend!
Ameleah says
I love your feather ornaments, so simple yet very cute. Kmart sells very inexpensive ribbon ornament hangers from the Martha Stewart collection that are pre-tied. I switched out the wire hangers on all my ornaments with the ribbon ones last year and it looks so much better!
Debkb says
Another thing to do- get white pearlized paint, squirt it into the glass balls (take the top off first) swirl around and suspend upside down over a paper cup for about 24 hours to drain and dry. You have to use a good bit of paint if you want full coverage otherwise it looks a bit thin. You can also do another coat if it’s not heavy enough. The great thing about the pearl paint is you end up with streaks of pearl and white. It’s really pretty!
Jesse says
So beautiful! I love them!
Catherine says
We were doing the exact same thing this past weekend! We mixed some PVA with water and then poured a small amount in an empty ornament, rolling it around to coat all sides. Then we poured some tiny red star sequins in the ornament and shook it around until the stars were stuck all over the inside. I love your glitter version- I might try that myself.
YoungHouseLove says
So many ornament ideas, so little time!
Thanks so much for sharing your ornament decorating tips and tricks. We can’t wait to tackle some more in the near future.
xoxo,
Sherry
Adrienne says
I love this idea! Feathers are so in right now, but I never know how to use them. I’ll definitely be making these for our tree. Thanks for the wonderful idea!
Hannah says
The feather ornaments look amazing!
One year my mom and I went crazy making ornaments for everyone. We took the same clear ornaments and put a couple drops of rubbing alcohol in each, swished it around, and tapped out the excess to clean them. Then we would pick 2 or 3 colors that looked well together and squeeze about 2 lines of each paint color down the inside of the ornament (we used the simple craft paint you can get at Walmart or JoAnn’s for about $1/bottle).Place them back in the box/holder they came in, but on their sides, and every so often roll the ornament to swirl the paint. It takes some practice to figure out how to get that “perfect” swirl – but the results almost always turn out great. When you’ve got a swirl you’re happy with, you’ll need to get some paper towels and use them to tap out the excess paint in the ornament.
Our favorite thing was to make ornaments that had a person’s favorite sports teams’ colors in them, like blue & white for the Magic or purple & yellow for The Vikings.
Allison Harris says
ok, so it’s a long time until christmas but i just had to share…
last year i made a custom ornament with
-clear glass ball ornament (just like you used)
-seemingly tacky silver sparkle alphabet stickers
-my random bead/sequin collection
using the stickers i put a monogram on the front and ’08 on the back and dumped all the beads/sequins i had that were any shade of blue or silver into the ornament. it didn’t fill it up (so it doesn’t compete with the text) but it has a nice sense of movement.
anne says
We use gold puff paint to make little dots and squiggles all over glass balls.
hello there! house says
I love this idea. Thanks for sharing such a simple yet impressive tutorial on spicing up the Christmas tree. :) -JS
Kristin says
I love your diy ornaments!! I’m super tempted to stock up on sale items and make them for next year. :)
Chad says
This will be a fun one to do with our kids this year.
Kay L says
How does one use the pre-cut ribbons?
YoungHouseLove says
Not sure what you mean. For the ornament holders? I guess if they’re pre-cut just tie them around the top and hang them?
xo
s