So, remember that microwave that we got a great deal on a couple of months ago? Yeah. Well. We returned it.
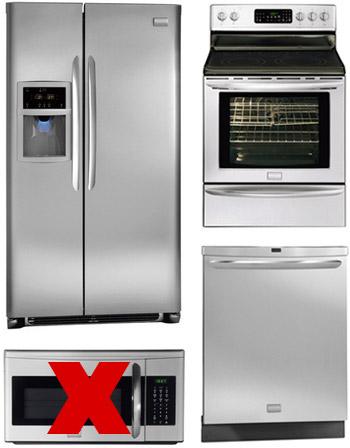
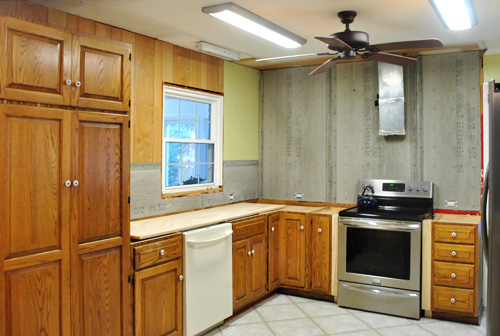
A few of you questioned why we needed “such a big microwave” when we originally posted about it, which did get us thinking that we don’t do all that much microwaving. A bowl of soup here. A bit of reheating/defrosting there. And when we took down the kitchen’s original black over-the-range microwave (which was just as wide as our oven – 30 whole inches)…

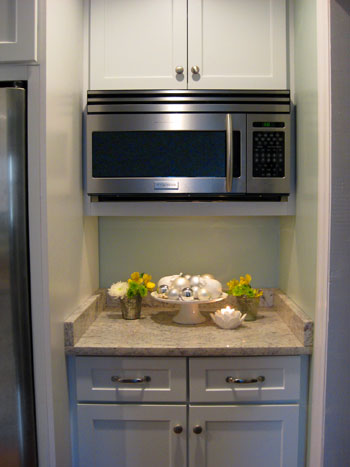
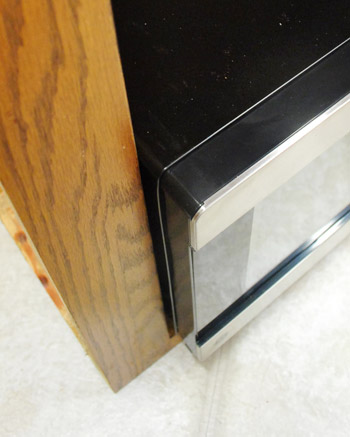
… we realized just how hulking the new 30″ one would look in its new home next to our pantry. See, we had originally planned to build it in there like the one in our first kitchen, but that meant that it would butt up right against the side of the window:
So two weeks ago (after seeing how nice and open the kitchen felt without a lot of those heavy, overbearing upper cabinets)…
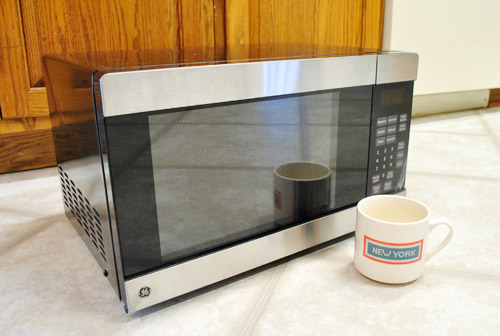
… we returned it and bought this much smaller countertop one instead for $84 (it’s 18″ wide). He’s nice and “modestly sized” as Sherry likes to say. I even tossed a tea mug in there for scale:
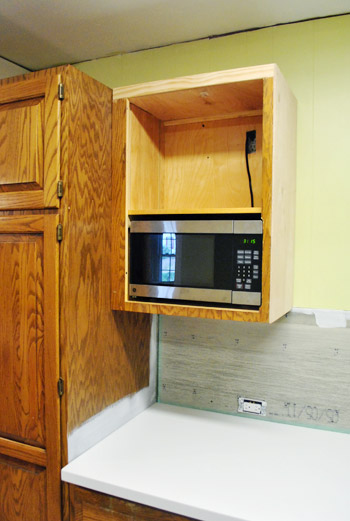
But much like the big original microwave that we got, we never planned for it to live on the countertop. Oh no, we got planz yo. This guy is getting built in…
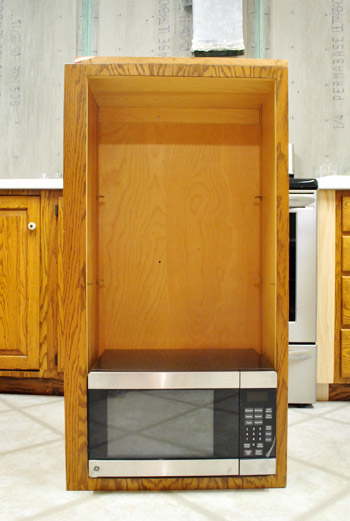
This is one of our old upper cabinets (it hung to the left of our old microwave when it lived above the cooktop) and it just happens to fit the microwave almost perfectly. It’s actually a bit snug around the frame, but the frame is built in around the front edge of the cabinet if that makes sense. So on the inside of the cabinet there’s about two inches of extra space on either side.
The only problem was that:
- the cabinet itself was too tall for its new home next to our pantry (it would hang oddly low as-is)
- it wasn’t deep enough for the microwave to sink back into it and look flush (with extra ventilation room for safety reasons)
So we had some work to do. We had to adjust the height and depth of the cabinet, then hang it next to the pantry with a new door. That way the infrequently used microwave can be hidden away most of the time and when it’s needed we can open the door and zap our food while allowing the appliance to vent (more on that in a moment). Oh and we already had an electrician add an outlet where the cabinet will hang, so the microwave will have power.
Many custom kitchens actually have built-in microwaves, like this one from here, and this one, from here. So we knew it could look great and actually be really functional (warning: read the paperwork on your microwave to see what type of ventilation it needs – some don’t need any except for the ready-made space under the little legs while some have a vent on the side or back that needs room for aeration, which is something we took into consideration as we went)
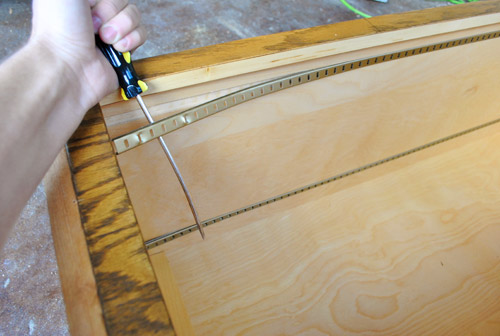
But back to the whole cabinet being too tall issue. First up was chopping that baby down to size. I started by prying out the metal shelf rails. Luckily they came out with almost no effort.
Then I measured, marked, measured again, leveled, measured again, double-checked my marks and leveled one last time…
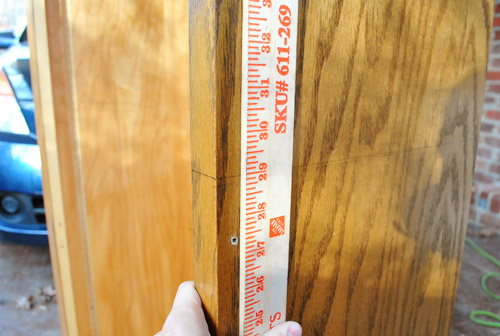
…before taking my jigsaw carefully along the lines I had drawn on each of the three sides.
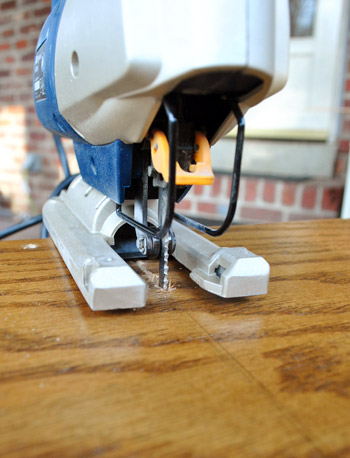
What I was left with looked like a bad magic act. All that was missing was a lovely assistant chopped into two lovely pieces.
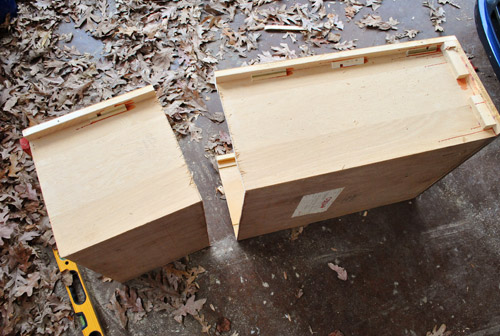
Are you nervous yet? I was. Although I felt a bit better because this was my second time doing this (I tested this method on another spare cabinet that we weren’t reusing first).
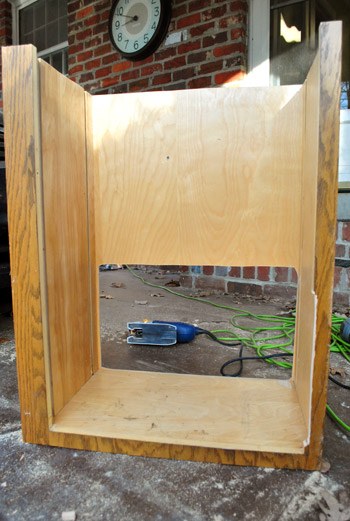
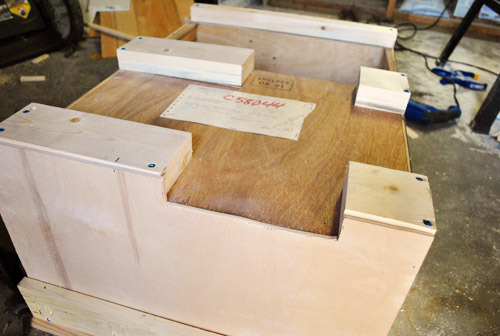
So that big cut started getting me to a better height, but I also had to cut a hole in the back to help with the depth/ventilation plan. Oh, and I had to put a slight notch in the bottom right side of the frame so that the microwave door could swing open more easily (this way we can shimmy the microwave over to the right in the cabinet, which gives the hinges on the left more room to swing so the door can open freely). Not to worry – it will later be concealed by a door.
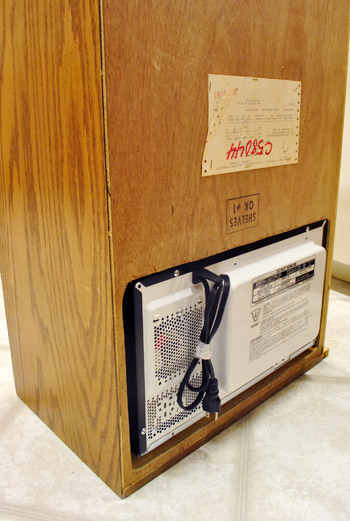
Here’s a shot to show how the microwave stick outs the back – which also helps it vent since there will be a column of “free space” behind the cabinet for aeration all the way up and out the top of the cabinet (more on that a bit later).
Enough looking at its backside. Let’s look at the front. Is this starting to make more sense? Remember once we add a door that small notched out area for the microwave will be concealed.
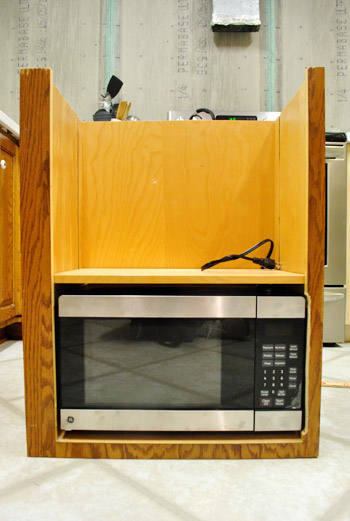
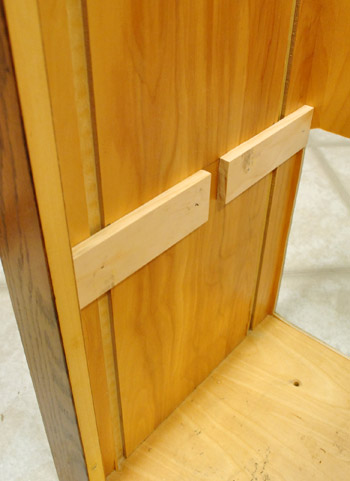
Oh, and I added that shelf above the microwave by nailing in some fixed ledges for the shelf (which we already had) to sit on.
Obviously the cabinet was far from being ready to hang. It needed a top, for one. And it needed some extra support on the back if it was gonna sit away from the wall enough to let the microwave vent out the back.
So we devised a plan, I made a sketch (which I don’t expect anyone other than me to understand) and hit up the hardware store to grab some wood.
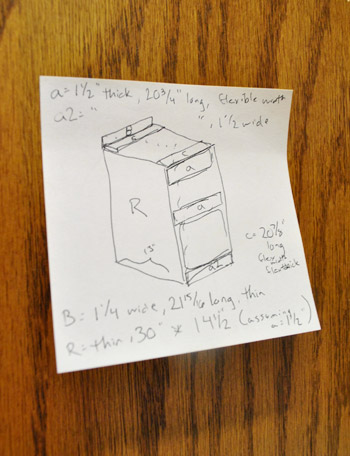
The new top was basically three pieces. A thin piece of plywood as a new top, a thin piece of pine on the front and a scrap piece of 2×4 to hold it all in place. It’s looking a bit rough at the moment, but bear with me…
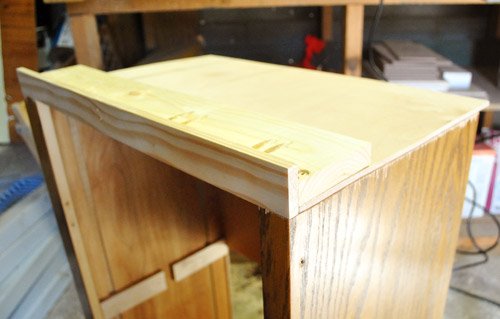
Along the back I screwed in a few blocks of 1 x 4″s doubled-up. This way the cabinet will sit away from the wall a couple of inches and I still have solid wood to screw into when we go to hang the cabinet. Oh, and we cut a wide channel in a couple of the blocks to (broken record alert) help the microwave vent up the back.
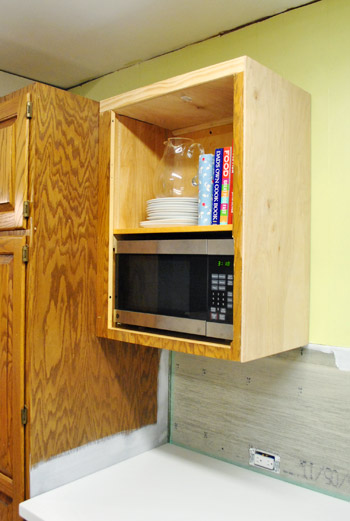
Last but not least was the side. For this I used another thin piece of plywood that I clamped on tight, cut to size, and then nailed in place.

After all that “fun” stuff, it was looking more like this:
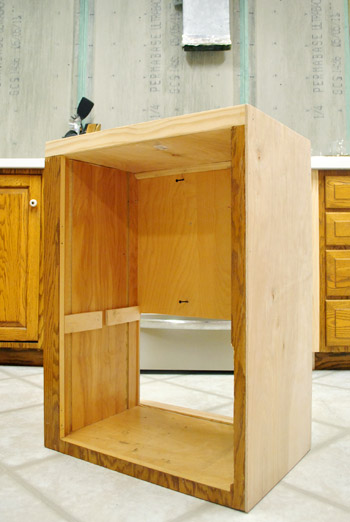
Significantly more cabinet-like if I do say so myself. Especially once it all gets painted the same color with a door in the front and some shiny new hardware.
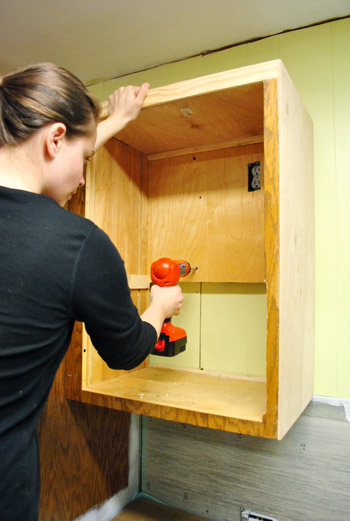
Then with the help of my lovely assistant (nope, not the one I pretended to cut in half earlier in this post) we hung this Frankstein’d cabinet in place.
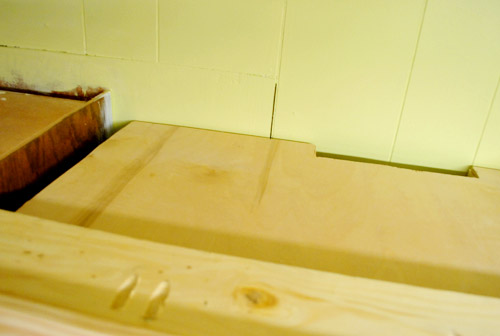
Here’s a view of the top so you get a sense of the venting on both the back and side. I drilled some holes in the left side of the cabinet to take advantage of the gap between it and the pantry (the gap exists because the cabinet frame was wider on that side).
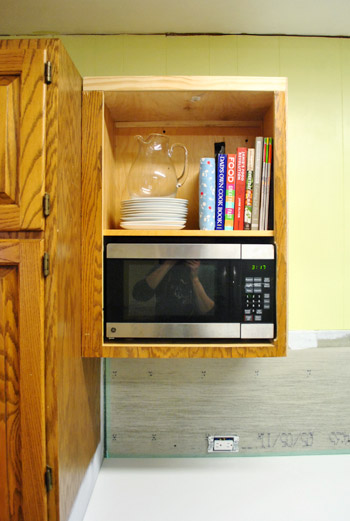
So with cabinet hung, we put the microwave in place and plugged it into the outlet that our electrician put in when he was here about a month ago (more on that here).
Of course it’ll look better once it has a door on it (and when it’s all painted) but even with the addition of some cookbooks and plates it’s starting to look more presentable. Even if just a little bit.
Update: as for that little routed out area that will only be visible with the door open, many of our cabinets are less than gorgeous when they’re open (picture them stacked high with cookware, blenders, tupperware, and all sorts of other stuff!) so we’re of the “what happens in the cabinets, stays in the cabinets” mindset. If the doors are closed and the kitchen looks good, we’re happy!
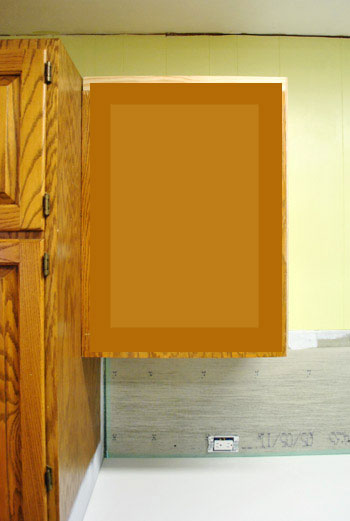
This makes us all the more excited to take care of the door situation – which we’ll hopefully be posting about later this week. Until then, allow this terrible photoshopped rendering to demonstrate how the added door will hide the little routed our area for the microwave when it’s closed (it’ll be open whenever the microwave is in use, of course).
Oh and with this cabinet now hung next to the pantry it leaves us 14″ to the right of it (between the side of the cabinet and the window over the sink). And once the new 12″ deep floating shelves get hung on the oven wall of the kitchen there will also be exactly 14″ between the front of those floating shelves and the right of that window over the sink). So it won’t look crowded, and will actually be nice and balanced. Whew.
Getting the whole cut-down microwave cabinet thing done also makes us excited about our shrinking budget. Not only did we get $255 back for returning the jumbo microwave, we also sold our old over-the-range one on craigslist for $90 (which adds up to $345 back in the ol’ kitchen piggy bank). Plus, we craigslisted our old kitchen table & chairs for $120 and actually sold our old granite counters for $350! If my math is right, that’s $815 back in our pockets… well, it’s actually $731 after we take out $84 for the cost of the new microwave. Still, over seven hundred beans is definitely a welcome “kitchen refund” as we get to that hard “middle part” of the makeover that has us eager to reach some of the bigger changes that we’re slowly but surely inching towards.
No one wants those cabinets painted and the new backsplash hung more than we do, but we’re trying to be realistic about the timeline in here (we originally estimated that we’d be done sometime in January, which we still hope to accomplish). We don’t know how much we’ll have done for the holidays, but at the very least we’ll have our microwave concealed by the time company arrives (oh man, I first typed that as “by the time cabinets arrive” – clearly I’ve been spending too much time in the kitchen). And just to lay it out for anyone wondering what our next steps are, they’re a little unglamorous for a bit longer – and then they should get a lot more exciting:
- cut down all the doors for the cabinets that we added
- add window trim and build a window sill (we had to strip the window over the sink down here)
- add toe kick around all the cabinet bases to make things like the peninsula unified with the rest of the kitchen (we’ll hold off on adding shoe molding until after we do the cork floors later)
- remove all the cabinet doors (after making sure they hang straight and are fitted correctly) and wood putty and sand any gaps/cracks/old hardware holes, etc
- prime everything
- and then we get to paint – yeee haw! (we’re still torn between white and a soft tone like gray-beige, but we’ll share as soon as we’re sure!)
Continuing the list after that step gets us all clammy and overwhelmed, but a new lighting plan, cork floors, and backsplash tile with floating shelves and a built-in range hood are all on the agenda. One cabinet day at a time. What have you guys been doing in the kitchen? Demo? Holiday cooking? Painting? Microwaving?

Leave a Reply