Young House Love

Home Decorating & DIY Tutorials

  • Shop Our Houses
    • Our Current House
    • Our Richmond House
    • Our Beach House
    • Our Duplex
  • Before & Afters
    • Our Current House
    • Our Previous House
    • Our Beach House
    • Our Duplex
    • Our First House
    • Our Second House
    • Our Showhouse
  • DIY & Decorating Tips
    • Most Popular
    • Home Improvement
    • Painting
    • Cleaning & Organizing
    • Crafting & Art
    • More . . .
  • Painting Projects
  • Plants Guides
  • Shop
    • Our Fav Home Finds
    • Our Lighting Line
    • Our Books
    • Book Club Picks
    • Black-Owned Businesses

Young House Love » Our Third House » A Soft Blue-Gray Paint Color For The Kitchen

| By John Petersik | December 2, 2013 | 333 Comments

A Soft Blue-Gray Paint Color For The Kitchen

Another Monday, another leap forward for our kitchen. Here’s where we were last week, after priming and painting the trim, doors, crown molding, and paneling white.

WhiteTrim After Main Angle

And here we are today, with the walls freshly coated with a little Nelson Blue (the light blue color that we’ve planned on from the start).

Nelson After Main

Shall we all let out a communal sigh of relief that the walls aren’t covered in wallpaper anymore and there are no more spackle holes and raw drywall from under those cabinets that we removed? Together now. Ahhhhh.

Nelson After From Garage

Update: There have been a few questions about the intercom and why we didn’t remove it yet, but we’re not sure if we’re going to retofit that with another system (maybe that plays an ipod in each room or something) so for now we’re planning to cover that whole wall with a nice framed out pinboard or something – so it’ll be hidden but the wiring will still be there for a future conversion. Getting to this was a bit more involved than just getting our paint on, though. For instance, you may have noticed that our big over-the-range microwave is now missing from the scene.

Nelson After Stove Area

It’s the only appliance we’ve planned to replace as part of our Phase 1 kitchen makeover, since it was so front & center in the room, it crowded our stove, and we always seem to prefer range hoods over microwaves with vents when it comes to performance. So we’ve replaced it with a stainless countertop version that we’ll eventually get “installed” into our pantry (which just calls for an outlet to be added in there so we can plug it in). It was just $78 at Home Depot (marked down from $139!) and that pantry solution isn’t just for phase 1, so we’re planning on using it for the long haul, even after Phase 2, which is nice.

Nelson After Mircowave Area

Removing the old one wasn’t 100% straightforward, but we managed. We had to unscrew it from above through the upper cabinet, but the screw was recessed a few inches below the cabinet, so our drill barely reached. Since it was so dark down there, we ended up breaking out the oh-so-thin battery-powered fairy lights from Clara’s Halloween costume to provide some much-needed illumination. #MacGyvering

Nelson Stove Sherry Unscrewing

I supported the cabinet from below the whole time so when it eventually came lose from the screws that Sherry was removing from above, I could guide it down safely. That puppy was not light. Probably all the dried food splatters inside wiring and stuff.

Nelson Stove John Lifting

Once we unscrewed the mounting bracket from behind the microwave, we also had this old vinyl backsplash to scrape off the wall. We knew we’d prefer a seamless painted wall back there for this phase of the kitchen’s transformation since we actually had a painted wall behind our first house’s fully renovated kitchen, and it held up well thanks to the paint being nice and wipeable – even with spaghetti splatters a plenty.

Nelson Stove Removing Backsplash

The pliable sheet of vinyl came off really easily (Sherry just used a spackle knife to pry it off) but it left the wall pretty pock-marked behind it. Thankfully it wasn’t anything a little spackle couldn’t handle.

Nelson Stove Putty

We already had the spackle out because there were plenty of holes around the room to be filled (and sanded once dry). This is a terrible iPhone pic, but you can kind of see the extent to which some of the walls were nail-holed. We’re talking 20 in a three foot radius.

Nelson Putty Holes

We finished all of our patching right before heading off on a whirlwind road trip to New Jersey for Thanksgiving, so it wasn’t until we got back on Friday afternoon that we could bust out the primer for our first coat (which is what many of you saw in our Instagram feed that evening).

Nelson Primer Instagram

Even though we were painting a light color over an already light wall, we chose to do a primer coat first for two reasons:
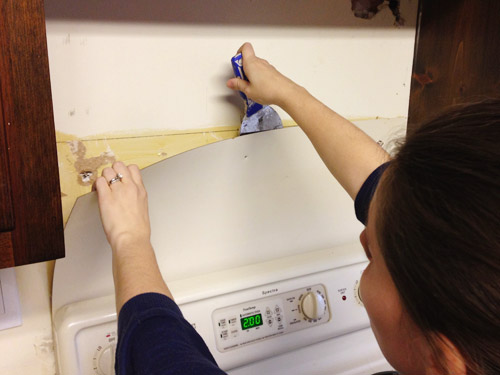
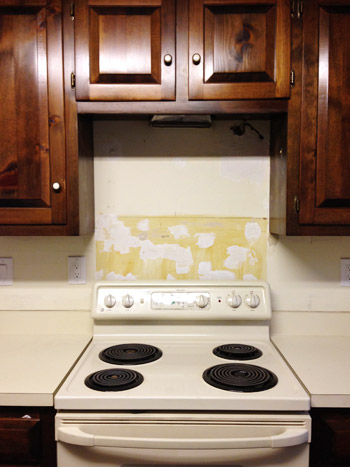
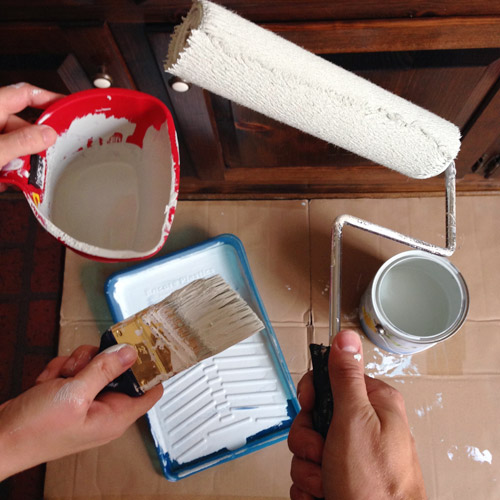
  1. The areas behind the cabinets that we took down had never been primed or painted, and it’s always good to prime drywall before painting it.
  2. Walls that haven’t been painted for several years may soak up more paint (as we experienced when painting Clara’s room) and we’d rather it soak up extra primer instead, since it’s cheaper than paint (one coat of primer + two coats of paint is almost always cheaper than three coats of paint because you usually need to buy more than one gallon of paint for more than two coats).
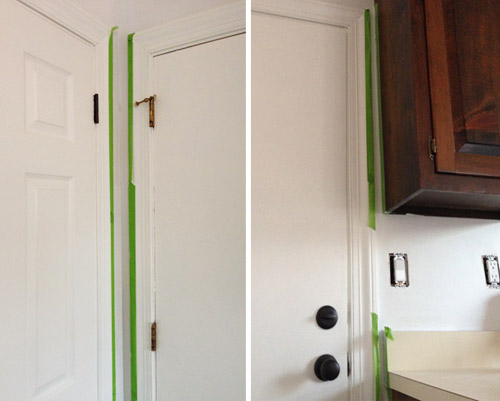
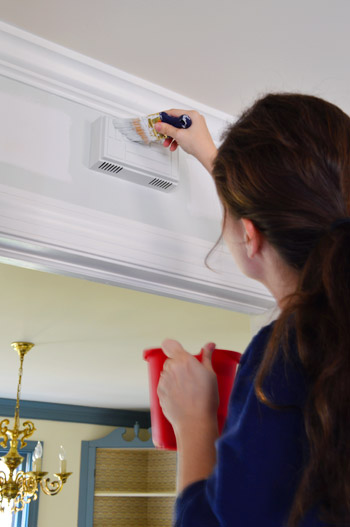
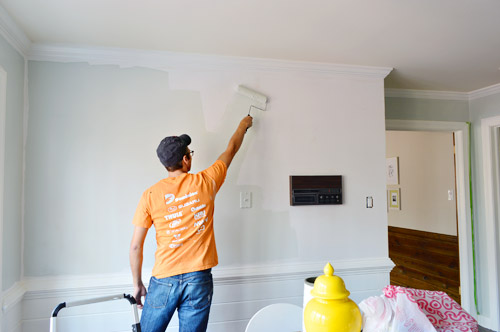
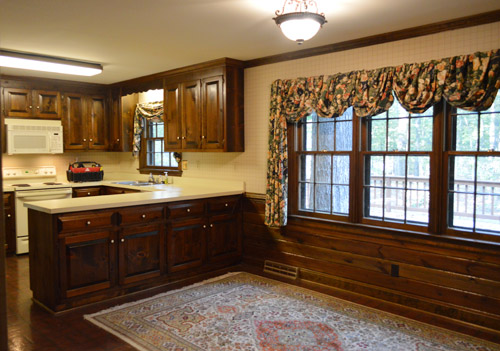
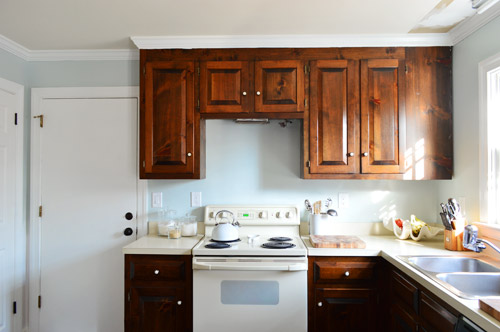
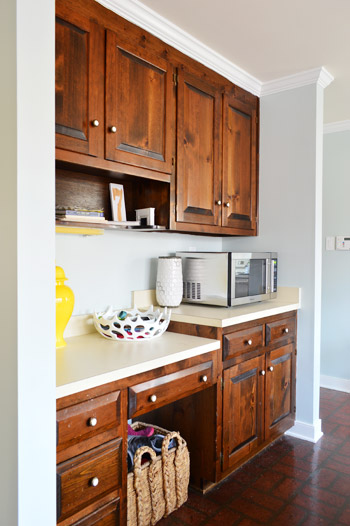
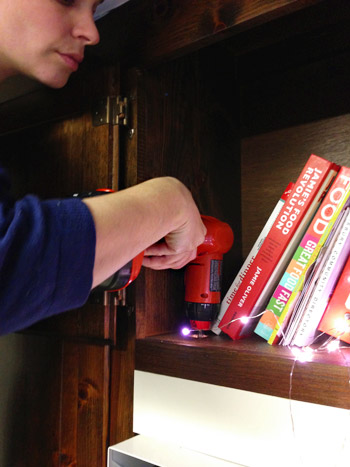
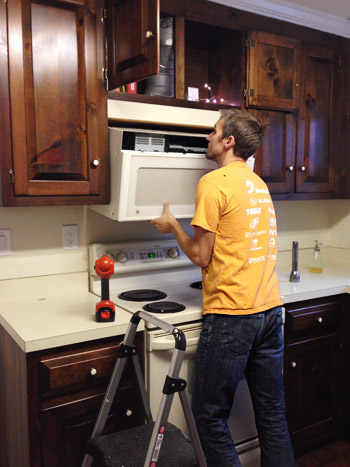
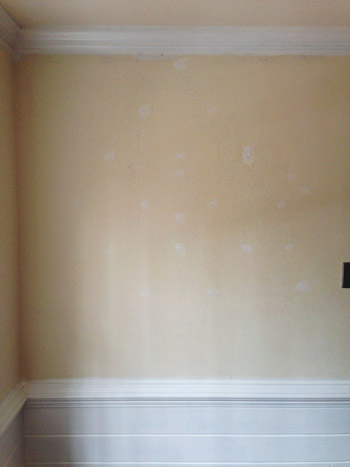
Nelson Primer Both Painting1

We knocked out our primer coat during Clara’s nap that afternoon using our usual Sherry-cuts-in / John-rolls system, which took the room from this…

Nelson Primer Before

…to this. Don’t mind the piles of stuff that we shifted to the center of the room, away from the walls. But much better, right?

Nelson Primer After

That photo was taken Saturday morning, right before we broke out the Nelson Blue paint.

Nelson Paint Hands

One thing we did to make our job (well, Sherry’s job) a bit easier was that we strategically taped off a few tight spots. Since it’s hard to squeeze into the gap between two doors, for example, we put tape along the edge of the door frame to protect the face of the molding from getting paint on it. It meant that Sherry could focus on making sure she got full coverage on the wall without worrying about messing up the crisp white molding next to it. And in less tight spaces, she’s great at just freehanding things (seven years of being the cutter-inner in the relationship can do that to ya).

Nelson Tape

We also decided to paint a couple of the eyesores in the room – like the yellowed doorbell box and an old phone jack next to the intercom box, which you can see two pictures down.

Nelson Paint Sherry Doorbell

We originally worried the Nelson Blue was a bit too faint, but it definitely showed up a bit more distinctly once it began to dry.

Nelson Paint John Rolling

We love the color. In fact, it almost feels like a nod back to our first kitchen’s wall color – although this one is a bit lighter and has more green to it, and the horizontal paneling around the bottom half of the room adds a little something extra. I’ll admit it’s a bit hard to fully appreciate the new color while the room is held back by things like the countertops, the cabinets, and the floor (we’re definitely in that “middle” stage, so it should start making more sense as we tackle other things on our list).

Nelson After Main

And we can definitely celebrate the fact that we’re a nice looooong way from where we started.

WhiteTrim Before Main Angle

When you look at it from certain angles, you can almost trick yourself into thinking the room is a lot closer to done. For instance, the view from the front door is much improved.

Nelson After From Foyer

And the little breakfast area is shaping up to be a nice combination of white trim + horizontal planking + blue walls + rustic wood. Just ignore the big intercom on the wall and the fake brick floor, mmkay?

Nelson After Beachy Kinda

So here’s what our kitchen to-do list is looking like now. We’ve officially crossed 9 things off and have 9 more to go… some of which are a lot easier than the nine we’ve already done (switching out lights and hanging shelves are a welcome relief after all this priming and painting – although that 15th bullet is going to be a multi-step multi-day extravaganza).
  • Remove wallpaper
  • Move fridge cabinet forward
  • Remove upper cabinets on window wall to prep for open shelves
  • Reinstall crown molding (you can read about how we did those first four things here)
  • Prime & paint the pantry and the door to the garage
  • Prime & paint the trim, crown molding, & baseboards
  • Prime & paint the paneling (you can read about how we did those last three things here)
  • Prime and paint the walls
  • Remove the existing microwave (craigslist it?) and get a countertop one we can eventually install in the pantry
  • Install a cheap range hood (we’ve seen some like this for $20 on craigslist) to lighten up that wall
  • Patch and paint the ceiling
  • Replace the florescent light in the cooking area and the pendant over the sink
  • Replace and center the light over the dining table
  • Hang floating shelves on the window wall
  • Paint the cabinets (you can see the colors we’re leaning towards here)
  • Update the old cabinet hinges and knobs
  • Get a rug for eat-in area? Possibly install peel and stick tiles everywhere?
  • Curtains for windows?
*To read why we’ve chosen these steps for Phase 1 (for example, why we’re painting the cabinets, why we’re not going to attempt to paint the linoleum, and what’s on the agenda for Phase 2) there’s lots of background info in this post for ya.

Our Favorite Paint Colors

If you’re having trouble picking the right color to paint your room, check out these detailed deep-dive posts about our favorite paints:
  • Sherwin-Williams Extra White
    • The 12 Best White Paint Colors
    • Benjamin Moore Edgecomb Gray
    • Benjamin Moore Simply White
    • Sherwin-Williams Pure White
    • Sherwin-Williams Extra White

    More posts from Young House Love

    Filed Under: Our Third House, Painting

    Our DIY “Thanks Jar”
    Introducing Our Dog To Our New Baby

    Comments

    1. Bailey says

      December 2, 2013 at 10:05 pm

      Well it took me all day of multi-tasking but I finally finished reading this post :) I absolutely love the way the kitchen is shaping up!

      I found myself sitting in a room in an old (deteriorating) house this weekend, envisioning what it would look like with all the dark wood paneling painted white and the white (yellowing!) walls all painted a soft grey… you guys would have been proud ;)

      Bailey

      Reply
      • YoungHouseLove says

        December 2, 2013 at 10:23 pm

        Aw, so proud!

        xo
        s

    2. lauren says

      December 2, 2013 at 10:15 pm

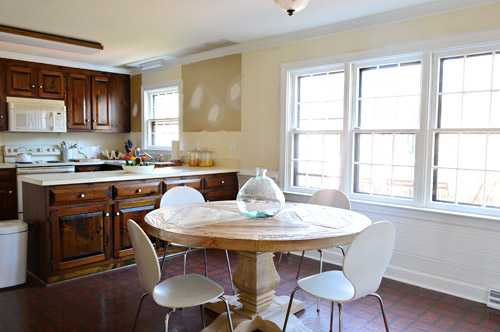
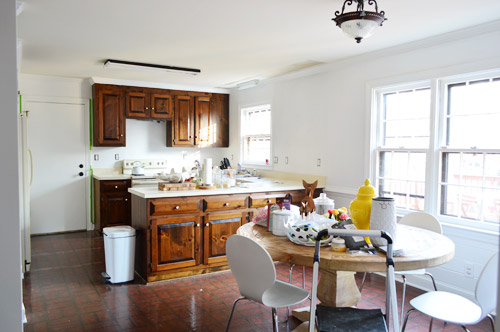
      Your kitchen window looks lighter. Do the lighter walls and trim make them look this way, or did you guys paint the windows white too? Everything looks great, as if you didn’t already know ;)

      Reply
      • YoungHouseLove says

        December 2, 2013 at 10:22 pm

        Yup, the windows are wood so we painted the frames of them white along with the trim and doors and crown and paneling last week.

        xo
        s

    3. Cindy @Made2Style says

      December 2, 2013 at 10:41 pm

      That color is gorgeous!! I’m obsessed, in love!

      Reply
    4. Kate Craig says

      December 2, 2013 at 10:56 pm

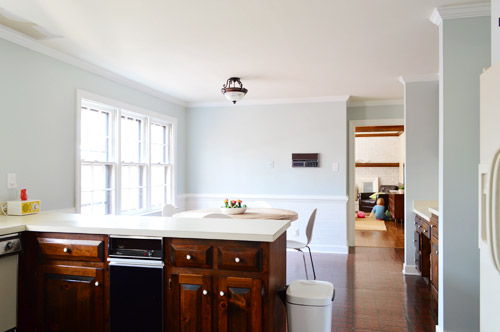
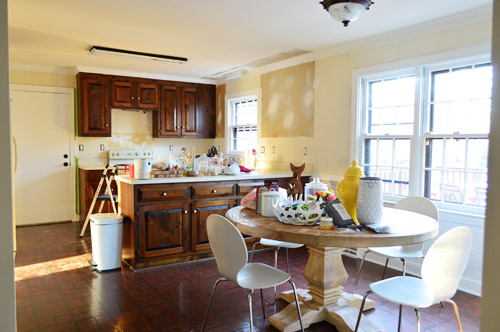
      I would have never taken out those cabinets (scared to lose the storage/wouldn’t think of it) but I can’t get over the difference it makes. I love how much light is always in your style!

      Reply
    5. Lindsay says

      December 2, 2013 at 11:08 pm

      Looks BEAUTIFUL! Your transformations always amaze me, even when you’re not even half done.

      Reply
    6. Anne G. says

      December 2, 2013 at 11:18 pm

      LOVE the color and the way your kitchen is turning out. The color really works with the whole house color scheme. I can’t wait to see more transformations!

      Reply
    7. Michelle says

      December 3, 2013 at 12:16 am

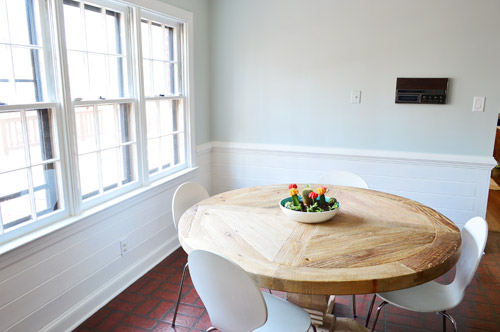
      I initially thought the little brown figure in the middle of the dining room table was Burger! (in Pic 13 – 14?)…..and then I got distracted by the beautiful Nelson Blue paint!

      Reply
      • YoungHouseLove says

        December 3, 2013 at 9:59 am

        Haha! That’s a cardboard Burger made by a reader and given to us at a signing. Isn’t he awesome?!

        xo
        s

    8. Jennifer says

      December 3, 2013 at 12:20 am

      Not to be weird, but sherry’s booty looks great in that one pic.
      Also, I really love that paint color. I think I’m going to use it for a bookshelf that accidentally got painted macaroni & cheese a few years ago.

      Reply
      • YoungHouseLove says

        December 3, 2013 at 10:00 am

        Haha! Thanks Jennifer! I must have just gotten lucky with the angle or something. I feel like I’m growing exponentially everyday!

        xo
        s

    9. This little blue homestead says

      December 3, 2013 at 12:43 am

      Love the color, I just picked up some Nantucket fog from a previous post. You really have an eye for color!

      Reply
    10. Kathy says

      December 3, 2013 at 1:14 am

      Looks great!!
      Sorry if this question is too early, but do you know what type of paint you’ll use this time on cabinets?

      I bought some BM Advance for mine, but when I used it to paint a coffee table last summer I found it to be pretty smelly (compared to the Natura based BM colors I’ve been using in the house). I sure love how Advance looks and ends up as a hard, smooth finish, though!

      Reply
      • YoungHouseLove says

        December 3, 2013 at 10:05 am

        Yes, I think we’ll go for Advance and will do as much painting in the garage (with ventilation and masks) as possible since we can remove all the fronts and drawers. That way John can roll the cabinet fronts while Clara and I are out running errands and hopefully air out the room, yet we’ll end up with durable cabinets that we won’t have to paint again (since we’re planning to use them in the garage after they move outta here).

        xo
        s

    11. Kathleen says

      December 3, 2013 at 7:36 am

      W-O-W! Very exciting to watch your progress and the speed at which you two accomplish your vision. When my hub and I put down new wood floors this past weekend… I was wishing we were your age again! DIY on your hands and knees for three days just isn’t the same at 50. Thank goodness for ibuprofen! Ha! Keep on rolling! You’ll remember these as the best of times. Building our farmers porch years ago was one of our best DIY we did and it’s just so lovely to enjoy every day. Smiles, K

      Reply
      • YoungHouseLove says

        December 3, 2013 at 9:57 am

        That sounds awesome Kathleen! Best of luck!

        xo
        s

    12. Julia@Cuckoo4Design says

      December 3, 2013 at 7:49 am

      It really is amazing how fresh, modern and spacious it looks now!
      No wonder your daughter plays with superheroes that carry paint brushes ;) She totally understands the power of paint ;)

      Reply
    13. Sadie says

      December 3, 2013 at 8:21 am

      Totally irrelevant, but I absolutely love that Martha Stewart Great Food Fast cookbook. I probably use it twice a week.

      Reply
      • YoungHouseLove says

        December 3, 2013 at 9:56 am

        It’s a good one, right?!

        xo
        s

    14. Firesparx says

      December 3, 2013 at 8:55 am

      Looks sooooo much better already! Just a note, you may want to check with your local building code about whether you can have an appliance in your pantry. In Ontario where I live it is against code. The danger is if you run the appliance and forget about it (ie close the pantry door) and it catches fire you won’t notice until its too late.

      Reply
      • YoungHouseLove says

        December 3, 2013 at 9:56 am

        Good tip! We had one in a vented cabinet in our previous kitchen, which was ok with code, so we’ll have to check on the pantry scenario!

        xo
        s

    15. bella says

      December 3, 2013 at 9:08 am

      It looks really great. Bright and cheery. I see the planter on the table, and it’s so cute.

      Reply
    16. tasha roe says

      December 3, 2013 at 9:25 am

      HUGE difference!!! LOVE what some muscle and paint can accomplish!!
      Can’t wait to see what you do with the intercom systems!! We bought a 1976 home and they are in every room. We looked into the Bose systems and OUCH! I know they would be spectacular, but I can’t shell out $6,000 when I have 3 bathrooms and a kitchen to remodel.

      Reply
      • YoungHouseLove says

        December 3, 2013 at 9:55 am

        Yikes! That’s a lot of cheddar!

        xo
        s

    17. April says

      December 3, 2013 at 9:28 am

      LOVE the use of “mmkay” thanks for making me giggle!

      Reply
    18. Tanya says

      December 3, 2013 at 10:06 am

      Looks great! Advice for phase 2 = gas stove. Once you use gas you will never want to go back to electric… :)

      Reply
      • YoungHouseLove says

        December 3, 2013 at 10:08 am

        We’ve heard that a lot! Anyone else have opinions on the subject. I don’t think I’ve ever heard someone say they prefer electric…

        xo
        s

      • SG says

        December 3, 2013 at 11:36 am

        Agreed. I now find it really weird to cook on electric. So much harder to judge.

    19. Katie {deranchification} says

      December 3, 2013 at 10:13 am

      Love that color!! Looks great with the crisp with trim and planks!

      Reply
    20. Steph says

      December 3, 2013 at 11:35 am

      I was hoping I could pop in here with a painting-related question: I am currently building a bookshelf modeled on this one (http://www.crateandbarrel.com/shift-black-74-bookcase/s254374) but made with real wood. Everything is cut and sanded, but not yet assembled or painted. Would you recommend painting once it’s put together, or would you recommend painting the boards individually? If it matters, we’re amateurs at this, and doing it in a small apartment. Any other advice to offer? Thanks!

      Reply
      • YoungHouseLove says

        December 3, 2013 at 12:20 pm

        I would put it all together and then prime and paint it. Good luck!

        xo
        s

      • Steph says

        December 3, 2013 at 1:57 pm

        Thanks!

    21. Karinny says

      December 3, 2013 at 11:40 am

      What a difference! You guys are great.
      Please look at the link of our DIY kitchen transformation.

      http://karinny-mylife.blogspot.com/search/label/remodelando%20cocina

      Reply
      • YoungHouseLove says

        December 3, 2013 at 12:06 pm

        Congrats! So awesome!

        xo
        s

    22. Ashley B. says

      December 3, 2013 at 2:21 pm

      Such an AMAZING transformation! Your blog makes my renter’s (but dreams of owning a house and doing projects) heart so happy!!! :D I always look forward to new post notifications in my email!

      Reply
    23. Amanda says

      December 3, 2013 at 2:23 pm

      It is looking great! For Phase 1 are you planning on living with grotty counters, or are you going to paint/cement skim coat/something else cool them for the interim? I’ve painted my kitchen counters, and they are just barely starting to wear away 5 years later, but I’m curious to try cement skim coating. Wanna be the guinea pigs?

      Reply
      • YoungHouseLove says

        December 3, 2013 at 3:23 pm

        I am thinking about that too! Jenny at Little Green Notebook did it in her laundry room and it was cheap and seemed somewhat straightforward. Just gotta get john on board…

        xo
        s

    24. Jo jo says

      December 3, 2013 at 3:15 pm

      What a difference – it looks GREAT!

      Reply
    25. Glynn says

      December 3, 2013 at 3:42 pm

      Do y’all worry at all that a microwave in the pantry will lead to linger smells? We’ve debated doing the same but I hate the idea of my pantry smelling like reheated food. Any experience or thoughts on this?

      Reply
      • YoungHouseLove says

        December 3, 2013 at 3:46 pm

        We had our microwave in a vented cabinet at our last house and didn’t have any issues with smells since we left the door open while it was in use. I’m hoping the same will be true for the pantry. Anyone have experience with this?

        xo
        s

    26. Leanne says

      December 3, 2013 at 10:00 pm

      I love the direction you are going with the kitchen! Perhaps you’ve said it before and I’ve completely missed it, but where is your table from?

      Reply
      • YoungHouseLove says

        December 3, 2013 at 10:12 pm

        Thanks Leanne! Here’s that post for ya: https://www.younghouselove.com/2013/10/im-still-laughing-about-blardware/

        xo
        s

    27. Tami says

      December 4, 2013 at 6:32 am

      I LOVE the color! Is it okay if I “steal” it for my kitchen?

      Reply
      • YoungHouseLove says

        December 4, 2013 at 8:21 am

        Of course!

        xo
        s

    28. Shelly says

      December 4, 2013 at 8:38 pm

      Newly introduced to YoungHouseLove — I’m addicted already. So inspiring! Your project are all so “doable” so a big “thank you” for that. Question, I’m on a question for a 58″-60″ round rustic wood dining table with a thick top and a big solid base…please tell me you got your round kitchen/dining table? Please don’t tell me you DIY’d it!

      Reply
    29. Shelly says

      December 4, 2013 at 8:41 pm

      Dag! Typos galore. Let me try again. Your projects are all so “doable” so a big “thank you” for that. Question, I’m on a quest for a 58?-60? round rustic wood dining table with a thick top and a big solid base…,please tell me WHERE you got your round kitchen table? Please don’t tell me you DIY’d it!

      Reply
      • YoungHouseLove says

        December 4, 2013 at 8:44 pm

        Aw thanks Shelly! Here’s that post for ya: https://www.younghouselove.com/2013/10/im-still-laughing-about-blardware/

        xo
        s

    30. Jamie says

      December 5, 2013 at 10:50 am

      Hey guys, just catching up on the past week’s prior posts that I missed. I have a SONOS system for my music and I really like it. I know it’s not something you could retrofit into that intercom but thought I should mention it so that you could check it out. You can control the system in one of 3 ways: Smartphone (easiest method), Laptop, SONOS controller (convenient if you don’t like carrying your phones around all day but they do cost a pretty penny). They sound really good and they have the ability to sync up with each other via WiFi so that every room in your house is playing the same thing, or they can be un-synced so that you can listen to something in one room and a different thing can be playing in a different room. No, I am not paid by SONOS :)

      link: http://www.sonos.com

      Reply
      • YoungHouseLove says

        December 5, 2013 at 10:52 am

        That sounds awesome! Someone else was saying how cool theirs was too so we’ll have to check it out!

        xo
        s

    31. Lonnie says

      December 8, 2013 at 1:41 am

      Wow! I wish I had you as neighbors because I would want to hang out at your place all the time! You have such wonderful ideas and the progress is always amazing to see. Great work.

      Reply
    32. Misty says

      December 9, 2013 at 12:30 pm

      After removing the wallpaper did you guys leave the walls flat or did you add some sort of texturing? I am in the same situation and am not sure if leaving the walls without texture is a good idea, what is your opinion? Are their pros and cons for each method?

      Reply
      • YoungHouseLove says

        December 9, 2013 at 12:43 pm

        It’s usually just personal preference. We love flat smooth walls, so we cleaned ours well, primed, and repainted – but if you like texture you can buy texturing spray and add it to the walls before you paint. Hope it helps!

        xo
        s

    33. Tanyad07 says

      December 11, 2013 at 4:52 am

      Hi Sherry,

      Just wondering if you painted when you first found out you were pregnant. Have just found out that we are expecting and the husband is adamant that we will not be able to have the painting marathon we had planned over the Christmas/New Year break because even low VOC paint can be harmful to the baby? What is your take, did you stay away for the first few months and then slowly ease back in?

      Thanks!

      Reply
      • YoungHouseLove says

        December 11, 2013 at 10:19 am

        Aw, congrats Tanya! I chatted a little bit about what I will and won’t do when I’m prego, and how I avoid chemcials and VOCs here in this post. Hope it helps!

        xo
        s

    34. Susan says

      December 22, 2013 at 10:28 am

      So late in commenting (using today to do some blog catch-up) – but have you thought of using the FLOR squares over the faux red brick? That way, you might be able to use them again once you really replace the floor. We have hardwood floors throughout our house, and have been looking at the FLOR tiles for use in one of our rooms. It seems like a great alternative to carpet squares that stick to the floor.

      Reply
      • YoungHouseLove says

        December 22, 2013 at 11:05 am

        That’s another fun idea! Thanks for the suggestion!

        xo
        s

    35. Debra says

      April 21, 2014 at 3:51 pm

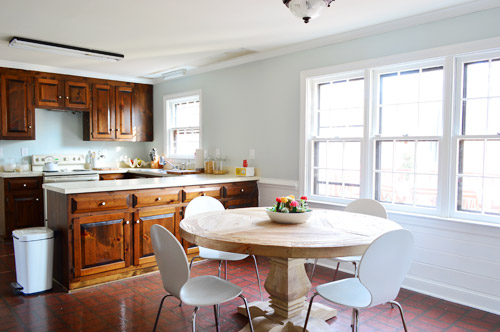
      Just a quick question… how did you select your kitchen wall color? It’s really beautiful, but I’d love to know the back story! Please give more info on why you picked it, what was your inspiration? Love it by the way! ~ Debra

      Reply
      • YoungHouseLove says

        April 21, 2014 at 6:28 pm

        We just liked the color after holding up a bunch of swatches. It’s Nelson Blue by Ben Moore.

        xo
        s

    « Older Comments

    Stuff We Love

    Leave a Reply Cancel reply

    Your email address will not be published. Required fields are marked *

    John and Sherry Sitting On Woven ChairHey, we’re John & Sherry. We’ve fixed up 7 homes, written books, designed products, started a podcast, and then downsized & moved to the beach! Here you’ll find over 3,000 DIY projects & home updates. More about us…
    *This site contains ads and affiliate links*
    See our disclaimer & privacy policy to learn more

    Latest Finds

    • Facebook
    • Instagram
    • Pinterest
    • RSS
    • Twitter
    • YouTube

    SHOP OUR LIGHTING

    Young House Love Shades Of Light Capiz Chandelier

    GET POSTS BY EMAIL

    We’re Digging

    Traditional Rug
    The “Magic” Rug
    Smokeless Solo Stove Firepit
    Smokeless Firepit
    Outdoor Solar LED Path Lights
    Solar Path Lights
    Criss Cross Office Chair
    Our Desk Chair
    Blue Air 211 Air Purifier
    Our Air Purifiers
    Eufy 11S Max Robot Vacuum
    Our Robot Vacuum
    Kohler Memoirs Toilet
    Our Favorite Toilet
    Livable Luxe Book
    Fav Design Book
    SEE MORE OF OUR FAVORITE FINDS > >

    • About
    • FAQs
    • Press
    • Contact
    • :)

    © 2025 Young House Love ® · Disclaimer · Privacy Policy · Terms of Use · A Fun Wordpress theme on Genesis Framework · Hosted by Liquid Web