We’ve made a bunch of headboards over the years and the method shown below is the all-time easiest and most customizable DIY headboard of them all. It doesn’t require any sewing, thread, buttons, or other technical upholstery knowledge. It’s so easy, we even made two headboards for this space. We are making a wraparound daybed-style headboard for our son’s room. It’s gonna turn his basic bed into a cozy nook for lounging, reading, and – of course, sleeping!

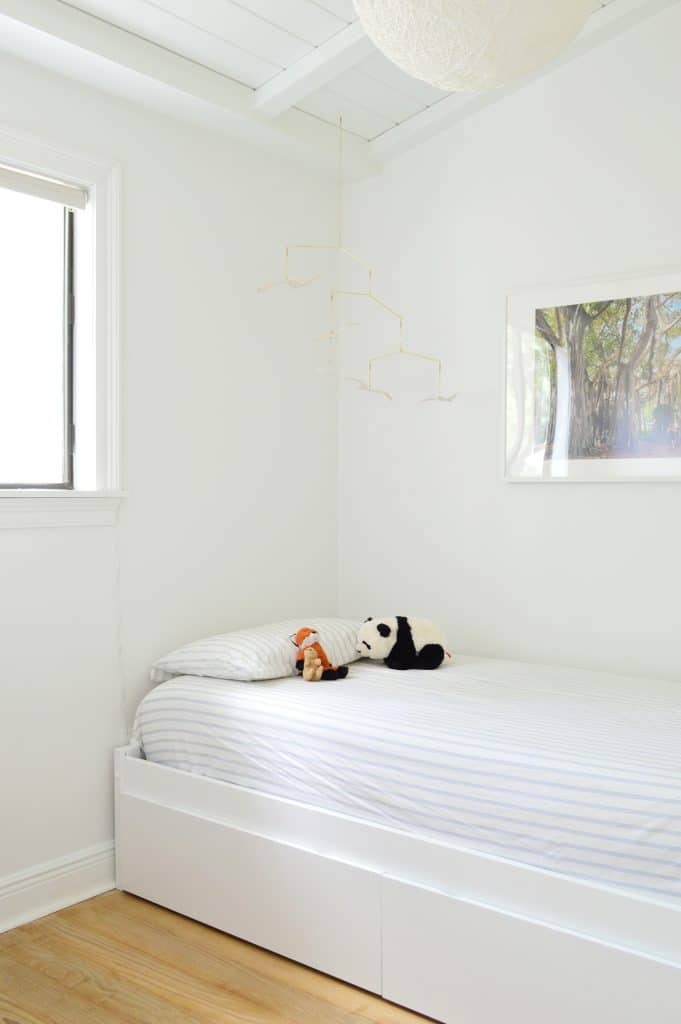
Here’s what his room and bed looked like before. It’s pretty bare bones because we just moved in. Update: See how his room looks after 2 years of living here, including the installation of his gradient accent wall.
We know from our beach house bunk room that sometimes the kids hang out in the smallest, coziest rooms. So not only does adding a headboard up the lounge factor, it almost makes it like a big couch to chill in.
Why Make A DIY Daybed Headboard?
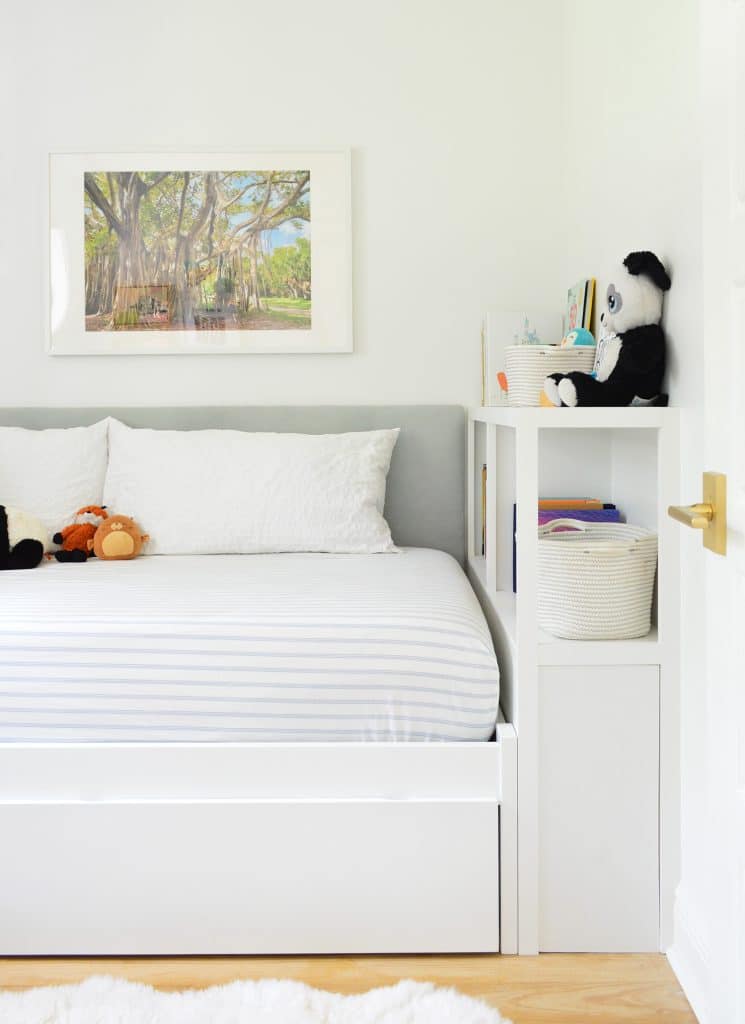
Every bed looks better with some sort of headboard, and this wraparound style is great for a daybed. It’s two separate pieces across the head and back wall. We didn’t need a third because we built a DIY bookshelf at the foot. But you could easily add a third panel. Plus you can make them any height and use any fabric that you’d like!
Materials & Tools
Here’s a quick list of what you’ll need to make this super simple DIY headboard. This headboard is also super lightweight and easy to install – just another reason we love it! Keep in mind exact supplies will depend on your measurements.
- 1×2 pine boards for frame
- Kreg pocket hole jig (optional)
- Saw (we used our miter saw)
- Power drill
- Staple gun
- Upholstery batting
- Upholstery batting
- 2 – 4 yard of fabric, depending on headboard size
- Stud finder
- Level
- Long nails or screws (for hanging on the wall)
- Scissors
How To Make A DIY Headboard
Here are the basic instructions to follow for this headboard tutorial. We’ll go into more detail for each below.
- Build A Lightweight Wooden Frame
- Wrap Frame In Batting
- Repeat With Fabric
- Hang Headboard On The Wall
Step 1: Build A Lightweight Wooden Frame
This DIY headboard tutorial uses a wooden frame hung directly on a wall, kind of like a picture frame behind your bed. We’ve also done versions that use a solid piece of plywood or MDF. Those are a bit more heavy-duty (and heavy) and work better for attaching a headboard directly to your bed frame.
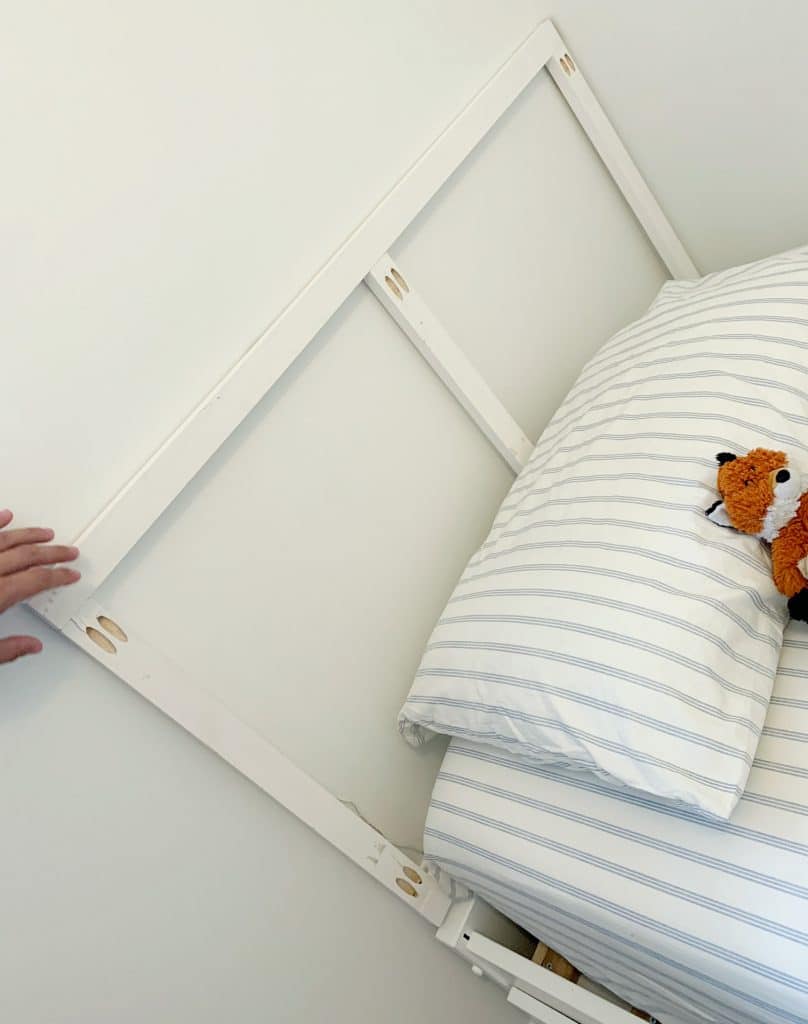
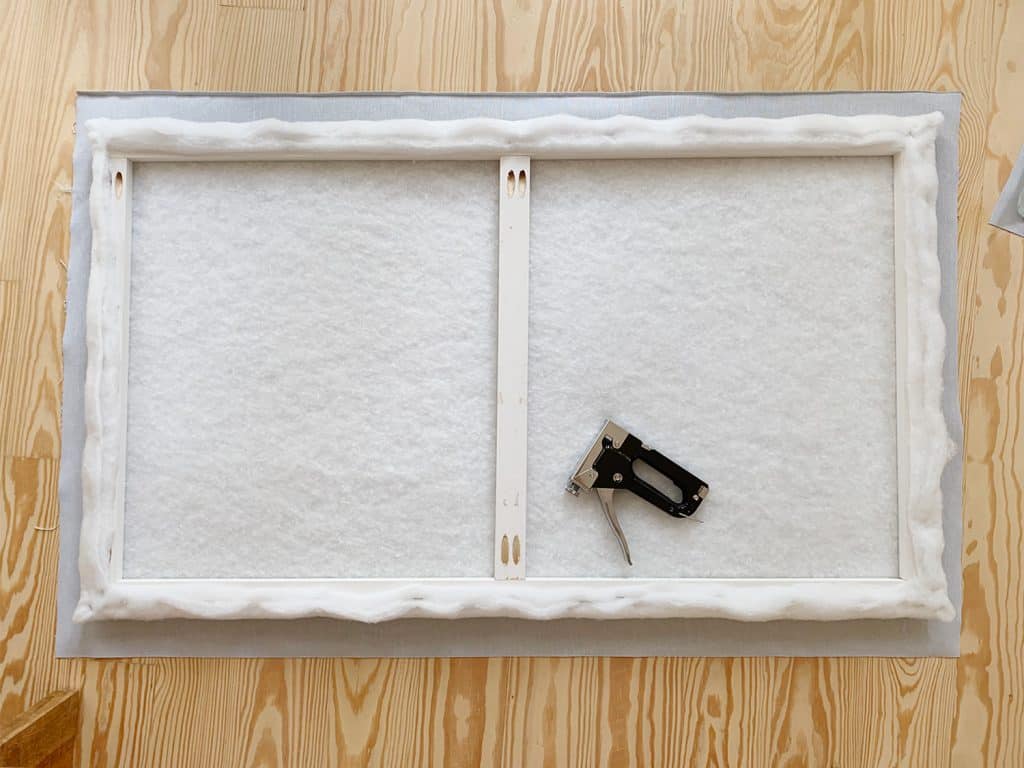
You can customize your frame to the exact width of your bed or size you prefer – just remember that your fabric and batting will add about a 1/2″ to your final size. Our frame was 42″ wide and 25″ tall, which was as tall as we could go without hitting the nearby window molding. I added the middle support just to be safe, but it probably wasn’t 100% necessary.
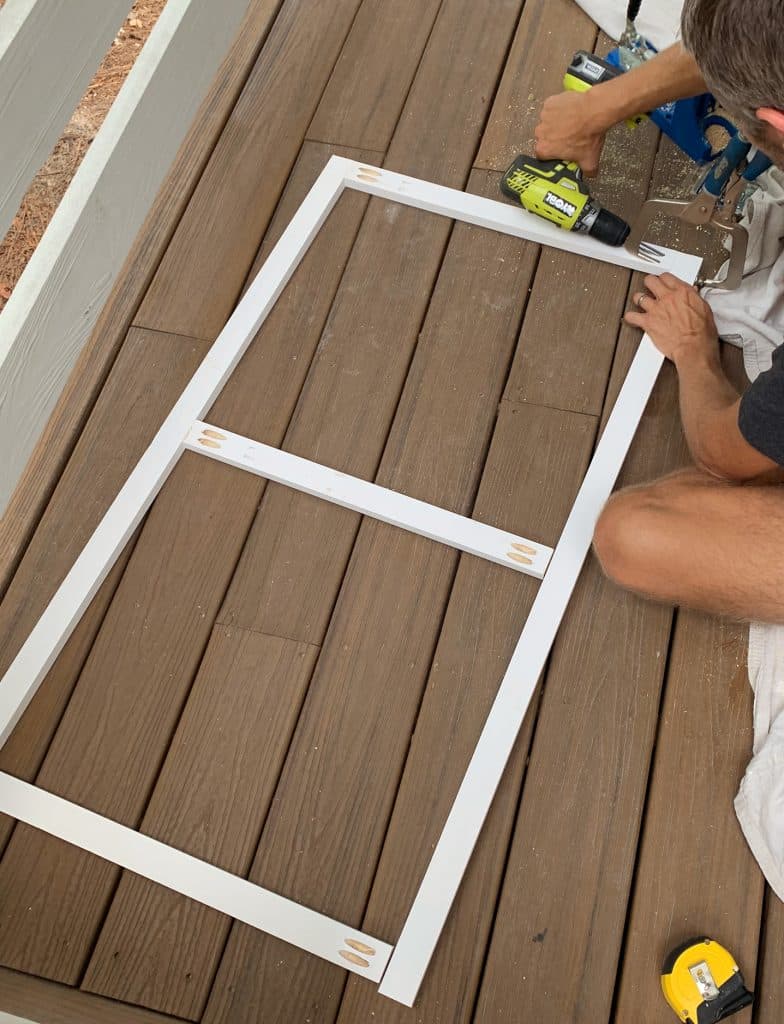
We used 1×2″ boards (they don’t have to be primed, this was just what our store had in stock). I cut them to size using my miter saw and used my Kreg jig & clamp to make pocket holes for securing them tightly together.
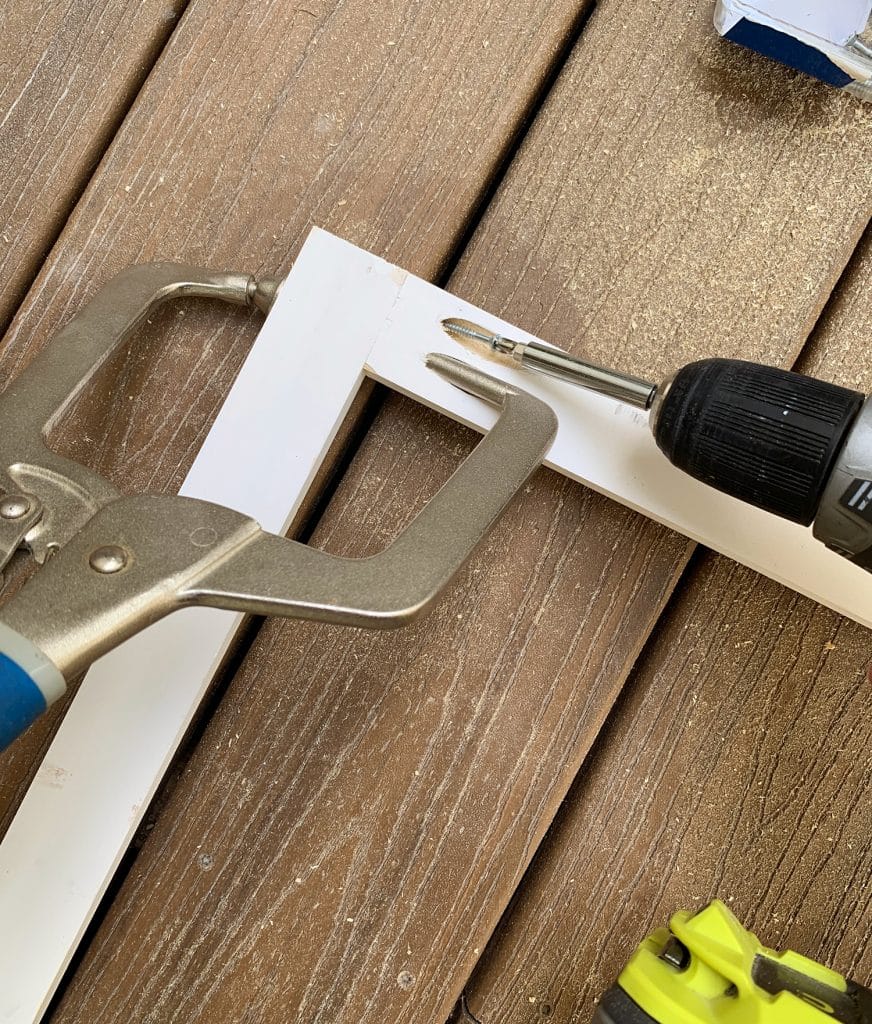
All of this will be hidden by fabric later so it doesn’t have to be pretty. So if you’d rather just drive wood screws through the sides of the boards that’s fine too (no jig required). Just drill pilot holes first so your wood doesn’t split.
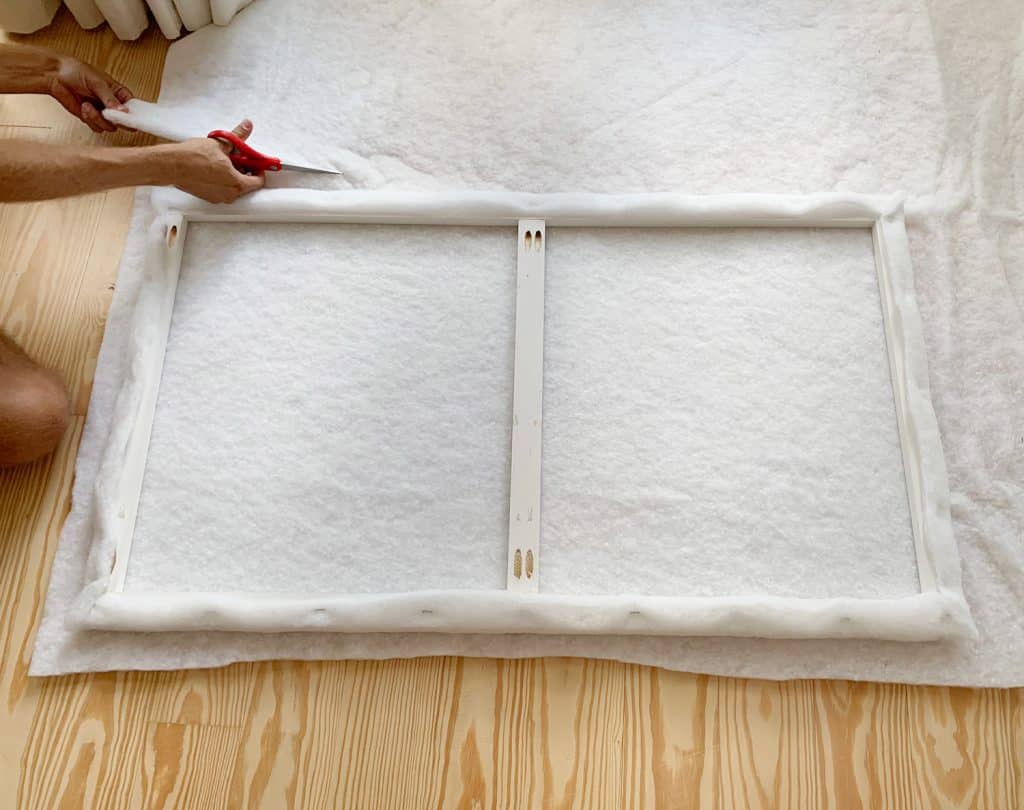
Step 2: Wrap Frame In Batting
Next, it’s time to wrap the frame – first with batting, then with fabric. Sherry always says: “If you can wrap a present, you can make a headboard.” Just cut your material to size, leaving 2-3″ of overhang on all sides. Then fold it over your frame and staple it in place with a heavy-duty staple gun.
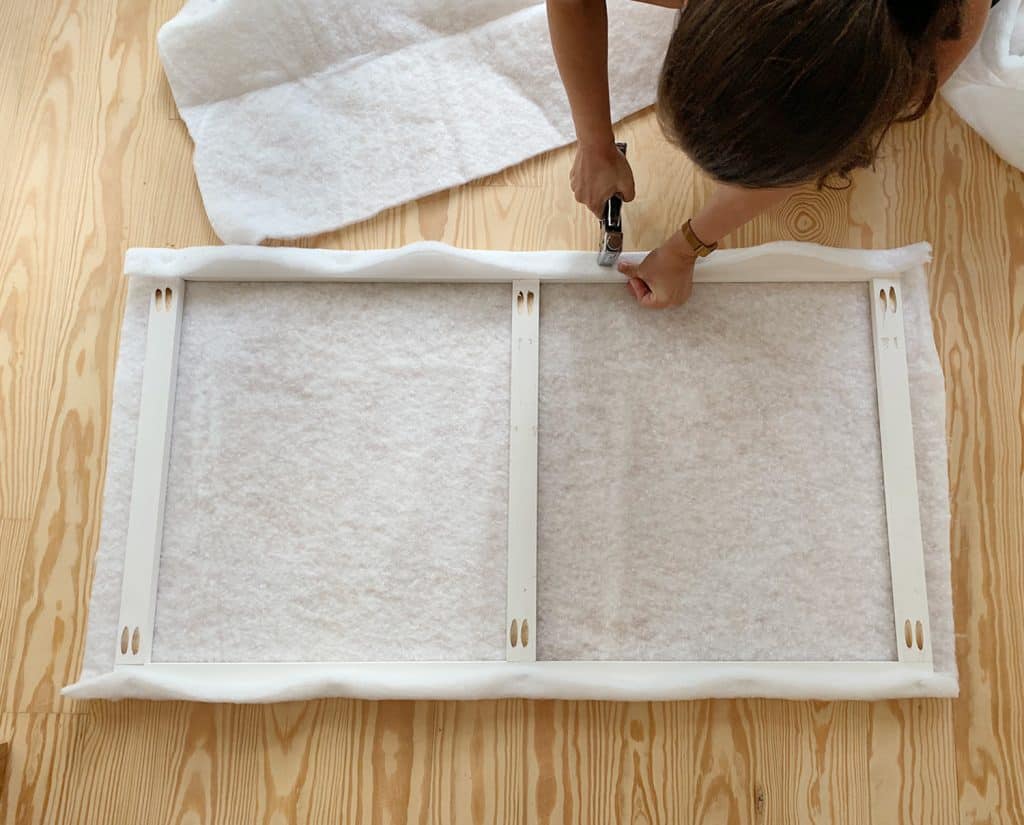
Depending on the thickness of your batting and how plush you want your headboard to feel, you may want to double- or triple-up your batting layers. We did two in this case.
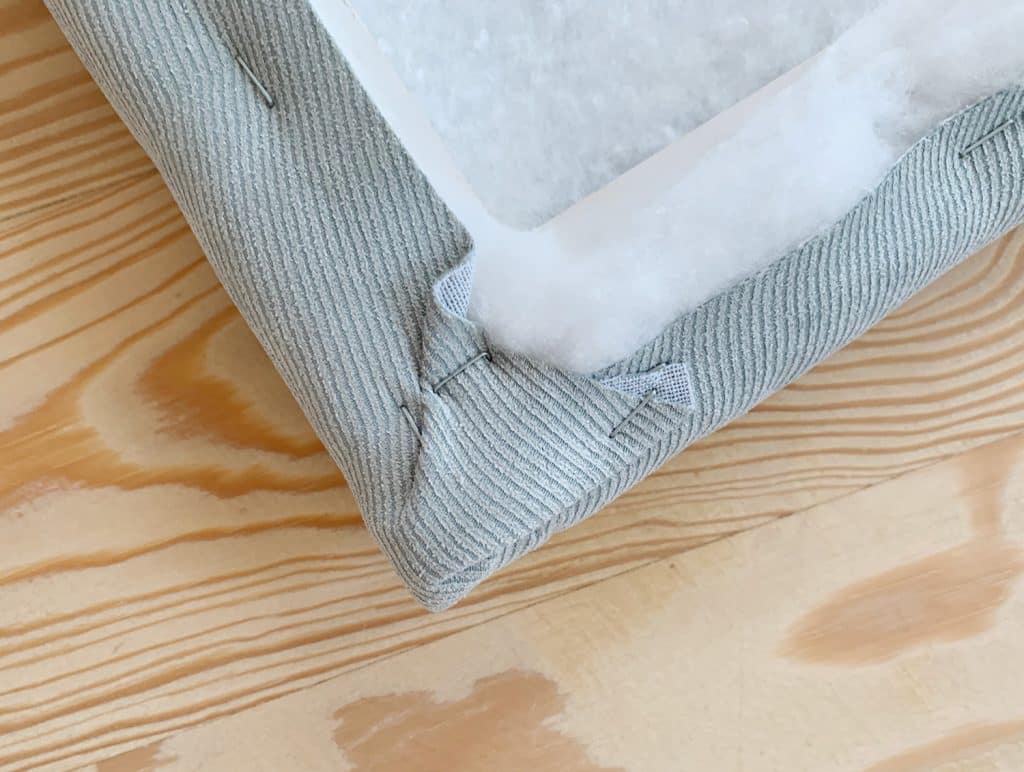
TIP: Wrap Your Corners Like A Present!
Whenever we share a project like this, people are always curious about how to do the corners. They can be tricky, but here’s a general idea of how we get them to look tidy. We pull the corners together, trim off the excess and then staple the rest down, trying to keep it as flat as possible.
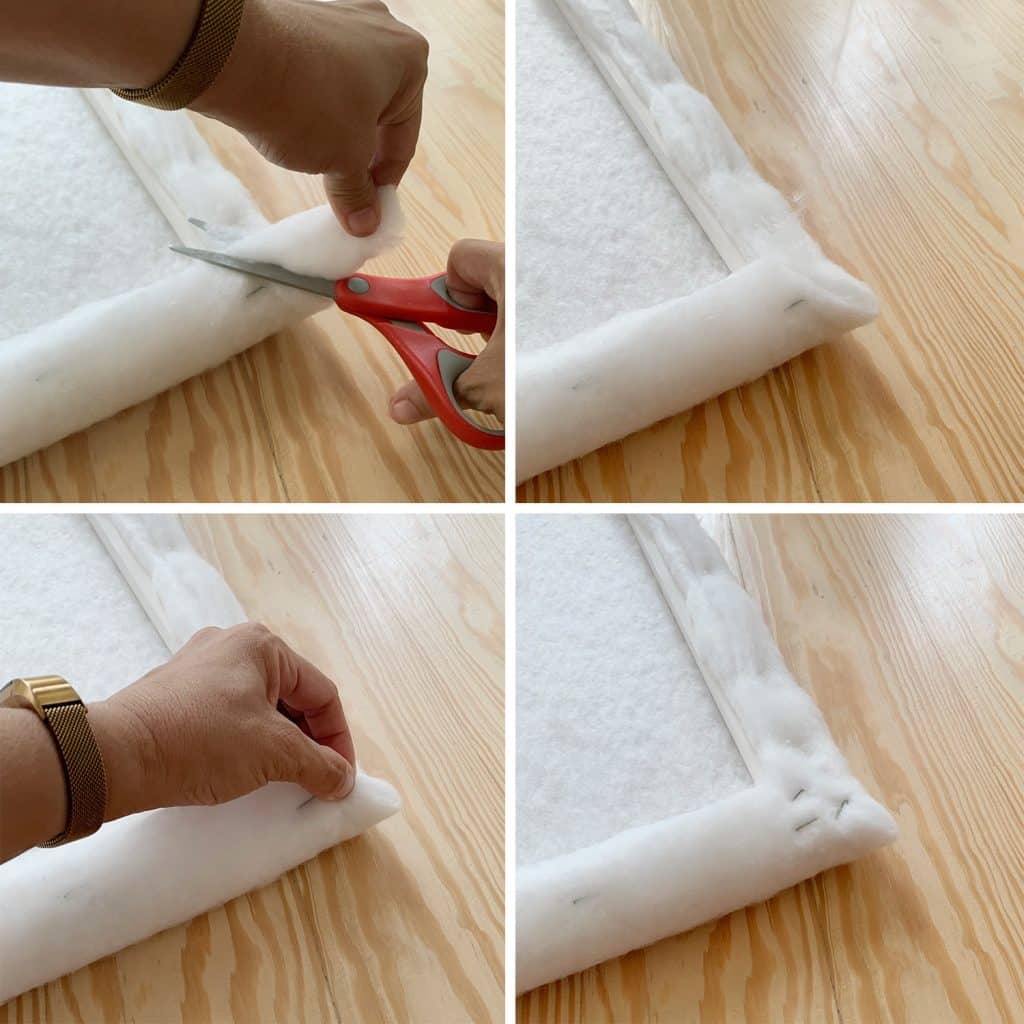
It’s not important that they look good, they just shouldn’t be too bulky. This is the back of the headboard, so extra bulk will make it hang less flush to the wall.
Alternate Idea: Glue on Upholstery Foam
If you want an even cushier headboard, try using upholstery foam instead of batting. You may need to add more cross braces to your frame to keep it from sinking through the slats. But it’s fairly easy to adhere to wood using craft glue. Just make sure you buy enough foam to cover your frame.
Step 3: Repeat With Your Fabric
Then you just repeat the process with your fabric. If you’re choosing a fabric with a pattern that needs to stay aligned or level (like a vertical stripe) you’ll need to be mindful of your placement. And if the fabric has a lot of stretch you need to be careful about pulling it evenly around your frame as you staple. Otherwise, you might warp your pattern or create accidental darts. Usually if you choose “upholstery fabric” you shouldn’t have much trouble with stretching.
Again, the corners can be tricky, so just be patient as you figure out the best way to staple it so you get your desired look from the front and side. It’s not unusual for Sherry to fold it around a corner, hold it there without stapling, and flip it over to check that she likes how it looks from the front before securing it with a few staples.
If you are doing a wraparound daybed style headboard like us, just repeat Steps 1 – 3 for the other sides of your bed. Here you can see the longer headboard we made for the back wall of our son’s bed.
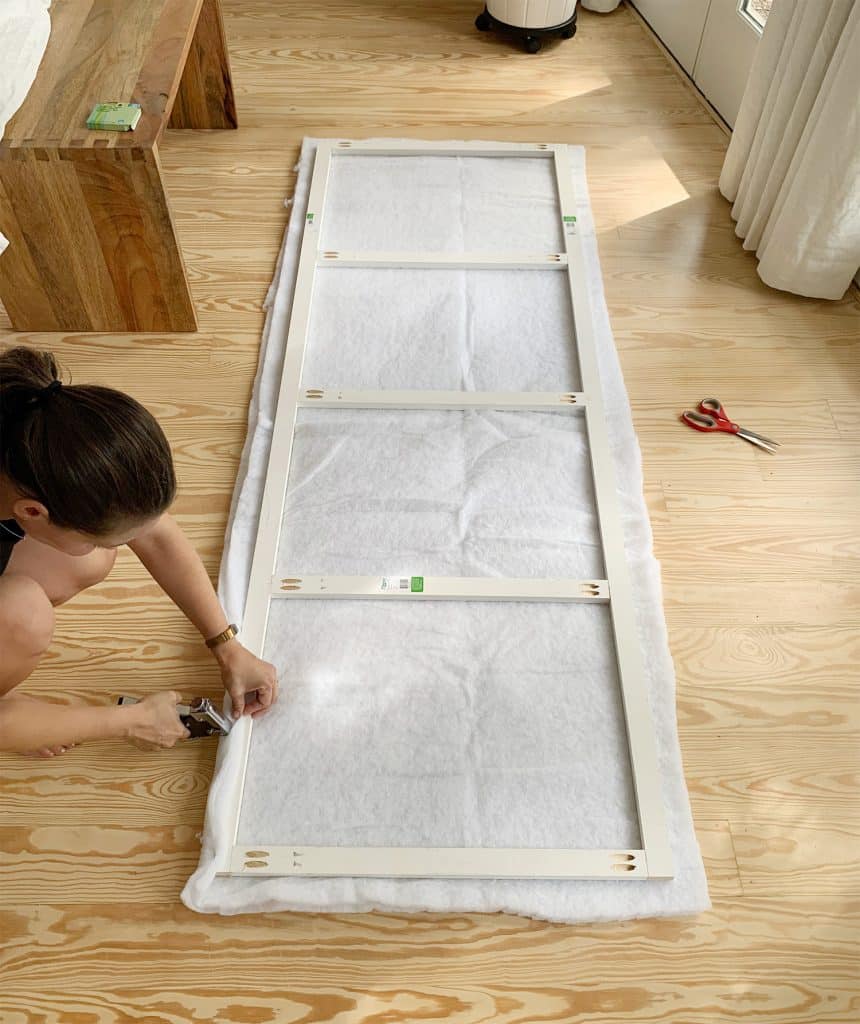
Since it was much longer, we added a few more middle supports along the way.
Step 4: Hang Your Headboard On The Wall
Next, hang the headboard on the wall just like you would a picture frame. Heavier headboards typically require hanging with a french cleat (more about that in this post). So bask in the simplicity of this method!
We used our favorite cheap stud finder to locate studs in the wall, then hammered in some long picture hanging nails. You can also use wood screws. Just be sure to use a level to keep your headboard straight. Then you can simply rest the wood frame on the nails or screws.
We didn’t bother securing the two pieces together in the corner – they’re just hung so that they butt up against each other along that seam. And having the mattress wedged against them keeps them fully in place.
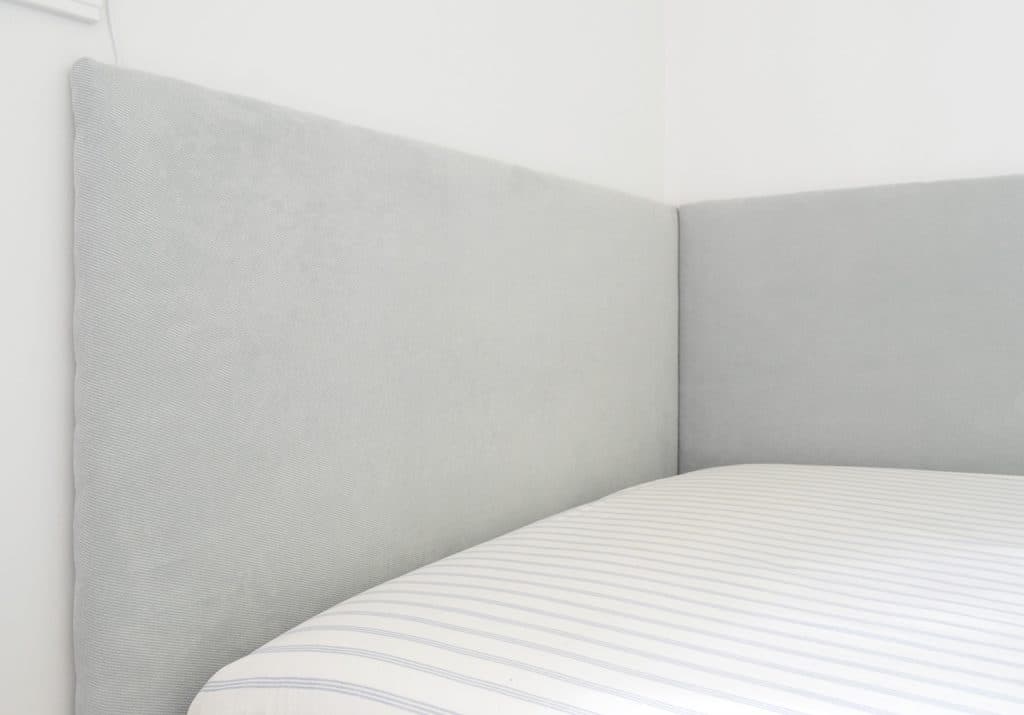
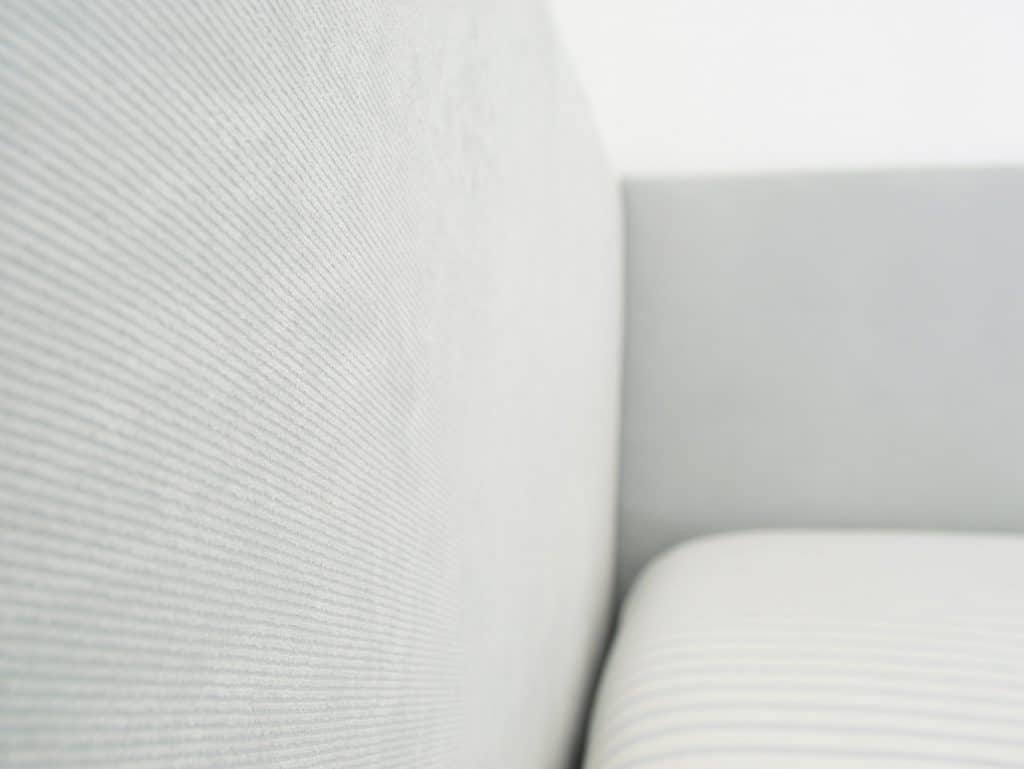
It’s hard to tell in these photos, but the fabric has a subtle diagonal stripe – kinda like corduroy almost. So in person it has a cozy soft feel to it and a nice texture that makes it more interesting than a flat solid sheet of cotton.
We have some other ideas brewing for this bedroom, including some sort of paint, wallpaper, or wall treatment (we’re collecting some ideas to show our son and see which one he wants to go for). So this is just what it looks like about 8 weeks into living here. It’s fun to imagine where we’ll end up.
More DIY Headboard Tutorials
Want more DIY headboard ideas? Check out these other projects we’ve made using the same basic techniques:
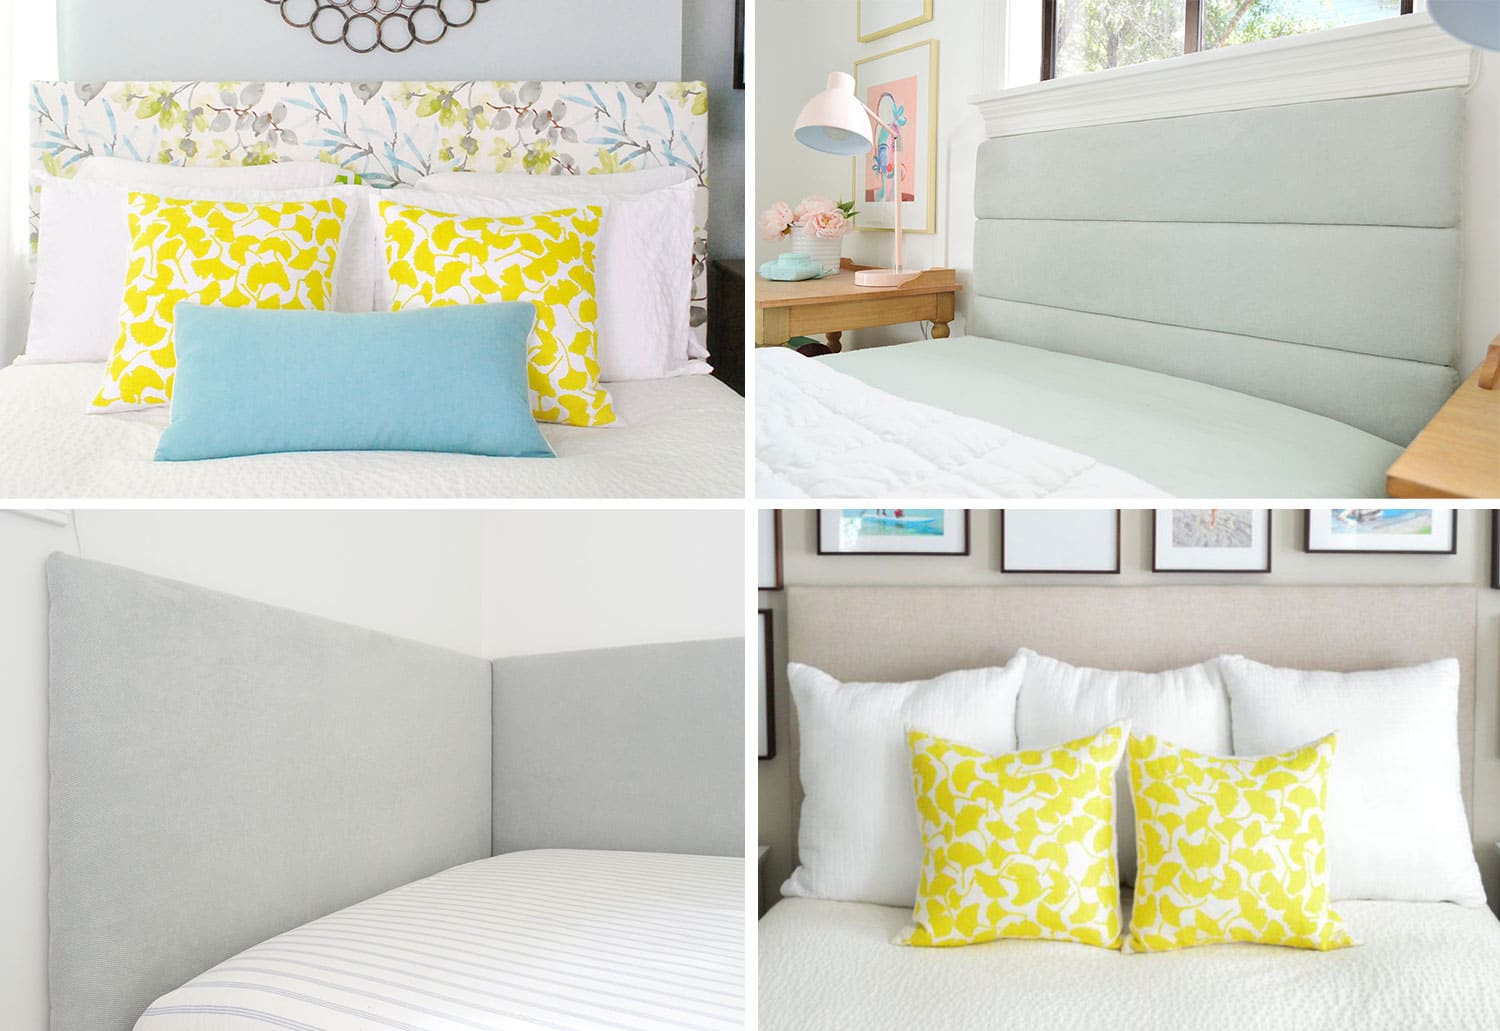
- Adding an upholstered headboard to an existing bed’s headboard
- Making a channel tufted headboard
- Creating a lightweight fabric headboard
P.S. To follow along with our entire reno of this house, you can see every single update we’ve made right here in this FL House archive.
*This post contains affiliate links, so we may earn a small commission when you make a purchase through links on our site at no additional cost to you.
