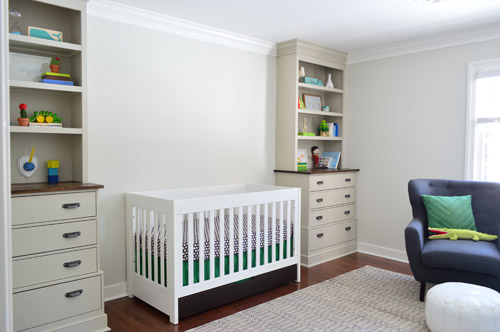
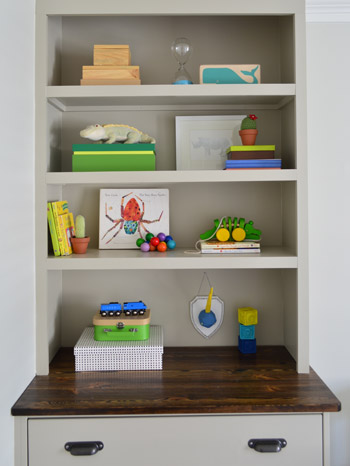
The built-in bookcases in the nursery have officially been filled with board books, toys, stuffed animals, framed prints, and a few other random bobs and bits that I hope our little man will love feasting his eyes (and mouth?) upon. We even created an easy paper mache craft there on the bottom left shelf. Can you spot him?
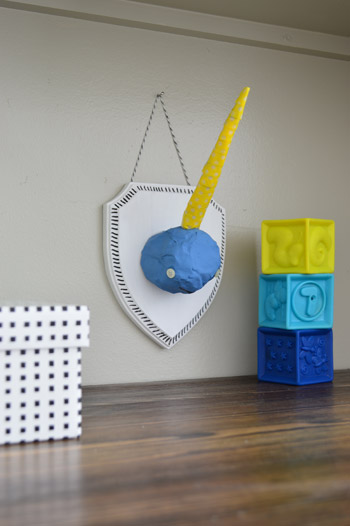
Ladies and gentlemen, allow me to introduce Norman The Narwhal. He’s FAR from a perfect specimen, but it was the sweetest project to do with soon-to-be big sister Clara. I think I love him more for his handmade wonkiness than anything else. Dude has some serious character going on. So let’s file this under “made by a kid with a little help from mom for her baby brother.”
Plus, it’s an easy craft to customize to make whatever animal you want to capture as a cheeky, faux bust display.
How We Made A Paper Mache Narwal Bust
Here was our inspiration (which is nowhere near as wonky, and very charming indeed), and here’s how Clara and I had fun subbing in paper mache for a styrofoam ball, made the horn a different way, used buttons for eyes, etc.
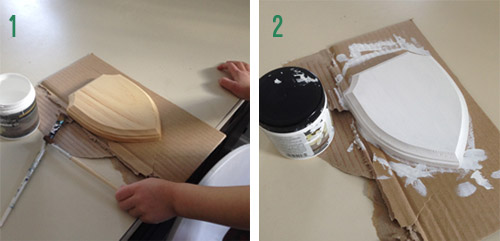
Step 1: Buy or Make Your Wood Plaque
We picked up a small wooden craft plaque from JoAnn for around $3 with a coupon, but you could also cut your own shape out of a piece of wood if you’d prefer.
Step 2: Paint Or Stain Your Plaque
We decided to paint our plaque white using a leftover sample container we had around. This was an easy step for a 3-year-old to help with. Plus, you could choose any color or choose to stain it for a wood grain look.
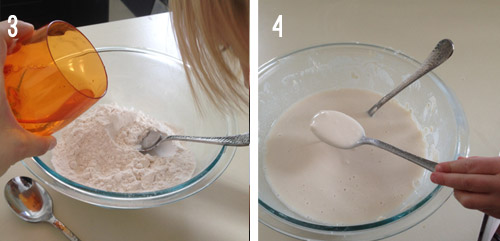
Step 3: Add Your Paper Mache Ingredients
Admittedly it had been a while since we paper-mached anything, but luckily you probably already have the ingredients around the house: it’s just flour and water. Here’s another great paper-mache tutorial if you’d like to see this process on video!
Step 4: Mix Until Smooth
Mix your flour and water in a bowl until you get the consistency of thick soup. We made waaaay too much). Clara LOVED this part, hence the comically large batch. She kept wanting to add more water and more flour and “stir, stir, stir” things up.
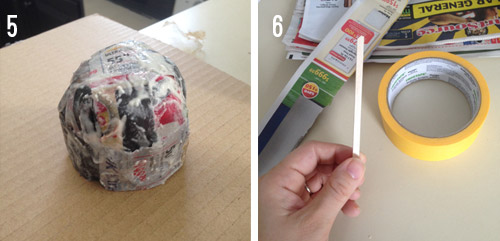
Step 5: Build Your Animal Head
Next, we used some small strips of newspaper dipped in our “soup” to make our narwhal head. Most paper mache crafts have you layer these soggy paper strips over a balloon. You can easily customize the size of your project with a balloon. Plus, it removes easily (just pop it!) when your paper has dried.
We didn’t have a balloon handy so we sort of just crumbled up a ball of paper to build around. It didn’t make for the smoothest finished project, but having a lightweight base that we could leave under the shell did help constructing the narwall head in the following steps. So maybe not having a balloon was a happy accident!
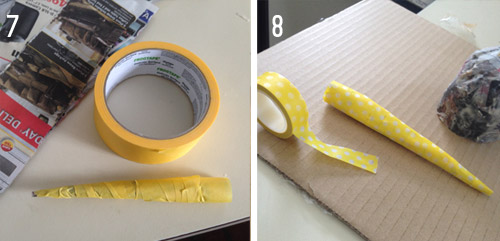
Step 6: Built Your Narwal Tusk
While our paper mache dried, we turnd our attention to the narwal’s tusk. For ours, we found a small wood dowel and trimmed it to about 5″. But a pencil or firm straw would also work!
Step 7: Wrap Tape To Create Your Shape
To create the tapered horn shape of the tusk, we gently coiled some painters tape from the top to the bottom of the dowel, wrapping larger loops as we went. We could’ve used more paper to form a cone under the tape, but we were going for a lightweight tusk so it wouldn’t sag.
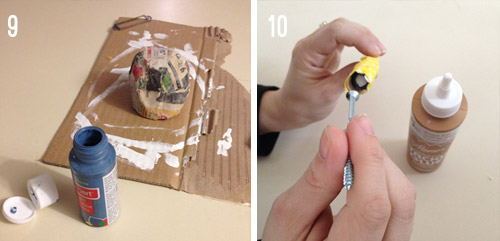
Step 8: Wrap Decorative Tape On The Last Layer
For the final layer of the tusk, we switched to a yellow polka dot washi tape that I had on hand. It’s hard to see in the pictures, but it was a nice way to introduce a little bit of fun pattern. We also coated the tusk in a layer of matte Mod Podge just to lock everything in place.
Step 9: Paint Your Paper Mache Head
While our Mod Podge dried, we paintd our narwal head using some blue craft paint. But again, this is a great chance to customize yours with whatever color suits you!
Step 10: Glue A Screw
In order to put the the tusk to the head, we first used Aileen’s Tacky Glue to glue a long screw to the inside of the dowel of our horn, which we let dry for a nice long time.
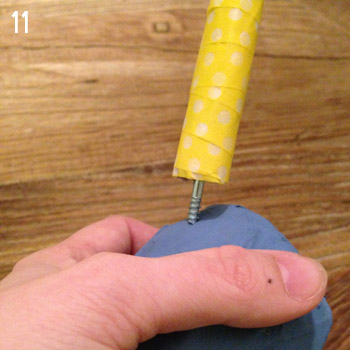
Step 11: Attach The Tusk
Once our narwhal face was dry and the glue for our screw had cured up, we screwws it right in to the paper mache for that horned look. I even made a small pilot hole with our drill to get things started (Clara LOVES anything drill related, so this was a thrilling step for her as well).
Step 12: Add Personality
We glued on some buttons to give our narwal eyes and drew a small smile on with Sharpie, but really anything goes at this point. Give it a bow! Draw freckles! Add a hat! Have fun!
Step 13: Glue To Your Plaque
With the narwal fully constructed, we used more glue to attach the head to our painted plaque from the first step. We also added some dash marks around the border with a paint pen, and added string to the back so it would hang.
This was such a project to involve our daughter with, and we think the final creation is so filled with personality (plus really screams “a 3-year-old helped make this!”).
Over the years I’ve been asked if I think obviously fake creations like these (or a ceramic ram head, or a cardboard deer head) might glorify the act of mounting an actual animal head. I’m sure everyone has different opinions about this (it’s such a highly personal thing) but I’ve thought about it for a while, and I don’t believe faux taxidermy makes any sort of pro-real-taxidermy statement. To me, it’s just like using faux sheepskins in our house instead of real ones, or how people might buy faux fur coats. Another example would be how animal rights activists like Stella McCartney will design things with faux leather (real leather = against her beliefs, but she’ll use the imitation to make a statement that there are great alternatives to the real thing).
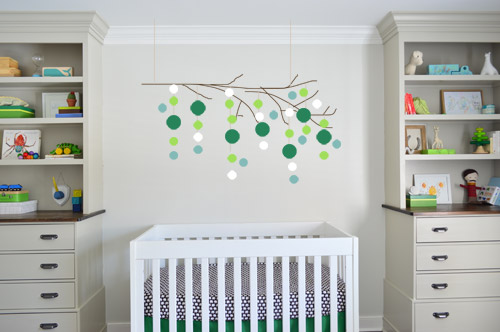
Now I’m excited to start in on some other personality-adding details, like a pair of colorful curtains, and a large-scale mobile for over the crib. This is just some bad photoshop below, but I have an old manzanita branch that I think could be fun with lots of colorful shapes hanging off of it at a ton of different lengths and depths.
So those are next on the list. What are you guys up to when it comes to bookcase-filling and art-making? Anyone else breaking out the paper mache? Clara kept trying to eat it, which was both comical and surprisingly ok (it is made from flour and water).
Psst- To see our nursery progress from the very beginning, here’s the planning and rug-buying post, the dresser-sourcing post, the wall and ceiling painting rundown, the first half of built-in building, the second half of the built-in project, and how we added crown molding and a homemade crib skirt.

Blair says
Hi Sherry, do you have a link to three toned Target box? I loved it.
Blair
YoungHouseLove says
Oh man, it’s really easy to find in stores (it’s on that end aisle with all the colorful Threshold items, and it comes in two sizes) but I can’t find a link online for it for some reason. Apparently there’s a cartwheel coupon for it (that’s a free Target app) so maybe that’ll help you find it?
xo
s
Alicia says
WOW it looks soo good! I would recommend painting the wall where the crib is located into a darker navy blue so that it makes contrast with the white crib and the mobile design you guys are thinking of! :D
YoungHouseLove says
That could be fun! We’re definitely eying that wall and thinking about a few options for it…
xo
s
Erin says
OMG I love the narwhal. Seriously, seriously adorable.
Jen @ The Well Read Fish says
ooo snugglepuppy of mine! everything about you is especially fine!
YoungHouseLove says
BEST BOOK EVER.
xo
s
Jody says
We have a love for alligator toys too as my hubby had one as a child. I already have the wooden pull along toy just like yours on my wish list. I would LOVE if you could share the brand or where you found the stacking tree toy, it’s soooo cool, one of the best I’ve seen out there. the room looks darling, no surprise! Congrats on your little boy to arrive soon.
YoungHouseLove says
That’s by Plan Toys (from amazon.com). Hope it helps!
xo
s
Sam says
Cuteness Overload! The creativity of this baby room was filled with love and fun. That unicorn is the best of them all.
Miranda C says
https://www.etsy.com/listing/87703467/narwhal-print-6×12-whale-art-whimsical?ref=sr_gallery_34&ga_search_type=all&ga_view_type=gallery
I saw this browsing through this etsy shop and immediately thought of the barnacles nursery! We have an octonauts lover in the house, too!
YoungHouseLove says
Cute!!
xo
s