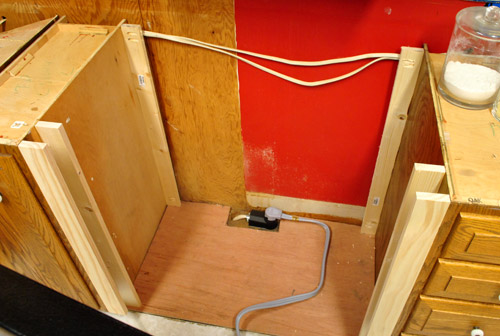
Some aspects of this kitchen remodel are certainly less exciting than others – especially when compared to having just opened the wall up. But alas, these things must be done. Including a few that we wanted to accomplish before the countertop guy came to template for our new counters (that’s something we want done accurately, after all).
First on our list of little things was filling the gaps next to our stove.
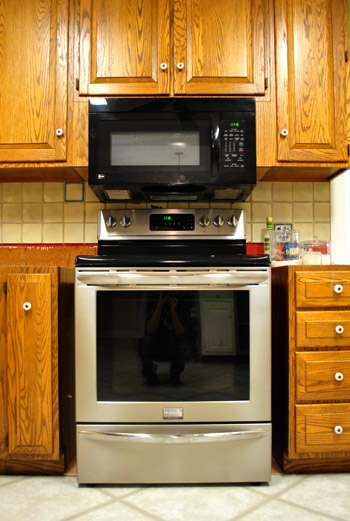
The base cabinet that we removed was 36″ wide, but the stove is only about 30″ leaving a little under 3″ of nothingness on either side. Since you can’t squeeze much function into two and 3/4ths inches (almost every pull-out drawer was 3″ or more), we decided just to put in filler pieces of wood. Oh and for anyone wondering why we didn’t scoot the stove to one side and add a wider pull out drawer, if we didn’t leave the stove centered the hood would be off-center, which would mean widening the ceiling hole (= drama). Plus none of the thin slide out drawers had doors that looked like our existing ones anyway, so it was just not worth the money/trouble. And although we thought about some sort of ornate leg or braided detail, we ultimately decided that we wanted other things like the wall of penny tile backsplash to be the star (along with items on our floating shelves), so two thin and basic filler pieces of wood were our final pick.
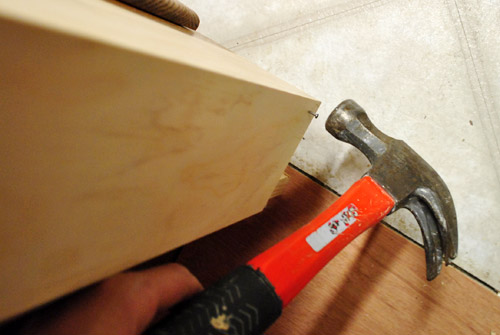
I grabbed a few pine “project boards” at Lowe’s, cut them to size, and drilled some pilot holes with my Kreg jig before screwing them carefully into place.

Obviously we needed the fillers at the front to visually fill the gap, but we also decided to put one at the back in case the counter guy needed it for support:
In total, each side had three separate filler pieces. We probably could’ve gotten away with two, but it’s not like the boards were breaking the bank (I spent about $11 total on this entire project – which is at least $100 cheaper than some sort of pull out dealie).
Here are both sides done (ready for the stove to slide back into place):
Not bad, eh? Once the counters are on and the cabinets are primed and painted no one will even notice them. Especially since many of the other base cabinets in our kitchen already have fillers in the 2.5″ range.
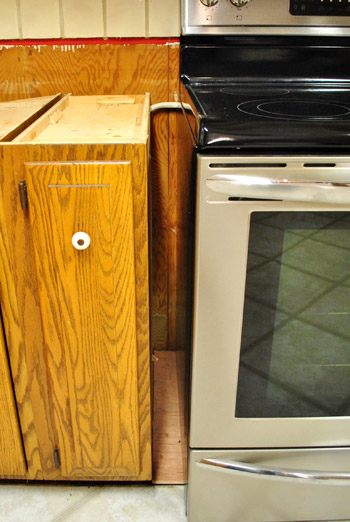
Then we stepped a little closer and put on our Picky Pants and we saw that there was still a noticeable gap. Guess we’ve gotta go buy a bigger stove…
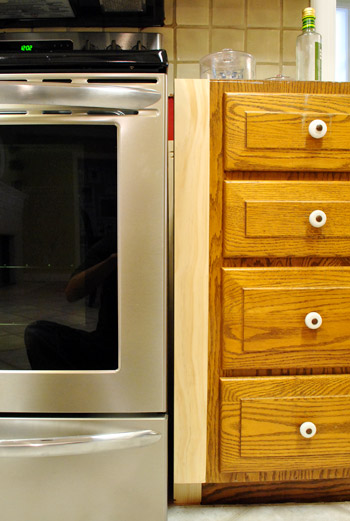
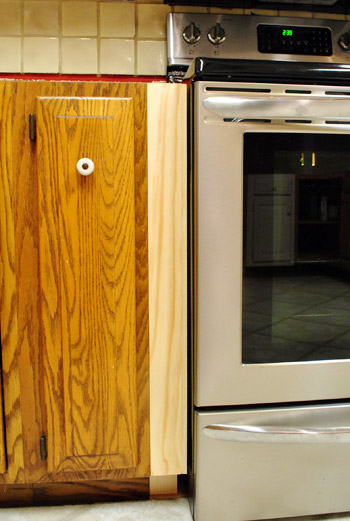
Kidding. Obviously I just needed to add one more sliver of filler wood. The gap was just over 1/4 of an inch, and I knew we could do better. So I headed back out to Lowe’s a grabbed a couple of these.
It’s a 3/8″ thick project board that fit perfectly into my slightly-too-big gap, thank goodness (though they added $4 to my total budget, now breaking the bank at $15). So I nailed those two suckers in place, being super sensitive to keeping them flush with my other filler piece along the front.
Here’s what they looked like on both sides. I didn’t bother putting them any further than the first two panels since they were strictly aesthetic.
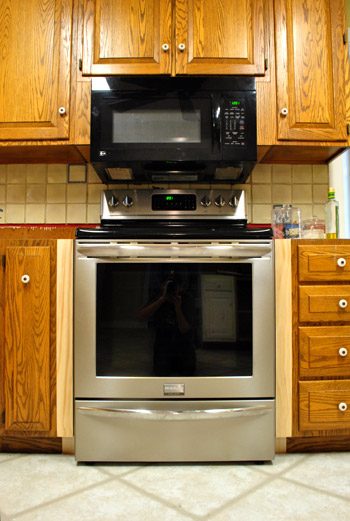
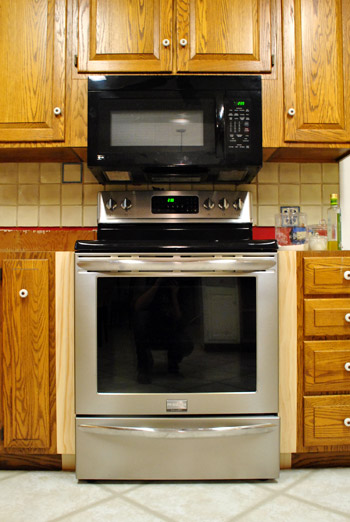
Then we just slid the stove back in. MUCH better. I know it’s hard to tell in the pic below, but trust us that it’s just about as snug as we’d ever want it (any closer it would be hard to get the stove in and out). Oh and once we demo the tile from behind the stove it’ll be able to push back against the wall a bit more for a more flush look. And once we add the toe kick across the front of all the cabinets the bottom will be seamless too.
So with that done…
… our next little task was over on the peninsula.
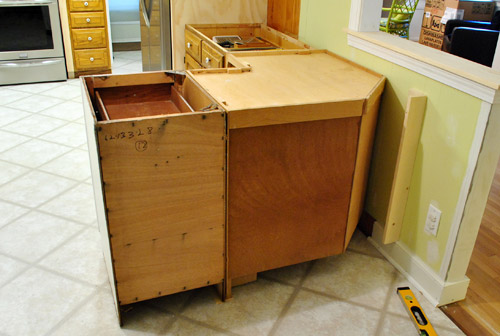
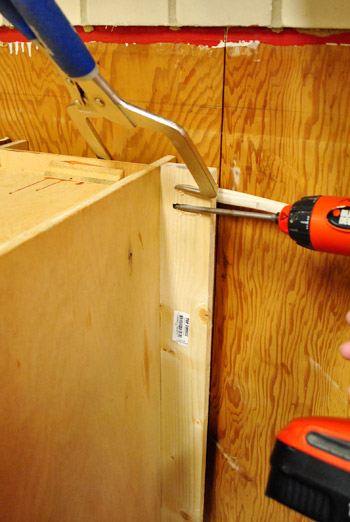
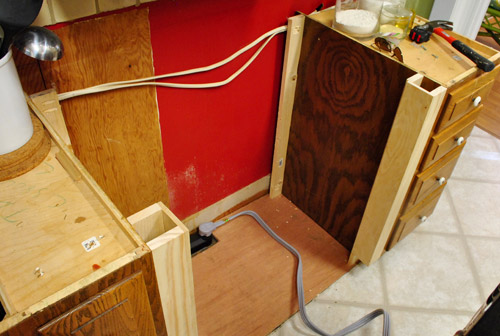
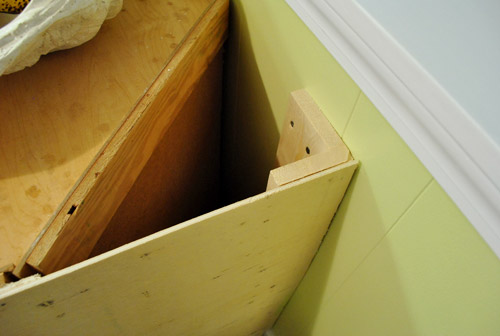
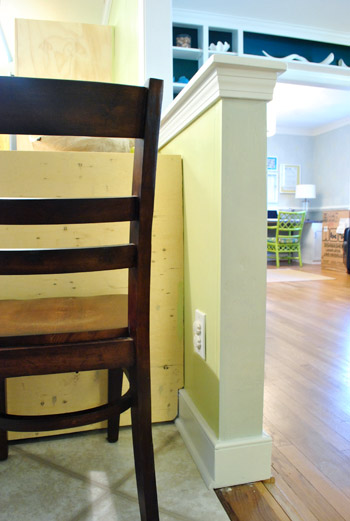
Since we don’t want the guy templating the counters to think we want an angled corner or anything, we wanted to attach a flat panel on the back of the entire peninsula. It’s something we’d have to do eventually, so why not tackle it while we wait for counters? You can see in the photo above that I had already attached a little corner piece to anchor the panel against the half wall. Here it is a little closer:
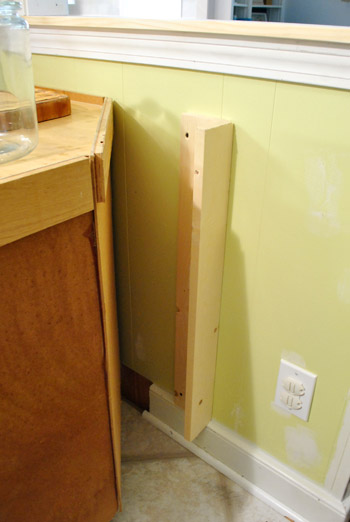
It’s basically just two scrap pieces of wood that I screwed together at a 90-degree angle using my jig. Then I screwed it into the wall so that the flat edge would be flush with the back of the cabinets. Then I was ready to attach my plywood panel.
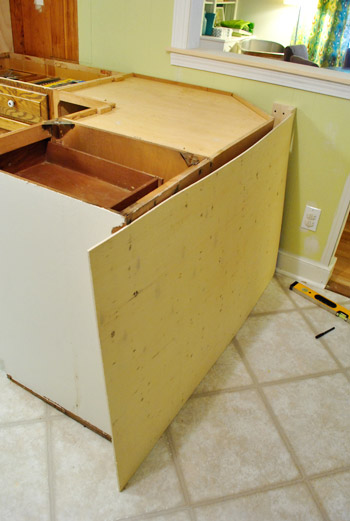
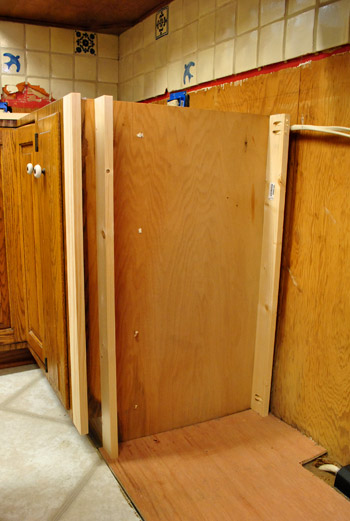
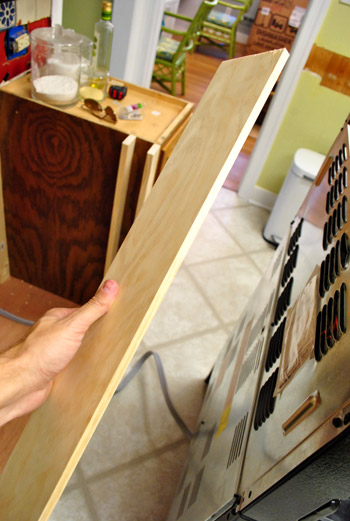
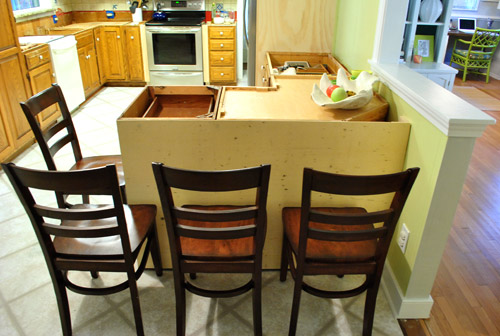
I actually bought this piece of wood back when I got the plywood for our refrigerator built-in so I could transport it in my rented Lowe’s truck (how’s that for thinking ahead!). It’s just a thin piece of “utility plywood” that the Lowe’s guy recommended. It was a whopping $9. They had cut it to size for me in the wood cutting area, but because we had later switched from a 21″ end cabinet to an 18″ end cabinet I had 3″ of overhang that I had to cut off with my jigsaw.
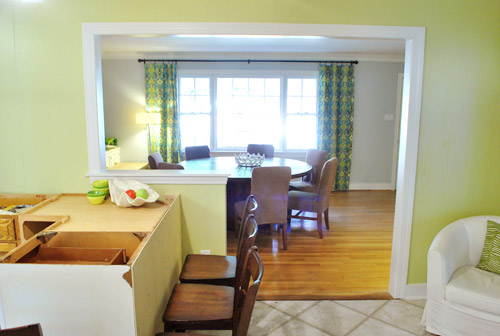
So here it is all cut and nailed into place:
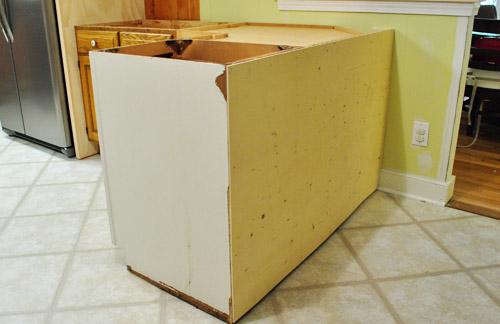
Not very exciting looking, we know. Eventually we’ll be adding trim – baseboards, corner pieces and maybe even a three paneled board and batten look. Not sure yet. Oh, and it will of course get painted to match the cabinets. But for now it accomplishes the goal of squaring off that corner for the countertop measuring festivities (it’ll have a 12″ overhang of Corian on two sides to accommodate four stools).
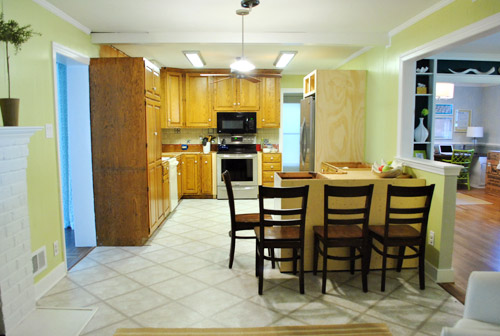
Can you sort of start to see how it’s coming together? Of course the chairs are placeholder and we hope to get some lighter looking stools (maybe made of acrylic for a nice airy feeling).
Oh, and do you notice the other thing that we did in the picture above? I’ll give you a hint. It starts with a “p” and ends with “aint touch ups.”
Obviously paint was not a critical step for the counter templating process, but it was more for our sanity (and we had it all on hand so it was free). There’s still lots to be painted (um, hello cabinets – but those have to wait until we get our counters in to avoid dings). So we got busy painting the raw trim, drywall, and paneling leftover from the pantry/fridge shuffle and wall opening. It really does make our exceedingly unfinished kitchen look a smidge less unfinished.
You’ll notice that we opted to paint the inside edge of the half wall light grey like the dining room. We figured it’d be weird to carry the grellow that’s on the kitchen paneling over since the side of the half-wall is drywall (like the light gray dining room). The soft grey is much more subtle and almost looks white like the rest of the door jamb, so it works nicely.
Oh and don’t mind the drip on the “temporary threshold.” That’s actually just a piece of paneling that we had leftover from the wall opening project that we cut down, flipped painted-side-down, and nailed in to bridge the gap that was created by removing the wall. It’ll eventually get covered with cork and we’ll add a very small threshold to join the cork to the original hardwood (just like we did in our first house where the original hardwoods met the new ones that we added to half of the house).
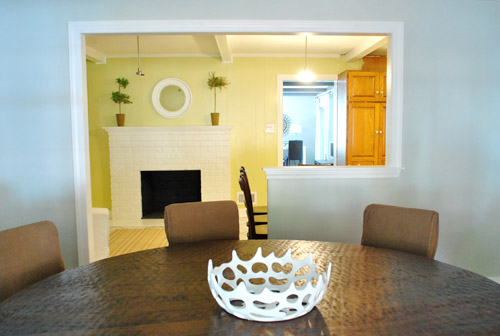
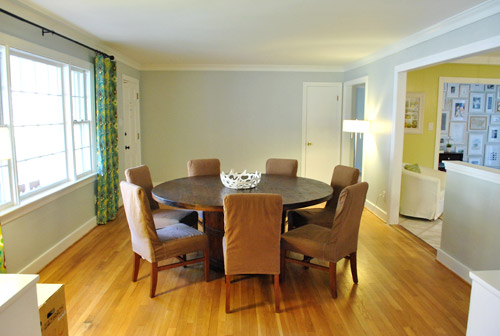
Now here are a bunch of “after painting” pictures of the kitchen and dining room (since it’s the closest thing we’ll have to a polished after for at least a few months). But ignore the two oddly placed floor lamps in the dining room (we can’t wait to get a big chandelier for over the dining table) along with the new microwave box sitting near the built ins (the new dishwasher box is hanging out in the office until install time).

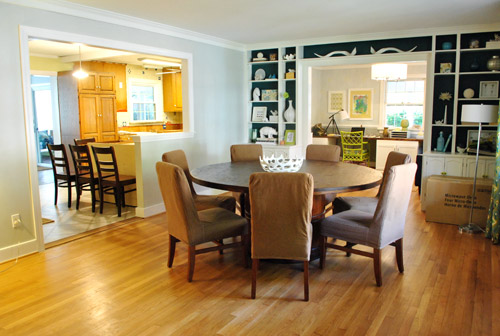
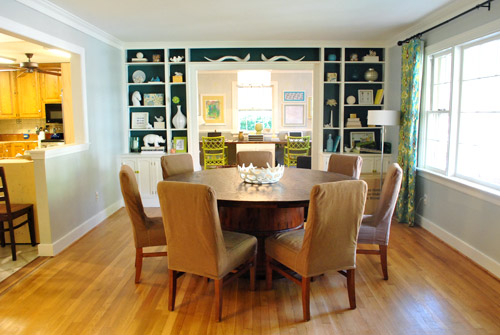
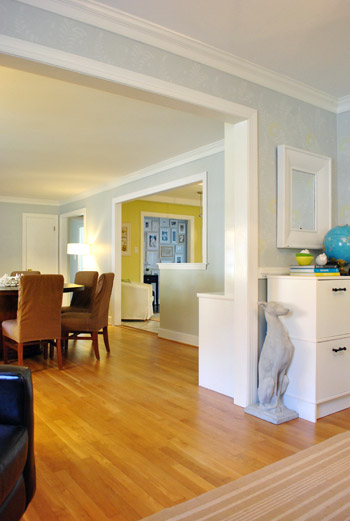
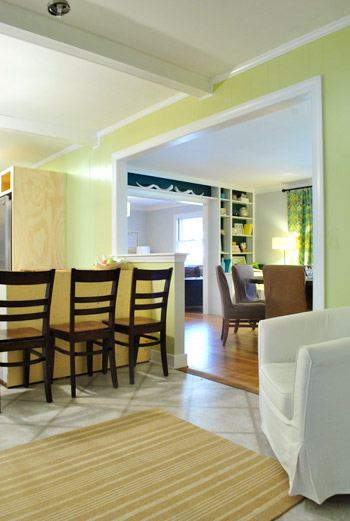
Oh, and although it’s not the most glamorous angle, a few folks requested a view from the living room, so here it is. We love that we can see the giant picture window from the back of the house. Widening this doorway would definitely be a nice change, but having widened a former-exterior brick wall in our first house we know it’s a messy and not necessarily easy job (this used to be the back of our house before they added an addition, which means it’s hugely load bearing and could be a big ol’ can of worms). So for now it’s on our “maybe someday list.” Although sometimes we think we’ll appreciate the privacy in the living room since it’s not a big wide-open straight shot from the front window to the back of the house.
Wow, that was a lot of pictures for a post about little things like filling gaps around the stove, nailing a panel to the peninsula, and doing some paint touch ups. I counted an even 30 photos. Guess we’ve been a bit trigger happy with the camera lately. Must have something to do with that glorious new doorway of ours. And yes, we still walk into the kitchen and grin at it like fools.
What little updates or small progress have you made on projects around your house? Any last minute tasks that you’re trying to bang out before this weekend or Thanksgiving?
Psst- We announced this week’s giveaway winner. Click here to see if it’s you.

Amanda @ Our Humble A{Bowe}d says
Looking much better! You still have a lot of work, but at least the kitchen is looking as finished as possible for the mean time. :) Quick question though. Why not paint the lower portion of the half wall white like the rest of the door frame? Not saying it looks bad in gray, just curious. :) We had a kind of similar issue with our range and wanting it to look tighter. Only our issue was vertically challenged. Our cabinets and counters are higher than average, so we’ll have to find some feet to put on our range instead of the standard legs. http://ourhumbleabowed.wordpress.com/2011/11/01/feeling-hot-hot-hot/
YoungHouseLove says
We figure that door jambs (areas of wood with trim on either side) are white in our house. But all drywalled walls are painted the color of the room they’re in or connected to. So we opted to treat that like a wrap-around-wall and not like a door jamb since there’s not trim on either side. Basically we thought three colors on the half-wall might be more odd and interruptive than two. The gray is so subtle it sort of looks like white anyway so it’s not very noticeable at all. Hope that makes sense!
xo,
s
Annie D says
I have to be honest…when you guys talked about opening up the space, I was a little worried. I didn’t think it would look good or flow, but I am eating my words right now. I love the way it has opened up and made the area look bigger! Can’t wait to see it all finished! I can’t wait to buy my first home so I can “borrow” some of the ideas you guys have!!
weirdfishes says
Looking good! All the little things make such a difference hey! The opening looks like it was always that way : ) Can’t wait to see it all completed!
Ali says
With each post, I’m incredibly amazed at your progress and ability to transform your kitchen into something beautiful! Keep it up! I love reading your posts! :)
Amy @ Lovely Nest says
It’s looking great! I’ve been working on updating our master bedroom with new bedding, curtains, etc… I’m trying to get it mostly finished before the holidays so it doesn’t look like a hodgepodge of things in there!
Lindsey @ arkadian belle woods says
Wow! The kitchen is looking awesome! I love seeing the progress looks freaking gorgeous!
PS-Sherry, I think you might appreciate my awkwardness yesterday when I met Grace @ Anthro. So awkwardly painful, I posted about it….eek.
YoungHouseLove says
Aw I love that you brought up Uncrustables! We got to chat with her at Plant Zero for a while and you’d be amazed at all the random stuff we covered! She’s so much fun! Girl crush = me.
xo,
s
Lindsey @ arkadian belle woods says
Haha! I knew you’d appreciate that! I so wish I could’ve made it to Plant Zero….I would’ve probably died if I saw you and John. Seriously, Grace + Lindsey = awkward but Sherry + John + Lindsey = a hot mess. Lol. She is cute as a button!
YoungHouseLove says
You’re sweet. I bet we’ll run into each other and get to be awkward hot messes together someday!
xo,
s
Katy says
Wow, I love seeing all the little touches that make such a difference! I will definitely have to remember these for any kitchen projects I have later. I spent my time installing sconces as bedside tables for my bedroom. Not a lot of space but still needed to somewhere to set stuff! http://thefirstapartment.blogspot.com/2011/11/50-dollar-fix-bedside-tables.html
can’t wait to see the counters!
~Katy
Andrea says
it’s coming together so well! you guys have such a great eye for design =]
Jessi E says
It’s all really starting to come together and look great! I can’t wait to see the finish product-but I love how you’re “real time blogging”. Great job and congrats!
Stephanie says
Looks wonderful guys! Silly question, but how do you integrate your paint touch-ups for a seamless look? Especially since you put down 3 coats of primer under that grellow. Did you have to sand the area?
YoungHouseLove says
Oh yes, we did some major sanding in some areas where there were cabinets (once we removed them there was a little “rib” of paint build-up that we had to sand smooth. Once we added the primer and paint and feathered it out a bit, it dried looking seamless.
xo,
s
Kati says
I love it! It looks sooo good you guys. I close on a 1965 brick ranch in January & have big plans for it. I would have never considerd an older house had I never found your blog. Thank you guys, you’re truly inspiring!
Emily V. says
I really like how its coming together! It is looking really nice! Can’t wait to see those cabinets painted. : )
Meghan says
LOVE IT! You guys are really putting it all together! Where’d you get the bowl on your dining table? I LOVE it…it’s so pretty just empty! Are you getting different counters for the island? You mentioned granite…?
YoungHouseLove says
Sorry about the granite thing – just fixed it (we were talking about listing our existing granite while John wrote this so the word slipped in but he meant Corian). As for the bowl, it’s from Joss & Main a while back.
xo,
s
Meghan says
Oh gosh, no worries! I was just excited to see the mix!! :)But I’m STILL excited to see the Corian :)
jess says
Great work you guys. You’re really knocking these projects out! We’re trying to wrap up our exterior renovation before the colder weather comes. This weekend we’ll be re-routing gutters, building a “farm house” table, and hanging sheers around our covered patio. Can’t wait to see your progress updated! Love the thoroughness! More pics the better IMO!
YoungHouseLove says
Wow- that’s a lot of stuff! Good luck with everything and feel free to share pics – especially of the sheers and the farm house table!
xo,
s
jess says
Ooo I may share! Our whole house is a “reader re-design” waiting to be discovered!
YoungHouseLove says
Do it!! Haha.
xo,
s
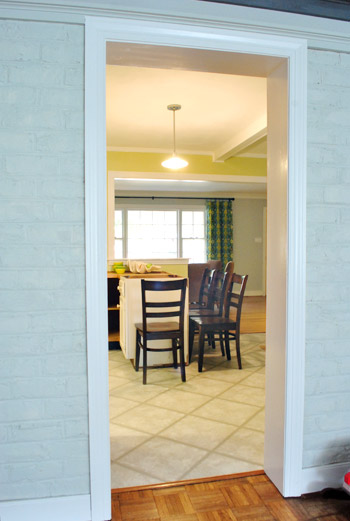
Andrea M. says
In the picture taken with you standing in the dining room looking through the new doorway into the kitchen, the new doorway is a “P” shape, a happy little coincidence!
YoungHouseLove says
Haha- yup, it’s our secret family monogram.
xo,
s
Kim says
Yes, I can see how it’s coming together! It looks great already!!
kristen says
“I know it’s hard to tell in the pic below, but trust us that it’s just about as snug as we’d ever want it (any closer it would be hard to get the stove in and out)”
that’s what she said
YoungHouseLove says
Ha. Nice one.
xo,
s
Sarah says
Looking Great! I think you need to put some time capsule items in the corner space between the plywood and the cabinets in the new pennisula. It would be fun to find that stuff in 100 years.
YoungHouseLove says
LOVE that idea!
xo,
s
Rebecca @This Nest is Best says
Someone did this in the house I grew up in! Wasn’t an entire time capsule, but a letter stuffed into one of the kitchen soffits. It was so exciting to read!
YoungHouseLove says
That’s so much fun!
xo,
s
Shannon @ Bungalow960 says
We have a super old house (1924) and I was super bummed when a lot of the work had been done for us when we moved in. I wanted so badly to find something like a time capsule! But, in our minor renovations we have found all sorts of awesome stuff, like vintage wood peach boxes in the basement. Old houses rock :)
Ashley@AttemptsAtDomestication says
It looks so great! Just touch up painting really does help it look finished! When is the counter guy coming?!?!
And on a Christmas note, my husband wants to know what kind of camera you use? (Hopefully, I’ll be getting one!)
YoungHouseLove says
He’s coming out this afternoon! Wahoo. As for what camera we use, we saved our pennies for a Nikon D3000. Love it so much (although there is a bit of a learning curve, we’re getting there…).
xo,
s
Christa says
I finally painted the grills on my fireplace
(http://controllingcraziness.blogspot.com/2011/11/welcome.html) from gold to black. It is so much nicer. I don’t know what took me so long. I decided to start a blog too and will add other home projects to it. Thanks for the inspiration.
Brandi @ His Shabby Her Chic says
Looks great! I think now that you’ve touched up the paint I can see it coming together more. It’s funny the difference little things can make!
Sheela says
You guys are such great “envisioners”! (I don’t think that’s a word, but maybe we can be word pioneers, like Disney and their “Imagineers”! It’s all looking terrific, and I’m so excited for you all. You are going to have some wonderful times in that fantastic new kitchen.
Christine at Casa-de-Christine says
It’s really coming together! Love the open feel to the house now… everything is just so much brighter and airy feeling. You definitely made the right decision with that doorway!
Janet Gaupp says
It’s really coming along! Can’t wait to see the finished product…I’m sure you can’t either!
Amy says
I’m so jealous. My kitchen is a disaster! I love what you’re doing with yours.
I am painting a platform bed (from Ana White plans) and this weekend I’ll be painting our living room.
Just in time for the in-laws to arrive. Yikes!
YoungHouseLove says
Wahoo! Congrats on the homemade bed and your upcoming painting project! Send pics! I’d love to see it!
xo,
s
Rosanne says
How excited are you!! I am excited and can only imagine how you feel. It looks fantastic.
Bob says
“two and 3/4ths inches”
Otherwise known as 2.75″
You should be as frugal with your words as you are with your money.
JennP says
You should follow your own advice!
heather says
It’s Bob! It’s like a Sasquatch sighting!
Bob says
Well, Jenn, I’m not very frugal with my money so I’m not frugal with my words. I therefore do follow my own advice.
Still proud of yourself for such a witty comment?
Mary says
No one respond to Bob when you see him! He never makes sense. What does being frugal with money have to do with using a few extra words? John and Sherry joke that they’re wordy all the time and clearly don’t even care to respond to his comment. Bob just comes here looking for a fight and if we all ignore him he’ll hopefully get his kicks somewhere else. Oh my gosh, who on earth takes the time to complain about how a blogger uses fractions?
Bob says
ALERT :: IRONY LEVELS THRU THE ROOF :: END ALERT
Andy says
Don’t forget to add a time capsule/renovation letter in a ziplock type bag. I would put it in the peninsula corner hole.
YoungHouseLove says
Love that idea so much!
xo,
s
Andrea @ the yellow cottage says
Yeah, its small, but you’re moving right along, just like these guys (http://www.youtube.com/watch?v=MMR5JVo21wQ) Personally I’m trying to get some yardwork done so that when my grandparents see my house for the first time they won’t judge me for having ratty rosebushes.
YoungHouseLove says
Haha- I love it! A frog and a bear seeing the countryside.
xo,
s
heather says
Nice! We finished painting our kitchen last weekend. It might not look good to anyone else but us, but it’s nicer than what we had. I’m not bothering with decor or the like simply because it’s all being torn down eventually. I loved seeing your wall torn down – I can’t wait to see ours hit the floor too.
http://www.likeacupoftea.com/kitchen-reveal
heather says
…and yes, we’re still missing our corner cabinet. It started falling off one day and I got pissed and took it off. I still have to fix it. Then again, if I fix it, it won’t be a big reminder to rip the rest of the kitchen apart.
Maybe I should just start taking a cabinet door off every month until renovations start.
YoungHouseLove says
Aw man, I bet it’ll all be worth the trouble when you have the kitchen you love someday!
xo,
s
heather says
I know that once it’s over it will be like it never happened because I’ll like my new kitchen so so much. Right now I’m just focusing my attention on my new “office”. I have some fun ideas I’m brewing up right now to display my fabrics since it will be my office/sewing room.
Jessica says
Love the changes! Question – will the new island be the new dining area for everyday? Didn’t know if the booster seat (we have the same one) attaches to counter height stools or not. I’m assuming they’ll have to have backs on them for that.
YoungHouseLove says
Yup, we’ve used it on stools with back at John’s parent’s house so it should be ok (backless wouldn’t work I don’t think, but we want them to have backs so they’re older-kiddo friendly too).
xo,
s
JennP says
You’re doing the counters before the cabinets? I’m not doubting you – my cabinets had to be replaced so there was no need for me to research this step. I would have just assumed that it would work the other way around.
Wouldn’t the risk of splattering the pearly white counters (or possibly having to remove a vital cabinet to properly paint it) be greater than the risk of dinging a cabinet?
YoungHouseLove says
We’ve definitely seen it done both ways and when they installed our last counters there was a lot of jamming and sliding and things needed to be touched up (broke my heart) so this time we’ll just wait until counters are in and tape a dropcloth over the counters. Should be all good (we painted the office after installing the wood desktop by slipcovering it and not a drop of paint got on it, so here’s hoping….)
xo,
s
Whitney says
I love how the opening looks like a giant P from the dining room! Looks fantastic. We just lived through a kitchen remodel so I feel your pain. Best of luck.
Carrie says
It’s looking so good!!!! Will you be putting the cork tile over the existing tile? And I just noticed you got a new dog!!! YAY!
YoungHouseLove says
Oh yes, we have to float the cork tile since the liner under the vinyl is asbestos so we can’t touch/disturb it and covering it is the safest method of dealing with it! As for that dog, he’s my concrete grayhound. I actually have had him for years. Just used to have a ceramic guy too. Sniffle.
xo,
s
Gina says
I was totally going to comment on the “new” dog, too!! So funny. Sherry, just get you a couple of cans of glossy white paint or even a couple of ORB if you want to get fancy and go to town…..new white or ORB “ceramic” dog!
Jen says
I haven’t seen a picture yet of this, and I’m not sure if you have one already in your reserve of photos, but how about taking a picture during a very sunny and bright day, but with the lights off in the kitchen? Then do a comparison of before and after? Of course, I realize your befores might not even include a kitchen shot with the new paint and NO lights on, since it was so dark before.
Really, just curious to see how much daylight filters in back there – would love to see it!
Congratulations on the progress!
YoungHouseLove says
Haha, yes. We couldn’t take photos in the kitchen without lights on before the opening. Even on a sunny day (since there are no windows in there, it didn’t really matter). Wish we had taken a black-hole pic (that’s what it looked like before) for comparison though!
xo,
s
Sara says
This looks incredible! I cannot believe that you still have so much to do – it looks so great already! I know you guys said you expect it to be done in January, but I’m guessing that you’re done before that! :)
YoungHouseLove says
I don’t know… three to four weeks for counters and then we still have cabinet painting, backsplash and open shelves and a range hood to hang, hardware to add, and the whole floor to redo! We’re still aiming to hopefully be done sometime in January. Fingers crossed…
xo,
s
Jennifer says
That is EXACTLY what I was thinking! The way you guys work, I’m surprised it’s not done ;)!! But I guess the holidays might throw a few days of downtime into the timeline for you…at least I hope! You deserve it!
Looks great!!
Devon @ Green House, Good Life says
Okay, when I read “wood-cutting area,” I stopped hearing John’s voice in my head and suddenly heard the Lowe’s announcer lady. You know, when you press the call button and she says, “Assistance requested in the wood-cutting area.”
It is RIDICULOUS how amazingly your kitchen is coming together. I don’t think even you had any idea how much truth there was in your statement that you had found your “perfectly imperfect house.” Even your (if I may say it) ugly kitchen had all the right pieces; they just needed to be rearranged, painted, etc.
YoungHouseLove says
Haha – I always say say “Who is Responding? Wood Cutting Area.” when we push that button. But now ours doesn’t say “who is responding” now- and it makes me sad. Hahaha.
xo,
s
Tessa says
I was in Kohls the other weekend and the female automated announcer kept saying “boys, please, boys” !!!!
YoungHouseLove says
Haha- I would have been laughing like a fifth grader.
xo,
s
melody says
I am amazed! Your house is really coming together so nicely! The coolest thing about you guys is that you actually get things done.
Anne says
Things are really coming along!
I cannot wait for you all to paint the cabinets and get rid of the eyes. It is going to make such a HUGE difference especially since all the paneling is now grellow. So you all doing some painting this weekend?
Oh and happy belated 30th, John!
YoungHouseLove says
Can’t paint the cabinets until the counters are in (when they installed them in our last house they were such a tight fit they scraped some cabinets and it broke my heart- so I’ve learned to wait). So painting those cabs is still probably a month off. Can’t wait though!
xo,
s
Anne says
Oh that is totally understandable. Chipping paint makes me cringe and then I get angry. Probably a good idea to wait.
It is going to be rewarding no matter when it gets done.
Regan @ RenovatingRothenbergers says
I get so excited to read about your changes everyday! The progress looks awesome and I love how attentive you are to the details :)
amyks says
It already looks so great, the finished room is going to be so amazing. I admire your problem solving and your DIY spirit. We did a total gut job, and rebuild of our house. We didn’t move in until it was nearly done and although my husband “GC’d” the job and he’s not a contractor. We painstakingly picked out all the finishes inside and out, but there is no way we could have done even a fraction of it ourselves! I am so impressed and inspired by you guys!
Trina says
I spent last weekend scraping out all the old grout from our shower walls & bathroom vanity counter and then re-grouting all of the above. Boy! What a job that was!! But it looks soooo much better so it was all worth it! Today is touch up day & the day I seal it all up. Then we have to put our shower door/walls back up and we’ll be back in bathroom business! Thanks for the great grouting tutorial, it was a BIG help as this was the first time I’ve ever attempted a project like this. :-)
YoungHouseLove says
Wahooo! That’s such a big project but such a great payoff! Congrats on your brandy new shower and counter!
xo,
s
Rachel Tatem says
It’s coming along so quickly! Congrats. Looking great. The stove match ups look perfect too!
Casey says
Wow, John! You can even see in the photos where you had to cut the plywood around the baseboards. Those little finishing details make things look so custom! When you do your final budget breakdown people are going to be AMAZED! PS: Is there plum in the curtains? I think the dyed slipcovers would look awesome plum (but I bet you picked the brown because it’s a good way to let your incredible curtains and punchy torquoise built ins steal the show!)
YoungHouseLove says
There’s no plum in the curtains but plum would definitely “go” in there! I’ve actually been debating overdying them some rich deep color (like dark plum, hahah). Someday!
xo,
s
Kelly says
I LOVE this suggestion from Casey! The brown slipcovers are literally the only thing I don’t “get” in the space- everything else is so well thought out and gorgeous! I think dying them a color that relates to the greys & jewel tones in the colors & textiles would tie everything together beautifully! :)
YoungHouseLove says
It’s definitely something we’ve chatted about doing down the line! Just concentrating on the kitchen for the time being! Someday…
xo,
s
NYer says
that’s funny, because in my mind’s eye, I always picture your slipcovers as already being plum or eggplant and then, when I see a photo, I’m startled that they’re not!
Your kitchen looks so very inviting. I’m loving following your progress!
Maureen @ This (Kinda) Old House says
All the little things add up! Everything is really starting to look a lot more polished, and the opening you guys made just looks like it has always been a part of the house. Can’t wait for more pics!!!
Pip says
I love the eye for detail that you both have – I would have a huge debate with my hubs re: touching up as you go. Those remnant patches of red paint make me flinch – what sort of gory 70s nightmare was that?!
I was strangely taken with the nice view of your happy office chairs when you’re sitting peninsula-side. can imagine breakfast convos across the rooms.
YoungHouseLove says
Haha, yes- that red backsplash paint is really something! Especially when you think about a room full of dark wood paneling and wood cabinets. It must have been a very brown and red room. Haha. As for the new opening, it’s amazing how many cross-views and cross-conversations we can have now. It’s like a whole new place!
xo,
s
Amanda says
Hope all is set for you guys to get your counters in soon! I’m sure it will be nice to have an actual counter top to work on, since it would appear you’re now working off of the indented tops of your cabinets which has to be a bit awk.
Just a quick question, though. What are you going to do about the laminate flooring below some of your cabinets (like the ones you used to create the peninsula)? I noticed that your original cabinets didn’t have that flooring under them, so wouldn’t it create some kind of height imbalance? Or are you going to have to pull the peninsula cabinets out when you go to install your flooring, to rip up the old?
YoungHouseLove says
The laminate flooring actually does go under all the cabinets in the room (the kitchen was redone in the 80s so it was gutted and the floor was put down and the cabinets were set on top of it). It’s just the quarter-round that makes it look like it was added after. So since everything is on the same level (over them) and there’s asbestos lining under the tile, we’ll be floating our cork on top of the tile and not under the peninsula or the original cabinets- so everything will still be the same height/level. Once we add quarter round and baseboard no one will know that the cork doesn’t go under the entire floor!
xo,
s
Amanda says
Ooohh, yeah definitely don’t want to mess with the asbestos! That makes much more sense. Safety first!
Carley says
Looking great guys! You have such great vision. Opening that doorway was such a fantastic idea. I’m really starting to see where you are taking things and I think it’s going to be beautiful.
Katie says
I feel as though I am renovating my own kitchen, though without all the work and headaches. Cannot wait to see the finished project! I love the opening.
Kristen @ Popcorn on the Stove says
I love the way the opening looks! Are you guys going to mostly be eating in the dining room now and keep that lounge chair in the kitchen??
YoungHouseLove says
We’re planning to eat most casual meals at the peninsula once it’s done. But lately we’ve been using the dining table (it’s just a few steps from the kitchen) and love that too (lots of space to spread out – hahah). We just thought adding another table in the corner of the kitchen plus having the peninsula and a table in the dining room was too much for us!
xo,
s