It’s no secret that I love giving various paint treatments a try – like stenciling a pillow, two toning a chair, painting patterns on baskets, or even tracing raindrops right onto the wall – and I’ve been excited to share this one. Some of you eagle-eyes even noticed it in the background of Friday’s post and asked for details.
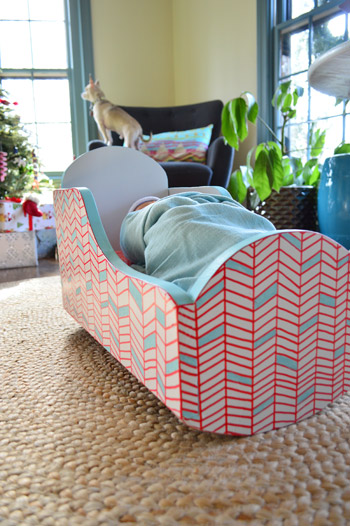
Now that Clara’s thrift store cradle is in heavy rotation (Captain Barnacle is often found being rocked, fed, or changed in there) and Clara has clearly established her love of red, blue, and pink, I used it to test drive a deceptively simple free-handed pattern. It’s probably the most “intricate” pattern I’ve ever freehanded, but it’s just a series of simple steps that anyone can do (it only took me about an hour to do all four sides). And this pattern could be added to the top of a table, the fronts of a dresser, the back of a bookcase, or even just a piece of wood (or canvas) hung on the wall as art.
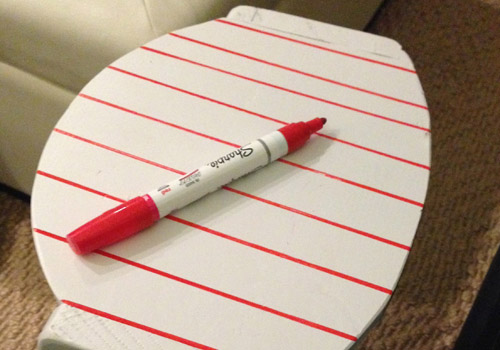
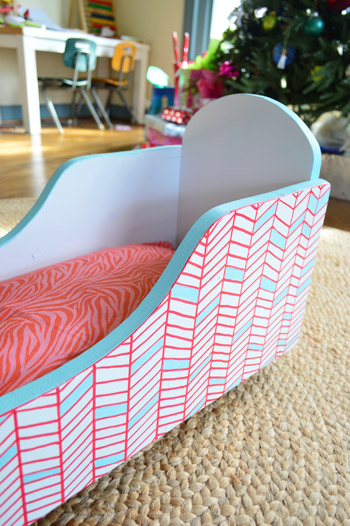
The first thing I did was use a red Sharpie paint pen and a ruler to make a bunch of vertical lines (use a yard stick if your item of furniture is larger). I just eyed these because I didn’t really want them to be perfect – I was going more for the imperfect-by-hand-looking effect.
Then I connected those lines with some free-handed diagonal lines (I didn’t use a ruler or anything for such short lines) that went up in one column, and then went back down in the next column. I started from the left and worked my way across each side of the cradle (from left to right).
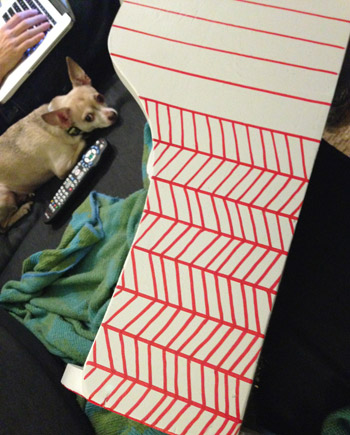
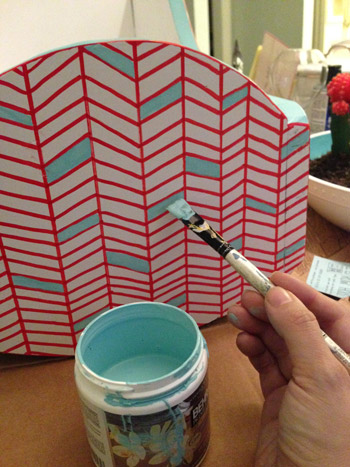
When I had diagonal-lined all of my columns, I was left with a nice red and white pattern on all four sides. Then I went back in and added some blue paint to a few random parallelograms with a small craft brush (it’s the same test pot of paint that I’ve had for years called Embellished Blue by Behr, which I also used for this project, this project, and this project).
I also painted the top lip around the whole thing in solid blue, just to add a little “piping” to the look. Oh and I recovered the green pillow that used to be inside with some pink zebra fabric from my scrap bin (since pink, red, and blue is the color trifecta for Clara).
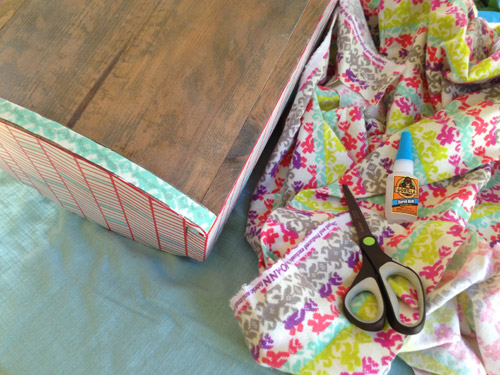
The last step was adding a strip of fleece fabric that I had in my scrap pile to the bottom of each rocker on the underside of the cradle. When it was just bare wood it could scratch things up a little if Clara pushed it across the floor, so “felting” those with strips of fleece fabric (which I just crazy glued in place) did the trick.
I brought it back out for Clara to see on Christmas Eve day, which is also when she also got a few “real” gifts from us (that was a tradition in both of our families growing up). So along with some books and toys, she also got her “re-mixed” cradle.
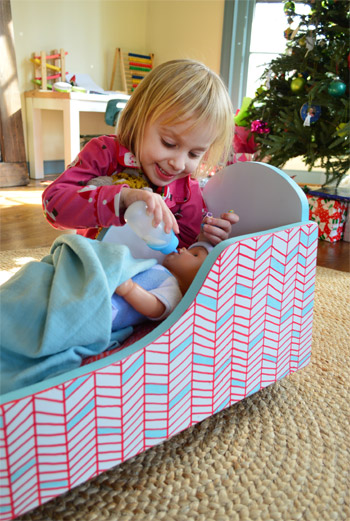
The new pattern didn’t go unnoticed and she even said “I love your paintings!” and wanted to know what each of those shapes were called, which led to her saying the word “parallelogram” about 100 times, and me beaming like a maniac every single time. What is it about kids and five-syllable words? They just sound so dang smart and adorable.
So there you have it: a design that doesn’t call for a printer or a paper cutter or any decals or stencils – just a paint pen and an old test pot of paint. Have you guys ever free-handed an imperfect pattern like this? Was it surprisingly therapeutic? I was totally in the zone.
PS: Wanna give another pattern a try? Check out this DIY herringbone pattern we created on a secondhand desk using paint!

Lori Keith says
I have a thrift store cradle that is calling out for a makeover but it has a very shiny finish. Is there a good way to determine what the finish is? Shellac? Varnish? I don’t know how to prep and paint it since I don’t know what it is. It is signed on the bottom and dated 1993.
YoungHouseLove says
If it’s either type you can sand it to rough it up and then use a spray paint with built in primer like Rustoleum Universal All Surface spray paint and that should hold well, and then you can use a paint pen or a test pot of paint on top of that. Good luck!
xo
s
Cathy says
painting by freehand freaks me out! You make it look so simple and come out looking great.
I might have to give this pattern a try on a canvas!
Charmaine says
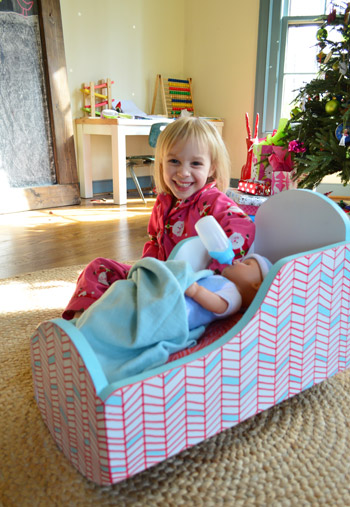
Goodness! I see both of you guys in that last picture! You guys are in trouble when she’s older! So beautiful! :)
Alisha says
Now I want to go get a canvas and do this for my living room! Thanks for the inspiration. I actually love to draw and doodle, so I think it will be really fun.
Brooke says
What a precious idea!! Looks fabulous x
Sara L. says
These colors are perfect. She looks so happy!
Koen @ TownHouseHome says
Just goes to show that you actually only need a little inspiration to create something truly unique, well done!
J Bagley says
Awesome, awesome and more awesomeness. Love the color combo and hand-drawn pattern tutorial.
Apparently I’m “ooooh and look at what’s in the background” girl recently.
I’m on a rug hunt and noticed that lovely, round, natural-fiber looking beauty under the crib. How big is the rug? What’s the material? Is it comfy for kids? Do you remember where you purchased it?
Thanks :)
YoungHouseLove says
That was a Joss & Main find for our last house’s office so we’ve had it for a few years and it’s nice and cozy. It’s not soft like wool, but it’s not scratchy (sort of like braided horse-hair if that makes sense) and it was from Joss & Main. I think it’s 6 x 6 and it’s jute.
xo
s
Sarah @ The Simple Home says
Hey guys! So I just started reading your blog in early June of last year so I sadly did not make your book tour :(, however, a seeing that I’m a fellow Virginian (woot!) we’re not too far apart. So I was wondering, could you do a meet up at like a bookstore or something? I’m sure that other locals would love it as much as I would. Sorry for the sort of stalker-ish sounding question, I would just love to know!
xo,
Sarah
YoungHouseLove says
You’re so sweet! We’re actually going to be at the Richmond Home & Garden show on February 8th and 9th, so we’d love to see you there (we’re doing a chat and book signing, and hope to share more details soon).
xo
s
Jenni Patillo says
So incredibly adorable and chic might I add!! I really want to find my daughter a wooden crib like this!! Was it a goodwill find?
YoungHouseLove says
Thanks Jenni! It came from a thrift store called Love of Jesus here in Richmond!
xo
s
Tony Burdin says
I love this design, on a whole it looks so complicated but in reality it’s pretty simple to put together (if you’re gifted with an artistic flare, unfortunately I’m not.) It also looks great on contract to the neutral carpet too! One of the ladies I work has young children and I know she will take some inspiration from this! Thank you :)
Olivia @ Simply Olivia says
This is such a beautiful pattern, I can’t believe it’s that easy! (No, seriously, I can’t believe it- I’ve been wanting to do something similar for a very long time and was lacking the motivation/inspiration to do so. Thanks to you, I think I’ve found it!) I’m literally going to get the canvas that’s been sitting in a corner for a few months waiting for me to do something with it right now so I can try this out. Thank you for posting! Love love love! xx
Olivia @ simplyoliviablog.blogspot.com
Julia | alivingspace says
I fell in love with this pattern when you posted it the other day, and today I did a slightly simpler version on a planter for a new house plant in my living room! Yours definitely looks better, but I still love how mine turned out, and you were totally right about how easy it is. You can see ours here. Thanks for the inspiration!
YoungHouseLove says
That looks amazing Julia! Thanks so much for sharing the link! I think yours turned out just as good as mine if not better! We’re our own worst critics, I think!
xo
s
Brittany says
Hi there :) Just wanted to drop by and say thanks for the inspiration! I loved your idea of a low-hung mirror in Clara’s room a few weeks ago, and found one just this past weekend that fit the bill. I added the same pattern you used on the cradle and I’m pretty happy with the results :)
Come on over and check it out if you’ve got a minute!
http://prettybittybugs.blogspot.com/2014/01/quick-craft-gold-herringbone-mirror.html
YoungHouseLove says
SO charming! I LOVE how that came out!
xo
s
Lindsey [ourhomegrownspud] says
Oh, so fun!! What is it about herringbone that is awesome?! We did a similar design on a busy board for our daughter Cora’s one year birthday gift. I had more fun painting the herringbone than she probably does using the board.
http://ourhomegrownspud.blogspot.com/2013/05/diy-busy-board.html
YoungHouseLove says
Such a cool project! I love that!
xo
s
Megan Frank says
Is there a name for this pattern? I am thinking of doing this design as an accent wall in the nursery and want to google the web for some tutorials if it’s been done often before, but googling stripes and diagnals hasn’t helped at all. lol. You guide helps but I’m nervous for how it will look on a large scale. Like if I should do the vertical stripes evenly spaced or not… Opinions on this pattern as an accent wall?
YoungHouseLove says
You could try searching “chevron” or “herringbone” for similar patterns. I think it would be an awesome accent wall!
xo
s
Megan Frank says
herrringbone did the trick!
this one shows your style of uneven spaced
http://www.nerdgonedomestic.com/2014/03/how-to-paint-herringbone-accent-wall.html
and this show even spaced
http://buttonsbirdsandbs.blogspot.com/2012/08/id-rather-do-laundry-than-math.html
I’m definitely torn on which way to go but I really appreciate the help!
YoungHouseLove says
So glad it helped!
xo
s