Let’s talk about a not so quick fix. Between patio building and kitchen makeover-ing, Sherry and I like to “treat” ourselves to a few quick and easy projects that keep the ol’ morale up and allow us to catch our breath (so we don’t burn out or throw things at each other). And one fast & easy job that we’ve had planned for a while was swapping out the fixture in our guest bathroom for something more us.
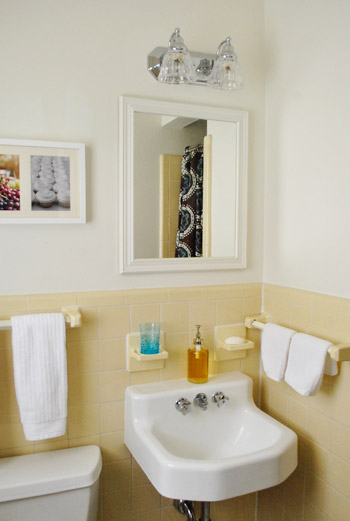
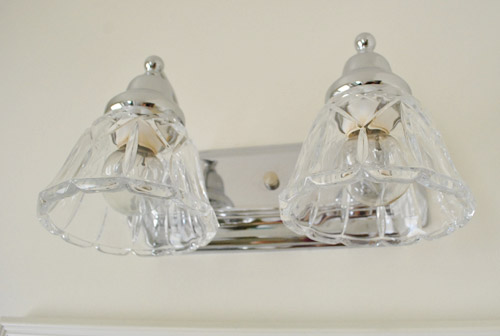
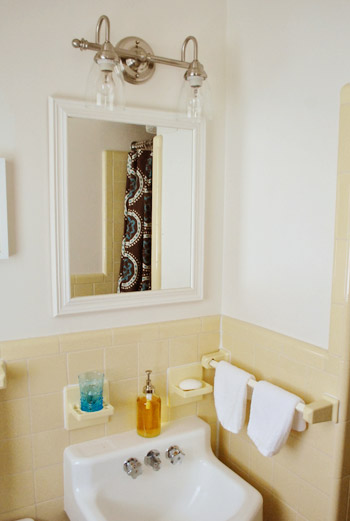
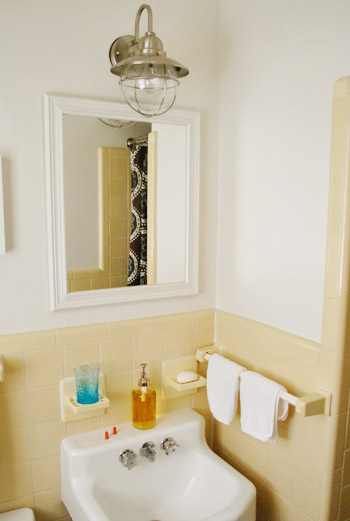
There was nothing particularly wrong with what was there, per se – but it was a bit more traditional than we’d pick ourselves (so we figured donating it to the Habitat For Humanity ReStore would give it a second life while we upgraded to something that felt more our style). At first we considered just replacing the shades for a quick mini makeover, but the big and chunky back plate (which was as wide as the fixture itself) wasn’t really doing it for us either.
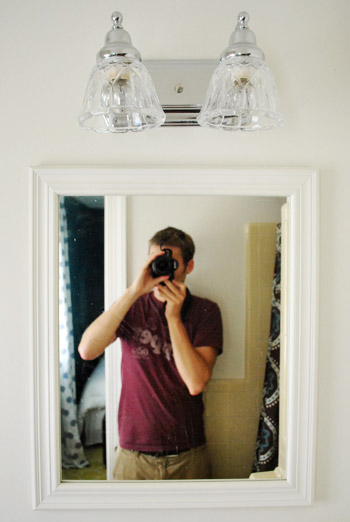
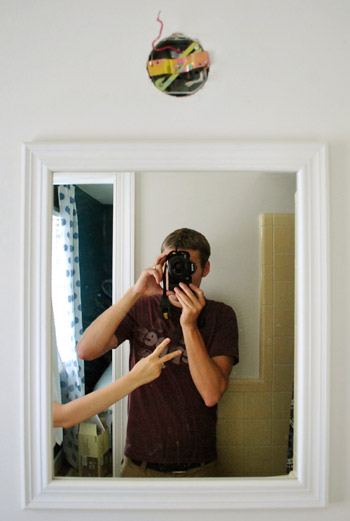
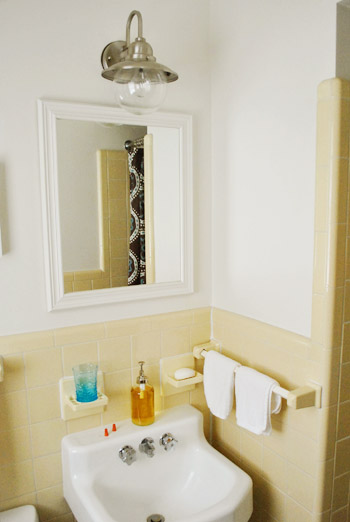
Here’s a more straight on shot of it, which was impossible to take without getting my whole body in the mirror. On the other hand, if I had just removed my shirt I could have done my dead-ringer Jacob From Twilight impression (note: to those unfamiliar with my shirtless physique, this is a joke).
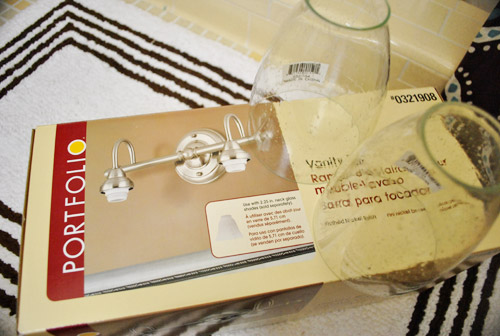
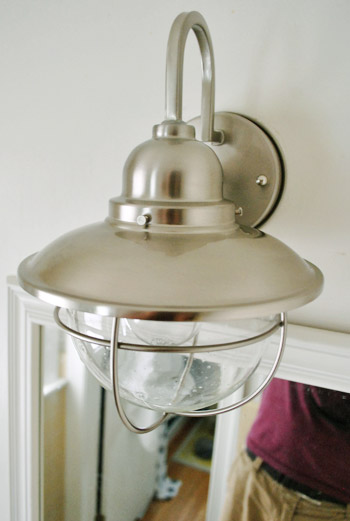
Anyway, back to our lighting situation. Here’s the new light that we picked up at Lowe’s a few weeks back. It’s one of those fixtures where you can choose from an assortment of covers to sort of “customize” the look. We’ve always been fans of seeded glass, so Sherry snagged these two covers (which are more seeded and textured than this photo really depicts). The total was around $25.
First I had to remove the old fixture. Which was clearly very tightly affixed to the wall. Not. After removing just one of the glass covers the entire thing tipped sideways from the weight of the remaining cover. Awesome.

Anyways, it came off smoothly and I was left with this beautiful site:
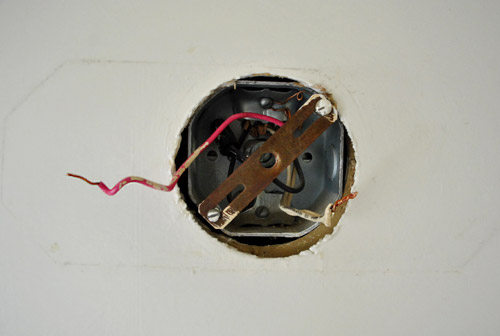
Did I mention I turned off the breaker to the entire house before I started? That’s how Captain Careful rolls.
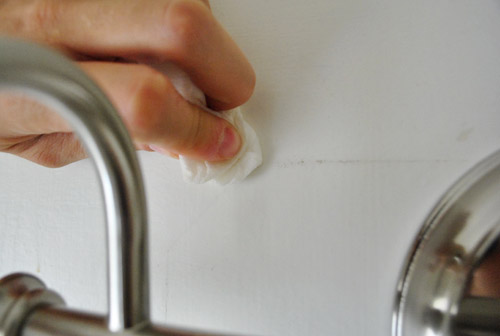
Attaching the new fixture was nothing special – I just connected a few wires (I usually just mimic how the old fixture was connected, taking note as I remove it and duplicating the setup with the new one). Once the fixture was wired and screwed into the wall (about a five minute process), I eagerly readied the wall for its debut. I scrubbed off some of the marks from the old light…
… and screwed on our favorite part of the new light: the seeded glass bulb covers that Sherry picked out separately for a little flair (you could pick from frosted, clear, seeded, and even colored or fluted options).
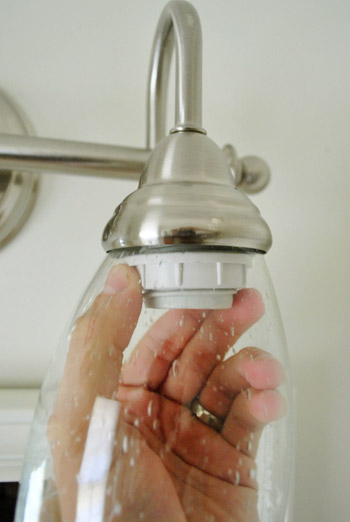
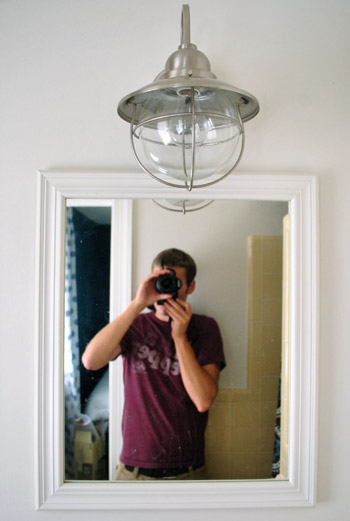
But when we stepped back and looked at it, something was off. Do you see what we saw?

All we could focus on was how giant and incredibly conspicuous those plastic threads were above the bulb thanks to the choice of the seeded glass cover.
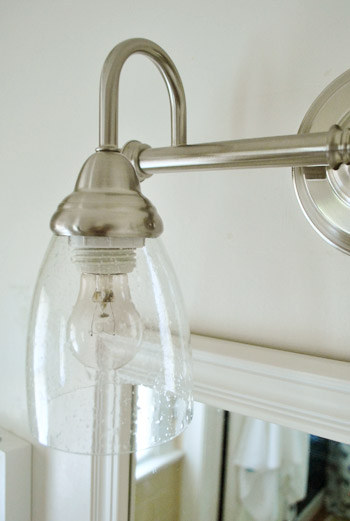
Some of you might think we’re crazy for fixating on that, but it was totally bothering us that the sleek brushed nickel fixture and charming seeded glass covers were interrupted by those big bands of plastic. To us, it made the whole thing look kinda cheap (even though it kinda was, we didn’t want it to look that way). So we were bummed because we otherwise liked how it looked (and briefly considered trying to paint them silver to match but decided that we didn’t want to settle).
Sure frosted covers could have solved the problem, but the whole draw of this fixture was that we could go with the seeded covers that we love (we had one hanging above our kitchen sink in the old house so I guess we were feeling sentimental). Not wanting to stop short of a fixture that we 100% loved, we darted back out to a few lighting places to find a replacement.
This time we had a new direction in mind (anyone else think of Glee when I said “new direction”?). Having been inspired by Lady Bower’s new bathroom fixtures and some of the exterior ones that we already have (seen here and here), we thought we’d go for something a bit more industrial slash retro. The guest bathroom already has that vibe going on with the vintage yellow tile and the old school floating sink anyway. So this is what we came home with, courtesy of the outdoor lighting section of Home Depot (for 29 beans):

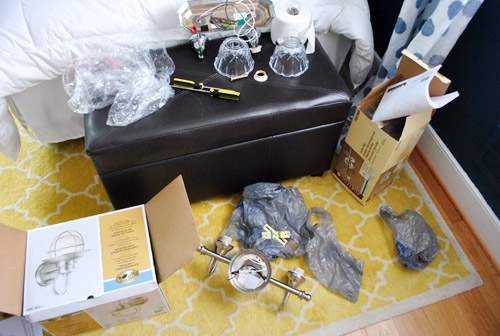
With new light in hand, it was time for take two of our light fixture replacement adventure. Which, of course, started by undoing our first attempt and carefully repackaging it so we could return it. And getting a “take two” hand signal from the wife in the mirror.
At this point the scene outside of the bathroom was starting to look a bit like this:
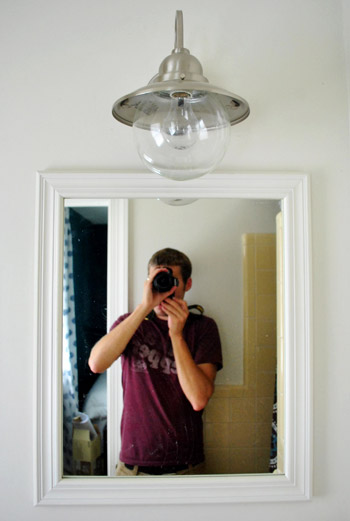
Another 5-or-so minutes later, this puppy was up and the power was back on.
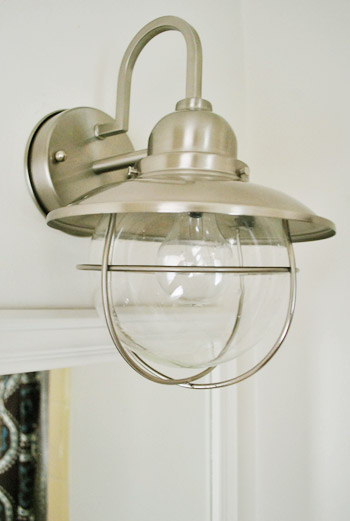
I know he looks a little funny since the rest of the room is so unfinished. But our new light actually gets us excited to let the industrial-ish vibe inspire some other choices in the bathroom (we still need some art, paint on the walls, and possibly a mirror tweak among a few other touches to make it all come together).
Plus, how’s this for a nice bonus? The glass cover is seeded glass. We didn’t even know that from looking at the display in the store or the picture on the box. Total bonus. Like it was meant to be or something.
Actually, speaking of the glass cover – the one thing we weren’t so sure about was the wire “cage” around it. We thought it was kinda cool, but maybe a bit too industrial for our comfort zone at the moment.
So we decided to take it off – just for the time being (since it easily snaps into place – or out of place if you want to remove it).
For now, we think we prefer it the cageless way, but who knows how we’ll feel down the line as we bring more art/paint/accessories into the room and it really starts to take shape. We’re definitely only about 2% done in here. More to come.
And thus ends the tale of our not-so-quick, quick fix. All in all I think it took us around three hours (driving included) so it wasn’t that bad. But we thought it was going to be one of those five minute things. Of course it probably would’ve been a little faster had I not been taking pictures of myself in the mirror every five seconds. Look, I put a filter on this one. You know, because everything looks more gangster with a filter on it.

And yes I am wearing my Dr. Pepper shirt. How you like me now?
Have you guys ever had projects that were supposed to be quick turn into a little something more? Don’t you hate climbing back into the car to grab something that you never anticipated needing? Does your grandma have a sugar bowl that reminds you of the original shades of the fixture that we replaced?
Mine and Sherry’s both totally do.

Courtney says
Beautiful! I LOVE the gigantic single light bulb! Our bathroom had a ‘makeover’ before we moved in…they left a gigantic hole in the wall for wiring, then covered with a mirror. The light is mounted on a bulky piece of badly painted wood…I’m more confident a fish would look better mounted on said wood.
I have been inspired to finally rip it off the wall and do a ‘quick fix’ :)
Krysta @ Domestic for Dummies says
We have rarely done a project when we don’t have to run out a million times for something else. I loved the first new light, but you’re totally right about the plastic threads. It turned out great and my first thought was to think of Katie Bower’s new powder room!
YoungHouseLove says
She was definitely our inspiration (we linked over to her and everything)! Seeing hers in person got out wheels turning so to speak. Haha.
xo,
s
Julie (from Pocketful of Joules) says
I love that you guys used an “outside light” instead of one from the bathroom section. When I did my 2 bathroom redo’s a few months ago, I was getting so frustrated at my lighting choices and didn’t even think about checking out the outside options! I’ll be sure to keep this in mind for our new house when we move (crossing fingers that our darn townhouse sells soon)!
Sara says
When you posted the photo of the first option, the one thing that caught my eye was the fact that the light shades hung down into the mirror frame, which to me, is very distracting. I would have just gone with frosted shades myself and kept that one. You guys have given me a good idea though for an outdoor light for my front door, though! Totally on my way to HD to pick that up!
Jeri says
I’ve got that last light! Mine’s outside with cage on, but good call to take it off for indoor use. Love!
Marie says
Definitely like the fixture more without the cage. Good eye :)
Random question: what’d you use to clean off the wall? Just water? i can never get those kinds of marks off easily.
Thanks! Love the blog!
YoungHouseLove says
Miraculously it was just water, but I would have broken out the Magic Eraser if push came to shove.
-John
ShannonNicole says
Sherry and John — I have been looking for a yellow lattice-type pattern rug forever… I’ve found them but they are super expensive. (I’m looking for an area sized rug.) May I ask where you found your yellow rug in the above photo (with all of the light fixture parts)? I would LOVE to find something just like that for my new apartment. Thanks in advance!
YoungHouseLove says
That was from Pottery Barn (on clearance) a few years ago. It’s called the Moorish Tile Rug (maybe try ebay?). I think Garnet Hill had something like it too. Good luck!
xo,
s
Maggie S. says
About a year a ago I had a “brillant” ten minute and $25 fix of changing the medicine cabinet with built in light out for a mirror and seperate light I found on clearance.
I was so excited about getting rid of the terrible medicine cabinet, I didn’t realize it was hard wired in with it’s own switch. Fast forward to “we’ll just add a switch into the nearby outlet box!” The underlying galvanized outlet box was nailed into the stud with roofing nails and “switching it out” took a 2×3 ft chunk of drywall out. I was put on restriction from “quick fixes” for quite some time after that one!
Carly says
Love the new light, I would never even think to use an “outdoor” light for something on the inside of the house. What I don’t love… having to make more than one trip to the store for a project, it drives me nuts. We were working on our landscaping, and of course I didn’t have enough mulch. I was so close to being done and could have put it off till the next day but I wanted to finish. While backing out of the garage to head to the store, I wasn’t paying attention and got a little to close to our deck and broke my taillight. So annoying!
Christina says
I have that Dr. Pepper shirt!! I love it! I’m a Pepper!
Michele Daggar says
You guys are making me tired just reading. What with all the painting and whatnot, I’d have taken at least a week off from DIY!!!! Maybe that’s why you guys are so fantastically successful and I sit on my butt living vicariously through your blog.
Anywho, love the Glee reference. By the way John, my 14 year old son just got the Sprite shirt (and a purple Fanta shirt.) You are as cool as any freshman in high school!!!
P.S. i like the light with the cage!
YoungHouseLove says
Yessss. I could walk into any high school and blend right in. Mission accomplished.
-John
Gina @ Running to the Kitchen says
I hate the “middle of a project run back to the store” thing! It always seems to happen and our nearest Home Depot or Lowes is about 15/20 minutes away so it’s not a quick trip.
Sally says
Ooooof. You guys lost me on this one. :)
bridget b. says
favorite line of this post: “You know, because everything looks more gangster with a filter on it.”
followed closely by:”And yes I am wearing my Dr. Pepper shirt. How you like me now?”
LOL!
as far as “easy” projects turning into total time sucks, that would be just about every project that i take on! i guess i’m not particularly handy or maybe i just have bad luck. but they make it look so simple on DIY network and i hate spending extra money on things that i can (theoretically) do myself.
Leah says
Love the change. My fiance and I found a fixture for our guest bath at Lowes this weekend. We got it way marked down because it was already on clearance because it was being discontinued. It was the display fixture so we got 10% off and then they couldn’t find the box! So we got an additional 10% off. So our 80 dollar five-light fixture only ended up costing around $17! Score. We just need to put it up… Your fixture looks awesome though. Never thought of using an outdoor fixture for inside. Love it.
The Little Wife says
It looks wonderful! I would have never been brave/clever enough to think of putting an outside light in a bathroom. But I think you might have opened up a whole new world of decorating.
Newness says
I am LOL at this entire post!! You have given me a great idea with the industrial looking light! I love that (you may see it on pinterest soon).
My quick project that turned not so quick was building our raised garden bed. I went to the hardware store and got the materials remembering I had screws at home and didn’t get extra. Got home, started building the bed and realized we needed more screws. Went back to the hardware store to get more screws. Got home, and realized I had the wrong screws (whomp whomp). Back to hardware store and got CORRECT screws. Back home, finished bed and put it in place. Then began to fill raised bed. Not enough compost (whomp whomp!). Back to hardware store for more compost. FINALLY about a week into my afternoon project we finished the raised bed. Totally worth it. The second one took only a fraction of the time. We were totally ready by then. lol
mary says
Love it. Ohhhh, Sherry, I am seeing a really cute sink skirt in your future. Get that Brother out!
Christin says
I love the fixture you ended up with and kind of hope you try it with the cage again once you do more with the room. John, I noticed your Dr. Pepper shirt right away and think it’s awesome. I’m not a Pepper fan, but my husband is and he definitely has that same shirt. Rock on.
Christin says
On a completely unrelated to this post note, don’t you guys have a Flip video camera? I think I remember you saying you do. If so, what do you think of it? My hubby and I are thinking of getting one.
YoungHouseLove says
Yes, we have a Flip HD and love it.
xo,
s
Megan says
My whole house seems to be filled with the should be quick fixes but they aren’t issue. Here’s an example… http://thependletonhouse.blogspot.com/2011/06/mail-slot.html … filling in the mail slot for a sleaker, more “us” look. And the fact that we are trying to keep as much air inside our house and fixing all the leaks that an 80+ year old house has! We had a towel shoved in for years until my wonderful dad spent HOURS filling in what should have taken way less than that! And it’s not even done… I haven’t been able to paint because we don’t have a screen/storm door yet and we want to take off the hinges, sand, and then paint. BTW, I like the light with the cage off too. :)
Michelle says
Hey guys,
Love your blog and have been following your home improvements for about a year now. An American currently living in the UK, I had the unfortunate experience of being told by my English professor that I had flicked him off by giving the 2 finger, back-of-the-hand-facing-out, peace sign. I was mortified, of course. Since you had two in this post, I thought it might be good to know if you have a wide English readership!
Cheers!
YoungHouseLove says
Oh no! Didn’t mean that at all!
-John
Rachel Tatem says
I totally know what you mean about needing to keep your moral up. My husband and I bought our house just 2 years ago and it is project after project and the big ones bog you down!
Smarts Magazine says
The plastic thing would bug me too. Also, good call on removing the cage for now but I hope in the end it makes sense to put it back. I will be curious to see what changes get made to the rest of the room that push it into cage appropriate territory.
Sarah says
Great post! I haaaaaaaate having to go back to the store…and so does my hubby so, instead of “discussing” for half an hour over who has to drive back – we determine the “chosen one” by a good old fashioned game of rock, paper, scissors. (I’m on a hot streak ;) )
Meg says
I was just going to say, that light is the same one we used for our bathroom renovation!! Got one at the ReStore and purchased a new one at the Depot! Great minds think alike!!
YoungHouseLove says
You’re so lucky to find one at the ReStore!
xo,
s
April says
I just used this same like in our playroom bathroom. My family thought I was crazy for using an “outdoor” light but I love it. Your house is coming together so nicely. I love reading about your projects and getting inspiration for my never ending list of projects :)
Stephanie says
What kind of light bulbs did you use?
(eek! first time posting, long time stalking! I love you guys!)
YoungHouseLove says
We usually use CFLs in around 95% of our fixtures/lamps/etc. But when you can see the bulb sometimes we go for standard 60 watt clear bulbs (like we did for the seeded pendant above our sink in the old house too).
xo,
s
Hanna says
Well there was that time that I wanted to change out the light fixtures on the kitchen of our newly purchased condo… which led to the discovery of hidden knob and tube wiring (?) which led to an electrical upgrade… new breaker box… new ceilings… new walls… new cabinets… (because if we were demo-ing everything else, why not?)… new flooring (the cabinets were out, might as well get that done as well)… aaaaaand the new wall and ceiling infection spread and spread until I had a new hallway, a new hall closet (with custom shelving system built by DH)… and a completely new bathroom.
BUT, 5 years later I have my darned light fixtures too.
Anne says
I love the light you chose. It looks a lot more bathroom-appropriate since you took the wire off.
LuLu says
Whenever I do something and tell myself it should take “X” amount of hours I just know to add about 25 more hours in my head!!! And can you please tell me what filter you used to get that “gansta” feel to that image. I love it!!
LuLu
YoungHouseLove says
I think it was called “70’s” from here: http://thepioneerwoman.com/
-John
Jenn says
Loving the final light the best, can’t wait to see the other transformations!
Rachael says
My grandma most definitely has some bowls that look like the original fixture – in fact, she just gave me a set of “sherbet bowls” that were her great grandmother’s. So now they live at my house, although unused. Who’s the grandma now? :)
lizzy says
love that fixture! i remember seeing it on bowerpower and loved it then too!
even the smallest project can make such a big difference.
i have been dying to do something about our main bathroom – the cheap, uneven wainscoting and green sponge paint drives me nuts but i don’t want to spend much money on a temporary solution. i’ve been scoping out the “oops paint” at lowes and HD for a color that might give the bathroom a lift but have yet to find a worthy candidate!
Reenie says
What a cute lil light. I LOVE that bathroom :)
Jill says
Going through a not so quick fix right now! We hung our tv on the wall and downsized our entertainment center, now we have no where to put our speakers…found floating shelves at Lowe’s…but hardware was missing. (Other floating shelves don’t hold over 6 lbs and our speakers are 7 and the closest store that had them is 40 minutes away). Then I found speaker mounts at Taget (after conceding to go in a different direction), brought the box home and yay, the hardware is missing. Probably going to order something online, but any suggestions would help!! **And what’s up with stealing hardware from a box in Lowe’s…THEY SELL SCREWS!!!**
Bree says
I just spent the weekend making over my parents’ dining room. It was so much fun, but we went back and forth to the curtain stores (5 of them) twice to find the right ones. We went back to the Depot about 4 times to get spray paint and new lights. At the end we just wanted everything up and done so we could do the fun dressing part.
I love the cage, fwiw!!
Jessica G in NN says
I agree with ForeverHostess…only that I haven’t blooged anything in a trillion years. I had the first fixture you chose in my bathroom with the seeded cups…and yes, I have debated over the visual aspect of the plastic threads.
And, the second fixture is the one we had budgeted into our outdoor-lighting-redo for later this summer. Great taste! :)
Oh, and thanks for the advice on turning off all of the power. We replaced 16 outlets/switches/covers/switchplates this weekend and I was much less freaked knowing all of the power was off. :)
Annette Young says
Love the light fixture! And PLEASE don’t get rid of that awesome retro tile – it would look pretty great next to some grey paint. I’m just sayin’…
YoungHouseLove says
Working with that vintage tile is definitely the plan!
xo,
s
KathyG says
I think that light can really inform your choices for that bathroom and make it look awesome!
Should bathroom light fixtures always face the light down? Seems it makes sense for the ‘makeup’ rule, but sometimes they look so cool facing up.
YoungHouseLove says
I think they can definitely work both ways assuming you try them out and they don’t look to harsh or crazy. Maybe with a softer bulb?
xo,
s
Cory Ann Ellis says
Too funny. I have the same light fixtures in my bathroom as your first set, but individually and not on a two light set. And your new light is our outside front porch light. We have a very very modern, industrial inspired home so they work perfect.
Cassie says
Every single project we undertake takes almost twice as long as anticipated! For instance, we started installing baseboards the first week of April (this year). My husband and his dad said they’d have it done in a week. Well, we just barely finished filling nail holes and paint touch ups LAST WEEK on the second floor. There is another floor to tackle!
Claudia says
I like both new lights! Great improvement! Whenever I have little plastic bits that don’t match I break out my trusty friend Mr. Spraypaint. And since they now carry brushed nickel (my favorite fixture finish) at my local Blue and Orange, it is a quick and easy fix!
Lisa G. says
What filter did you use? Was it on camera or in photoshop??
Love the new lights and that they look industrial as you said.
YoungHouseLove says
John thinks it was a filter called “70’s” from thepioneerwoman.com.
xo,
s
lark + linen says
I’m generally on board with all of your guys decisions (and that’s saying a lot because I’m an interior designer and I’m PICKY), but I think I prefer the wire cage. It gives it that little oomph. and oomph is good!
Lisa G. says
Never mind…. I read above… Darn, I even did the search this page for filter to find the answer before I asked…
YoungHouseLove says
No worries!
xo,
s
Heather says
Quick fix turned huge project:
Thought I just needed to patch a small hole in the ceiling. After closer investigation, the previous owners did not know what they were doing when they “finished” this room, and we have to take down the whole ceiling and re-do it before it falls down. :(
Shannon says
I LOVE the industrial look for lights, and I see them all over kitchens nowadays, but never in a bathroom. What an awesome idea. We have a cosmetic bathroom makeover coming up, and I’m going to keep my eyes open for something like this for a lighting fixture now. Smart!
Jesselyn says
You kids are too cute. I am a pro-cage girl myself! Love the update.
lizzy says
p.s. i came across this pic when looking for pics of unique tubs…maybe keeping your yellow tile, white base, and throwing in a punch of color in the vanity or tub would be a solution for your space?!
http://2.bp.blogspot.com/_OiAGUBJLvWQ/SgxqknONiaI/AAAAAAAABW8/NuiYOHT1ItY/s1600-h/country-bathroom-14-de-21295811.jpg
YoungHouseLove says
Gorgeous!
xo,
s
Erin says
First off … thank you for ridding the world of that light. Good call. Secondly, those plastic thread things on light No. 1 were ridiculous and would have driven me nuts too. Thirdly, I love the light you ended up with although I am all about the cage. I adore the cage. But hey … I don’t live there, so if cage-free works for you, I can dig it.
Barb says
Looks great! Not only did my Grandma have a sugar bowl but a matching creamer as well, and a butter dish, and a pitcher, and a…
Jill says
… and a punch bowl w/ matching candle sticks? lol