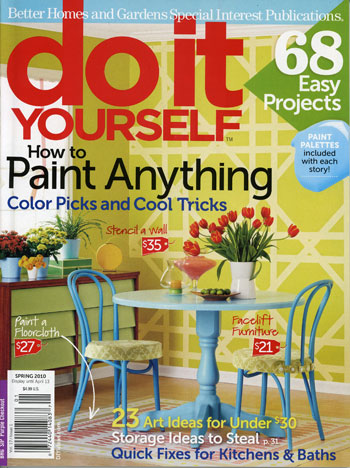
If this magazine cover looks familiar, then you’ve probably already noticed that the second appearance of our “He Said, She Said” column in Do It Yourself Magazine is out on newsstands. Seeing it again was no less exciting than the first time we tackled decorating disputes from both sides of the gender line, especially since we got to cover even more reader questions (hooray for two-page spreads!). Plus we got the help of a professional illustrator to bring one of our floor plan suggestions to life. It felt like what we imagine providing descriptions to a police sketch artist must be like – though much less “make his eyes more sinister” and more “let’s make the coffee
Archives for January 2010
How To DIY A $100 Backsplash With Stainless Steel Stick-On Wall Tile
When Amy sent over her $100 backsplash makeover we were so inspired and just had to share. Here’s her letter: I whipped this out in about five hours and am very excited about the results! I bought nine packages of these light, thin stainless wall tiles. The tiles include double-stick foam squares for hanging, so there is no messy tile work. Some reviewers recommended Liquid Nails, but I was worried about making corrections if thing didn’t line up properly. I can go back if there is a problem, but they feel very secure! You can cut these tiles with a pair of scissors and even bend the tiles! I snipped a cut on each side
A Nursery With Pear Green Walls & A Light Blue Ceiling
Pretty much from day one (even before we learned that the bean was actually a beanette) I was dreaming of painting the nursery walls a fun pear green while taking the ceiling from bland ol’ white to a light aqua color. But somehow saying “green walls with a blue ceiling” conjures up all sorts of scary Trading Spaces episodes so even my dear hubby wasn’t getting my “vision” until we broke out the paint swatches and I was able to explicitly show him what I meant. There’s a tip for you ladies: many people (especially guys who don’t speak “interior decorating”) are visual creatures. So saying something like “I want to paint the side tables
Where To Keep The Sponge & Dishcloth At The Kitchen Sink?
Q: I love your blog and often check in twice a day. Thank you for your great work! But I have one question: what do you do at the kitchen sink with the few things you regularly use for washing-up/cleaning the dishes and the table (like a sponge, a dish cloth, a brush, dishwashing detergent, maybe gloves)? Are there good solutions out there that look clean, well-organized and perhaps even cool? What would you suggest to anyone who hates having too much stuff lying/standing around in the kitchen? Thank you and greetings from Europe. -Monica A: Good question! In a nut shell, we keep a dish cloth folded up next to the sink or draped
A Beautiful Light Blue & Red Nursery
When Brieanne sent over her amazing nursery before and after pics we couldn’t wait to share the major transformation. Here’s her letter: Last year my sister asked me (her younger sister with the architecture degree) to help her with her nursery for my future (and now completely adorable) niece Claire. Because my sister and brother-in-law could possibly have more than one child in their current space, they wanted a decently gender neutral nursery. Beginning with some bedding by Skip Hop my sister loved, we started a “mood board.” The criteria: gender neutral, simple, non-cluttered and CHEAP. Jen (my sister) wanted something fresh and relaxing for herself, knowing the nursery would be mostly for her enjoyment.
Turning A Third Bedroom Into A Nursery
Now that we’re done with the big bathroom makeover it’s nursery time, baby. Pun intended. The sad thing is that we love our third bedroom, so the idea that it has to somehow disappear to make way for the bean is a tad bittersweet. Of course we’re over the moon to meet our little girl in May and can’t wait to start whipping up the perfect nursery to welcome her to Casa Petersik. We’re just use-what-you-have kind of people, so the idea of suddenly having a daybed, table, chair, rug and ottoman without a happy home had us stumped for a good half hour or so. Then we channeled Tim Gunn (picture us putting on
Budget Blooms: Take Two
Remember I shared my first of the year flowers a little while back (a sweet monthly gift from the hubs)? You may recall that they had a bit of New Year’s sparkle thanks to a cake stand full of gleaming silver ornaments… … but I mentioned that in a week or so I’d retire those and fill the pedestal with something a bit less holiday-focused. In all honestly I figured it would be something naughty (cupcakes, cookies, brownies?) but somehow we resisted that tooth-rotting stuff (maybe it’s the whole we-regret-our-holiday-gluttony syndrome that hits each January) and filled our clam shell fruit bowl nearby to the brim with apples, oranges, pears, avocados and other healthy fare.
It’s All Greek To Us
The fun of being on the world wide web is learning what the rest of the world is saying about you. Or at least what Google Translate thinks they’re saying about you…
Some Bathroom Renovation Issues
You already knew that our bathroom project had some unforeseen challenges. Well, here are five little ones that we didn’t cover before, but prove something are never as easy as they seem.
How To Make Vintage Looking Wall Signs With Wood & Paper
As promised, we’re back to detail the simple steps that anyone can follow to DIY some chic and cheap vintage-looking wood signs. We first unveiled these guys in our big bathroom reveal post yesterday morning, but now we’ll divulge the step-by-step process so you can follow along at home. Just remember to sing “I saw the sign” by Ace of Base the whole time you’re making them like we did. Good times. John actually came up with the idea of creating vintage-looking wood signs (isn’t he quite the artisté?) after I lamented that square frames next to the rounded mirror might look a bit chaotic. We wanted something simpler (nothing with reflective glass or a
Frosting The Glass Doors Of A Media Cabinet
When Courtney sent over her awesome entertainment center transformation we just had to share the goods. Here’s her letter: YHL always inspires me because you find ways to tweak or repurpose the resources that you have rather than blow the budget on something expensive. I’m not a fan of clutter and have tried multiple ways to hide the shame that is the DVD collection in my entertainment center (I’ve covered the glass doors with wrapping paper, but this required opening the doors to use the remotes for the cable box and DVD players). Then I came across these cut-outs at Michael’s that are used for scrap-booking and thought they would make great stencils. Down came
Our Bathroom Makeover – A Full Reno For Under 2K!
Oh happy day. We’re here to share all of our bathroom after pictures complete with a full timeline and a budget breakdown to detail every step of this month-long weekend and evening project of ours. First we should remind everyone what the room looked like at the bleakest moment of the makeover. When it comes to most major renovations like installing a wet wall board, rooms usually have to get uglier before they turn the corner and start looking good, so let’s take a moment to appreciate just how un-aesthetically-pleasing our bathroom was when it was all stripped down after John demo’d the entire thing by himself over the course of about 24 hours spent