What’s one thing that every office needs? Bingo – a lava lamp.
Ok, I kid, I kid. What I meant to say was “file storage.” And ours is no exception. We made a nice leap forward on the storage front with our hacked Ikea bookcase, but the desk I built was seriously lacking any place to stash papers and such. So after failing to find a perfectly sized file cabinet at our local thrift stores, we spotted a pair of simple embossed gray file boxes at Target (for just $14.99 a pop) that had our names written all over them.
Here they are sitting on the floor of our very much a work-in-progress office a few days ago.
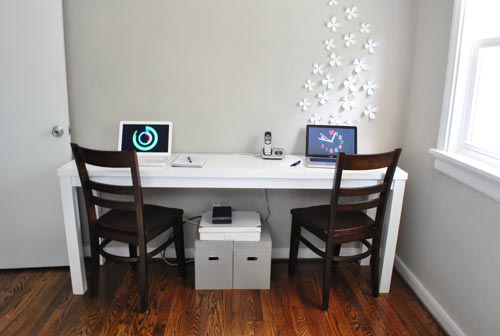
I’ll give you a close-up of ’em later in the post, but basically they were just about the perfect amount of hanging file storage for us (you know, the kind of boxes that have those rails that hold folders that you can use to label and categorize your papers?). Plus, with two of them side by side they were the beginnings of a perfect spot to stack the white Ikea storage boxes from Sherry’s old office that contain our receipts and our modem (we paid Comcast $28 to move our modem into the office so we’d have the strongest wireless signal in there).
But… it wasn’t the prettiest setup. And having to lift the white storage boxes every time we wanted to access the file boxes was a quick way to ensure that we’d never actually use said file boxes. So with my carpentry mojo still in full force, I decided to tackle another building project. And this time I wanted to create something to optimize our storage and file box sitch.
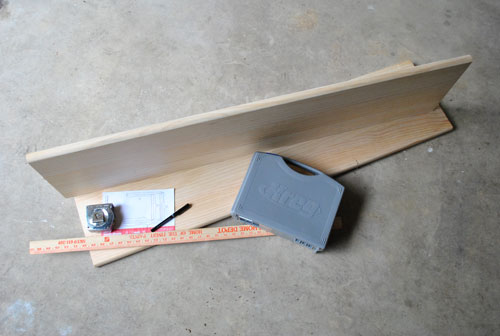
Once again I opted to rely on the Kreg Jig (can you tell I’m addicted?) to connect all the pieces. The pieces in this case being two $10 pine boards intended to be stairs (I bought them because I liked the finished-looking rounded edge). I’ll spare you all of the construction details this time around (just trust me that it was actually quite similar to my desk and shelf building projects). About three hours later, I had this little guy:
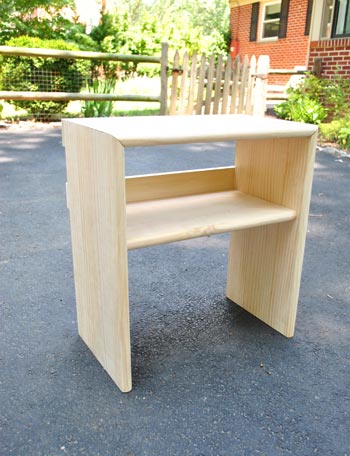
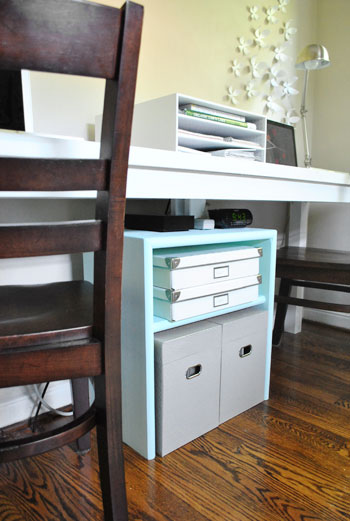
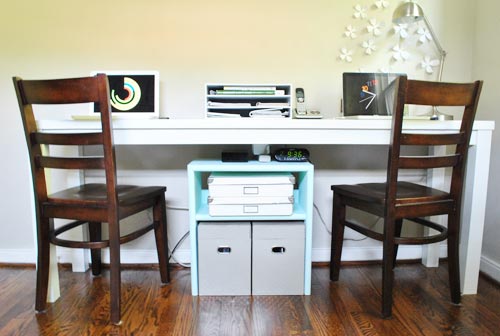
He was perfectly sized to fit the two file boxes snugly in the bottom opening while the two stacked Ikea storage boxes could be slipped in and out of the cubby above them (with plenty of room for the modem cords in one of those white Ikea storage boxes to feed out the back). We even left some room on top for a few miscellaneous items like our external hard drive and the radio that we like to listen to from time to time.
We brought it in unfinished because (1) I wanted to make sure I had measured everything correctly and (2) we weren’t quite sure whether we wanted to paint it white to match the desk or stain it dark to match the chairs (which are free leftovers from our existing dining set, since we substituted two of them for a bench a while back).
And once we had it in place… well, we actually decided to toss out both of those ideas. Instead, we opted to paint it the same soft aqua that we used on the back of the bookcase (Mythic’s Adanna Aire). Just for fun.
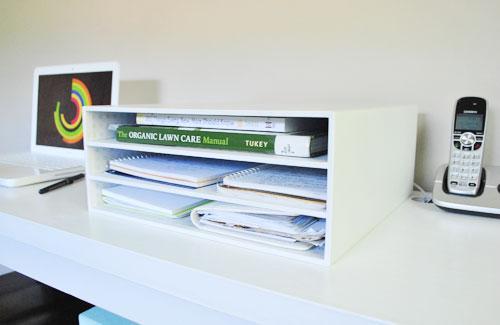
You’re probably noticing something else in that pic, sitting on the desk itself. It’s another little file system that we also picked up at Target. It’s actually intended to be used as storage for scrapbooking, but we liked that its shelves were a great size for our notebooks, bills to pay, and even the books that we’re currently reading. Plus, because it’s deep enough to store those big scrapbook sheets it creates a nice wide surface on top for us to place other items that we like to have on hand. Stay tuned for those accessorizing details in the coming weeks (for now we’re tackling the big things like larger storage, toy corralling, art, etc).
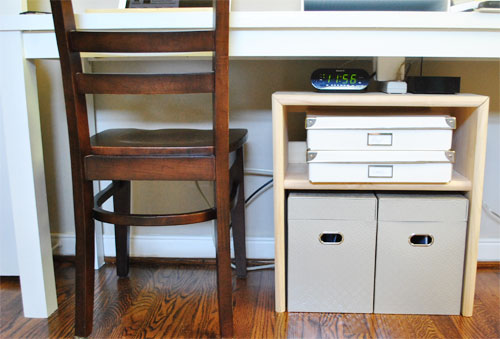
But back to the action under the desk. I promised close-ups of the file storage boxes so here’s a pic illustrating that we achieved our goal of making it easy to slide the boxes out and actually access our files. Then we can either pop open the top compartment which will be good for storing cables, cords, scissors, stamps and more (it stays closed thanks to a magnetic strip)…

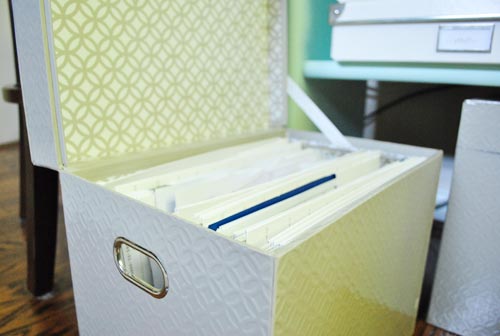
…or flip the whole thing open to access our hanging files like insurance info and hospital bills (sigh).
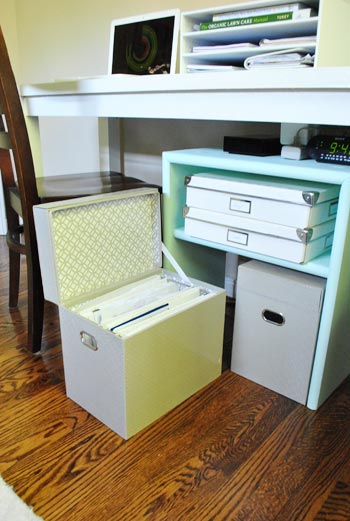
And the subtle overlapping circles detail on the outside (and bolder version inside) is a nice touch – especially for the $14.99 price tag.
In general it’s a pretty simple update, but it’s already making a huge functional difference for us (since we’re using this office on a daily basis even while it’s a work-in-progress). Now we’ve got a place to stash paper and better manage the clutter on the desk. And we like that it’s helping to turn the long two-person desk into two distinct workspaces for me and Sherry.
But the room is by no means finished. In addition to simple things like wrangling our wires and cords, figuring out where to put our printer (and if we’re even keeping our current one), we’ve still got to decide on what the heck we’re gonna put on that big blank wall that we get to stare at all day long. Well, when we’re not staring at Clara.

Oh and in case you’d like to see the new setup in action, here’s how we get things done around here lately:

And we wouldn’t have it any other way.
So that’s the scoop on our end. How about you guys? Have you spotted or created any simple file storage systems lately? Or any other clever, sneaky, or beautiful ways to wrangle all of those papers, bills, mail, etc that tends to pile up? Please do share, because even if we can’t use ’em in this room, we may just file the ideas away for a rainy day. Pun intended.
Psst- Wanna follow the entire office/guest bedroom/playroom makeover? Click here for the intro post, here to read about the big sleeper sofa hunt, here for the DIY desk play-by-play, here for the homemade light fixture project and right here for our hacked Ikea bookcase.

Leave a Reply