Archive for August, 2011

Notice Anything Different?

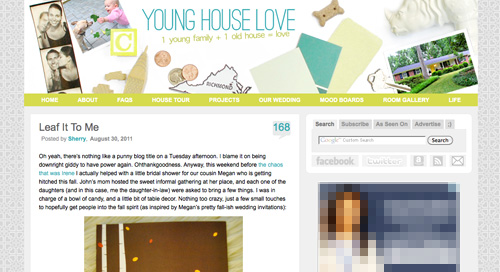
Yup, after months of working on a little behind the scenes blog makeover (not kidding, this stuff literally takes us months) we’ve FINALLY let ‘er rip. Like any project, there were unexpected delays: mysterious coding glitches, inexplicable site crashes (thanks for your patience on those, btw), an earthquake and even a hurricane to round things out. But before we let another excuse get in our way, we decided to just go for it. It’s not 100% done. It may crash the site again. There could be a blizzard next week. Who knows.

It’s actually surprising to us that we haven’t done this sooner. We’ve had the same exact blog look/background/layout since the spring of 2008 (if you can believe it). It seemed silly that we’ve been through so many room re-paintings, furniture re-arrangings, and even a move to a whole new house… but hadn’t so much as changed the background pattern for three whole years. So it was definitely time. It just sort of felt like we were wearing old clothes that didn’t quite fit anymore. So although we know there are probably folks out there who will miss the old look (we’re sentimental creatures too) we’re excited to finally put on a fresh new outfit.

Here’s a little bit of what we were hoping to accomplish with the new design:

So this is what our amateur web designing skills came up with. So far we really love it, even though there are definitely things we’re still trying to finesse. We’ve been tweaking it for the past several weeks, so we’re kinda used to it by now – but we understand if some of you are still skeptical of the change. Think of it like rearranging a room or painting a wall – you might just need to give it a few days to get used to it.

When it comes to the actual header, we photographed a collection of objects that had special meaning to us on white cardstock outside (you know we love keeping things personal). In case you can’t figure it all out on your own, here’s the meaning behind each item:

When it comes to the background, we actually created that as an homage to our previous logo (you know that little YHL heart? the background is actually just a gazillion of those laid out at all different angles to make an abstract-ish pattern). And as for the actual functional changes that we made, here they are:

1. We added a new side-deal called Young House Life (see the “Life” title under the header on the right?) to serve as sort of a “mundane everyday happenings area” where we mostly share Clara & Burger pics/videos along with behind the scenes blog stuff and other odds and ends that aren’t beefy enough for a dedicated YHL post over here (you know we love to over-share). But don’t worry, it doesn’t mean Clara, Burger, and other life stuff (vacations, anniversaries, etc) will suddenly be gone from the main site. Those things have always been a huge part of who we are, so they stay. Just think of Young House Life is a little “bonus footage” spot. Oh and it has a separate feed address for you to subscribe to as well (if you’d like to get those updates on your reader).


2. We finally made a paint color page about all of the ones we’ve used in this house and linked to it from our sidebar (like this one that we made for our first house).

3. We also made a dedicated source list for where we got nearly everything in this house (like this one that we made for our first house) and also linked that up on the sidebar.

4. We tossed in a Fav. Posts button, also on the sidebar (with little thumbnails and links). We intend to update it every month or so with new faves (since we’re fickle folks and because we’ve also heard from a bunch of readers who’d love to see more archive stuff, but aren’t sure what’s worth digging around for).

5. We also added a Videos button on the sidebar, which shows thumbnails of a few of them. All of our videos used to be accessible from the bar under the header, but we moved some other stuff up there and thought videos could breathe better down below – so now you can access them all by clicking the link at the bottom of this button.

6. We added a Giving Back button to share the love for three charities that we’re thrilled to support, each of which were chosen because they represent stuff we love (homes, kids, & dogs). We make an annual donation of $1,000 to the Richmond Habitat For Humanity along with $500 to St. Jude Children’s Research Hospital and $500 to the Richmond SPCA (and we definitely encourage others to check them out – you can donate here, here, and here or find a local Habitat for Humanity or SPCA in your area here and here).

7. We retooled a lot of other buttons that have always been on our sidebar (like the House Crashing one) with some updated pics/type/colors. But that’s more decorative slash fun than functional. As is the new Twitter button which now goes by the name of Tweetersiks. Oh yeah, we officially out-punned Mr. Tom Petersik (my dear old dad).

8. Oh and we were inspired (by Kate over at Centsational Girl) to add a nice thorough pagination capability (so you can click back to the very first post in our archives, you know in case you have a year to spare reading 2,000+ of them).

So there it is. Of course we still have a bunch of stuff on our blog-to-do list, so here are just a few things that we’re hoping to roll out in the next few months (or years, you know how long these things can take us, haha):

Should keep us busy for a while. And we do have our $6 cabinets to finish. Might switch back over to DIY for at least a little bit. Web stuff is kind of fun (when you’re in the zone), but there’s nothing like paint under your nails and sawdust flying. Hope you guys like the new look. Has anyone else done a little site tweaking lately? Any new color schemes or functionality that makes you giddy in that “it’s 2:52 am and we’re still working on this post way?” Not that we are. That would be irresponsible parenting.

  Leave a comment

Leaf It To Me

Oh yeah, there’s nothing like a punny blog title on a Tuesday afternoon. I blame it on being downright giddy to have power again. Ohthankgoodness. Anyway, this weekend before the chaos that was Irene I actually helped with a little bridal shower for our cousin Megan who is getting hitched this fall. John’s mom hosted the sweet informal gathering at her place, and each one of the daughters (and in this case, me the daughter-in-law) were asked to bring a few things. I was in charge of a bowl of candy, and a little bit of table decor. Nothing too crazy, just a few small touches to hopefully get people into the fall spirit (as inspired by Megan’s pretty fall-ish wedding invitations):

Of course I took it as an opportunity to get all craft-tastic (I tried to resist, but I was powerless against the draw of Michael’s). First I grabbed $2.50 worth of colored paper in a few pretty fall-ish colors. Then when I got home I googled “leaf pattern” and sketched out a few different leaf outlines onto a piece of white cardstock with a pen (I just free-handed them, but you probably could trace them right off the computer screen too). Were they perfect? Nah. Were they leaf-esque? Sure.

Then I cut them out. It didn’t take ten seconds, but it wasn’t too bad. Maybe five minutes for ten of them. I recommend watching Real Housewives Of NJ in the background to keep morale up.

Then I used each cardstock leaf as a template and traced it onto one of my colored craft papers with a black pen. I actually ended up tracing each one a few different times and crowded them in so I’d get as many leaves as possible from each sheet of paper. And yes, I did crack insanely bad jokes like “hey John, leaf me alone” as I went. He was not amused.

Then I stacked an extra sheet under the one that I traced my leaf shapes onto (so I could cut each leaf out once, but get two out of the deal – each in a different color thanks to the stacked paper). Then I did the rest of my sheets in the same way (tracing the shapes on the top page and stacking the paper so I could cut it once and get a few leaves out of it). Total time spent: an episode of Real Housewives. And surprisingly (because I half expected this crazy spurt of craftiness to be a total bust), the varied colors and shapes ended up being pretty darn cute.

I mean they’re not über upscale and spendy looking (Posh might not demand them at her next shindig), but they’re sweet and charming in that homemade full-of-love sort of way. Which seems to work when you’re casually gathering with family on a stormy day to celebrate love, love, and more love. I ended up sprinkling them down the middle of the table to make a little leaf runner of sorts.

Not bad for $2.50.

Then came my weird M&M project. I thought tracking down some sort of candy in fall tones could be sweet in a clear cylinder vase (of which we have many, leftover from our own wedding). So when I came across two bags of brown, red, and yellow peanut butter M&M’s at Target, I took the bait and bought them (for around $5 total). Then I sorted them by color in three bowls and stashed each tone in a different ziplock bag so I could bring them with me to the party already-sorted. Oh yeah, and wash your hands before you touch all the candy. In case you’re wondering, I watched last week’s Design Star during this part of the process (I’m hopelessly behind on that show – don’t ruin this week’s episode because we haven’t seen it yet).

Once I arrived at the party, my big M&M arranging finale took ten seconds. I just poured the pre-sorted brown ones into my big glass cylinder vase, followed by the pre-sorted red and yellow ones. Bing, bam, boom.

I probably can’t take any credit for the fact that everyone scarfed them down (peanut butter M&Ms are irrefutably addicting in their own right) but Megan and the other ladies seemed to enjoy the little layered look. Weird candy separating mission accomplished.

I also grabbed eight glasses from Target (sold for $2.99 for a set of four, so I spent under $6 total) and John’s mom just took a few clippings from two potted mums that she already had on the front porch to make eight mini bouquets to fill our glass “vases.” I loved the idea of using already-owned potted mum clippings because there are about a million blooms covering them, so it’s way more bang for the ol’ buck. We probably would have needed to buy at least four bouquets of flowers to fill the eight vases that our two mums easily covered with plenty of blooms to spare (we tried to clip from the perimeter/underside of them, so the remaining plants will still look nice and fresh out on the porch for a few more months).

So with the cups-turned-vases filled with mums and my little paper leaves spread down the center of the table like a festive little runner, it was time for one last touch. Oh yes I did buy six little glittery faux pinecones from Michael’s for 50 cents a pop. Guilty as charged. I can’t help it. I’m like a magpie when it comes to shiny things. Especially shiny fall-ish things in the golden color palette of the leaves from Megan’s wedding invitation. They conveniently came on a little wire (I think they’re made to be stuffed into bouquets or wreaths) so I just stuck them randomly into a few of the little mum vases (which we sent home with each guest as a small party favor).

It was a sweet little party. Even though it was rainy and gross outside, it was warm and happy inside. And I don’t mean to harp on odd things like glittery pinecones (I’m from Jersey, ok? Maybe that explains it), but they seemed to be quite the hit.

Oh and check out this cute thing John’s mom put together. We all played one of those how-well-do-you-know-the-bridge-and-groom games, and she hunted down fall-colored ribbons and tootsie pops to tie on top of each clipboard, which she also sent home with each guest. So yeah, come to our family’s showers if you want to leave with vases of flowers, glittered pinecones, ribbon slash tootsie pop riddled clipboards, and M&M hangovers. Do we know how to party or what?

My favorite part of the whole celebration was when Clara and her cousin Jake serenaded us. Once again proving that random is good. Bring on the paper leaves and faux pinecones! And don’t forget that baby solo to end things with a bang.

Oh and because you know I love a little budget breakdown, here are all the supplies I grabbed:

Not bad for eight flowering favors in little glass vases, a festive fall-inspired table runner o’ leaves, and a quirky color-coded dish of M&Ms. I just liked that it felt more Megan-specific to DIY a few things than run to party city and spend $20 on plastic tablecloths and crepe paper. But enough about my insane propensity for faux nature and glittered anything (why yes I did own a bedazzler in ninth grade). Have you guys whipped up any crafty little homemade-with-love party decor? Ever arranged candy by color? I think that takes a special kind of crazy. And I’m happy to wave my little yes-I-sorted-M&Ms-by-hand freak flag nice and high.

  Leave a comment

Cabinet Painting Prep

We were humming along on our way to updating our $6 cabinets with some primer and glossy white paint until the whole hurricane thing took out our power (update: miracle of all miracles, it’s back on, and we’ve never loved electricity more). So the three day outage robbed us of our cabinet mojo since John has some building to do (which necessitates the use of a few electric tools like drills and saws) before we paint and reassemble everything in the office.

Thankfully we did get to tackle all of the prepping and priming before the outage, and took about a million photos of the process (who’s surprised?). So we figured that part of the makeover is worth a big ol’ wordy explanation for anyone at home who might want to follow along in detail, whether you’re also refinishing wood cabinets to make a wall to wall built-in desk or you’re just interested in refinishing your wood kitchen cabinets (which we also did back in the day). Note: this method sadly won’t work on laminate cabs – so it’s just for solid wood.

First, we removed all of the hardware on the doors along with the doors themselves (and the door hinges). Oh and we used two plastic drop cloths to create a Dexter-ish setup to protect the floor/walls from primer drips, paint splatter, and sanding dust – just so we wouldn’t have to worry as much about keeping the sunroom pristine.

Then we put the door handles and accompanying screws into a plastic bag and all the hinge parts from each of the six cabinets into another bag. Two bags are key so you know which screws go with what (no mixing up handle screws with hinge screws), and can put everything back together in the end and hopefully not have an extra screw or part that you have no idea about (which is pretty much the story of our life whenever we assemble Ikea furniture for some reason- do they toss extra things into each box just to freak you out?).

Then I got ready to sand each door down by hand with some low grit paper (50) followed by higher grit sandpaper (200), just to cut the glossiness so the primer and paint would grab on and hold for the long haul.

After one good round of low grit stuff, I myself experienced a makeover. I went from a dorky but normal-ish gal to a sweaty heavy-breathing mess. Seriously, I wasn’t ready for that jelly. Speaking of which, who else is freakishly excited about Beyonce being prego?

So then I opted to break out the big guns (aka: our little Black & Decker electric sander). Thank goodness this was back before we lost power.

Little man got it done for me. It still took a while to sand down each door with low grit and then higher grit paper, and I did end up with a weird numb right hand from all the vibration, but I was happy to have help (as opposed to the grass roots manpowered method that I started out with). The entire door-sanding step probably took me a good hour to do each of the six doors twice (with low and then high grit paper).

As for the backs of the doors and the cabinet interiors, from day one we decided that we wanted a nice clean glossy front for our wall to wall built-ins, but to keep the backs and the interiors (and slide out interior fittings) of the cabinets the same natural wood tone that they were to begin with. I bet you’re wondering why, or doubting this’ll look good, am I right? Well, we certainly know that not everyone would go that route, but the new KraftMaid drawers that we installed in our first house’s kitchen renovation had wood interiors and we really liked them (you can actually see some of them here full of tools:

They had glossy white drawer fronts, but inside they held up a lot better to natural wear and tear than anything painted (since we’re weirdos who will stash hammers and screwdrivers almost anywhere). And we actually don’t mind the whole wood + white look (sort of like the dresser we refinished for Clara). Although in this case we decided from the outside that the cabinets would look entirely crisp and white (no contrasting top color), and only when you swing them open will you see the wood tone.

So here’s a shot of three doors face up (all sanded and ready for primer) and three face down (with Frog Tape carefully applied around the edges so we’d end up with a nice clean line between the painted fronts/sides and the natural wood finish on the back). We also considered doing both sides of the door white and just leaving the cabinet interiors wood, but decided that durable unpainted backs-of-doors was a better decision for us – but some folks might opt to paint the front & back of the cabinet doors a color and leave only the cabinet interiors unpainted, and that works too. It just comes down to personal preference.

But back to the whole prep process. Next I took Señor Sander to the fronts and sides of the cabinets (which would also be getting a coat of primer followed by some glossy white paint so the entire exterior of the cabinets would look seamless and white). In contrast to the door-sanding part, this was a sanding step that I couldn’t do outside. Well, I guess I could have carried all six cabinets outside, but instead I just relied on our Dexter-tastic dropcloth setup (and the suction bag thingie on the back of my sander). It actually wasn’t too dusty. See, no smoke cloud (which I totally expected to see):

It was important to me that I got a nice roughed up edge around the cabinet frame, since the door would constantly be banging against it, and I wanted my paint-job to stick like glue for a nice long time (we had really great luck painting the original cabinets in our first house’s kitchen about two years before taking on a full kitchen renovation, and they looked mint for that entire time – which definitely gives us some confidence in this method).

Then it was primer time. We opted to go with Kilz Clean Start, which was the same No-VOC primer that we used on our kitchen paneling with success (after trying two other low/no VOC options without much at all). I applied it with a small foam roller for a nice paper-thin coat without having to worry about brushstrokes.

Primer always looks pretty rough when it goes on (since it’s just one thin coat, and isn’t meant to sit smoothly, it’s meant to be kind of roughed up so it can grab paint and hold it tight). I thought sharing this photo might help anyone who applies primer and then wonders if they did it wrong if it looks uneven and imperfect. Chances are you did it perfectly, that’s just how it looks.

Of course I had to use a brush to get into the frame around the edge that my roller couldn’t quite squeeze into. But notice how my brush isn’t dripping with paint in this pic. I wiped it firmly along the edge of the paint can on both sides, so there wasn’t any gunky drippy issue. Just a thin coat of paint applied around that frame. And then I picked up my foam roller again and rolled the door one last time to smooth everything out so there weren’t any rogue brush strokes around the front of the frame.

Oh but do each door one at a time (roll the sides, the front, brush the cracks, and reroll the front one last time). Because if you roll all of your doors and then go in with a brush on each frame and then try to reroll everything after that it’ll be a lot of time between those steps and it might not look as smooth (the roller could even pull up half-dry paint, so doing one door at a time keeps the paint wet enough to be “worked with” for a little bit).

Next it was on to the sides and frames of the cabinets that I sanded down about an hour before. John was going to tape off the entire interior frame of the cabinets so we’d have a nice clean line between the white paint and the wood finish just like the doors, but being ever so cocky confident in my rolling ability, I knew I could lightly roll the frames (without too much paint on the roller- this is key!) to achieve just as clean of a line as tape, and it would save us time (and Frog Tape, which is like currency at our house).

Thank goodness I was right. It looked nice and smooth. Well, as smooth as one coat of primer can look (remember, primer is meant to look uneven and kind of disastrous by nature – so fret not if your priming step doesn’t look perfectly even and smooth since a few thin and even layers of paint on top of it should get you there).

So here’s what the room was left looking like after all that hardware & hinge removal followed by door and frame sanding, and door and frame priming. Oh and see how some of the doors look whiter in certain areas? Some of them had little scratches or imperfections in certain spots, so I sanded them down slightly longer in those areas. This means the primer reads a bit more white on those spots just because the darker wood finish was removed and then primer was layered on. The good news is that doesn’t matter in the end because once a few thin and even coats of paint are applied it’ll all look seamless and bright white. At least that’s always been our experience. Probably shouldn’t count my chickens just yet though…

Now we just have to fire up the saw and build up the cabinets about three inches. Then we’re planning to assemble them in the office (they’ll be way too heavy/awkward to carry into the office after we screw them together to create three double cabinet bases) and I’ll apply those last 2-3 thin and even coats of paint when they’re in place (since painting them before assembling/moving them makes us fear scratches and dings that could occur when we move/assemble them). But by assemble them I just mean screwing them together to create those three pairs of double cabinets (not putting the doors and hardware back on – which we’ll definitely do after painting them, as usual).

Then it’s onto the counter. We’re still completely undecided on what we’re going to use (assembled planks of wood, one giant piece of wood or even some other material like an Ikea countertop, etc), but we’re planning to do some legwork so we can hurry up and work at our new built-in desk. We’ll keep you posted. If one things for sure it’s that we take great pleasure in over-sharing.

Psst- Speaking of over-sharing, we’re spilling all of the names that we considered when I was pregnant with Clara (including the boy ones we debated, and all of the other girl ones we tossed out) over on BabyCenter. And of course we’d love to hear any naming faves on your list. Or stories of epic naming disagreements. Those are fun too.

  Leave a comment