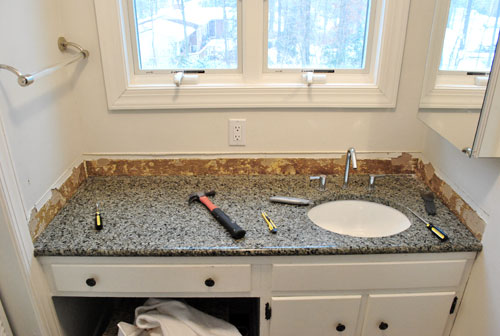
You might notice a theme when it comes to posts like this and this and this and this. Making this house feel like ours seems to be just as much about stripping things down and removing stuff as it is about adding new furnishings and wall colors. Just like the old matted carpets in the sunroom and the bathroom of our old house had to go (along with the crocheted duck curtains, the wallpaper, some small doorways, a few bi-fold doors, and the linen closet door) we’re all about working with what we have. Which could mean altering things a little bit to help them fit more within our aesthetic instead of just junking them and starting from scratch. Which is why the granite backsplash around the bathroom sink (which happens to live in a nook on one wall of our bedroom) had to go.
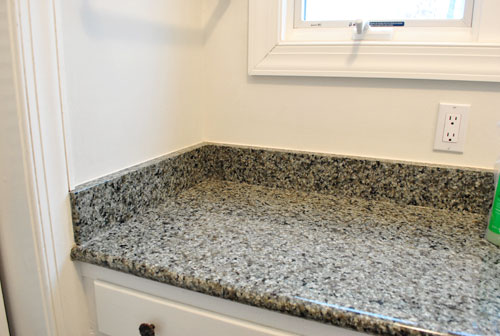
Wait, before you get all nervous, let me explain. We thought the backsplash made the sink scream “Look! I’m a sink! In the middle of the main bedroom!” And removing it might make it whisper “Hey. I’m a sink. But I look more like a piece of furniture because I’m slick like that.” We don’t actually mind the location of the sink, we just want to make it fit in more with the rest of the room instead of sticking out like a sore thumb. So this little project is step one of that process.
Thanks to some waterproofed caulk around the edge and some semi-gloss paint on the walls of that alcove, we won’t have any issues with splashing or water damage (our last house didn’t have a backsplash in either bathroom and the caulk and semi-gloss paint approach worked like a charm. I would even venture to say that the caulk & semi-gloss paint method took a licking and kept on ticking. Yes I just pulled out that hokey little rhyme. You’re welcome.
So here’s how it all went down. First I scored the clear silicone caulk by running a box cutter along the top of the backsplash:
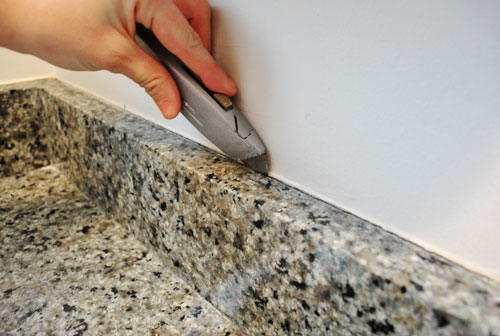
Then I scored the caulk between the counter and the backsplash using the same method:
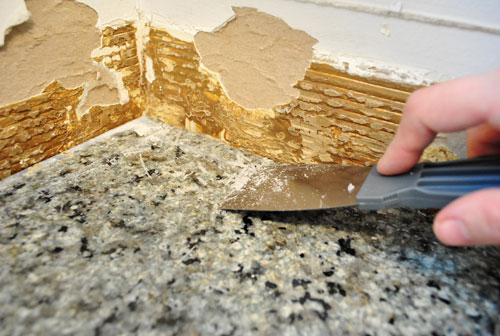
Next I used a thin metal spackle knife to get in there behind the backsplash and the wall and pry it away slowly:
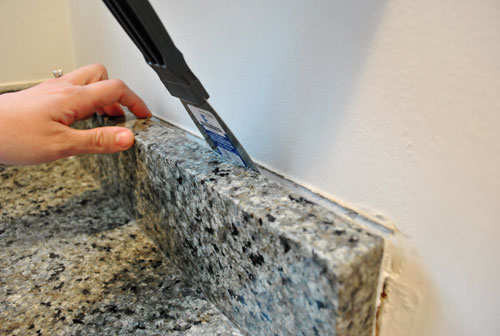
I was able to teeter (yes, that’s a technical term) each of the three backsplash pieces back and forth away from the wall and back again until they completely broke free of the wall and could be lifted out. Those suckers were heavy but I got ‘er done. In fact I’m pretty psyched that I was also able to do this whole project on my own while John was on Clara duty (she says with pride, while simultaneously patting herself on the back and brushing her shoulders off).
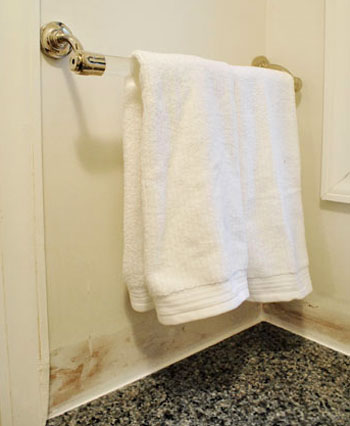
Wait. Did I mention I started it without talking to John first? I just wanted to see if removal was even possible and once I got into it there was no turning back. Or telling John what I was doing since the sink looked like this. I would have been in so much trouble (cue all the kids in class saying “ooooh” when the principal gets on the loud speaker and calls someone down to her office by name).
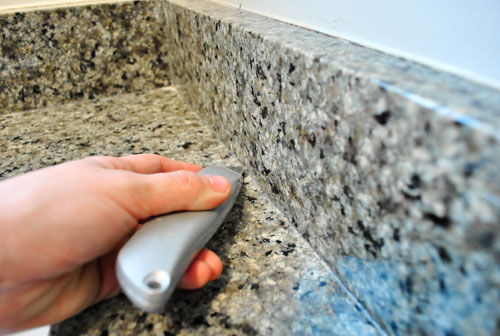
I wasn’t totally going rogue though. I knew he’d go for the backsplashless concept since we had chosen it for both of our previous bathroom overhauls in the old house. So I just crossed my fingers that I could strip things down and make them look a bit more presentable before he and Clara came in to see what I was up to. So here I am furiously scraping the silicone caulk off the surface of the granite counter with the same spackle knife I used to remove the backsplash pieces (it worked really well without scratching the granite at all):
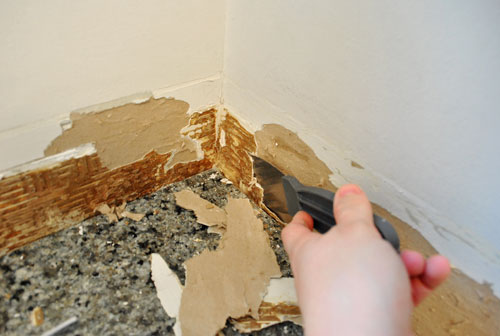
And here I am using the same trusty spackle knife to get in under all that nasty glue and flake it off to reveal a slightly roughed up (but much less gnarly and bumpy looking) piece of drywall:
Here’s what it looked like when John came in to see what all the noise was about. Thank goodness it was a lot less grody looking once all that glue was scraped off. And he was, dare I say it, pleased (!) with the surprise project that I sprung on him. Whew.
Then it was time to skim coat all the roughed up drywall so it would again look seamless like the rest of the wall. Some people would choose to mud the wall when skim coating, but I actually used some of the same lightweight Dap spackle that I mentioned in this post, which I was able to sand down to a totally smooth and even surface that looked seamless with the rest of the drywall (but remember, don’t sand until the spackle is totally dry). Then I used some white waterproof paintable caulk (I like the Dap door and window stuff) around the perimeter of the counter to fill and seal any tiny hairline cracks between the granite and the wall so no water could collect or drip back behind the counter or vanity.
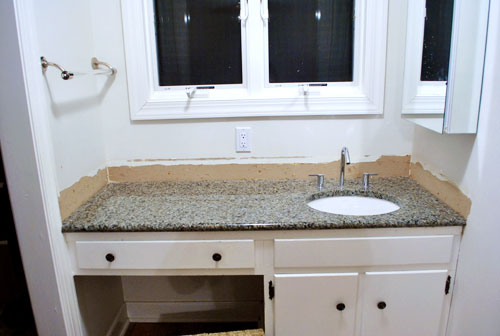
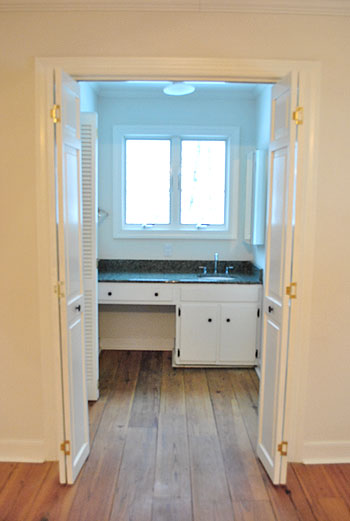
Here’s what she looks like now from afar (ignore the baskets and all the junk that we have yet to organize):
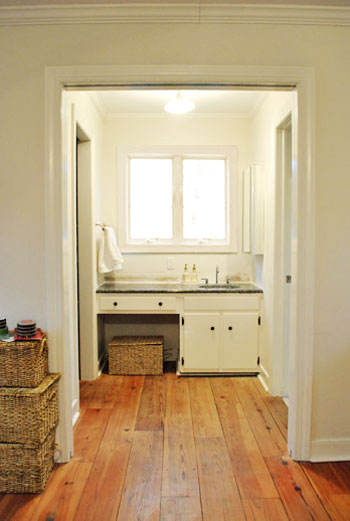
It’s not too bad when you compare her to her glory days (this next photo was taken when we first moved in, before removing the bi-fold doors and of course that backsplash).
My apologies about the bad blue light, I’m still learning how to tell the Nikon who’s boss.
Anyway, I know the after pic above this one still might not look like much, but we’re psyched. We can picture how great some wipe-able semi-gloss paint will look on the walls of that little nook, and we have some other big plans for that area (to make it look even less bathroom-sink-ish). Oh and as for where those three slabs of granite that I removed will go, we’re sending them off to the Habitat For Humanity ReStore since someone else might be able to use ’em. You know in case they buy a house from someone who went crazy and stripped out their backsplash while the hubby was watching the baby and they’d now like to add it back in. Haha.

Leave a Reply