We’re back with our homemade nursery curtain panel how-to.
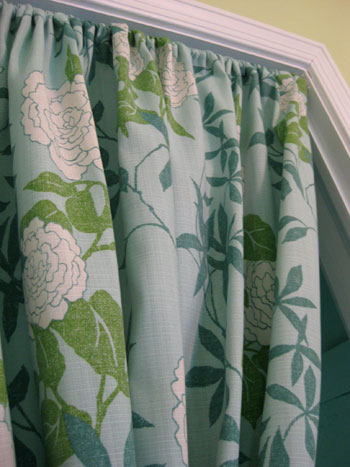
Remember when we revealed our punchy patterned find during last week’s shopping post? Well here’s how we took it from one big bolt of rolled up fabric by P Kaufmann…

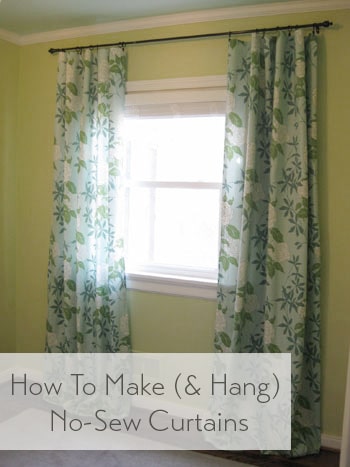
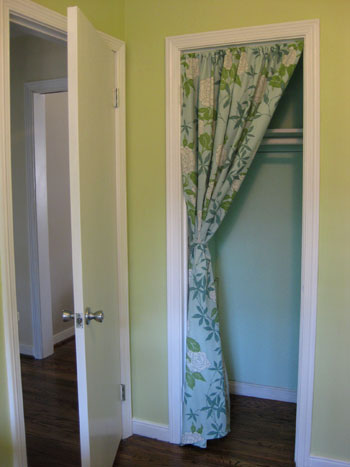
… to three gorgeous floor-length curtains (two for the window and one for the doorless closet). And probably best of all: there’s no sewing machine required. In fact, here’s my short and sweet list of supplies: tape measure, scissors, iron on hem tape, and an iron of course. Plus we even added a few kid-safe features so stay tuned for those details…
But before we get into all the dirty curtain-makin’ details, we should mention that we hope our baby sleeps well. So in the interest of aiding our little one in that area, we decided that we also needed to grab some sort of 100% light-blocking blinds or shades. So we trolled the aisles of Home Depot and found some chic white faux-wood blinds. We loved them because they felt almost like substantial wood shutters when they were lowered (a lot more solid than those thin plastic or metal venetian blinds) and they definitely would block any and all light when in use (and could easily be pulled up and out of the way to let light stream in during the day).
But here’s the bummer. Of course they didn’t come in the exact measurements of our quirky old house’s window (39 1/4″ wide in case you’re wondering). Sadness. But we soon learned that Home Depot could actually cut them down to custom fit our window perfectly- and the cutting service is F-R-E-E. That turned our frown upside down. So we give the guy in the orange apron our window’s odd width and he had our custom-cut clean-lined faux wood blinds waiting for us about five minutes later. The blinds weren’t super cheap at $37, but they look convincingly like much pricier white wood blinds and we know the darkness that they’ll provide will be priceless when we’re dying for one more minute of sleep.
Of course we also liked that they didn’t have those dangerous loopy pull cords (they were labeled as having “kid safe cords” that are actually separated instead of connected so they’re less of a strangulation hazard- no loop to get caught in). And of course we plan to keep them wound around one of those cord wrangling pieces of metal at the top right corner of the window far out of baby’s reach anyway, but we love the added loop-free design.
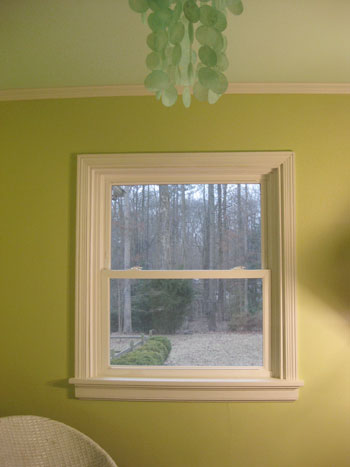
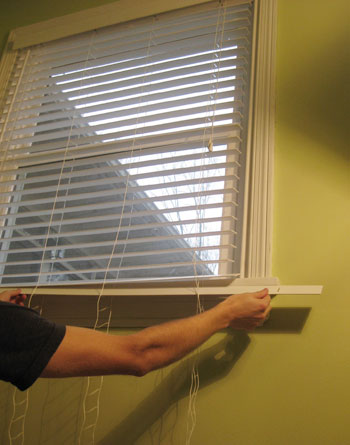
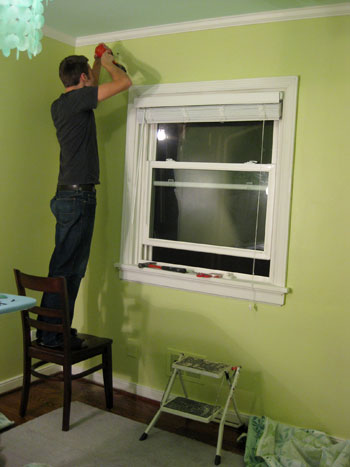
And since we love a before picture, here’s the window prior to our little curtain and blind fest:
John had the blinds up in about twenty minutes, but they definitely left a lot to be desired in the length department. They were actually a bit heavy to raise and lower, all due to the fact that they were at least two feet too long for our window, so there were a bunch of slats that just clumped together at the bottom of the blinds when they were in the “lowered” position. Luckily in the installation instructions they actually detailed how to shorten them to customize their length to fit any window. Nice.
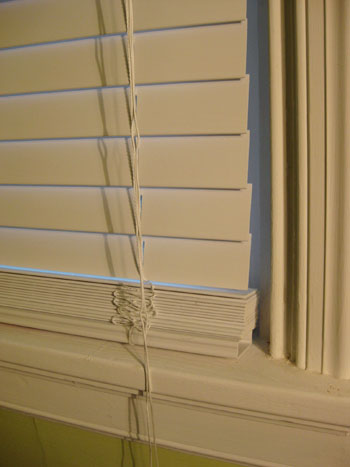
So John just followed the included directions and popped out these little plastic pieces on the bottom and could easily remove as many slats as he’d like and trim the excess string. Then he just popped the bottom pieces back on and we had an even more customized nursery blind that was a lot less cumbersome to raise and lower without all those extra slats at the bottom. Then, like a finely tuned relay team, John tagged me and said “your turn” and I began working on the curtains.
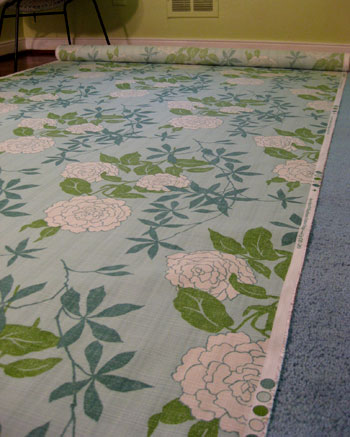
First I measured the approximate height that I wanted the curtains to be (just shy of 8′ for an almost floor to ceiling look) and added an inch and a half on the top and bottom to accommodate the hem. It was actually a nice clean measurement in the end because I determined that cutting two eight foot long sections of fabric would do the trick perfectly (since I wanted them a bit shy of 8′ but with the added hem measurement it brought them right back up to 8′ exactly). Hurrah for no quarter of an inch calculations!
The other super convenient thing about measuring out my fabric was that we already happened to have our new 5 x 8′ rug on the floor… so to cut my 8′ long fabric sections, I simply rolled the bolt from one end of the rug to the other and cut a straight line using the edge of the rug as my guide. It doesn’t get much easier than that. And for the width I just left each panel as wise as the bolt allowed (so I didn’t need to trim those edges at all).
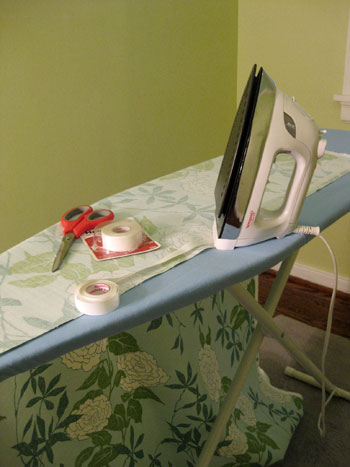
Then it was time for my trusty Heat N’ Bond iron on hem tape (I always grab the “ultra hold” variety). You may have seen us using it in this crib skirt tutorial from a while back and we’ve also used it to hem all the white Ikea curtains that we have hanging in the rest of the house. In short: I’m a hem tape black belt (the irony is that John does all the clothes-ironing in the house). Anyway it’s great stuff for leaving a polished and clean-looking edge (a lot more reliable then me with a sewing machine!) and it’s even washable and super cheap (we grab ours for a few bucks a roll at Michael’s). So I whipped out the ironing board, fired up the iron, laid out my big eight foot long fabric panel and had my scissors and hem tape on hand.
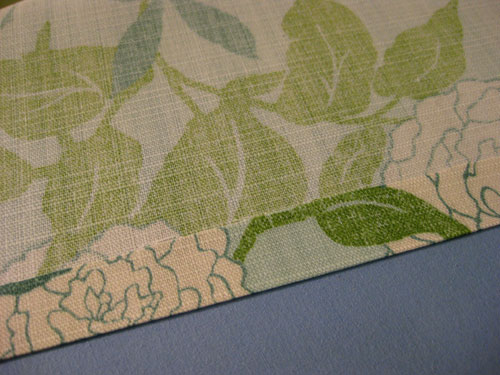
All it took was an easy-iron hem on each of the four sides of my fabric (for step by step hem tape instructions, just check out this post). Then I had a nice finished panel (without any rod loops or tabs) that I could clip up using my cheap-o oil-rubbed bronze curtain rings and rod from Target. Just look at how seamless and perfect that edge is! Much more even and less bunchy than anything I could sew…
Then I tagged John to get to work hanging the curtain rod with heavy duty anchors (so it’ll never come toppling down, even if over 100lbs of force is used) while I created a third curtain panel for the closet (this one only needed to be seven feet long). I also made a little rod pocket at the top of this panel (I just positioned hem tape about 4 inches below the edge of the fabric and ironed the fabric to that line of hem tape created a nice loop of fabric). Meanwhile John was already executing my let’s-cheat-our-off-centered-window-so-it-looks-more-balanced plan.
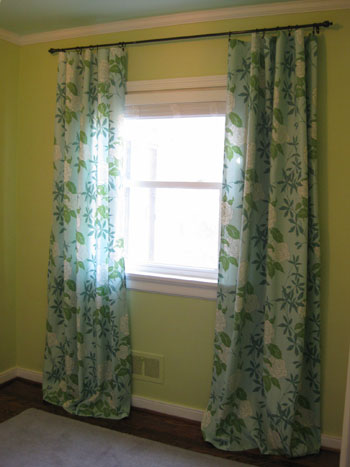
This angle gives you a better idea of what we were dealing with. See how the window is shifted a bit too much to the left? Well it’s nothing a curtain rod and some billowy floor length curtains can’t totally solve. I asked John to hang the left curtain rod support hook only about four inches wider than the trim on the left side of the window but requested that he hang the right curtain rod support hook about fifteen inches wider than the trim on the right side of the window.
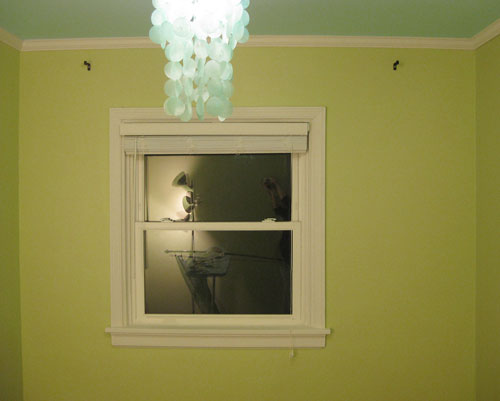
This way, once we hung each of the curtain panels, we could cheat them both over to the right (blocking a bit of the window on the left side, but adding a ton of balance and polish to the room):
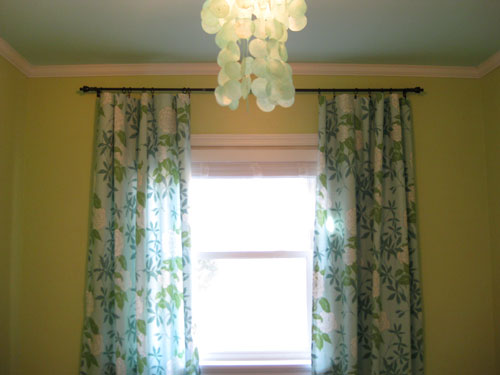
And we also mentioned in our shopping post that we snagged our simple oil-rubbed bronze curtain rod along with two packs of curtain rings on clearance at Target for less than $12 total. We love the height and the elegance that the shot of dark color brings to the wall, and love that it echoes everything from the mocha finish on the floor to a few of the darker wood accents that we’ll be bringing in to keep things from getting too sugary sweet and matchy-matchy.
Plus the clip-on curtain rings are actually something of a safety feature. Remember how we mentioned that someone could hang on those curtains without the rod coming down thanks to the use of some heavy duty anchors? Well we also realized that using clip-on curtain rings would allow for just the fabric panels to pull down if anyone got too rowdy and tried to swing from them (while the rings and the rod would most definitely stay put). We even tested them out by tugging on them a bit, and although it took pretty much all of my pregnant adult weight, sure enough the fabric was released from the rings and fluttered lightly to the floor while the rod and the rings stayed nice and securely in place on the wall.
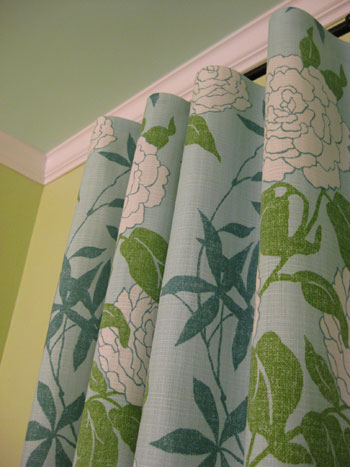
And as someone who has never used curtain ring clips before I just have to sing their praises. Not only are they nice little secret safety features, they also create such perfect little “waves” in the panels which result in such an amazingly high end look (and best of all, there’s no rod-pocket required, so you can hang any panel of fabric without worrying about extra sewing or loop-making).
Update: This P Kaufmann fabric seems to be discontinued now, but here’s an affiliate link to another fun oversized floral print on amazon for anyone looking for something similar.
Oh and we can’t forget our tiny little blue closet (thanks to John’s cute idea to bring the aqua color from the ceiling into the mini enclave for fun). Doesn’t the curtain panel add some nice pattern and sweetness to a closet that was formerly pretty bleak looking?
Maybe we should refresh your memory with a before pic:
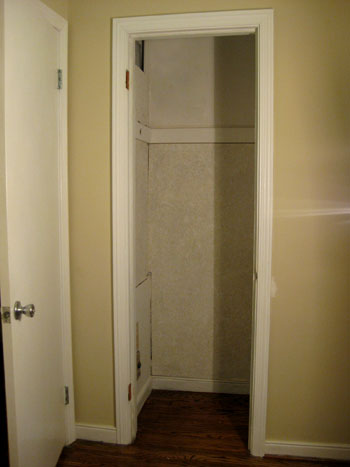
It’s looking better already, right? And of course we still have to add bins, baskets, and more hanging rods (along with some sort of storage piece on the floor of the closet).
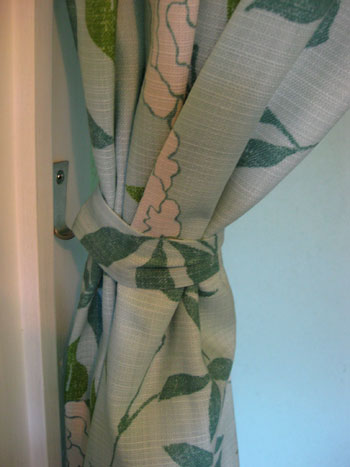
As for how we swagged our curtain panel so it’s mostly out of the way, we just hung it on a $3 tension rod (one that screws into both sides of the molding for more reinforcement than those that rely only on tension). Then we added a regular old Ikea coat hook that we already had on the left side of the closet’s interior trim. Next I made a little strip of fabric (using my trusty hem tape to finish the edges) and used that to create a loop around the curtain panel. Note: it’s safety pinned in the back so it can easily be removed and readjusted.
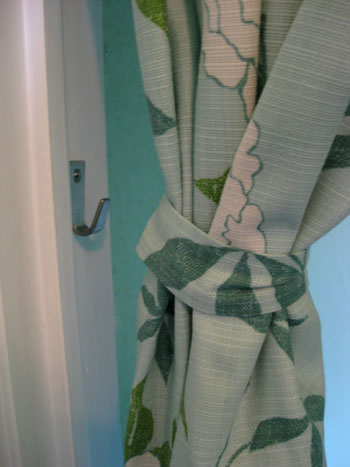
Then it was as simple as slipping my loop of fabric onto the hook on the side of the closet to hold the curtain off to the side.
So that’s the story of how we made our off-centered window look more balanced, blocked out all the light for less sleepless nights (fingers crossed) and added a fun pop of pattern to both sides of the nursery in the form of breezy floor-length curtains (which make the ceilings feel about a foot higher). Plus we only spent about $35 a panel (with almost an entire yard of fabric leftover!). Oh and it always makes us smile at our fabric luck when we recall that it’s actually indoor/outdoor fabric, so it’s a lot more stain and fade resistant than the average bear (although still completely washable). Which is a good thing when it comes to sticky fingers and goey faces…
But what about you guys? Have you made your own curtains before? Do you have a closet with a panel of fabric on a tension rod in lieu of a door? Spill the sewing (or hem tape) beans.
Psst – Wanna see our nursery progress from the very beginning? Here’s our painting post, our big shopping spree, and our crib hunting rundown.
Update – Want to know where we got something in our house or what paint color we used? Just click on this button:


Laura in Denver says
Here’s an even easier (though more expensive) way to make no-sew curtains for a kitchen if you like the vintage look–clip up a vintage tablecloth (approx 52 x 65). No sewing required at all! If you want a matched set, which is hard to find if you’re buying vintage, you can use two tablecloths from modahome.com. If I were a little handier with the camera I’d post a photo.
YoungHouseLove says
Love that!
xo,
s
Jenny says
I used a sheet that coordinated with my sons bedding. I did use my sewing machine to hem it but I also did a stitch across where the hem is in the top making a rod pocket and a nice little ruffle at the top when I inserted the rod!
YoungHouseLove says
Cute!
xo
s
Coco1101 says
I have to say you’re incredible! I don’t even know how I found your blog (for another article I’m sure)… I don’t know who you are (except you were expecting parents in 2010), where you live or anything except you are doing a baby girls’ room for your daughter.
I have no sewing skill, but your explanation on how to do this ‘seems’ so simple even a terrible house person such as myself could follow your instructions. You are GREAT! Thanks for teaching me something I may try in my dining room to replace the one’s I’ve had for a while!!!! Thanks again!!!
YoungHouseLove says
Aw thanks!! And good luck with everything!
xo,
s
laura says
LOVE this! But did you need to cut holes in the fabric to get the rings on? I feel like i missed a step? Thank you!
YoungHouseLove says
I just used ring clips! They clip onto the top of the fabric and hold it in place (no hold cutting). Hope it helps!
xo,
s
Ashley says
I have an exceptionally dumb question, as someone who does not sew or do anything crafty….with the curtains…what did you use to make the holes for the little clip on rings to go through?
Ashley says
oh sorry just read the above post
YoungHouseLove says
No worries! Good luck!
xo
s
Mellisa Moyd says
When the world says, “Give up,” Hope whispers, “Try it one more time.”- Author Unknown
Jamie Lu says
I was introduced to you guys by my sister Vickie. We also live in Va. On the southern end. Love the curtains and I am so thinking(and mentally planning) on making these. I do however, think it would be awesome to see you guys make a toy box/chest. My daugter Ailani has TONS and not really a box to put them in.
Sincerely Addicted to YHL, Jamie Lu.
YoungHouseLove says
Love that idea!
xo,
s
Melissa says
I just happend upon this blog for the painting furniture tips but have loved reading it for everything else. Love the advice on using iron on tape for the curtain panels. I have been avoiding making some for my kitchen because my sewing machine is acting up and isn’t giving me a nice clean stitch. I will just head down to Michael’s and give it a try! Thanks.
YoungHouseLove says
Good luck Melissa!
xo
s
Jane Dawson says
Really cute curtains! Looks easy to make by myself, so i’ll try this at home. Thanks a lot :)
Caty Smith says
Wow! This is darling! I just found out that I am pregnant, so haven’t gotten to the nursery stage yet! But I’ve been scoping out fabrics and stuff. I found some really nice robert kaufman fabrics that I think I’ll use. Looks great though!
Anne says
I have been agonizing over kitchen curtains for the past 2 weeks. I really don’t want to deal with sewing them. I figured if anyone had made no-sew curtains it was you guys, and I was right! I had already come across curtain rings and I love that idea. Wonder if I can use this technique to make a straight across valance, too?
YoungHouseLove says
Totally! It would work the same way! I’d just make a rectangle and clip it up!
xo
s
Katie says
I will definitely be attempting these curtains! how wide is each curtain panel? and how much wider than your windows do you hang your curtain rod? I need curtain hanging for dummies!
YoungHouseLove says
I usually go about 18″ wider than the window trim on each side of the window with the rod, that way the curtain can hang in that space instead of blocking light from shining in the window. Our curtain panels are just the width of the bolt (if you get upholstery fabric it’s usually nice and wide – and you can easily draw them to close most windows unless they’re giant). Hope it helps!
xo
s
Danielle says
dumb question– from the tutorial video, it looks like you only fold the edge over that once, which would leave a raw “edge” on the back side of the fabric… but your close-up photo on this post of the back side of the project has such a clean inside edge… does that edge unravel when you wash them?
YoungHouseLove says
There are two finished edges from the edge of the bolt (they’re not cut, they’re sort of fused) so that’s why it looks so clean even with just one fold. They don’t unravel when we wash them either – hope it helps!
xo
s
Whit says
An Instagram friend just directed me to your site because we found a well loved basketball goal that desperately needs a coat of paint…so glad she did!! Anyways, I am also looking at making curtains for my kitchen and am no seamstress either. I noticed on the one you made for the closet you did not use the ring hooks, but have the rod thread through the fabric. This is the way I will have to do mine, so, how did you work the top to make that work? Love your blog…a new one to follow for sure! ????
YoungHouseLove says
I just hemmed a little pocket in that one to slip the rod through (just make a little narrow “tube” at the top of the fabric by hand stitching or with a sewing machine). Hope it helps!
xo
s
bananas says
I love the no hem curtains and the paint colors! When my daughter was very young I found some very cute minnie mouse large graphic fabric in pink and I put a white tension rod across her closet and used white shower curtain rings to make a easy open/close closet curtain to replace the closet doors……I loved what it did to the room and it made it so much easier for her to get to her toys….
Deann says
I was wondering, does John sometimes not like a piece but will “tolerate” it because he doesn’t hate it either? I found an amazing ottoman that’s grey chevron and my husband said (exact words) “I said it was fine, I never said I liked it. But I could tolerate it.”
YoungHouseLove says
We like to have a Full Agreement Agreement, which basically means we both have to like something or we don’t get it/do it/paint it/build it. That means it takes longer since we have to wait to agree, but it ultimately makes for a house that feels balanced and that we both like :)
xo
s
Kayla says
I love this idea! I tweaked it a bit and used this concept to make no new bed skirt for my daughter’s crib! Thanks so much for the inspirations. We love your guys blog! :)
–Orchard Girls (orchardgirls.blogspot.com)
YoungHouseLove says
Love you right back!
xo
s
Kayla says
I love this idea! I tweaked it a bit and used this concept to make no new bed skirt for my daughter’s crib! Thanks so much for the inspirations. We love your guys blog! :)
-Orchard Girls (orchardgirls.blogspot.com)
Debra Young says
These curtains look amazing! I just hope I can find the clip on curtain rings down here in New Zealand. :-)
Anna says
I love the closet curtain idea. Where did you get the tension rod that screws in also? I have only ever seen true tension rods and I’m afraid they wont hold a floor length curtain.
YoungHouseLove says
It actually doesn’t screw in, you just twist it to get a ton of tension and it stays up. It’s from Home Depot and we’ve used them in our house since the very first one (they have yet to come crashing down, knock on wood).
xo
s
Denise says
do you remember who made the fabric for these curtains? I really want to buy it! Thanks! Looks great!!!
YoungHouseLove says
I think if you scroll back in the comments you’ll find that info :)
xo
s
Lauren Donley says
I am horrible at sewing, after many have tried and failed to teach me, but this makes curtains look less daunting! This is by far my favorite place on the internet, but sometimes I get emotional reading it and have to take a break from it… my husband I want a home in the country more than anything in the world but because of student loans and a lack of health insurance, it seems a million miles away. Seeing the transformations in your home give me hope that one day I’ll be able to do the same. (Provided we ever get even a downpayment saved!!!) Thank you for making a bright spot in a world of darkness on the web.
YoungHouseLove says
Aw so glad!
xo,
s
KENDRA says
Hi guys,
I bought some Target curtains that I love, problem is if we hang the rods right on the trim of the window (like we normally do with the windows in our house) the curtains are too long and drag on the floor. I thought about doing this type of look with hanging the curtain way above the window, but we have plaster walls (old house) which my hubby hates working with or nailing things into (he says you have to find a stud to nail into). Have you ever done this with plaster walls and do you have any tips for hanging the rods on the walls instead of window trim? thanks much!
YoungHouseLove says
Oh yes, our first house was all plaster walls! It’s not so bad. Just use anchors and screws!
xo
s
Jaclyn says
For the blinds you mentioned a cord wrangling piece that mounts onto the wall. Do you know what this is? I have a 2 year old boy that loves to pull on our blind cords and is destroying them.
YoungHouseLove says
It looks sort of like a metal Y that connects to the wall and you can wrap the cord around it a ton of times to keep it from hanging down. Hope it helps!
xo
s
Vangie says
This is awesome! Now I never have to search for the perfect curtains, I just MAKE them! With two littles one…who has time to sew?!? Thank you for this!
Denise says
I have always adorn those homemade curtain! What ever happened to the lil green shell ceiling fixture/light.
YoungHouseLove says
That stayed with our last house when we sold it, but we loved that thing!
xo
s
Alycia says
I love that these are no-sew! I have a sewing machine but I always jam it up so i am afraid to even touch it. So this inspires me to go into joanns to get some pretty fabric to do it myself. Great job, and your nursery looks amazing with all the hard work you’ve done!
Stephanie S. says
I love this curtain idea for a closet. I’d like to give this a try instead of purchasing closet doors for our nursery that’s in progress. We have a very large closet that would require double doors. Would it make sense to make two panels, hooking one to each side of the closet?
YoungHouseLove says
That sounds like it could work really well! Good luck!
xo
s
Stephanie S. says
Thanks Sherry! :)
bryna says
Hi there! Love these curtains! Just grabbed some cute ikea curtains for our kids’ room but I have a dilemma – one window is super close to the wall. Is it okay to have the rods at different widths in the same room or will that look odd?
YoungHouseLove says
Yes, that should work well I think, as long as they’re the same height. Good luck!
xo
s
Tammy says
What are the paint colors you used? I love them!!
YoungHouseLove says
For the ceiling we landed on Adanna Aire (in a flat finish) and for the walls we used Autumn Bloom (in an easy-care eggshell finish) by Mythic paint.
xo
s
Aqiyl Aniys says
Congratulations! You two have done such a beautiful job fixing up and decorating your place.
Melinda says
Love this room! Can you tell me what the name and brand of the fabric is? The link to fabrics.com no longer works.
Thanks!
YoungHouseLove says
Hmm, it’s P Kaufmann fabric so maybe try google imaging that and looking for a swatch that looks the same?
xo
s
Peg says
Love your colors, and the fabric, but the link is no longer working. Would you be willing to share info on the fabric again, please? Thank you!
YoungHouseLove says
Hmm, it’s P Kaufmann fabric so maybe try google imaging that and looking for a swatch that looks the same?
xo
s
Diane says
Glad to see that you still answer questions on posts so many years later! I’m not typically very good at DIY projects (my errors tend to cost more money than buying things ready-made) BUT, I’m feeling really inspired by your no sew curtains. So, my question: how do you make sure the hem is straight across the top and bottom? I can see myself cutting/ironing everything and the curtains ending up slanted. Any tips for that?
YoungHouseLove says
The hem tape is pretty good to follow since it’s a straight line (it folds when you bend it so it’s pretty simple). Good luck!
xo
s
Jill Hampton says
I love the curtains and the fabric you chose. Fabric.com must no longer carry it, because the link doesn’t work. Can you please give the name and make of the fabric? Thanks so much! Your houses are beautiful.
YoungHouseLove says
It’s by P. Kauffman if that helps. Maybe google image that name and look for it that way?
xo
s
Erin says
Where did you purchase the tension rod for the closet with screws? I’ve only been able to find the ones with rubber grips on either end.
YoungHouseLove says
I think it was from Home Depot?
xo
s
Alice says
Thanks, I followed your tips. The end result is AWESOME!!