Well well well, if isn’t those little photography note cards again. You know, the ones we bought on our anniversary from a local art gallery to hang in our bathroom? You might not even have registered them in that post since everyone went bananas over the whole Sherry-haircut thing.
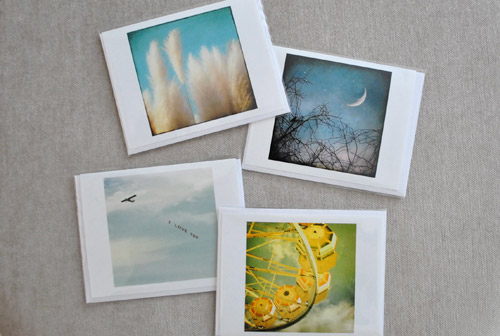
Anyway, hanging them in the bathroom was the initial plan. Until I noticed some of the photo colors were in the same neighborhood as our framed $5 scrapbook paper. That neighborhood being Sue-the-Napkin-ville. Or is it Sue-the-Napkin Heights?
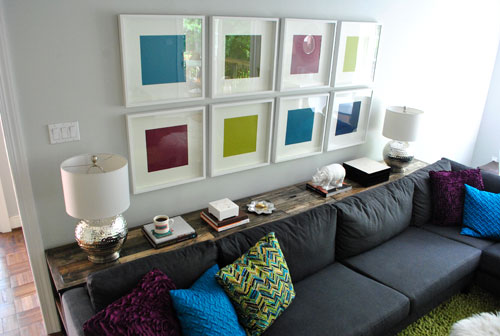
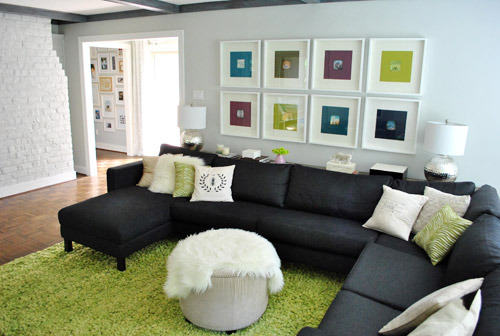
We figured that maybe our $4 a pop Sherri Conley note cards were destined to live in these eight frames (plus we couldn’t decide on a configuration for the bathroom, so we liked the idea of enjoying them out in the living room). But it meant we had to get four more of them first, so we shucked out another $16 to round out our “local art collection” (from Crossroads Gallery here in Richmond).
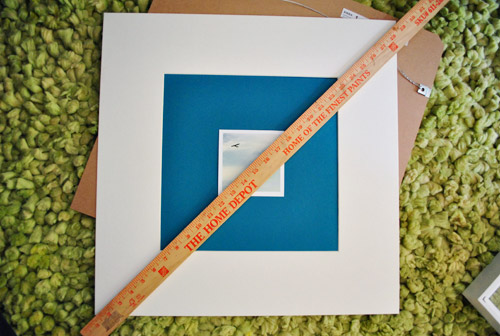
The idea was to add the small square of art into the middle of the colored paper square that already sat inside the square frame. Thereby making the colored square of paper into a fun little colored square mat. Wow, lots of squares going on. We’re one do-si-do short of a square dance.
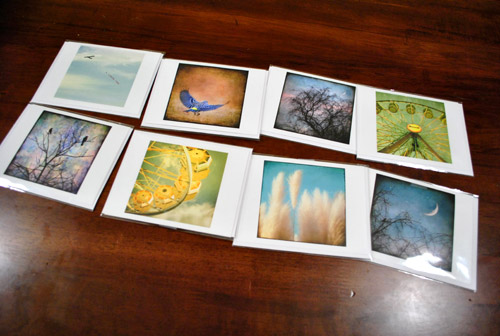
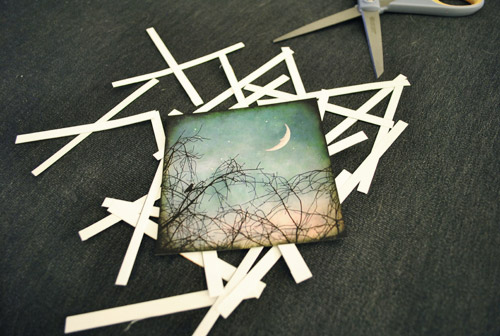
First we had to cut our rectangular note cards into… you’ll never guess… squares. I used an exacto and a ruler to keep my lines straight, but was brave enough to just eye the placement of my slice. Yup, my middle name should be Danger. Or soda. Or both. John Danger Soda Petersik. I like it.

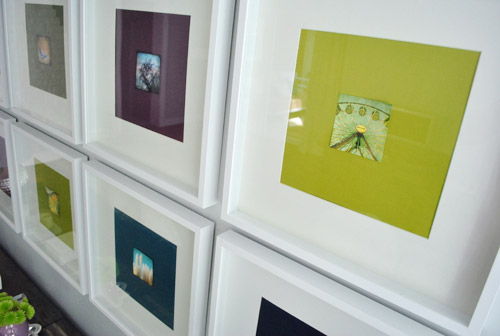
As you can see, we left a thin white border on the pictures to, I dunno, further emphasize their squareness? They sort of looked like little polaroids to us.
Then one by one the frames came off the wall so the photos could be scotch taped into place on each colorful background which essentially became the “mat.” To get them centered we eyed them, then used a yardstick to make sure they were actually centered. To do that we just lined up the yardstick across two opposite corners, and then repeated that with the other two corners to make sure they seemed to intersect equally.
Finally, everything was reframed and ready for our viewing pleasure.
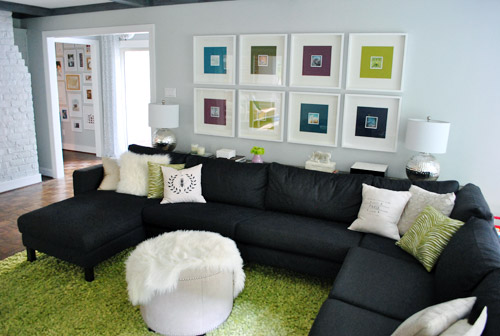
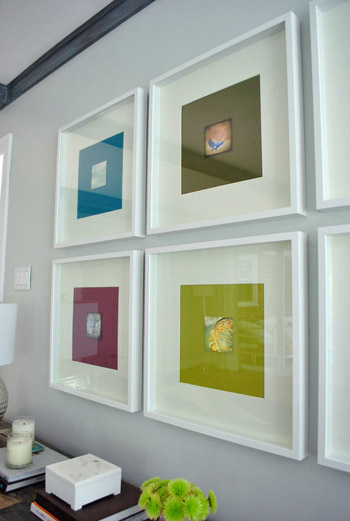
Only problem, we weren’t totally psyched by the result. We didn’t mind the small size (it just makes us want to lean in and take a closer look) – although I know some folks might think bigger is better (that’s what she said). Our issue was that something about them was really interrupt-ish and busy and, well, just too square-y (it honestly looks better in pictures than it did in real life). And yes, the reflection on the glass totally bites for taking pics, but we’re not quite ready to splurge on eight panes of museum glass just yet.
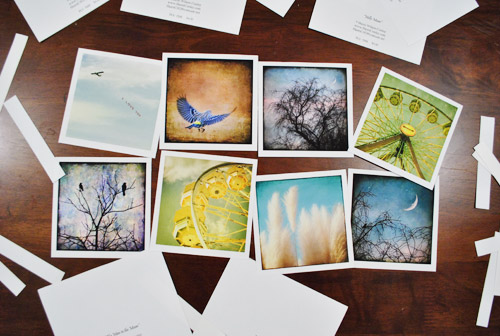
We realized the white borders I left on when trimming the note cards might be the problem. It made the distinction between the photo and the colorful mat so defined that we kind of lost the fun coincidence that each pairing was sort of linked by color. So rather than the paper feeling like an extension of the art’s hues, it just felt like a tiny picture on top of a thick bright mat on top of a thick white mat. It was a square vortex and it was threatening to eat our brains.
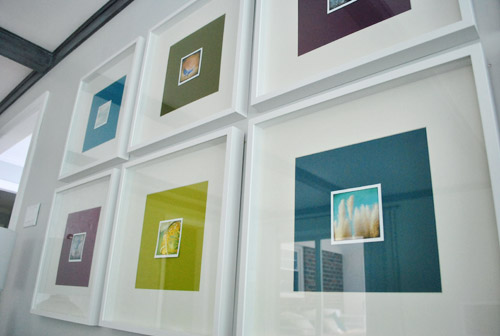
So after a few days of living with it (and not growing any fonder) Sherry took it upon herself to remedy the situation. And since she has a much steadier hand than I do, she didn’t even use a level and an exacto (just a regular old scissors). Cocky much?
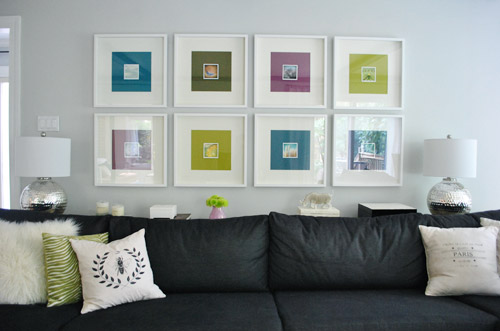
Of course her cuts were great. And now we’ve got this:
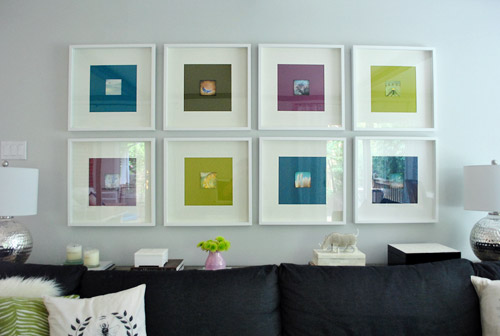
We like it muuuuch better – especially in real life. Although we’re the first to admit that for some reason the white framed note cards didn’t photograph as crazily as they looked in person, so there’s not as much of an obvious improvement from the square-on-square-on-square action that was going on before. But in person it was such a relief. We worried we might have to scrap the whole note card idea entirely, but once they were trimmed down and put back in place, all was right with the world. Or at least with the left wall of our living room.
We like that they feel less busy and that subtlety is much preferred. They don’t scream “check-me-out!!!” but are nice when your eyes meander around the room and happen to land on them. So for a total of $4.64 per frame (64 cents for the scrapbook paper backgrounds and $4 a pop for the photo note cards) we’re psyched.
I still wouldn’t go as far as to call this our forever art solution for these frames. We’ve learned our lesson when it comes to making those sort of giant declarations since our house is always a WIP (work in progress). Not to be confused with an ORB (even though Sherry is definitely demonstrating her undying love of all things oil-rubbed-bronze). So we think adding these small photographs are a good warm-up for us since they might end up laying the ground work for something else that we may want to transition to a bit further down the line. So let’s call it a baby step. We’ve introduced some small photography, so maybe in a while we’ll try some larger photography, rehang the note card photos somewhere else, and scrap the 60 cent scrapbook paper altogether… who knows.
What I do know is that looking at some of these photos makes me want to go on a ferris wheel. Oh, and eat funnel cake. Yeah, definitely that.
Has anyone else made any art-y updates lately? Or used note cards as wall decor? Or gotten sucked into a square vortex, never to be seen or heard from again? Well, if you have, I guess you wouldn’t be able to comment…
Psst- We announced this week’s giveaway winner. Click here to see if it’s you (plus the $15 discount code for everyone is still valid until August 31st).

Megan says
Love the blog, and love what you’ve done! Where are the frames from? I’ve been on the hunt for some just like that.
YoungHouseLove says
They’re Ribba frames from Ikea ($19 each). Hope it helps!
xo,
s
Megan says
Good ole’ Ikea, I should’ve known! Thank you!!
Violet Craft says
I never comment… but had to on this post for some reason. I totally notice the difference between white borders/no borders is huge. Just sayin’. :)
Yasmin Mariess says
OK… my take on your square-inside-a-square thing?
Your overall look is RECTANGULAR (i.e.: 8 frames) and I would have divvied them up into two sets of FOUR. On different parts of the wall, or with a decent gap between the two sets of four. (to keep the square thing going on)
Totally random comment, to be taken with a pinch of salt!
Loving your blog. At first, I thought you guys sounded to ‘perfect’ to be interesting, but I kept reading, and now I ‘know’ you a bit, I’ll be coming back for more!
YoungHouseLove says
Haha- oh yes when you read a bit more it’s clear we’re dorky and imperfect. Haha.
xo,
s
Yasmin Mariess says
Oh, also…. I’m from Guernsey, Channel Islands. I live in a 200+ year old farmhouse.
YoungHouseLove says
That’s amaaaazing! I don’t think I can even imagine all the character and magic you can find in a 200+ year old farmhouse!
xo,
s
AnnahStudio says
You guys are awesome! I spend way too many hours neglecting things that I should be doing so I can read about what you two have accomplished.
Really there is no reason I should even be suggesting this, especially since this post is over a week old, I love what you did with the pictures, and you have over 300 comments already! …but, maybe you could take Sherry’s dry brush technique & the gray color she used on the beams on the ceiling and lightly apply it to the scrapbook paper allowing the colors to still show through. I think it would give it a little more texture and bring in some of the dark color for a more cohesive look.
YoungHouseLove says
That could be fun down the line for sure!
xo,
s
Sharon @ mamadoitall.blogspot.com says
I like it! I like all of it. Basically, everything you do. :-) In answer to the question at the end, I’ve used museum postcards for inside a wardrobe closet in cheap 4×6 brushed metal frames from Target – works perfect for a tiny space and makes it a little special.
Nikki Kelly says
I remember when you changed all this stuff out, but thanks for posting it again! Since the first intro of these little pictures I’ve really gotten into Instagram (aka I upgraded my iPhone 3G to 4s) and now I’m obsessed! I’ve been thinking about printing some out and this really motivates me to actually do it now.
Oh, and the tile is looking fantastic! Great job.
Nikki @ the ambitious procrastinator
Bernadettta says
I love the frames may nI ask where you guys found them?
YoungHouseLove says
They’re from Ikea. Hope it helps!
xo
s
laura@printing-instagram says
Hey, this is such an awesome display. I blog about tips for displaying printed Instagram photos and this display can be used with Instagram prints. This idea was too good not to share so I have put it in Printicular’s blog and linked back you guys!! thank you for the inspiration!
YoungHouseLove says
Thanks Laura!
xo
s
Sierra says
Hi,
I absolutely love what you did with the picture frames. I am thinking of doing something of the like in my living room and was wondering where you got your frames from.
Thanks :)
YoungHouseLove says
They’re from Ikea!
xo
s