Since one-year-olds aren’t really “of age” when it comes to pumpkin carving, we’ve been trying to figure out a way to involve Clara in pumpkin decorating this year. And she deserved a promotion from last year’s job as hand model:
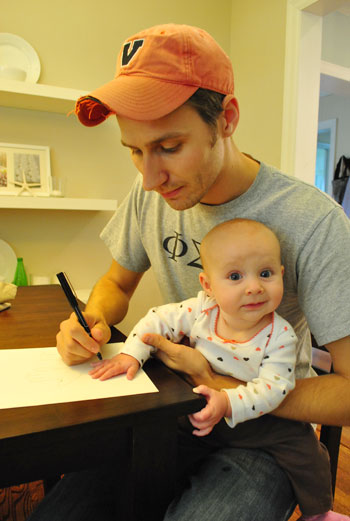
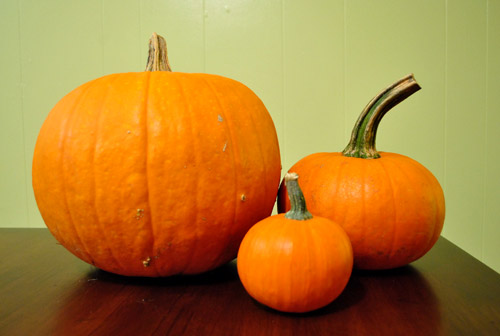
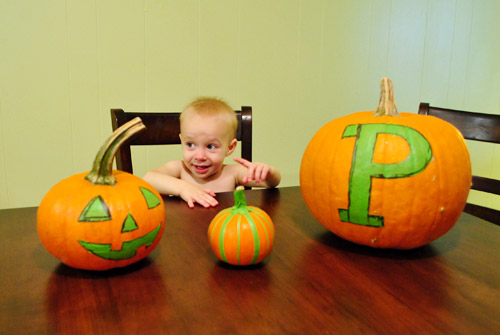
So a few days ago we finally figured out a way for Clara’s hand to come in, um, handy again. But first – let’s introduce our subjects. We’ll call them Big Brother, Middle Child, and Little Piggy.
On Monday night I broke out my favorite all-purpose medium (aka painter’s tape) and marked out a traditional jack-o-lantern stencil on Middle Child.
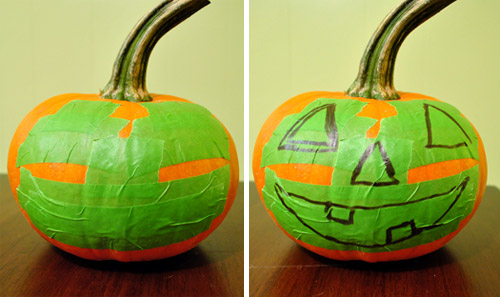
Then with an exacto knife I cut out the pattern carefully (okay, not that carefully – I sliced into the pumpkin a bit) and peeled away the extra tape.
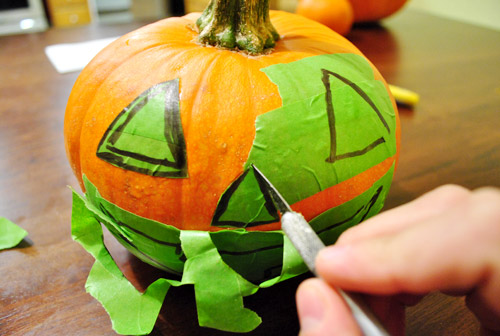
Voila. He’s not done – just ready to be painted. Do you see where we’re going with this?
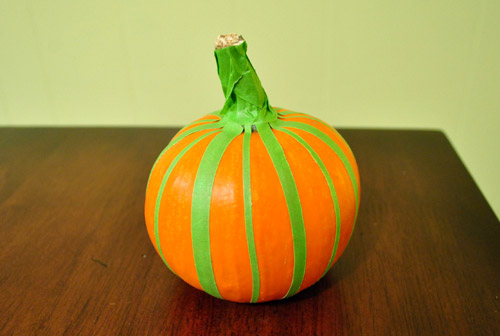
For Little Piggy I used a ruler to slice some thin strips of painter’s tape and created a stripe pattern all around the pumpkin.
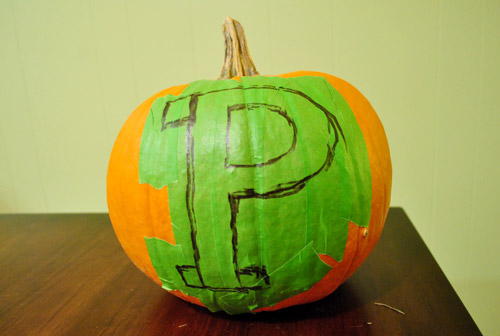
And for Big Brother we decided to go with a P to represent the whole Petersik family of four (four-leggers count in our house – so this isn’t a baby announcement).
A few more cuts later, and our trio of pumpkins were ready to meet their artist.

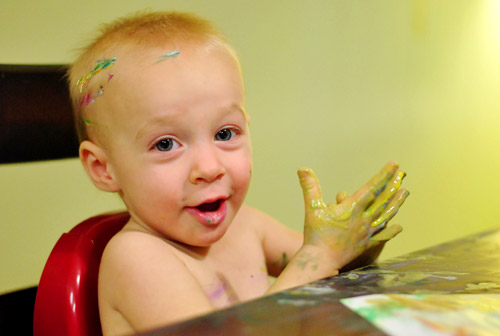
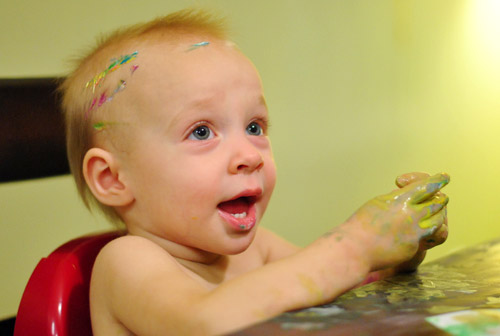
And here she is now. Stripped down to a diaper and ready to make a mess.
We poured out some Crayola Washable Paints on a few paper plates and with some minor urging, Clara delicately started coloring her orange canvas.
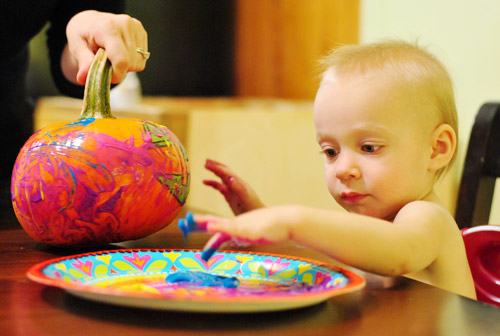
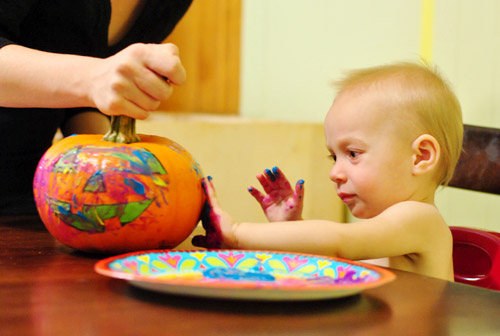
She grew a bit tired of touching the pumpkins after the first two (she liked just dabbing her hands in the paint instead), so Sherry took over the task of painting Big Brother. Which was probably for the best since we decided that a rough circle around the monogram might be fun (and there was no way little miss toddler hands could contain herself to such a strict parameter).
The verdict? Clara seemed to have a blast. But eventually we got the “all dawn!” signal (aka: all done) and decided to call our art session officially complete.
Not before snapping a few more cute pics, of course.
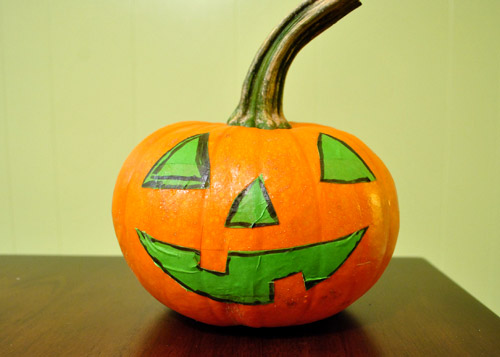
Once Sherry had whisked Clara off to the bathtub, I got to seeing what our artiste had accomplished. Yup, it was tape-peeling time…
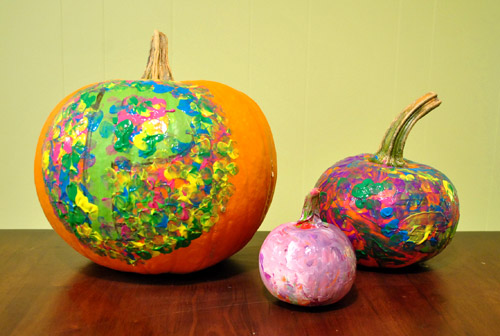
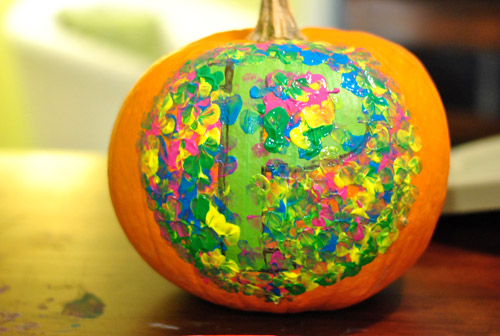
I carefully peeled of the painter’s tape to reveal our final result (with the paint still wet, since we feared that peeling it off once the paint was dry would result in the paint peeling off in chunks). Behold: Psychedelic pumpkins!
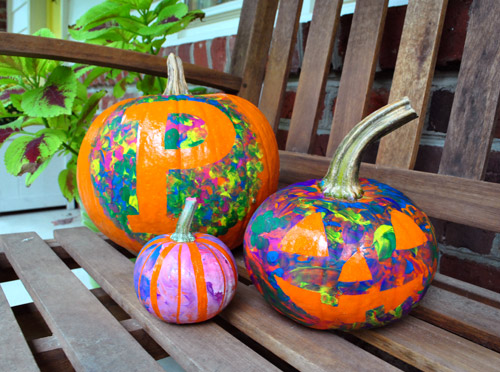
Sure, they’re not über sophisticated – but they were fun. And we think white pumpkins + a more refined color palette (yellow & gray? emerald and navy? teal & grellow?) could be really fun instead of the rainbow-inspired color scheme that Clara chose. Oh and we sprayed them over with a sealer (we had Aileen’s Gloss Spray Acrylic Sealer around, so hopefully that’ll do the trick) because this paint is washable, so we don’t want a rainstorm to send colors bleeding all over our bench (hopefully our porch awning + sealer = enough protection).
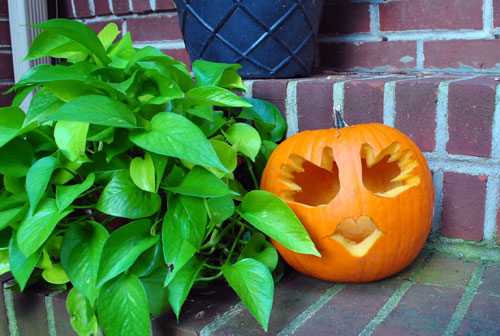
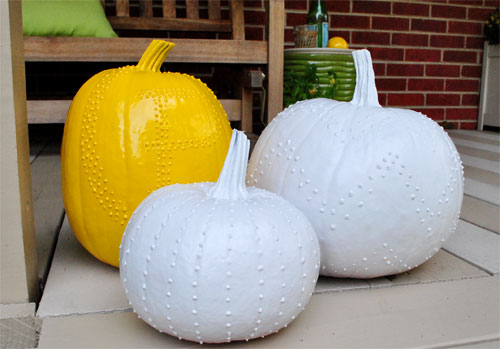
And on the subject of pumpkins, let’s take a walk down memory lane. You’ve already seen our handprint-eyed jack-o-lantern from 2010 (first pic) but that was actually in addition to the crazy puffy painted versions that we also did last year (without Clara’s help). I think they’re our favorites of all time – and they could be fun to do with kids too.
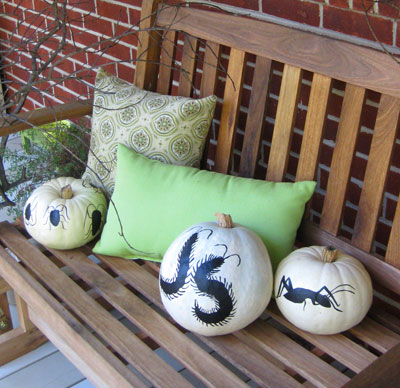
In 2009 we went the creepy route and painted insects on white pumpkins (and yes, monograms or initials tend to be a theme for us – but kids could have fun painting these too).
You can even watch that pumpkin project on time lapse video:
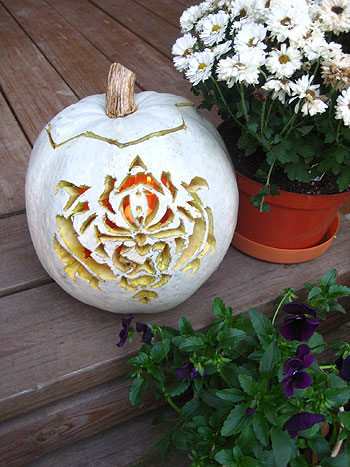
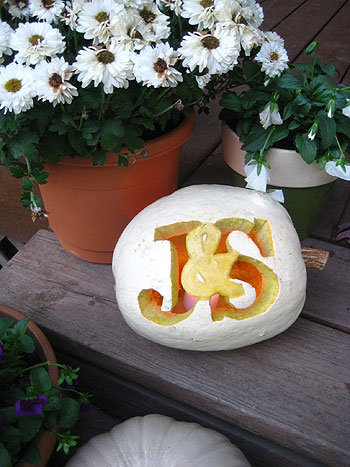
And last but not least, here’s one where we actually cut our pumpkins. In 2008 we tried our hand at intricate carvings – only one of which really worked out that well, if you ask me. Which one? The monogram of course. Wow, we really do like to see letters on pumpkins don’t we?
So, with all that said (and shown) – what are you guys doing for pumpkins this year? We’d love to see links and photos if you’ve got ’em. Or if you have any great tips for including kids and toddlers in the festivities, I’m sure Clara will thank you when next Halloween rolls around…
Psst- We had some fall fun this past weekend (more over on Young House Life).

Julie says
We stole your idea!! Hope you don’t mind :) I gave you credit with a link back and everything :) Thanks for the great idea! My daughter had a blast!!
http://mjrougeux.blogspot.com/2011/10/its-fall-yall.html
YoungHouseLove says
So cute!!!
xo,
s
Ashby says
LOVE this idea! We are going to a pumpkin carving party this weekend and there were be a few kiddos there who aren’t old enough to carve yet. This is a great way to get them involved! Thanks!
Sarah says
LOVE your blog and thanks SO MUCH for this idea!! We tried it this weekend and our little one had so much fun.
http://thecianofam.blogspot.com/2011/10/halloween-art-pumpkin-painting.html
YoungHouseLove says
So cute! Love it!!
xo,
s
Ashley says
I did this with my two year old and he loved it! (And wrote about it on my blog too.) Great way to let the little ones in on the pumpkin fun!
YoungHouseLove says
So glad!
xo,
s
Cynthia says
I went au naturale with our pumpkins, and they’re in the hallway outside of our apartment. (I thought that the smell of pumpkin wafting through the enclosed corridor would probably turn a few stomachs.)
But I LOVE the results of Clara’s painting! The vibrancy of the colors works really well with the orange. I don’t have little ones, but if I ever do, I’m totally stealing your idea.
Take care!
Joy G says
John & Sherry–just wanted you to know that this post inspired my “Thanksgiving Pumpkins” this year and I just put a link to you on my tutorial version: http://getagriep.blogspot.com/2011/12/heres-one-to-tuck-in-your-pocket-for.html
I love your blog and read it faithfully! <3
YoungHouseLove says
So much fun! Love it!
xo,
s
Kelly says
Thanks so much for being a constant inspiration and creativity resource! We’re totally taking a page from your pumpkin painting book this year to host a pumpkin ‘decorating’ party for all ages.
YoungHouseLove says
Aw so cute!
xo
s
Jill says
This sounds so fun! Looking to do it for my son’s bday party in October. Can you tell me, how long does it take for the fingerpaints to dry? I’d hate for the kids to not be able to take them home…
YoungHouseLove says
Hmm, this was a while back so I don’t quite remember but maybe 2 hours? It probably depends how thickly the paint is spread.
xo
s
Jill says
Thanks for replying! I’m SOOOOO not crafty, but I’m trying.:-) I just think this looks like so much fun. My son is going to be 3 years old and we’re just having family over, kids ranging between 1 year and 5 years old. Trying to think of something for that range is tough. Any other ideas?
YoungHouseLove says
Hmm, what if you made orange pumpkins from foam (you can buy those thin sheets of it at the craft store) and cut out a lot of eyes and noses and mouths and kids could glue stick their own pumpkin faces? Could be fun!
xo
s
Betsy says
Ok – I know this post is super old – but I have a 14 month old and we want to finger paint her pumpkins this year. Only problem, I am afraid she will eat the paint. Would an all natural paint stick to the pumpkin? Most suggestions for finger paints I am seeing online are a mixture of food (whipped cream, yogurt, etc..) and food coloring. And if I did use a “food-based” paint, should I spray a primer on?
sorry – so many questions!! I appreciate any advice you have.
thank you!!
YoungHouseLove says
I would just use an non-toxic paint and then you can spray it with sealer if you’re worried about it lasting. Hope it helps!
xo
s
Rosie says
We tried this using washable finger paint and then sprayed Krylon clear acrylic spray over the whole pumpkin. The washable paint flaked off completely after two days. A good idea, but it didn’t work out the way I thought it would.
YoungHouseLove says
Oh man, it stinks when things don’t work out like that. I feel for you!
xo
s
Rosie says
I am not sure where we went wrong (maybe the brand of paint), but the kids still had fun painting….and now we have a clean pumpkin to carve or decorate again! That puts a positive spin on the situation.
YoungHouseLove says
Amen! If the kids have fun, it’s a win!
xo
s