Pretty much from day one (even before we learned that the bean was actually a beanette) I was dreaming of painting the nursery walls a fun pear green while taking the ceiling from bland ol’ white to a light aqua color. But somehow saying “green walls with a blue ceiling” conjures up all sorts of scary Trading Spaces episodes so even my dear hubby wasn’t getting my “vision” until we broke out the paint swatches and I was able to explicitly show him what I meant. There’s a tip for you ladies: many people (especially guys who don’t speak “interior decorating”) are visual creatures. So saying something like “I want to paint the side tables black” can be a lot less effective (ie: scary for a dude) than showing your man an image of a room with black side tables that you know will calm his nerves about the whole deal.
Sure enough, as soon as I whipped out a soft celery-pear-ish tone for the walls and showed John how sweet a subtle and dreamy aqua would be on the ceiling (especially with the white crown molding between them to really set them off) he was on board. Then we just had to get into our trusty painting clothes and finish clearing out the room so it was ready for the big transformation (and speaking of big, check out that belly- it’s quite a feat with four more months of baby-carrying left).

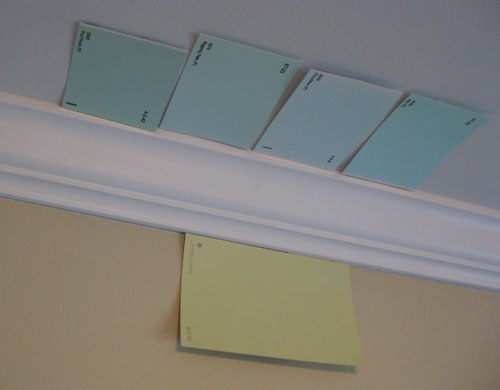
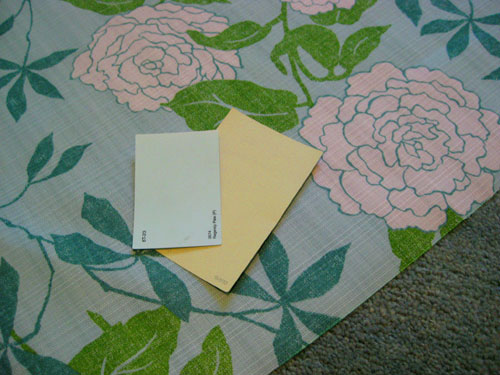
But back to my favorite subject: paint. Just like we did in this old ceiling painting post, we taped all of our potential ceiling paint chips on the actual ceiling so we could see how they would look in that light (colors look different on ceilings than they do when you hold them up to the wall since light reflects differently off a horizontal plane). We decided the swatch on the far right was too bright, the swatch to the left of that was too light and the swatch to the left of that one was juuuuust right (while the swatch on the far left was a bit too muddy). So that’s how we honed in on our final ceiling color after hunting through a bunch of swatches and taping up the ones we liked best. Oh and the winning swatch was called Regency Pale by True Value by the way.
As for selecting the wall color, that was pretty simple. I’ve always loved Celery Sticks by Glidden (it has happy golden undertones and so much personality without overwhelming or sucking the light out of a small space). So of course I was giddy about finally having the perfect opportunity to use it to create a fun and cheerful nursery thanks to the little person that I’m busy growing.
We also decided it was time to take some Mythic paint for a spin- not only because I’m knocked up (and shouldn’t be painting with anything full of chemicals and VOCs) but also for the sake of the baby (since regular paint can off-gas for one to even three years after it’s applied!). Sure it’s $40 a gallon (while a lot of the cheaper Lowe’s and Home Depot stuff is around $25) but it’s known to be the cream of the no-VOC crop thanks to the great coverage, the wide range of amazing colors, and their completely non-toxic and mommy/baby friendly formula. So we hit up EcoLogic (one of our favorite local haunts for all things green) with both of our pre-selected swatches in hand.
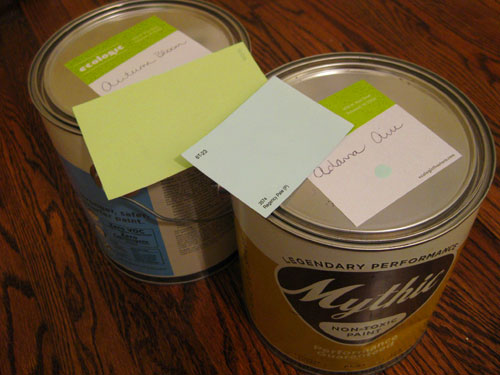
We figured we’d hold them up to the Mythic paint deck to select something as similar as possible in both colors but we had no idea that Mythic could actually do color matching (but not with a machine, they store a plethora of other brand’s formulas in their database for easy replication- without the VOCs). The only catch was that our swatch from True Value was one of the brands that they didn’t have in their system and Celery Sticks by Glidden was too new (just introduced a few months back) so it wasn’t yet in the database. Not to worry, we actually found two extremely similar (if not identical) Mythic colors in their deck. For the ceiling we landed on Adanna Aire (in a flat finish) and for the walls we ended up with Autumn Bloom (in an easy-care eggshell finish).
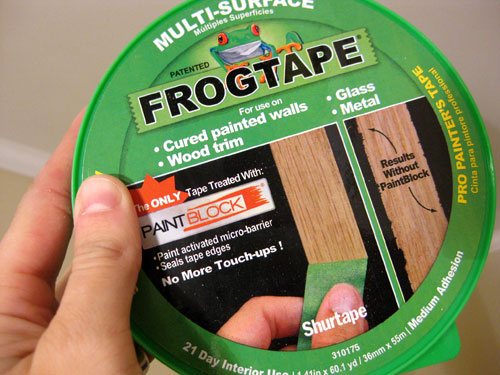
When we proudly returned home after purchasing our new nursery paint we remembered that the kind folks at Frog Tape had actually sent a few rolls our way so we could give it a try. We’ve heard so many good things about their mad scientist tape (which has a patented formula that creates a “micro-barrier” on the edge of the tape when paint comes in contact with it, which seals it and makes bleeding a virtual impossibility). Isn’t that some Bill Nye The Science Guy technology? We were intrigued to see what that magical green tape could really do…
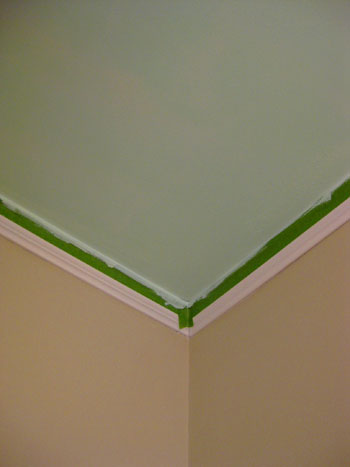
We’ve always been fans of cutting in with a brush (specifically, a special little brush that I love) but we must admit that taping the crown molding off didn’t take very long…
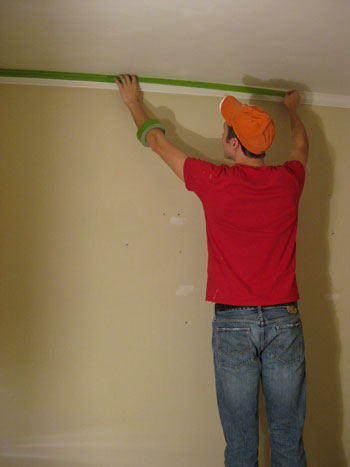
… and it really made painting the edges of the ceiling go a lot faster than it would have if we were carefully edging by hand with a brush.
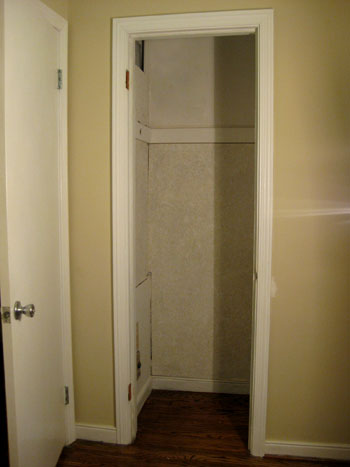
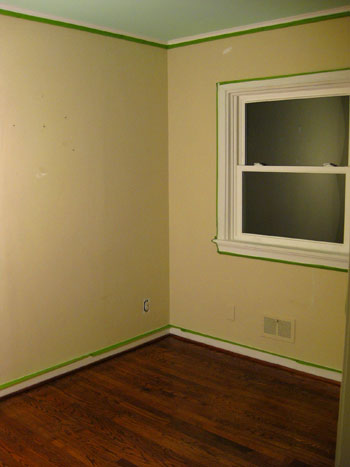
Oh and we interrupt all the tape talk to bring you our sad little nursery closet. We’re actually very lucky to have this pathetic little enclave since this room was originally a dining room so the fact that we could convert it into a bedroom (thanks to an already existent closet) was great. Too bad it looked like this. Wop wop.
We took off the door before we started painting (we’re planning a cute little closet facelift complete with a curtain that we can push to the side since the door swings out into the room and interferes with the main door to the nursery- grrrr).
And it was actually John’s fabulous idea to take the light aqua color from the ceiling and add it to the inside of the closet for a bit of fun. Isn’t he smart? The whole time he was painting the closet I was watching in awe and telling our baby girl what a decorating genius her daddy is (yes I talk to my stomach just as often as I talk to our chihuahua).
Here’s a sneak peek of the closet in progress, but we actually have to add a ton of baskets and bars (and the closet curtain of course) so stay tuned for another closet post when we get to that stage of the ol’ nursery makeover.

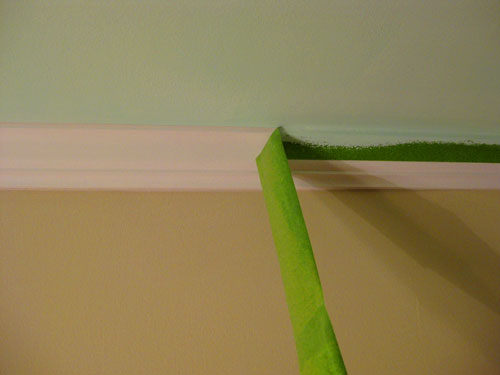
But back to the Frog Tape. After we finished painting two coats of soft aqua on the ceiling and in the closet it was time to remove the tape around the molding (we’re all about removing tape when the paint is still wet so it doesn’t peel any dried paint off with it when it comes down). And ladies and gentlemen we can definitively proclaim that we saw a sincere and amazing difference between blue painter’s tape and Frog Tape. It really does create a much crisper edge with zero bleeding or stippling. Seriously, it was such a clean line that it looked like we painted the ceiling before adding the white molding (which is always the goal). In short: it definitely would have come in handy for the horizontal stripes that we added to our half bathroom a while back and we’re extremely glad we had a chance to test drive it for our little nursery paint project.
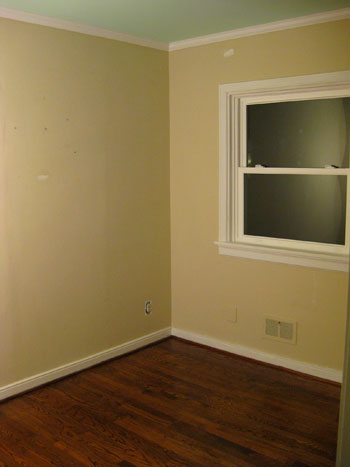
So here’s the room after we removed the tape. Isn’t the soft blue ceiling sweet? But it’s only halfway there.
John was on a taping roll so he decided to keep going. Within about ten minutes he had taped off the bottom of the crown molding and also around the windows, doors, and baseboards. Then it was time for some warm pear green paint…
Ta-daaaa! Isn’t it a sweet and playful combination?
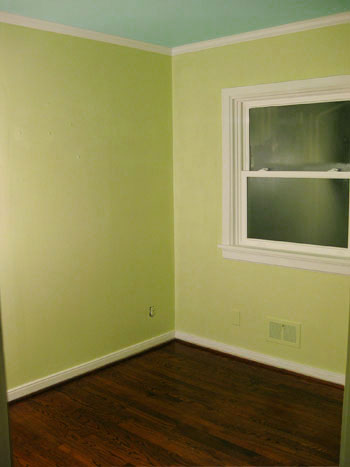
Oh and it bears mentioning that this photo was taken at night without any natural light (and wasn’t color corrected or anything)- so it’s a bit harsher and less subtle than it is in real life (especially in natural light). You’ll have to stick around for some daytime pics to really see it in all of its green and blue glory. Once we layer everything into the room (furniture, art, playful patterned curtains, a rug, a chandelier, etc) the walls will be the perfect cheerful-but-not-too-scary backdrop. And we love that it works with the rest of our home’s color palette thanks to the blue ceiling (which really relates to the soft gray-blue in our bedroom and kitchen) while the green ties into everything from our guest bedroom’s bright green headboard to our more-neutral-but-still-taupey-green bathroom. We like to think of our home’s newly defined color scheme as “sea glass inspired” since it’s full of soft creams, sandy neutrals, serene blues, and a variety of greens- all colors of old weathered glass that can wash up on the beach.
So that’s a little update on our nursery progress. And we’ll toss in this sneak peek of a few of the fun accessories (fabric and a cozy area rug) that we snagged to layer into our freshly painted space. Stay tuned for those details coming soon.
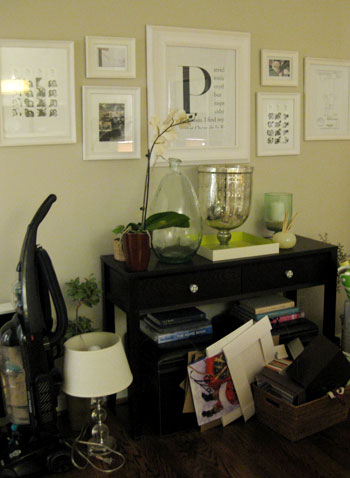
And since everyone seems to love seeing our house when it’s messy, we snapped this photo of our living room’s console table which was bogged down with everything that used to be in the nursery (namely the nursery closet). The good news is that it has all since found a new home, but we know you love seeing our house all crazy-like, so enjoy!
And while we’re on the subject of painting, we’d love to know what color you guys gravitate towards when it comes to nurseries. Whether you’ve already painted one (or five) or just dream about whipping one up someday, we’d love to know what hues tickle your fancy. Pale pink? Brown and blue? Bright rainbow stripes? Spill the beans.

Leave a Reply