Updated 2018, Originally Posted 2009
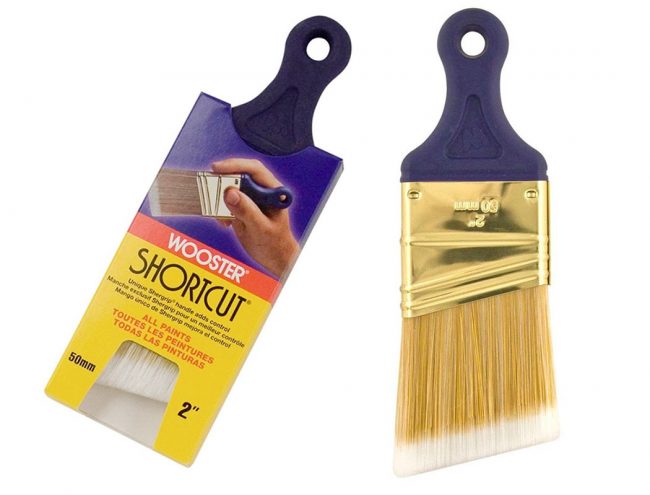
We actually get a lot of edging, cutting in, and trim-painting questions so we figured we’d share our secret… this short-handled, angled, 2-inch angled brush made by Wooster. With this brush and a little practice, you’ll be painting straight lines without painter’s tape in no time!
Best Cutting In Brush Buying Options
These days you can find these short-handled, angled brushes just about anywhere. The Wooster brush is our usual go-to (you’ll find 2 or 3 of them around our house at any time) but lots of stores sell them these days! Whatever the brand, it’s the 2-inch handle and angled bristles that make them the best paint brushes for a professional paint job.
– Wooster Shortcut ($6, available at Home Depot)
– Valspar Wall & Trim Brush ($7, available Lowe’s)
– Purdy XL Cub Sash Brush ($12, available at Lowe’s and Amazon)
Why An Angled Sash Brush Is The Perfect Cutting In Tool
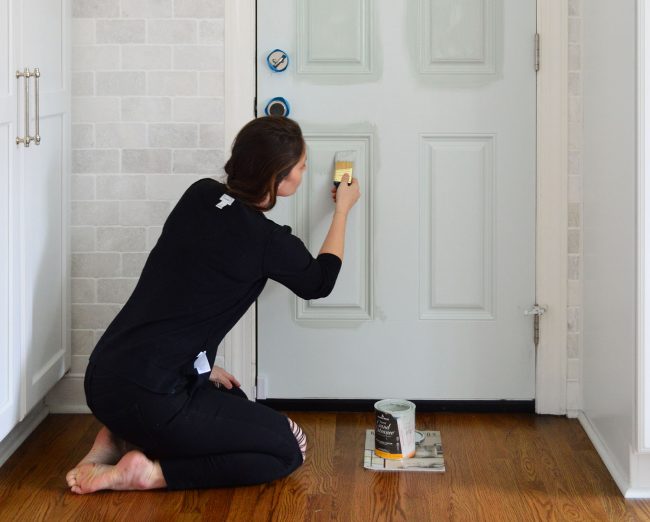
The short handle on these types of brushes (sometimes called a “sash brush”) makes it easy to grip – almost like a big pencil! – and that makes it worlds easier to stay in the lines, whether you’re edging around door or window trim, or trying to cut in around a ceiling. And the angled tip keeps your paint from globbing up into drippy puddles as you drag your brush along your edge.
All this means you can paint any room like a pro without having to bust out the painter’s tape (which is a time consuming and not-always-successful process anyway). We actually love the easy control of the short-handled brush that we use it for almost any painting project: even painting the trim itself!
How To Edge A Room With A Short Angled Brush
And if you want to see the brush in action, here’s how Sherry used it to get a clean edge in our guest bedroom – both on horizontal edges (like a baseboard) and vertical edges (like a door frame). You can watch the video below or see it here on YouTube.
The Big Mistake To Avoid When Cutting In
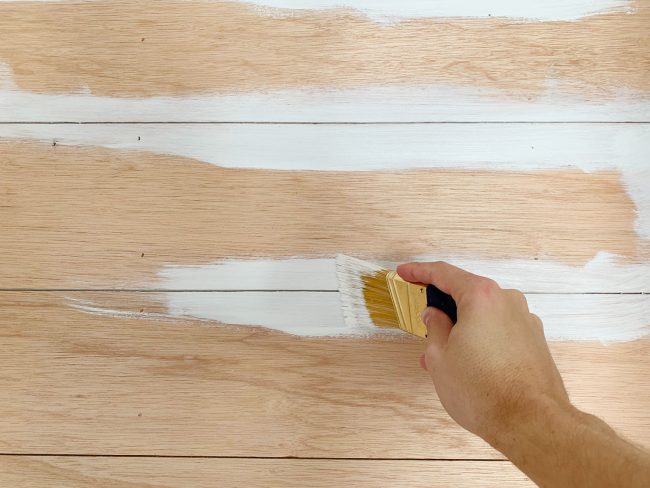
The main thing that can wrong when using this type of brush is to put too much paint on your paintbrush. That will lead to globs, drips, or a build-up of paint as you drag your brush along your edge. That’s why we always like to wipe the excess paint off in the can AND brush a little extra off elsewhere on the wall or trim before pressing our brush to our edge. This helps make sure you have the right amount of paint on your brush when you begin cutting in. It make mean you don’t get full coverage in one coat, but that’s better than having lots of drips or globs.
Storing Your Paint Brush
The polyester bristles on these brushes are easy to clean with water, but you’ll probably find yourself wanting to keep it fresh between coats. Luckily these short little brushes fit nicely in a snack-sized Ziploc bag. The tight seal keeps your brush from drying out – even days at a time!
More Painting Resources & How-Tos
If you’re looking for more help getting your painting project off the ground, here are a few other posts you might find helpful:
- How We Roll A Room To Paint Ceilings and Walls (With Video!)
- Preparing A Room For Painting (including Time Lapse Video)
- How To Paint Trim & Molding Using A Brush
- Painting Window Trim With A Paint Sprayer
- Painting Doors With A Paint Sprayer
- Tips For Making Your Paint Job Easier
*** This post contains affiliate links***

Johnna says
So – call me dense but does this mean that you have eliminated your need for painters tape when cutting out ceilings and corners?!?!?!?
Johnna
YoungHouseLove says
Hey Johnna,
We haven’t completely eliminated the need for painters tape (in fact we used it to make those bathroom stripes) but we don’t regularly use it for ceilings and baseboards anymore. This brush is quicker and produces smoother results than the semi-reliable blue tape (and there’s a lot less waste!).
xo,
s
Laura says
Hm… I didn’t think it was possible to do trim without painters tape! Perhaps I’m just too impatient to take my time painting. Thanks for sharing the awesome tool though!
YoungHouseLove says
Hey Laura,
That was totally me. And the beauty of this brush is that it’s so easy to control you have to TRY to go out of the lines. The angled bristles and the short handle make it so easy to make a nice smooth line between the trim and the wall (smoother than a tape line) and it’s so much faster than taping the room off first. Definitely give it a whirl!
xo,
s
Vanessa says
We will have to give this a shot on the next project! My bf is a huge fan of the little pad on wheels for getting a great line without paint on the ceiling (as long as you are super careful not to get paint on the wheels). We are thinking of taking on a beadboard project in our small dining room. Any helpful tips?
YoungHouseLove says
Hey Vanessa,
No beadboard tips here (we haven’t taken that on yet) but we’d love to hear from anyone who has! Any tips guys? Do tell.
xo,
s
Kristina says
Getting ready to paint the trim in my living room today–will have to stop and grab this brush. It sounds amazing!
We found a sweet tool for our ceiling, window, etc., edges: Shur-line edger pro (http://www.amazon.com/Shur-Line-01000-Paint-Premium-Edger/dp/B000WOMYIU). I was dubious but it came with a paint set we bought (our first time painting and we’re tackling 60% of our new house… yikes!!) and my hubs gave it a whirl. One word: amazing. Oh, and fast. Love it!
KK says
Yes! I love that thing too. It made painting the walls next to our trim and ceilings so ridiculously easy.
Elise says
I thought that tool was awful – try dipping it in paint without getting paint on the rolly edge! Then the paint got on the ceiling where it wasn’t supposed to be. Never again.
Sarah says
I tried it out but was unsuccessful. Any tips on hos to use the Shur-line edger pro?
Stephen says
Here’s my tip for the Shur Line. I’m using the new one where the guides flip up. I had issues at first and about gave up. First, don’t dip. Load the Shur Line using that 2″ angled brush of yours. Don’t try to load up the edges, just load the middle of the pad. Second, about an inch below your ceiling, blot the pad leaving a nice (ugly) spot of paint. Third, guides still up, push the pad up through the blot toward the ceiling, lowering the guides right as you get up to the ceiling. I also find arcing into the ceiling prevents you from pushing any excess paint onto the ceiling edge (rare but can happen if you are being careless or to heavy). Easy. Works like a champ.
YoungHouseLove says
Love the tips!
xo
s
Sarah says
My house was built in 1914 and has TONS of wood, moldings, built-ins, the works. I love it, but the thought of painting made me want to die. I am also a “no tape” painter. I have found that good quality, short handled brushes make ALL the difference. And practice. After edging my whole house, I don’t have to stick my tongue out as far. I am about to do my bathroom this weekend where there are some intense angles and corners. I may have to pick up that little guy to try him out!
Johnna says
THANK YOU SHERRY!!!!
What a blessing…I am the WORST taper EVER…my husband always has to do it for me. Now maybe I’ll be able to paint on my own! Not that i don’t love his company…he talks to me the whole time – but we know who is better with a paintbrush and roller and who is better with a baseball. There are some battles you can’t fight.
Imaging how much money you’d save not buying that roll of tape just to do a room! I love this story!
xo
Johnna
Julia says
The best paint brush I’ve ever used, bar none, is the Purdy XL Cub. I bought it because I painted my kitchen cabinets, and I was going to do the insides of a couple of them. I’d seen a few blogs where peeps had done it, and I really liked the look. Anyhow, there were lots of corners involved, and tight spaces, and I figured my usual 2½” sash brush would be getting in the way.
I’m about to tackle the trim in my foyer, and I think I’ll use it there too… and you’re right about painter’s tape. It takes longer to use it, and once you figure out how to hold the brush correctly, you have to go out of your way to mess up. (A tip for your readers – try holding your brush like you hold a pencil… and hold it sideways!)
Purdy brushes rock!
Ken says
You are so right, Julia. Painting mouldings with a 3″ angled Purdy brush is like driving a BMW on a curvy road!
Julia says
Oops! I forgot to mention I took the doors off those cabinets! :)
Jen Z. says
Thanks for this tip Sherry. I just might have to go and buy one of these. We painted an accent wall and the corners need to be redone. This brush might just do the trick. We also painted the risers on our stairs white and we used the blue tape. Well 25 year old steps and blue tape doesn’t always work. Now we have to clean up the stairs because the white paint bleed through onto the stained steps. Ugh! Any tips for getting the paint off of the stained steps? Please!
Jo says
Frog Tape is the bomb. It works so much better that blue tape. Go green!
Rebecca says
So excited to read this post today! I am a teacher and one of my summer projects while off school is to repaint my baseboards, trim, and interior doors a bright white…they are currently a yucky off-white color. What kind of brush do you recommend for doors that have lots of grooves (and therefore can’t use a roller on)? Also, any tips on picking a good white that will look crisp and clean?
Meredith says
You couldn’t have posted this at a better time – I have to paint the trim in my bedroom TONIGHT if I want to be able to set up our new (to us – actually my grandfather’s) bedroom suite (queen-sized bed for the first time in our married lives!) this weekend. I might just squeal with happiness if I really don’t have to use painter’s tape!! Holy cow, I can’t even imagine. I’m stopping by Sherwin Williams on my way home, and I can test it out with training wheels on the window I already taped last night. Do you wash and re-use this guy over an over again, or buy a new one every job or two? I’d expect you to wash and re-use, but the pic above is new in its packaging, so I had to ask.
Here’s another question: what about getting in corners created by the window sill? If I still have to tape for a couple of corners I won’t complain. We’ll see how it works tonight I guess…
THANK YOU!!! It’s almost eerie sometimes how perfectly the timing of your posts mesh with my DIY home improvement needs!!
YoungHouseLove says
Meredith- Of course we wash and reuse (which is oh so easy with latex paint). The only reason we had one laying around in packaging was actually because it was an Easter gift from John’s cute mom who knows how much we love those brushes and picked one up for our “Easter Basket.” It was a small miracle that I remembered to take a picture of it still in the packaging for this post! It should work pretty wall in those windowsill corners (the bathroom stripe project dealt with those areas and we were able to maneuver without blue tape using the brush- so hopefully it’ll work for you!).
Rebecca- And 2″ angled brush will do the trick for your grooved door. I would actually roll the door first and then use a brush to get into the grooves so you’re not painting the entire surface with a little brush. As for our favorite white paint, it’s Benjamin Moore’s Decorators White (we keep a gallon of semi-gloss around for furniture projects, trim, etc. Hope it helps.
Jen Z.- So sorry to hear about your paint bleed issue! I think you could hit up Lowe’s or Home Depot and explain your situation and the person at the paint desk should be able to show you to a product that will lift the paint without lifting the poly on your stairs. You can also try a Magic Eraser and see what happens…
xo,
s
Jen Z. says
I’ll try the Magic Eraser first. Hadn’t thought about that. If that doesn’t work, off to Lowe’s we go. Thanks.
Lindsay says
Alas, the perfectionist of the house (can you tell that isn’t me?) will just NOT allow anything to be free-handed. The man has gone around every inch of this house with a mini watercolor type brush (think: kid-sized small) touching up invisible imperfections.
For anyone else living with such a lovably crazy person (note that I’m SO INCREDIBLY NOT recommending this for everyone as it’s insanely time consuming and only like 1% of the population could ever tell the difference) the only sure-fire way to get a CRISP line where two paint colors meet? After you tape, paint the “wrong” color over the edge of the tape. THEN, after that dries, paint the right color. Painting the wrong color over the edge first seals the tape up – absolutely no jaggedy weird seep-through funky lines. I guarantee it will be crisp. The effort is almost not worth it though. ;)
Saucy says
Brilliant tip! Thanks!
Christin says
I just discovered your blog yesterday through The Nest. It’s fantastic! I already have so many ideas of what to do with our home. Of course, my husband and I are renting right now and therefore don’t have much to work with, so I’m stockpiling ideas for when we own our home and can do whatever we want to the walls, floors, etc. I’m looking forward to checking in with this site frequently. Thanks and keep up the amazing work!
Brooke says
Any suggestions on how to thoroughly wash/clean brushes for reuse?
YoungHouseLove says
Good question, Brooke. We’ve got a good answer for you courtesy of our good friend Katie over at All Bower Power. She just did a step-by-step instruction on brush cleaning this week. You can check it out right here: http://allbowerpower.wordpress.com/2009/06/17/howtocleanpaintbrush/
-John
Renee G. says
I saw this brush cleaning trick and it works fabulous! Rinse out as much of the paint out of your brushes as possible. Once that is done, fill up our kitchen sink with a few inches of warm / hot water and add a little fabric softener. This will help get rid of the stuck on dried paint. Rub the bristles with your fingers and you will be amazed at how easy the paint comes off. My purdy brush that I have had for years still looks like new, and smells good to boot! Also, I just, purchased that little brush from Sherwin Williams you suggested. I practiced a little last night before starting my painting project today. I have to say I am impressed how well it works and so happy I don’t have to do any taping! Thank you so much for sharing that little wonder brush secret!
YoungHouseLove says
Wahoo! Thanks for the tip! And good luck with that brush. You’re gonna love it! Years later I’m still loving mine.
xo,
s
Kate says
Lindsay, I’m with you on the watercolor brush. I love painting and hate taping so I always grab a tiny, narrow art brush for edge work.
It normally works out great, until my most recent project. I dusted the walls of my new bedroom before painting and I guess the dust hadn’t settled yet because while rolling paint onto the walls, a sneeze came out of nowhere and boom! An entire smudge of blue-grey paint on my white ceiling. Now I’m spending far too much time trying to find the right ceiling color so I can do a touch-up. Dang! ;)
Lindsey says
I’m actually doing some edging this afternoon so I may have to pick one of these bad boys up. Thanks for the tip!
{ Lindsey }
http://greatfullday.blogspot.com
J says
This comes at the perfect time!! My husband and I are working on getting my inlaw’s old house up for sale and have to paint all of the trim/windowsills and it’s been taking us forever with the brush we’ve been using. I can’t wait to pick this up before painting some more this weekend – hopefully it will make our lives a lot easier!
erin fudge says
Ok, I’m so off to the store right now to buy that brush! I’m the queen of cutting in here at Casa Fudge and we’re tackling the guest room tomorrow, that will be a handy baby to have! Thanks for the tip.
Sarah says
Brush cleaning tip:
BEFORE you start painting, wet the brush with water completely, then squeeze it out. Starting with a wet-ish/damp brush means it absorbs less paint and makes washing easier. It won’t mess with your paint either.
THIS DOES NOT WORK WITH ROLLERS. Don’t even try.
Mrslimestone says
You must have a steadier hand than me b/c it doensn’t matter what brush I’m using – I always make a mess. I just carry a wet rag with me everywhere.
YoungHouseLove says
A wet rag is a fantastic tip! Thanks for that reminder Mrs Limestone. For those who just can’t stand taping off, it’s a great little quick-fix if you stray from the lines (one swipe with a wet rag and off you go).
xo,
s
erin g says
I also swear by the Shur-line edger (http://www.amazon.com/Shur-Line-01000-Paint-Premium-Edger/dp/B000WOMYIU) mentioned by a previous commenter… if you haven’t tried it yet, you absolutely have to… words do not describe it’s power. anything that has a slight edge (ceilings, doors, windows, moldings, baseboards)… just slide it along and it covers evenly and crazy fast… i can’t imaging painting without it. of course, a small angled brush is still a must for corners and the actual baseboards or molding.
becky says
Seriously? I’m painting trim tomorrow. How did you know? Now I am not dreading it so much. Off to Sherwin Williams I will go. Thanks for the tip!
Tracie says
Hi Sherry,
I’ve been so enjoying your blog for a couple of months now. Any tips for rolling paint, selecting colors, finish (flat, egg shell, satin, semi-gloss)? Perhaps an upcoming post? I am in the middle or painting our living room and hall. Initially I planned on a tan and chocolate color combination. Tan in the hall and on two living room walls and chocolate on the other two living room walls. I will also be bringing in light blue accents (pillows, vases, etc). I bought what I thought was a tan creamy color and it looked lavender on the walls. I freaked out. Not at all what the paint chip looked like. Thank goodness I started in the hallway. I went back to the store and had more tint added to the paint. Now I have a mocha color. This is okay for the hall but not the living room. I may have to consider the Valspar Honey Milk you used in your bathroom for the light tan color. I also have a problem with the roller lines showing (perhaps a some wallflowers are needed).
Any tips would be greatly appreciated. I’ve lost my confidence but am learning from the experience. Making sure I get colors I really like is taking more time than I like so I was hoping to get a bit of advice. I hope to share the finished room with you. Your site has been so inspiring! Thank you.
YoungHouseLove says
Hey Tracie,
First a word of warning about the colors you mentioned: Valspar’s Honeymilk looks almost white (it’s the lightest cream ever) so if you’re looking for a tan you should go a bit darker. As for finishes, we always go for flat in all rooms except for the bathrooms/kitchen (flat paint hides imperfections best, but in the kitchens and bathrooms we do semi-gloss for wipe-ability). As for your roller lines showing, you either need another thin and even coat of paint since you might just not have enough on the walls to hide the inconsistencies or you’re putting too much paint on the roller and applying way too much pressure which is causing the lines. The roller should glide over the wall so you shouldn’t have to press very hard which will always result in those annoying lines. But don’t dismay, anyone can paint like a pro with a bit of practice! You’ll definitely get there and you’re learning so much as you go! Good luck with everything.
xo,
s
Lisa says
SERIOUSLY. . . .you seriously posted this the DAY I finished 3 rooms of trim? How disheartening. A week ago would have been much better!! :-)
Jennifer says
Thanks so much! I am in the middle of painting horizontal stripes in our laundry room now! Well, actually I had gone about half way and just about given up until I saw how great your results came out! And… now that I know your secret tool, I am inspired again!
rebecca says
This is a very amateur question, I’m sure, but do you have to sand down the baseboards before applying a new coat of paint to keep it from peeling (like with refinishing furniture)? What about interior doors?
YoungHouseLove says
Hey Rebecca,
No it’s a great question and we’re so glad you asked! There’s no need to sand baseboards or trim like you do when you’re refinishing furniture (unless the paint is already peeling or cracking and you’d like to smooth things out before applying fresh paint). Most likely your baseboards are in great condition and you can just repaint them for a totally crisp and updated look. Hope it helps!
xo,
s
Sophie @ Century Finds says
I will run out and get one of these babies…
Now, do you have any tips for painting stripes on a wall textured by a 3 year old (yes, I do have a fixation on the mess the previous owners left us, why do you ask?)
Every single time, the paint seeps through the tape.
I am planning to try Lindsay’s idea above, but I am not sure even that will work with wonky texture ;-)
YoungHouseLove says
Sophie,
Lindsay’s tip is actually one I’ve heard many times so I would definitely recommend it. Plus if there’s any minor seepage you can always use a small brush or even a flat paint pad to touch things up afterwords. Hope it helps!
xo,
s
Tania says
The little paint brush is amazing and so much easier to use!!!
Alicia says
Thank you so much for the post! I’m looking to paint my medium wood colored window trims and baseboard trims white. Do you use this particular brush to paint hard to reach places like behind the toilet tank (do you take down the tank to paint)?
YoungHouseLove says
Hey Alicia,
I actually used my little short-handled brush to get behind the toilet with absolute success. It’s super versatile and works almost everywhere. I would definitely give it a go!
xo,
s
beth says
I don’t use painter’s tape either. I also find it to be very unreliable. Every time I would pull the tape off, I would either have paint all over the trim that I would have to touch up with a brush anyways, or the tape would peel my fresh paint off the wall. I love cutting in using my trusty Purdy angled paint brush. I have been using Purdy for a few years now, and I won’t use a brush of any other name. Although your little brush sounds like it works great. Might have to give it a try sometime.
Kate at Centsational Girl says
Great tip, thanks y’all. Anything to get rid of painter’s tape on trim. ANYTHING !
Kate
Beatrice says
Perfect timing, Sherry! I just had my bedroom painted this morning (*blushing – yes a painter did it*) with Behr’s Pale Cucumber and I was totally shocked at the color that came out! I’m staring at a Seafoam Green room! So, now because my husband won’t let me pay to have it painted again, I have to repaint it myself, trim and all, but I have no idea how long it will take… It’s a 13’x11′ room. Can you give me some insights on how you guys pace yourself, please? In addition, what greenish color would remedy my little mess (ceilings are sloped with exposed original brown beams). Thanks so much!
YoungHouseLove says
Hey Beatrice,
Try Benjamin Moore’s Par Four. The key is having enough khaki or grey in the tone so that it’s not too minty or pastelly (of course you’ll want to take the swatch card home and look at it in your room morning noon and night before picking up a gallon to be sure that your lighting situation supports it). Fingers crossed that it does the trick. As for painting your 13 x 11 room, it should take no longer than an afternoon if you set your mind to it. Rolling the walls and painting the edges will go faster than you think and you’ll step back and be done in no time! Good luck…
xo,
s
Anita says
A 2″ brush is a beautiful thing. We don’t use painter’s tape much anymore either. To the readers who are wondering, the key is to push the brush down and go across the edge/molding/trim in one straight motion and you’ll get a straight even line. The angle keeps it straight. Also, I find it easier to paint the trim first, then the edge the wall with the paint color.
Julie says
Wow, sometimes your posts come just at the perfect time. I’m getting ready to paint a bunch of trim in my home next week (we painted the walls when we moved in almost five years ago, but didn’t take on the trim b/c we didn’t want to tape everything off again!). I called my local Sherwin Williams store this morning and they have the brush. I suspect that you just saved me a bunch of time – thanks!!!
Rebecca says
I have brand new carpet in my home, and while the carpet turned out beautiful, the baseboards got a bit banged up during installation. Is there a trick for painting the baseboards without getting paint on the new carpet?
YoungHouseLove says
Hey Rebecca,
Eeks be careful with the new carpet! You can either lay down a tarp or use a piece of cardboard to block the carpet as you go- but be careful not to get paint on the back of the tarp of the cardboard or you’ll be dragging it around! Using a small brush (even the short handled one above) will help you stay in control and avoid any drips or carpet mishaps. Hope it helps! Good luck…
xo,
s
Carly says
Hi Sherry,
I found your blog a few months ago, and have been a regular reader since! We just bought our first home (a little 1956 rancher) and are in the midst of updates.
I saw a kitchen update from last week or so in which the couple used Valspar’s Ultra White on their cabinets. We are painting our cabinets white, and so we grabbed a couple gallons of that color for the cabinets and all the trim in the house. In your opinion, should this work, or would BM Decorators white be a better choice? I am still really unsure on how to pick the “correct” white. :)
Thanks!
YoungHouseLove says
Hey Carly,
Valspar’s Ultra White will work beautifully. Go for it!
xo,
s
Beatrice says
Thanks Sherry! Off to the store I go to get my little swatch card and my new trim brush! :)
pearls and green tea says
thanks for the tip!
http://pearlsandgreentea.blogspot.com/
chacha says
Yeah, I actually stopped taping, too, after seeing all the pros on HGTV just using a brush. Taping is a pain and a waste of paper. I use a high-quality 1-inch angled brush – it was like 7 bucks or something at Home Depot. I get high accuracy with the 1 inch. I just do the trim part and then come back with a 2 inch (angled or not) brush to get the part in between the roller and the 1 inch brush area.
Sam & Jacci says
Well, I feel much better about “cheating” by skipping the taping step :) Sam and I quit taping with painter’s tape several years ago after being **frustrated** too many times by paint seeping beneath the tape and ruining the finish. I have a fairly steady hand with a normal 2″ angled brush, but it does take more time than I’d like. Sounds like maybe I need to run down the road to the local Sherwin Williams ;) I’m gearing up to paint the entryway and kitchen trim after we finish the exterior painting, so this is a great tip for us right now!
Thanks :)
XO,
Jacci
Todd - Home Construction Improvement says
One of the best tips I ever learned from a Pro painter was to paint the trim first. In fact, paint the trim first and allow the paint to get onto the wall a bit. Typically you paint trim with a semi-gloss paint. Now when you paint the wall it’s much easier to free hand a clean line along the trim that was previously painted. Next time you paint give it a try, trust me you’ll be sold! Have fun painting everyone!
Kitsch Krafts says
Years ago, while standing in line at the Lowe’s paint center, a lady suggested this very paint brush to me and I have never looked back. I started by just using them for the cutting in, but I quickly learned that they are great for nearly every project involving a brush. I used them to not only paint all the trim and windows, but also our kitchen and bathroom cabinets because the tiny handle really reduces hand fatigue that you get from gripping around the handle of most brushes. These things are terrific!
Thanks for sharing!
Amy says
Carly and Sherry,
We used Valspar’s ultra white on our kitchen cabinets and they look great! We’ve used in on the trim in a few rooms as well.
I was a little worried it would be too “white” but it’s not, and it’s a great contrast with our wood counters and slate floor.
Kylee says
Thanks so much!!! I went and bought a little short handled Purdy brush and used it when I painted the kitchen this weekend. The edges look great and I didn’t use a single piece of blue tape!
Karen says
Ok I am totally going out and buying one of these today!!!!
And I won’t take offense to Lindsay’s remark. :) Your crazy lovable man isn’t the only one who uses a tiny kids paint brush to paint the edges of the baseboard. I probably spent 3 hours on my stomach going around my living room with that thing!!! And my lines are still crooked!! It drives me crazy!
tracy says
Now ya tell me! lol…..I considered taking a saw to my long handled cutting-in-brush every time I banged it in the corners. I just finished my painting projects (for the time being) but I’m going to pick up one of those brushes for the next time I decide to change my wall paint.
I really want to thank you two for sharing all the good tips you’ve learned. I just love your blog and tho I’m more of a color girl than a white painting gal, I’m always inspired by coming here. I have one question tho….maybe I’ve missed it somewhere, but it’s this: where do you store all your tools and supplies? I imagine you guys have GOBS of stuff/supplies/tools! do you keep paint in the garage? It’s really hot here so I have to keep the paint in our utility room….ohhhhh,, I’m starting to see the benefits of painting mostly white lol
love yas!
YoungHouseLove says
Hey Tracy,
We actually keep all of our paint in our detached garage since we’ve heard that it can offgas VOCs so you don’t want to keep it in the house. Although the garage can get a bit cold in the winter all of our paint has survived (or at least the few colors that I’bve reopened for touch-ups) so it really works for us. As for where we store most of our tools, check out this post:
https://www.younghouselove.com/2009/04/how-ya-bin/
The answer might surprise you.
xo,
s
Alycia Wicker says
Thanks for that tip, I will have to pass the info on to my painter… my hubby!
heather s. says
oooh…I despise flat paint. If you bump it with anything you get marks on the wall and the Magic Clean Eraser or a rag removes flat paint from my (plaster) walls rather than removing the offending mark. I use eggshell finish in all rooms except the bath and kitchen – it still covers imperfections but is easiser to clean.
I’ll have to try this brush since one of my goals in the next week is to touch up the trim in the house. Thanks for the tip!
tracy says
Thanks for the storage tips link!! I can’t get over how incredibly organized you are ~ and I just LOVE the tools in the kitchen. I’m off to find my own kitchen tool box spot. Thanks again for sharing all your great tips and ideas.