I like to consider our hallway frame wall a constant “work in progress” since the art in the frames can be swapped out at anytime. But there was at least one element that was less a “work in progress” and more an “um, you’re not going to leave it that way, are you?” Can you spot it?

Yep, it’s the placeholder photostrip in the center. We didn’t have a frame to fit that slot at the time, so we figured down the line we’d cut a piece of wood, paint it white and mount the strip on something more officially looking than, well, a piece of office paper held up with painter’s tape (oh the tricks of the trade!).
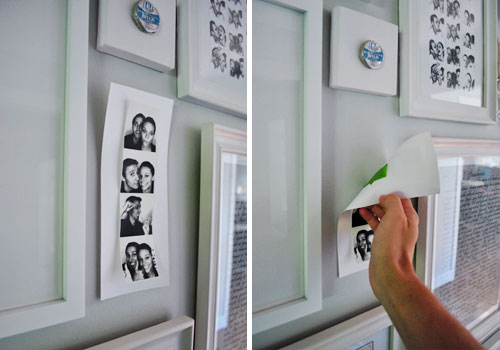
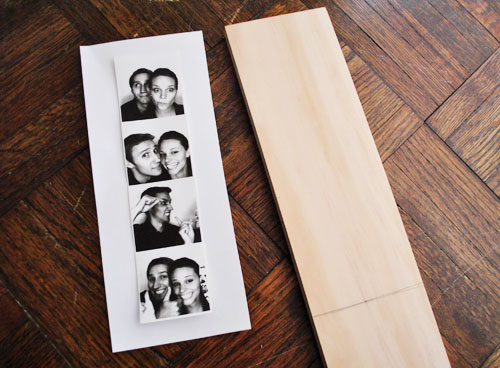
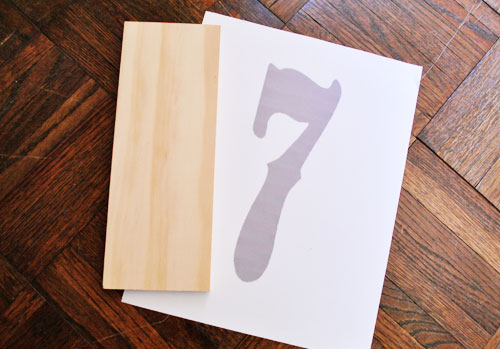
So we bought a piece of craft wood at Lowe’s for a couple of bucks and marked the cut spot using the soon-to-be-trashed paper “frame” as a template.
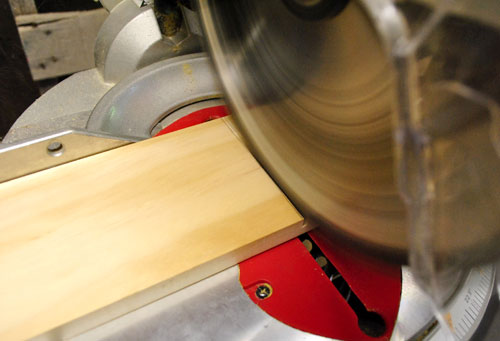
Then down to my workshop I went to give it a quick slice with the miter saw. Zzzzzzrripppf! (That’s the sound my saw makes, if you couldn’t tell.)
It was about this time that a random idea popped into my head. Staring at this tiny piece of wood gave me a flashback to an episode of Secrets of a Stylist that we watched where Emily had made this cool table by using some floral wall decals (she stuck them on, painted the table white, and removed the decals for a cool stenciled effect). And thus, an idea was born:
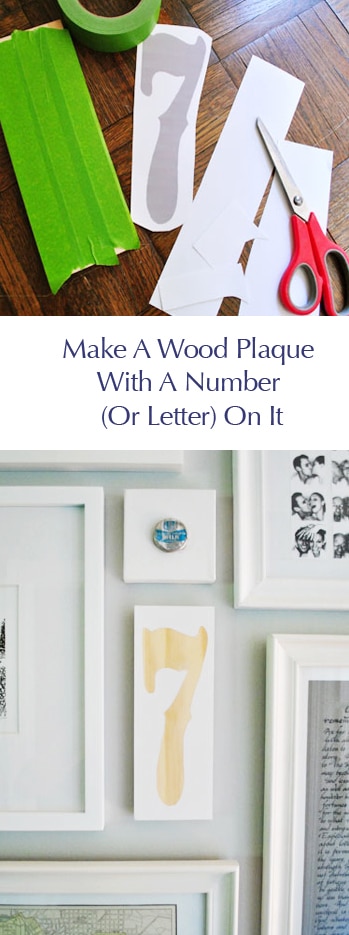
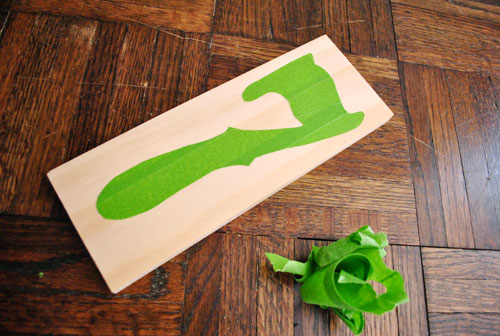
Since I had neither flower decals nor a desire to put florals on my plank of wood, I decided to DIY a more meaningful stencil using a similar method. So tracked down an ornate number seven online (since we started dating on 7/7/05 and our wedding day was 7/7/07 – plus I’ve always thought sevens are kinda cool looking) and stretched it in Photoshop to be the right size (long and skinny). Here it is printed out on cardstock in a basic please-don’t-use-too-much-ink gray.
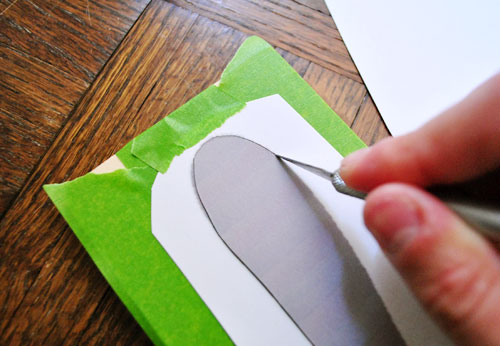
To create my makeshift stencil I broke out the painter’s tape again (see, it’s not only good for holding up temporary paper frames in the hallway) and covered my piece of wood – being sure to stick it down tightly everywhere (I rubbed it all pretty hard with the pads of my fingers).

Then I taped my printed seven loosely on top and began using an exacto knife to cut out the shape of the number. I pressed down pretty hard to be sure that I was slicing through the cardstock and the painter’s tape underneath. It cut into the wood slightly too, but I figured that would only help to keep the border even crisper in the end.
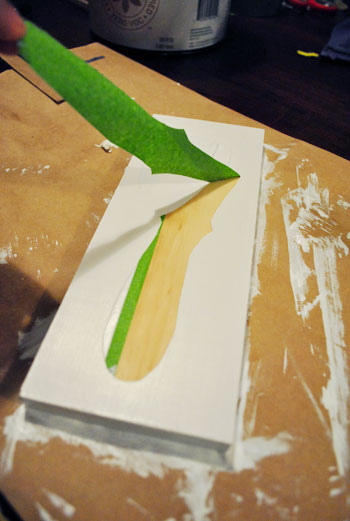
Once done, off came my paper guide…
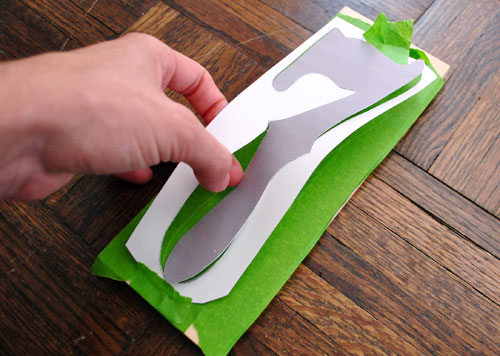
…followed carefully by the painter’s tape (remember, I want the seven to show the wood grain so that’s why I’m removing the tape around it).
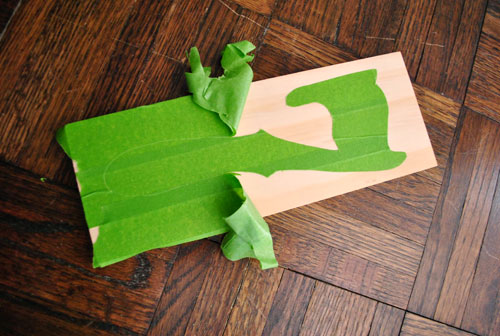
I took a moment to press down the remaining green tape again, especially around the edges. Just because I didn’t want any paint that I would apply to bleed under and mess with the crispness of the finished numeral.
Next came two coats of white paint (I used leftover Olympic semi-gloss that we keep handy for trim touch-ups).
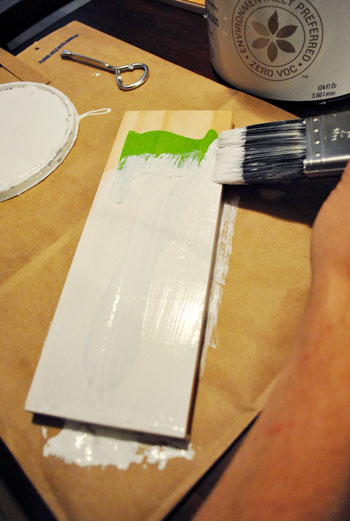
Before the second coat dried, I slowly peeled up my stencil to reveal the wood below that was spared the white-paint treatment (removing tape when the paint is still wet usually results in a crisper line).
Once all of the green tape was taken off and it dried for a few more hours, I added a spare sawtooth hanger (like this) on the back and hung it up on the frame wall.
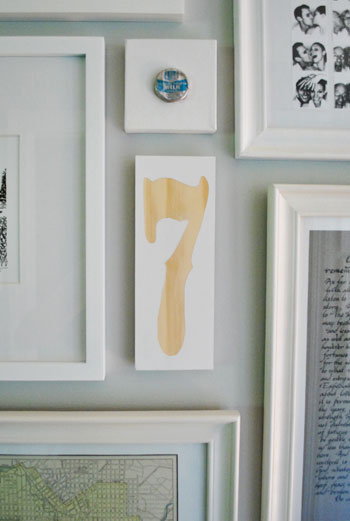
We lurv it. As much as we like photostrips, we’re both glad we did this instead (especially since there’s already a frame of photostrips right next to it). Plus, you know we love meaningful slash personal stuff that’s homemade (so a subtle reminder of our anniversary crafted by yours truly is sweet to suckers like us). Oh and when it comes down to cost, everything was free/already on hand except for the piece of wood (which we got for under $2 at Lowe’s).
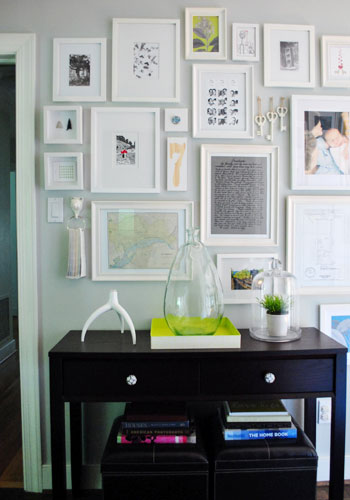
My only wish is that (had I know I was going to do this project from the start) we would have bought a piece of wood with a bit more interesting grain going on. Oh well. There’s always next time (or we can wax or stain or outline it to tweak it someday). For now we like the soft wood tone since it ties into a few other objects on the wall – like a tan map with pins where we’ve gone and a backwards canvas that we hung so the wood frame faces out (both of them are the same blonde wood tone as the seven, although unfortunately not pictured in this post- oops). Have you guys used tape as a stencil to do something like our little wood art project? Or for glass etching (like we did here)? Or for something else entirely? And what about numbers. Do you have a lucky one? In our house we like 43 (the number of digits in “love you”), 14 (Clara’s b-day), and 7 (our anniversary of dating/being married) the most.
Psst- Find more on our big hallway wall of frames here, here and here.

Alex says
I don’t know how many times we’ve had a “You’re not going to leave it like that” moment…only to have that moment last for several years :-/ I like the idea and the simplicity of what you’ve done.
Dianne says
We’ve recently adopted the number 4 as our family’s number. Hee hee. It started because my husband’s former wife has concocted a crazy story and has told our teenage children (my stepkids) that their dad is my fourth husband and I’ve had 3 other failed marriages (truth – just one first marriage that I don’t consider an actual failure … it lasted 17 years and yielded many good memories). So, rather than be upset, we’ve made it our inside joke and you can now see 5 or 6 “4”s around our house. It also works well because there are 4 of us (me and my wonderful husband and our two awesome kids). The kids think it’s pretty funny too. But I think I’m obsessed with 4s.
Shellilee says
Gotta love painters tape! I used it to stencil a trellis on my stairway wall.
http://modernjanedesign.blogspot.com/2011/05/diy-trellis-wall.html
YoungHouseLove says
Sooo amazing!
xo,
s
Gina @ Runningtothekitchen says
Very cool! I got embarrassingly excited when I did guess the photo strip before scrolling down! haha
Kari says
I LOVE everything about this! I thought I knew where you were going with your tutorial and then as soon as you cut out the painters tape I was as giddy as a school girl – what a cool idea! I just finished doing a monogrammed wooden sign as a wedding gift. I printed off what I wanted on the sign and then shaded it on the back and traced it onto my wood. I then painted it on there…
I’m sure you know what I’m talking about, but if you’re interested:
http://karicorsi.blogspot.com/2011/05/memorial-day-weekend.html
I REALLY love what you’ve done – I’m going to have to get my grimey hands on some wood and try this out for myself!
p.s. how is the green painters tape different than the blue? Just the color?
YoungHouseLove says
It’s just what we had on hand so we used it, but it has some technology that’s supposed to combat bleeding a bit more.
xo,
s
Jenn says
If you’re ever trying to save ink when printing something to use as a template or stencil, you change the text to “outline” …just doing my part to fight the printer ink industry. :)
Jenn says
oops, that should have said “you can change the text…” once i re-read the comment it felt a bit bossy. :)
YoungHouseLove says
Haha great tip. Love it.
xo,
s
Necole says
I live vicariously thru you two. What a great idea. I am going to do this with girls birthdays.
Jill Stigs says
VERY COOL! I made a sign using store bought vinyl letters but of course I painted it black and when I removed the letters, the cheap plywood scrap I used was SO light, I just painted brown craft paint on and quickly wiped it off. Makes the wood grain stand out more too.
http://www.flickr.com/photos/29996837@N08/5313622313/in/set-72157624888359742
YoungHouseLove says
So cool!
xo,
s
Rachel Tatem says
That’s so great! I don’t know if I would have thought of that… but then again I don’t know if I could just pick one number
Lorilyn says
Another good idea for painting stenicls on wood is to cut the stencils out of contact paper and just stick that to the wood, although it wouldn’t be as sticky as your frog tape.
YoungHouseLove says
Love it!
xo,
s
Anne says
Love it!
You can also use a soda pop tab as a “sawtooth” hanger if you dont have any of those around. Saw the idea on pinterest the other day :)
I love all your ideas, keep them coming.
YoungHouseLove says
Love that idea so much!
xo,
s
Emily says
43 digits in “love you”? Am I the only one who doesn’t get it? ::sheepish::
ali says
don’t feel bad!
4 digits/letters in LOVE
3 in YOU
also seen as 1-4-3 for I LOVE YOU!
Lindsay says
Hi Emily! love = 4 letters, you = 3. So it’s 4 3, not 43. I had to look twice myself! :)
Meg says
love= 4 you=3
lms52 says
4 letters in “love” 3 letters in “you”
amy says
no, you’re not alone! i came to the comments to see if sherry explained. :)
Ashley @ DesignBuildLove.co says
LOVE it! And the color of the would totally plays of the strings used to hang the keys! Gorgeous guys!
Caroline says
Sherry, I have an incredibly random question. Where did you get the silver strappy wedges you have on in your dyed-wedding-dress picture (at the vineyard Virginia wedding)?? Your slipcover post led me to your wedding dress post and I think those shoes are amazeballs (thanks Bethenny) and would be perfect for standing on grass…Thanks!
YoungHouseLove says
Those were my wedding shoes from Payless three years ago!
xo,
s
Sarah says
This is so so cute! I’m going to use this idea for Father’s Day and make my dad a plaque that says “TT” (his initials). Thanks!
Wendy says
Glad to see John using the right pair of scissors :)
YoungHouseLove says
Ha! I’m a shameless rule follower… even when it comes to household scissor restrictions.
-John
Angela says
I love it! A great show of ingenuity, as always.
Kathe C says
Neat idea, but I think the number would pop more if it was the same color of the tape. The wood color disappears with all that’s going on. Is there a paint color that matches Frog Tape?
YoungHouseLove says
Haha, I bet you could get it color matched.
xo,
s
Kate says
My favorite number is actually 7 as well. My birthday is 7/7 which I always thought was kind of fun. From the moment I read that you guys got married on 07/07/07 I knew I was going to love this blog!
I really dig the idea using tape to stencil and my house-project-wheels are already turning to find out how I can copycat it. Thanks for the great idea!
Sherry says
Very cute. I bought some dollar store wood doll house furniture one day and rubbed them down with food-grade mineral oil (from our stone counters). It was amazing what a difference that made – brought out the grain and just darkened a tad.
YoungHouseLove says
Love that idea!
xo,
s
sara @ it's good to be queen says
i LOVE this!!! i need to rummage around in the garage for a scrap piece of wood to try this on! :)
Lizzy says
3’s and 8’s are “our” numbers. We met online, and met in person on 3/8/08… and our first house together is 3388 River
This is a cute idea.. hopefully we’ll get a chance to try something similar.
twelvedaysold says
I wanted to thank you guys for always citing previous posts when you mention something in a blog post. I’m a relatively new reader, and love being sent back to the old posts to see how things are done!
Lisa says
I have to know…where is Clara’s adorable swimsuit from? I LOVE IT!!!!
YoungHouseLove says
That’s a hand me down from her sweet cousin Elsa (but I think it was originally from Gymboree).
xo,
s
StefanieK says
Well, my husband proposed on 8/31/07. And, when we found the venue we wanted to be married in, and inquired about September Saturdays the following year, the vendor said, “We have no Saturday’s left that time of year, but we do have the Sunday before Labor Day open”…well, we really didn’t want a Holiday weekend wedding, but wouldn’t you know that that “Sunday before Labor Day” was 8/31/08. So, we were married on our engagement anniversary, 8/31.
And “I Love You” = 8 letters, 3 words, 1 lovely meaning. 831. It’s engraved in our wedding bands, and people assume it’s for our anniversary, but it’s really a reminder of our love for each other <3
Our first baby is due 8/25…will he/she come precisely 6 days late? Time will tell. ;)
Shannon says
My husband and I sign emails and texts 143 and/or 1432 (too, I know wrong 2…)
Our son was born April 22 at 9:01 PM, weighed 9lb, 1oz and was 22 1/2 inches long…that’s close enough!
Your blog is delightful!
Adriane Wacker@FortheLoveofPainting says
Really great idea…so easy to do to!
SingleMama says
Love the 7, it looks perfect on your wall collage!
Kimberly says
I love your wall of frames =)
&I also love the significance of the number 7 and how you can make it into a piece of art, to show off in your house.
Jami says
Wow I love this idea! We have been talking about doing a gallery wall, more like I’ve been talking about it, and I think instead of one number I may do our anniversary and later maybe one for when Baby G is born! I’ll be pinning this!
Laura says
Brilliant!!! I absolutely love it!
Rachael says
i’ve been really into stencil art recently, i have about 3 different art pieces in my “projects” folder on my computer. unfortunately since i’m living in australia short-term, i may not even be able to start these projects until i visit the states again this christmas. but i’ll remain excited until then!
http://clayrachael.blogspot.com/
Dana says
sherry, do you remember the art-school trick of painting edges of your stencil-sticker with clear acrylic medium to stop paint from bleeding underneath? this has seriously revolutionized the quality of my paintings
YoungHouseLove says
Ooh that’s such a smart tip. Forgot all about it!
xo,
s
Barb says
Something so simple made into something so dang cool!!! You guys have got it “going on!!” Like I said yesterday…everyday, you amaze me!!!
Nice job John!
B.
Meaghan says
Could you guys be any cuter with your favourite numbers? The 43 kills me!
Karen says
I love the new addition to the wall! So cute and clever, and so meaningful! I want to do this on my stairwell when I get a chance. It is a long high wall, very boring. The frames are just what it needs!
One question, what is the thing on a ring near the light switch? I don’t remember you saying. It looks like a paint swatch ring?
YoungHouseLove says
Yup it’s a paint deck that I made with a 3″ binder clip and some hole punched Benjamin Moore paint swatches (I use it all the time!).
xo,
s
Lindsey says
I love this so much. I love how yall make sure each room has a personal, sentimental touch…
Malissa says
I knew that we shared an anniversary date (my husband and I got married on 7/7/07 as well) but we also started dating on July 7th, only in 2003 instead of 2005. I love this idea of using the number 7 in a meaningful way. So cool!
Amy C says
I love the hanging paint swatches! After years of reading this blog, I think it’s safe to say “That’s so John and Sherry!”
Amy @ Triangle Honeymoon says
So creative and personal. Love when that happens. Painters tape is a wonderful thing.
Angela says
On a slightly separate topic- I see keys! And not the paper cut out one! Did you buy them or did I miss the making key post?!
YoungHouseLove says
Here’s that post for ya: https://www.younghouselove.com/2011/04/the-keys-to-my-heart/
xo,
s
Meg says
7 + 7 = 14
couldn’t resist.
love the project.
inspired to try it with scrap wood and try stenciling the kiddos’ names.
jessica says
wow! it looks so good with the grouping. our address is 7707 and its always been a favorite number…i might have to steal this idea…
rosita designs says
the # 7 always reminds me of my most favorite friends episode! :)
http://www.youtube.com/watch?v=rZmnqY5iJUg
hee hee
YoungHouseLove says
I totally forgot about that one. Hilarious.
xo,
s
Amanda says
What frame size is the frame in the bottle cap? I need an IKEA near here, so I can find all sorts of different size frames [for a good price!] so I can make a gallery wall.
YoungHouseLove says
It’s a 4×4″ canvas from JoAnn with the cap glued on.
xo,
s
elle C. says
I like to use contact paper for a stencil. For our first baby, I wanted to do something special for her room – inexpensive, but personal art. I used contact paper to print out the silhouette of a sparrow in two different sizes, as well as several differently sized circles, then cut them out with an exacto knife. I painted the walls a limey-green, then peeled off the backs of the contact paper, stuck them on the wall in staggered positions and painted bird-silhouettes & circles throughout the room with a peachy-pink paint. It looked even better when I put bird silhouettes within the pink circles so that I was able to get a mix of green & pink birds. Yay for stencils!
YoungHouseLove says
Sounds so cool.
xo,
s
jess says
Great idea! Good use of inexpensive items and creativity!
Taylor says
Love that!
Totally random request:
Would you guys ever consider posting about how you designed the blog and other blogging maintenance type posts?
YoungHouseLove says
It’s kinda boring so we didn’t think anyone was interested (haha). Maybe John can do a post about that for our next blogiversary!
xo,
s
annabelvita says
I’m totally interested in this! I’d also be interested to know what sort of things you learnt in advertising that transfers to the blog (like your tag lines and stuff are always sooo good and I’m guessing that comes from being a copywriter).
YoungHouseLove says
Cool beans, it’s settled. We’ll blather on about that stuff on our blogiversary. If any one else has q’s let us know and we’ll do our best to address them!
xo,
s
laxsupermom says
Love this! I love how personal it is, and that it cost next to nothing is just an extra bonus. I hope you don’t mind, but I referenced your reindeer rug you made for Real Simple magazine in my latest post. Let me know if that’s not ok.
YoungHouseLove says
Love it! Thanks for the link love!
xo,
s