The toilet in our hall bathroom has rocked a little bit from the day we moved in (the inspector even noted it on our little home inspection form). Some people can fix this with plastic shims or tightening bolts, but we quickly diagnosed the issue as a rusted bolt under the toilet flange. That’s a fix that requires removing the entire toilet and replacing the bolt, so it took us a while to get to this to-do task. But here’s how I finally decided to seize the day toilet and show this rocking throne who was boss!
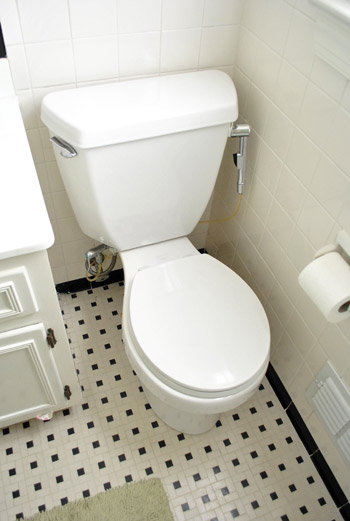
The process is similar to our toilet installation tutorial, but that project didn’t involve removing an old toilet first. So today you’ll get to see the fun part of removing an old, somewhat grody wax ring (along with some uncomfortable close-ups of the Petersiks’ potty). Sounds like fun, right? Don’t say I didn’t warn you. Let’s start with turning off the water.
Materials For Fixing A Rocking Toilet
Removing and reinstalling a toilet involves pretty basic hand tools (no power tools!) that most homeowners will already have around their house. The only thing you’ll probably need to buy at the store is a new wax ring kit, which is
- Flathead screwdriver
- Wrench
- Hacksaw
- Small putty knife
- Bowl, sponge, and/or paper towels
- New wax ring kit*
- White silicone caulk
*We always recommend buying 2 just in case… and make sure it’s the KIT that comes with bolts!
Step 1: Turn Off Water & Drain The Tank
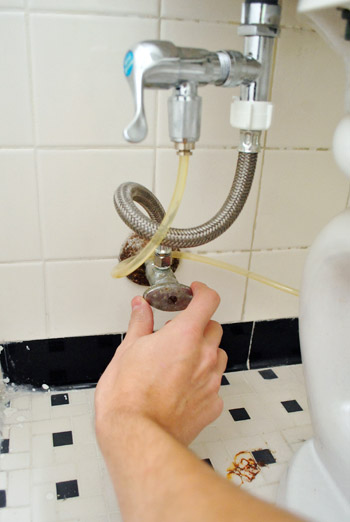
Start by turning your water supply line valve clockwise to turn off the water. Try to do this by hand to avoid breaking the valve. If it’s stuck, try spraying WD-40 or even olive oil to lube the connection (don’t remove the screw!)
With the water off, flush the toilet to get as much water out of the tank and bowl as possible. Then use towels or a sponge to sop up the extra water by hand. And no, I won’t show you a picture of my hand in the toilet bowl.
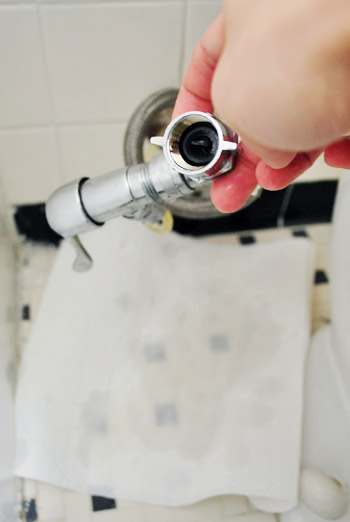
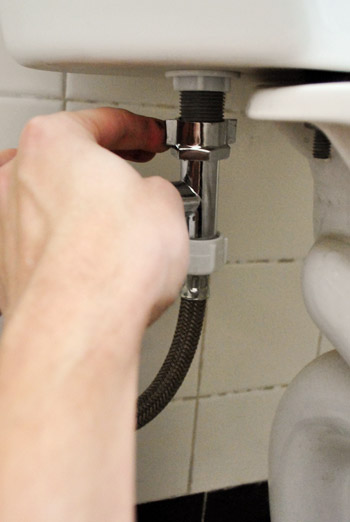
Step 2: Detach The Supply Line
Once things were pretty dry, I unscrewed the supply line from the bottom of the toilet tank. We’ve got a diaper sprayer attached so ours looks a bit crazier than your average toilet, but the idea is basically the same.
There was a bit of water leftover in the supply line, so I had some paper towels on hand to soak it up.
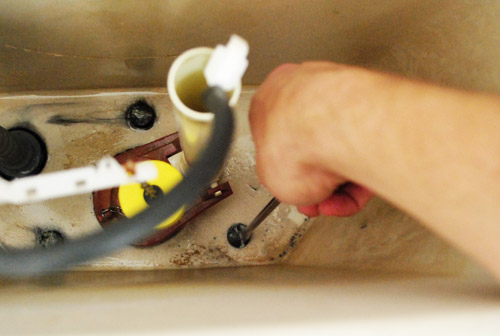
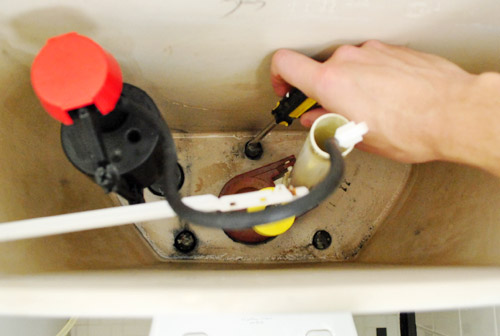
Step 3: Unscrew & Remove The Toilet Tank
Next up was removing the tank, which is bolted to the bowl in three spots. I was pretty much able to do it with a screwdriver all from the top, but I did have to unscrew the nut from the bottom side at one point.
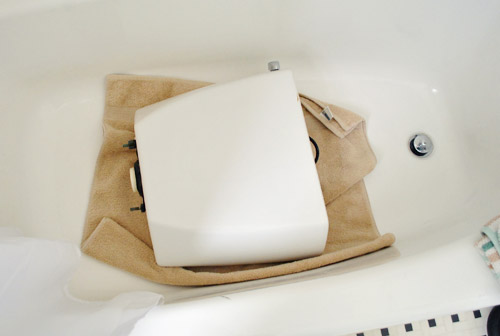
Once it was unscrewed, I lifted it up carefully and set it down somewhere soft and out of the way. In this instance, that meant an old towel in the bathtub. Oh yeah – we’re a classy operation ’round here.
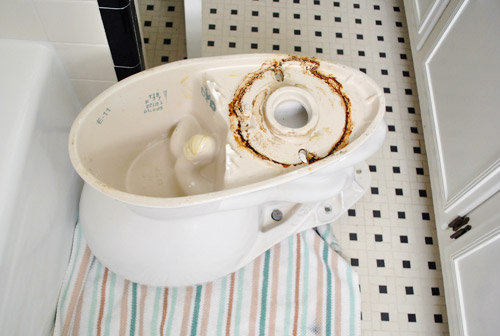
Speaking of classy: here’s our topless toilet.
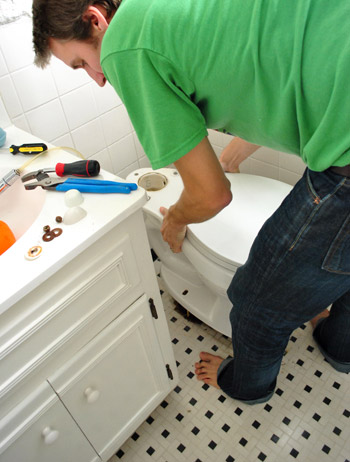
Step 4: Remove The Toilet Bowl
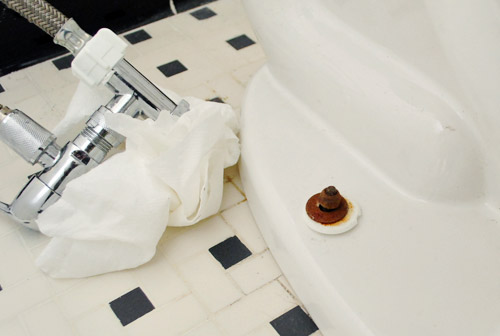
To remove the bowl, I used my wrench to unscrew the bolts on either side – this particular guy was the culprit for the rocking situation that got us into this whole mess:
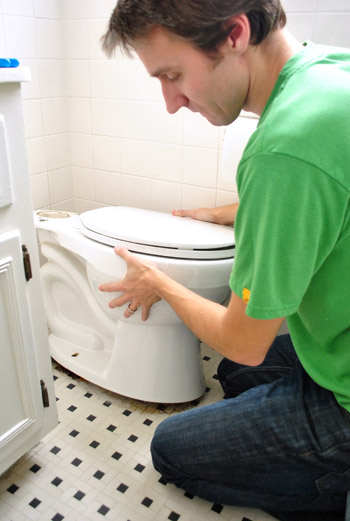
With both bolts unscrewed, I used a gentle rocking motion to detach the toilet from the floor. It’s stuck to the floor in place by a wax ring (just wait for that beautiful picture – it’s coming up!). But once you’ve got it unstuck, the bowl comes up pretty easily.
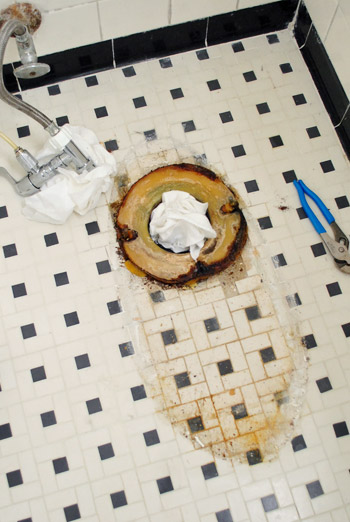
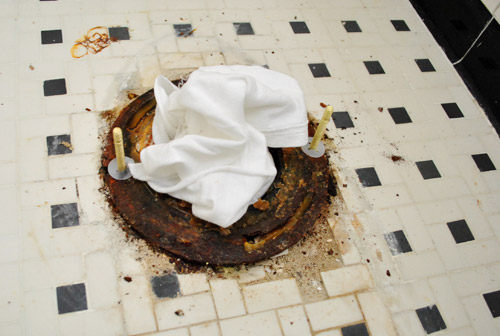
Step 5: Plug The Sewage Hole
And here’s that beautiful picture I teased. If you’re eating breakfast, you might want to stop scrolling. You can see I plugged the hole with an old rag to minimize the odors creeping back up and assaulting my nostrils. You just have to be careful not to put it in so deep that it gets lost into the sewer system. You might anger the Ninja Turtles living down there.
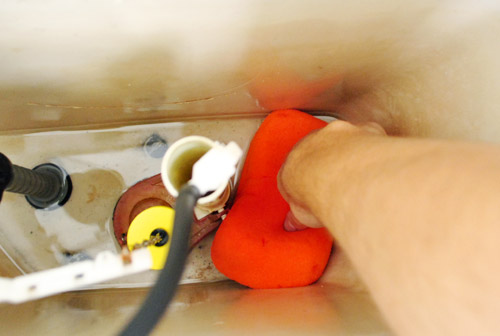
Step 6: Scrape Away The Old Wax Ring
Since the old wax ring had to come up to make room for the new one, I got to scraping it with a plastic putty knife. This is probably the grossest picture of the post, so please accept my apologies. But rest assured that it’s just wax and rust – nothing more.

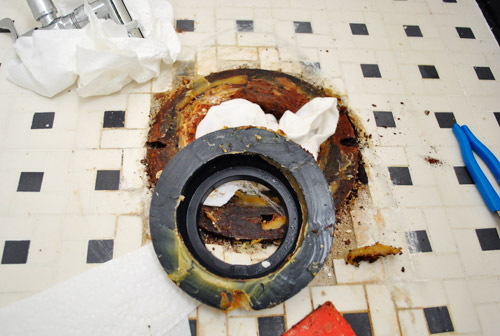
Oh, and I made sure to remove the old rubber reinforcement ring too. This comes in some wax rings, so it shouldn’t be left in place (our new wax ring had one in it).
I also had to clean a little bit of the wax off of the base of the bowl too so it was all pretty looking. Well, pretty is probably a stretch.
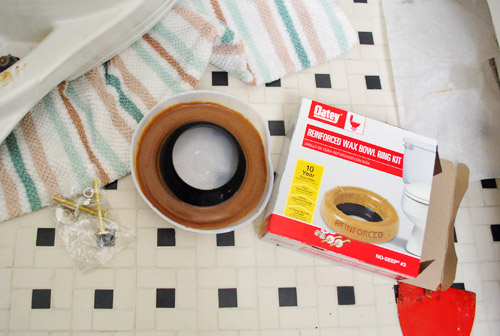
Step 7: Put The New Bolts & Wax Ring In Place
Here’s the new wax ring kit. It came with new bolts and everything for a whopping $7 at Home Depot.
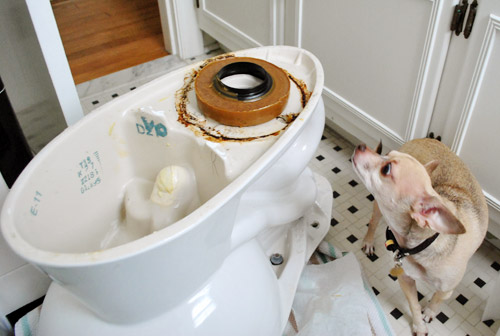
The new ring gets stuck to the bowl, not the floor. I just pushed it slightly down over the opening at the bottom of the bowl. Be sure to have an inquisitive chihuahua double-check your work.
Oh, and of course the new bolts had to go into place around the flange (that’s the steel piece attached to the floor – ours is very rusty). And remember to pull up the rag right before you put your toilet back into place (so as not to meet the wrath of Ninja Turtles living in our sewers).
Step 8: Set The Toilet Bowl Back In Place
Then came the tricky part – which I’ve been known to mess up in the past – putting the toilet bowl back into place. It’s tough only because:
- They’re a bit heavy and
- You have to line it up perfectly over the bolts
But if worse comes to worst, you just pull it back up and try again (though if you’ve squished your wax ring too much you may need to put a new one on). That’s why I always buy two wax rings just in case. Better to spend an extra $6 to save a trip to the store (or risk a leaky toilet). Plus you can always return it the next time you’re at the store if you don’t end up needing it. Oh and this step can be helpful with two people (Sherry did once she was done taking this picture!)
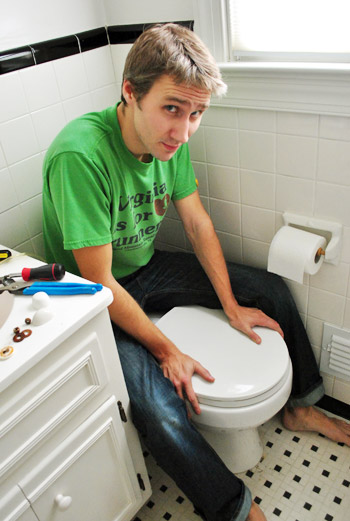
Once we had the toilet placed and straight, well, I sat on it. This little bit of pressure squishes the wax ring into place to ensure that we were getting a good seal. I wish I could say this is the first post that featured a picture of me on the john, but alas…
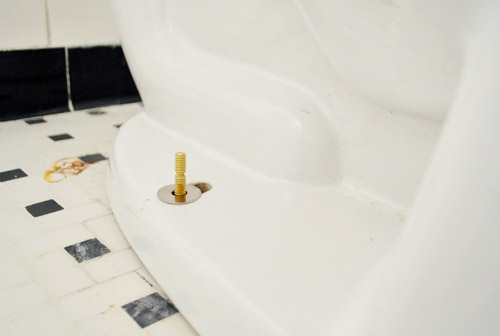
Step 9: Tighten The Bolts
Once it felt pretty set, I went to work bolting it into place. You can see how the new bolts stick up nicely through the holes in the bottom of the toilet bowl. Note: that is not a hairball on the floor, it’s a weird rust stain that has been there since we moved in. So we plead the fifth.
I hand-tightened the nuts most of the way, but used a wrench to finish things off. The thing about a toilet is you don’t want to over-tighten because it can easily crack the ceramic. So just be sure to do this slowly and go back and forth tightening each side a few spins for an even installation. You can also break out a level if you really want to make sure.
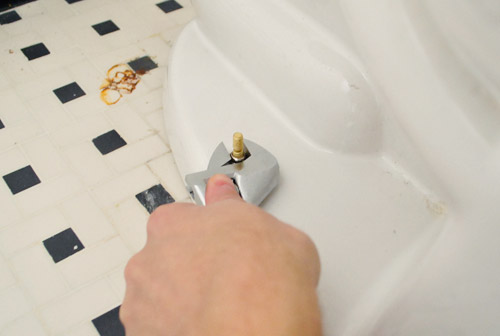
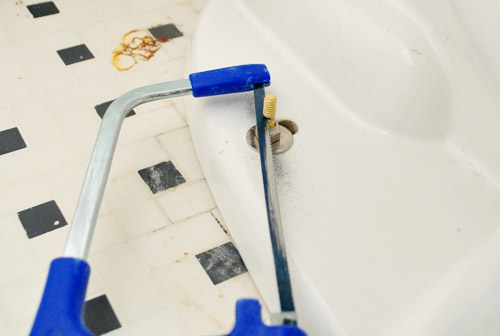
Step 10: Cut Off Excess Bolt Length
Your bolt will likely be a bit too long for those little plastic covers to fit over them, so use a hacksaw to saw off any extra length.
Step 11: Reattach Your Toilet Tank
Bowl securely in place? Check. Not rocking anymore? Check. Now it was time for some tank action. I put the tank back into place on top of the toilet and screwed it in. Again, not too tightly because I didn’t want it cracking. But enough so that it felt secure and I didn’t think it would leak.
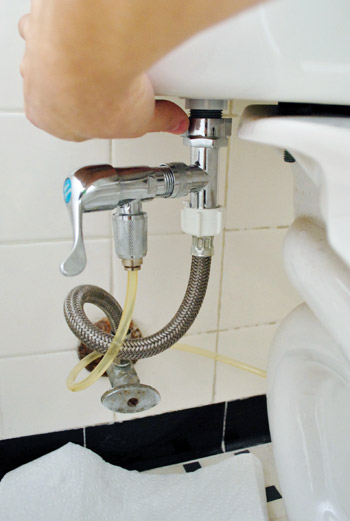
Step 12: Reconnect Your Water Line & Check For Leaks
And last but not least, I reconnected the water supply line so we could refill the tank and bowl. Be sure to check for leaks around the base of the bowl, the bottom of the tank, and where the water line is connected.
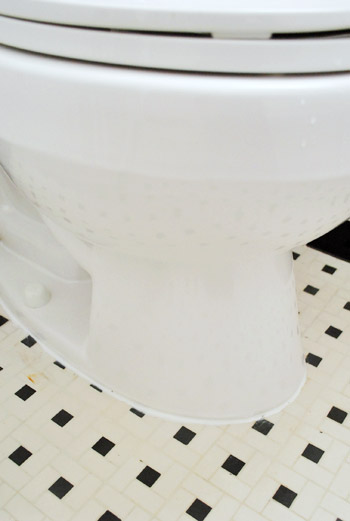
Step 13: Caulk Around the Base Of the Bowl
All of that checked out okay, so I ran a line of caulk around the base of the toilet. I only did it around the front 75% of the bowl so that if a leak were to happen in the future, it could escape out the back and alert us to the issue (that’s a little plumber’s trick we learned a few years back for ya).
BONUS: Add A Dual-Flush Converter Kit
This is usually where a toilet replacement adventure would come to an exciting conclusion, but we used this as an opportunity to install a dual-flush converter kit to this toilet.
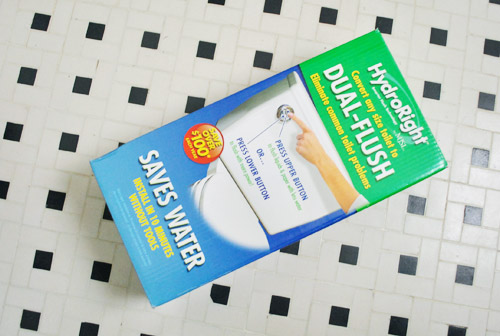
We did this in our last house so you can read our more in-depth dual flush toilet conversion tutorial. But basically, this $25 converter kit lets you take a normal toilet and give it two flushing options: a lighter flush for, um, lighter “activities” and a fuller one for the, you know, other stuff. Hooray for saving water (and money) and pretending your toilet is from the future.
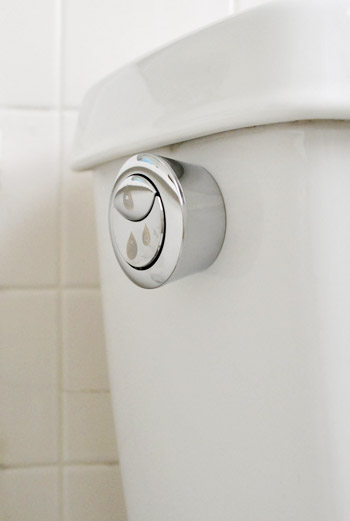
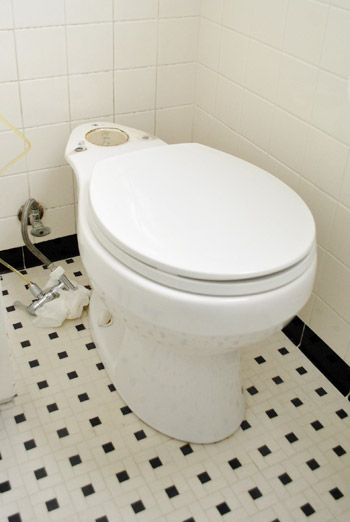
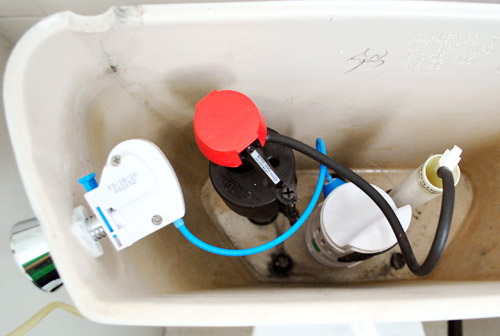
The installation was a cinch compared to the whole wax ring replacement stuff. Here’s a shot of the finished product.
And for the grand finale – and “after” shot of our now fixed, now dual-flushing toilet. Sure, it looks pretty much the same. But just try sitting on it. It’s soooooo much better. No more seasick-esque motion. No more shouting a warning to guests who head down the hall to use the facilities.
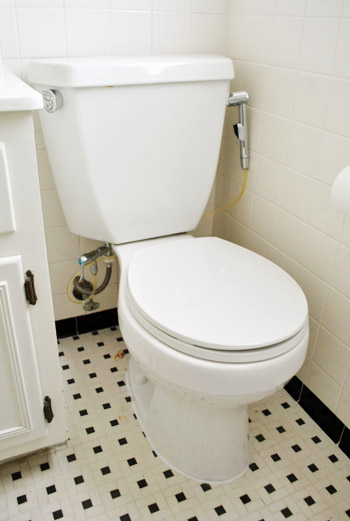
And admit it, that diaper sprayer on the right is hardcore. Like our toilet is wearing a little holster or something…
Psst- Now that I’ve assaulted your eyes with toilet pictures, check this out (it’s much cleaner and sweeter).

Marilu Luna says
John, just a tip, the next time you have to work with the toilet, please use gloves. You never know if you might get cut and with all the germs around a toilet, you wouldn’t want to catch something nasty. Also, a motherly advise, where your shoes to prevent cuts, or the toilet falling on your foot.
YoungHouseLove says
Never even thought about that! Thanks for the tip!
xo,
s
Nikki says
This project couldn’t be behind the dreaded Petersik Valentine’s Day bug could it? We got a bug after a little “toilet maintenance” one time. Couldn’t help but think that was the culprit!!
YoungHouseLove says
Haha- nah, it was independent events. Clara actually got it first and gave it to us. Poor gal!
xo,
s
Calypso says
Barkeeper’s Friend. It comes in a cylindrical container similiar to comet. It’s super cheap. Works on EVERYTHING!!!
It’s cleared up EVERY rust stain, makes my stainless steel pots and pans look like new. Let me say it again… barkeepers friend.
Firesparx says
I’ve heard Barkeeper’s Friend is also good for getting the marks metal leaves in porcelain sinks (and plates as well)!
Charlotte says
I’m wondering about the “Like this post? Then might we suggest these:” section.
I see “Asparagus in the Bathroom” and “Bamboo-tiful” on every. single. post.
Is this feature broken or something?
YoungHouseLove says
We’ve wondered about that too – it seems to really like those! Maybe I’ll try a refresh or something to maybe clear out that preference.
-John
Kacie @ A Collection of Passions says
Thank you sooooo much for this post. Our bathrooms need this kind of work!
Kacie
http://www.acollectionofpassions.com/
Calypso says
Oh and on the comments above on the lemonade flavor of kool-aid–> This formula cleans my dishwasher very very very well. Just load it in where you’d put the dishwasher tab and run an empty cycle. The citric acid will eat up all the yucky grimey stuff.
YoungHouseLove says
Interesting!
-John
bethany says
this is awesome! i totally want to do this to our GROSS toilets, i guess i need to replace them first though. how timely, i have to have my hubby read this :)
Bethany
http://www.powellbrower.com/2012/02/planter-love.html
Jane says
I read daily, but comment rarely. Today I had to. As I was reading about the toilet, I got to the part where you said you put a rag in the hole to cover up smells. At that exact moment, I smelled a really bad smell. I thought it was in my head, until I realized my dog tooted right next to me. Thanks for the laugh. :)
YoungHouseLove says
LOL! Yep, Young House Love is not coming to you in smell-o-vision quite yet. :)
-John
mp says
John, I admire your derring-do. This is a job I called the local appliance vendor/repair folks to handle. (And yes, an inquisitive chihuahua checked their work — Burger’s doppelganger, Bindarra, supervised everything — Jack & Shannon even asked for her approval.)
Petra says
Let us know which method you’ve used to remove the weird thing on the tile. Looking forward to the cork floors for your kitchen!
Lola says
Have you tried using a Mr. Clean Magic Eraser? That’s what we use to remove rust on our boat. I’ve even used One to remoe rust from some screws on my husband’s motorcyles, on rusty keys, all over the place. They work great! When we bought our house, the tile had a scummy film all over, especially the edges, probably from having been cleaned with bleach or some cleaner that left a residue. We used the magic eraser mop and our tile is like new now and has stayed sparkly & clean (with regular mopping with vinegar & water) since we did it 2 years ago. I love those things and I love that they’re odorless & fairly non-abrasive.
YoungHouseLove says
Thanks for the tips guys! So helpful!
xo,
s
Firesparx says
LOVE the Magic Eraser! (Though it still is considered an abrasive, so you have to choose wisely what you use it on). When we moved into our rental house we had an old gross vinyl floor in the kitchen. I Magic Erased the floor and it looked like new! One place I find it doesn’t work well on is walls (leaves a dark mark that looks dirty, worse than what I was scrubbing off. Could be that it’s new matte paint…)
There are a lot of bogus scares about the Magic Eraser being toxic and harmful. It boils down to a few stupid people trying to use it to remove permanent marker from their children’s face and then freaking out when the kid breaks out into a rash. It’s a chemical pad with abrasion!? What did they expect?!
Cara D says
CLR should get rust off. You can get it at walmart.
Mary Ellen says
next time you install a toilet, try slipping a drinking straw over each bolt, use them to guide the bolts into the holes, and then remove the drinking straws. Makes the job much easier. I have actually installed a toilet by myself using the straws.
Also, be careful of CLR on grout. It can eat it away.
Beth says
OMG, We just did this too! You’re post would have been helpful BEFORE we did it! Great post. So cute how you started out your article. Keep ’em coming!
//Beth @ the Chicago Wedding Band
Lana R says
Nth-ing Barkeepers Friend. That stuff is awesome, for bathtub and kitchen sink too!
Sam Power says
Ha ha! Your American toilets are funny looking! Where’s the U-Bend!?
This is one of the reasons why I love reading your blog. All the real stuff you put in it. Love it!
YoungHouseLove says
Young House Love: Showcasing American toilets since 2007. :)
-John
Stacey says
I recently hung pictures in my bathroom. Only after I’d drilled all the holes I touched the wall and felt the hot water pipe behind the plaster. I still cannot believe how narrowly I missed drilling through our plumbing or how dim I was not to check the position of the pipes beforehand.
YoungHouseLove says
Oh. My. Gosh. Soooo glad you missed it!
xo,
s
Kelly of www.twosixe.blogspot.com says
go you guys with the dual flush for the green factor! we put one in both our bathroom remodels – one seen here: http://twosixe.blogspot.com/2010/09/half-bath-bliss-our-dreams-come-to.html . our guests always come out and ask us what to do though. do you get that a lot? :)
YoungHouseLove says
Haha, the first day we had it in we had to explain it to the photo crew! Now they’re old pros!
xo,
s
Momcat says
Oh. My. Gosh. You have just changed my life… I had no idea there was such a thing as a diaper sprayer. I have a disabled person living in my house and sometimes you just need to rinse *STUFF* off into the toilet (and NOT into the washing machine!). Since we have no laundry tub, it has been a real problem but YOU HAVE JUST CHANGED MY LIFE!!!!!!! Can I find one locally (RVA?) or order online??
Thank you thank you thank you!!! (Can I possibly post more exclamation points or will that crash your server?)
YoungHouseLove says
Oh I’m so glad! It’s definitely the reason our diapers are still in such great shape (we still have the same original 12!). We got ours from amazon.com and it’s made by BumGenius (just called the BumGenius diaper sprayer I think). Hope it helps!
xo,
s
Cathy says
Does the dual flush converter work with a high-efficiency potty? It looks like yours is, so I’m assuming yes, but I fear the phantom toilet paper that just won’t flush on the “light” setting with our 1.28-gallon tank…
YoungHouseLove says
Hmm, I’m not sure. Maybe read the back at Home Depot (it might say what tank sizes it’s optimized for?).
xo,
s
Elizabeth@ wake&gather says
I did not even know the dual flusher existed! I am going to Home Depot right now! I wonder if they sell those white caps that cover the bolts? Ours is missing them in the rental we’re in and it’s driving me crazy.
YoungHouseLove says
Oh yes I think they do! Good luck!
xo,
s
Heidi P. says
I was almost not going to read this post – not to be rude – but just because I don’t have any toilet-repair needs. (But of course, how could I really skip a YHL post on purpose?) I must say, it was actually a good read. Haha! And your topless toilet looks so European. How do they do that? Anyone know?
YoungHouseLove says
I know, right? I love how it looks without the tank!
xo,
s
Maggie says
Ha! Nice work! Just had to reinstall a toilet myself this last week after a bathroom makeover! Instead of using a sponge to get out the extra water I use one of those “sucky” water toys with the plunger that pulls water in…stole it from my kids years ago and it works awesome. No, they weren’t allowed to have it back!
Maggie
Laura B. says
we got some “mean green” brand rust remover spray and it was able to remove some mean rust stains from our bathroom tile that nothing else was able to remove, its pretty cheap too! The trick is to let it soak for about 5 min, Im not sure if you guys use only natural cleaners though?
YoungHouseLove says
Thanks for the tip Laura B (and everyone else who has taken the time to share)! So helpful.
xo,
s
HeidiG. says
I don’t think the wax ring was grossest picture, it was you not wearing any shoes! Dude?!? Aren’t you scared the ninja turtle were going to come out and bite your toes?
Nice work on getting another ‘Dude get on it already’ project done.
Erin T says
Thanks for showing how to remove the toilet and put it back on! We don’t have a rocky toilet, but we do have one that needs to go! It is a guzzler! It takes forever to fill up and runs for a long while after it is already filled up. I do have a question about the rusty steel plate under the wax ring. Is there a reason you decided not to replace it while replacing the wax ring? Just wondering!
YoungHouseLove says
That’s a much more major thing (it’s really installed into the floor, etc) so typically just replacing the bolts, the wax ring, and the rubber thing (which all come in the same package) is sort of a nice “toilet refresh” – haha.
xo,
s
katie says
I had no idea that it was so easy to install a dual flusher! I’m maybe more pumped than I should be by that little piece of information. :)
Alyce says
I don’t know if any of the other commentors have noted, but if dual flush toilets are futuristic, than us Aussies are eons ahead of you Americans :P They’re standard issue over here for water-saving reasons. As are water-saving shower heads (although we still use an old one as its pressure is much better!).
And John was certainly pretty brave lifting that toilet barefoot… ouch!!
YoungHouseLove says
Yes, we definitely have to catch up over here! Haha.
xo,
s
Lindsay says
It’s sad how excited I am about this post… toilets toilets hooray! 1) I used to live in Europe and dual flushers were everywhere (in homes AND public bathrooms) and that was 15 years ago…why is the States so behind on this!? Good for you guys! 2) I’m glad your bracket thing under the wax ring is all rusty/crusty – I changed my toilet a few months ago and it looked the same way… I’ve been wondering if I should have replaced the piping. 3) A diaper sprayer – who knew! haha When I have a little one I’ll have to get one of these.
Erin K says
i think i might be ‘see’ing things. i though that you installed a new flush hinge that looks like an eye crying. do you ‘see’ what i ‘see’? third pic up from the bottom. i am so not punny. sorry for the extremely bad humor and hallucinations. darn reflection had me do a double take!! keep up the good work john & sherry. y’all rock!
YoungHouseLove says
Haha- totally looks like that!
xo,
s
Liz F says
100% am bookmarking this post for future home DIYing reference! I would love to have a water-saver flush option on our toilet. I wonder if I could convince our landlord to install one? We live in a desert region (hah, almost wrote dessert–that would be awesome!) so water conservation is super important. The college here even has water-saving flushers installed on all the toilets on campus :)
YoungHouseLove says
Oh I wonder if your area offers a rebate for doing it? Might be helpful in convincing the landlord if you could show him that a $20 device could even be free to install (after the rebate) and could save him money for years to come!
xo,
s
Christina says
I don’t have a chihuahua! Will a Great Dane work?
YoungHouseLove says
Absolutely! Dog substitutions welcome!
xo,
s
Kelly B says
When you are changing a toilet — a wet/dry shop vac is 100x more pleasant to get out the “leftover” water than a sponge. And it’s a whole lot faster too. :)
YoungHouseLove says
Great tip Kelly!
xo,
s
Nicole says
Thanks for the in depth post on the loo (literally)! I need to caulk my 75% around it, but have been putting it off. I cannot master the caulk gun. My caulking is erratic.
Also we have some bathroom rust spots in our old tub, and I am definitely trying on BKF thanks to all the recommendations!
Love this blog!
Nicole
Michelle says
It seems so strange to me that you think of dual flushing as futuristic! Here in Australia all toilets are dual flush. And have been for a long long time. But I guess that’s cause we don’t have much water down here. They’re all also slowly getting connected to rain water tanks instead of mains as houses get built/upgraded.
YoungHouseLove says
I wish we were that ahead of our time! Here’s hoping we catch up someday!
xo,
s
Megan says
have you tried baking soda and/or vinegar? that combo does the trick on a lot of things!
YoungHouseLove says
Thanks for the tips everyone! Can’t wait to try a bunch of these methods!
xo,
s
Micha Davis says
I confess this made me laugh and cry at the same time. Not quite two years ago I bought a fixer upper (understatement) where I knew there were some plumbing fixes that needed to be addressed. Long story short, the upstairs commode no longer worked AT ALL and had caused major water damage to the basement. The previous owners had installed new flooring and done everything BUT screw the toilet back down. The kit as you say is like $6, but someone not using it later cost around $1200 to repair.
Little things like this are soooo important.
YoungHouseLove says
Oh my gosh, that stiiiiinks! So sorry for the pain and suffering that silly little mistake most definitely caused!
xo,
s
Christine says
Hey – two quick tips from our plumber. He goes through his house’s bathrooms twice a year and snugs up the bolts on the toilets. He says if homeowners would do this one simple thing a couple times a year, they would save themselves possible flooding disasters down the road. The other tip is that he fills each of his sinks up once a month or so, pulls the plug and lets them drain. I do it when I brush my teeth, my husband while he’s shaving. Anyway, our plumber said he’s never had a stopped up sink in his own house because of this simple thing. Who knows – but, it’s an easy thing to do and if it works, better than those horrible chemical drain uncloggers!
YoungHouseLove says
Sweeeeet tips! Love them both- especially since they’re frreeeeee and greeeeeen! Can you tell I’m excited? Haha.
xo,
s
Amanda says
I can’t believe you did this without gloves on! Brave!
Deb says
Thought you might be interested to know that dual flush is standard in New Zealand and has been for years!
YoungHouseLove says
You guys are light-years ahead of us!
xo,
s
Tania @ Carnoustie Lane says
I also like Barkeeper’s Friend, in the powder version. You can pick some up for about a buck. It great on tile and will get rid of your rusty spot.
We just re-did our powder room and your tip about the dual flush gadget is great! Thanks again!
http://carnoustielane.blogspot.com/2012/02/powder-room-reveal.html
Heather Jo says
The title to this post is just awesome. AWESOME.
Amy says
I have had the gross misfortune of replacing the wax ring in two toilets. I cannot think of a fouler DIY project! I helped my Dad who took great delight in dragging out the process and adding sound effects. Of course, not replacing the wax could present a whole host of other foul problems so I guess you gotta pick your poison.
YoungHouseLove says
Haha- tis true!
xo,
s
Kate R. says
I love bathroom humor..and diy :)
Jen says
Another long time reader, 1st time poster – When Bar Keeper’s Friend wouldn’t completely move my rust stain, I used wet silicone sandpaper with BKF in a circular motion. Magic! And didn’t scratch the tile.
PS. Love your energy!
YoungHouseLove says
Love that tip! Thanks Jen!
xo,
s
Connie says
We installed that exact dual flush system a few months ago. It works great! I hope you enjoy your toilet of the future.
Felicia says
We have these in Australia. They are everywhere. The aussies really know how to go green!
YoungHouseLove says
Love it! Here’s hoping we catch up!
xo,
s
Maggie says
Oh how i LOVE your blogs so much :)
this toilet thing is great guys ! u made gross DIY into loveable story.
I tried to convince my husband to use dual-flush, but he hated it. It’s because we keep on finding broken dual-flush button toilets in local malls.
How’s yours?
Btw, i’m from Indonesia, and the converter kits here is sooo expensive (around $150 + labor) :(
YoungHouseLove says
We had ours for over a year at our first house and it never broke! Hope it helps.
xo,
s
J.D. says
You could also try a fantastic product based on citric acid. Now, don’t let the citric acid scare you, it’s not any sort of caustic material. The product is called Lemi-Shine and you can usually find it in your dishwasher detergent aisle. It is for use in your dishwasher but you can practically clean the whole house with it. It comes in a crystal-like powder form. You can simply add a touch of water to make a paste and it’s sure to get that stain out. I’ve introduced friends to it and they’ve gotten stains of various kinds out of flooring all over the place that no other product has removed. WARNING: It might lead to a slight addiction. You buy the product for one stain, then you think it might work on ‘x’. You try it and before you know it, you’ve used it all over the house removing stains like a crazy person. You have been warned! :-) PS: It’s also great in your dishwasher if you have hard water. We put it in the place of the detergent and then actually only splash a bit of regular Dawn on the dishwasher door and our dishes have never been cleaner, or clearer.
YoungHouseLove says
Thanks again for all the tips everybody!
xo,
s
Brenda Schwarz says
I love that John most always barefoot in posts! Keepin’ it real…