Alternate post title: “In A Minute, I Have To Hairdry The Chair”
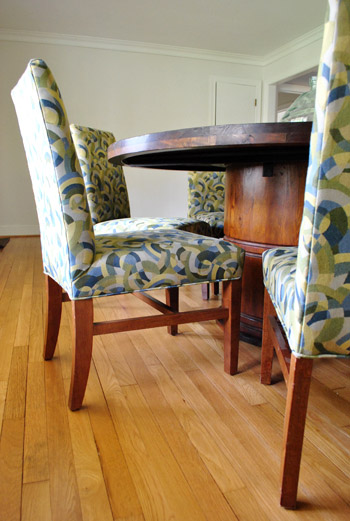
Guys, I did something crazy. Since we’d like to take our $25 hotel-ish dining chairs to a crisp not-patterned apple green (the curtains I want to make will be patterned, so I just want chairs in a fun color but without a pattern that I’ll tire of) I decided to paint them.
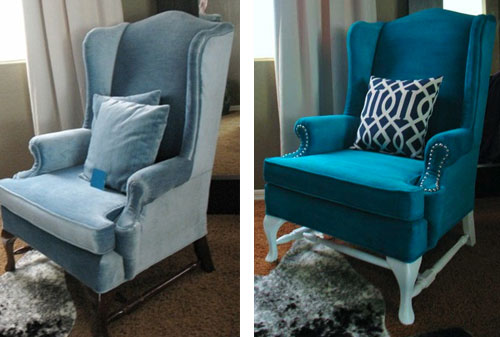
I know. Insane. But I didn’t think I had much to lose since the backup plan is to reupholster or slipcover them (both of which would still be entirely possible if I didn’t like how the whole painting thing turned out). I went into it as a hmm-this-experiment-should-be-interesting thing. Nothing was guaranteed and I felt like a crazy person the whole time. Yup, I was skeeeeered. I mean who paints a chair? Well besides a few amazing bloggers who have posted about how well it went for them. For example, this tutorial was up on my iPhone the entire time for reference and encouragement. Just look at Kristy’s amazing chair transformation. She did that with paint!
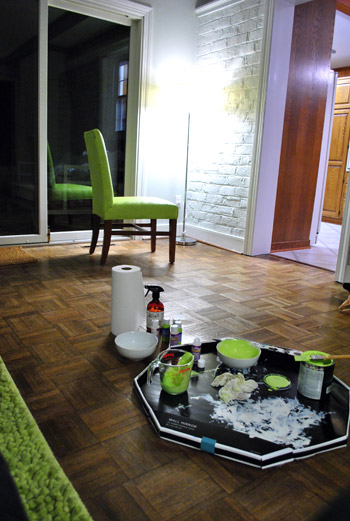
So here’s how it all went down. I pretty much just based my method on Kristy’s breakdown with a bit of flexibility since the directions on some of my supplies conflicted with a few steps. And speaking of supplies, here they are (that’s the Top Chef finale in the background BTW):

I got three tubes of “Fabric Painting Medium” and three tubes of acrylic paint in cheerful apple green from JoAnn Fabrics for under $10 total. I also picked up a quart of satin interior paint by Glidden in Granny Smith Apple (I thought it was meant to be since I’ve always talked about “apple green” chairs).
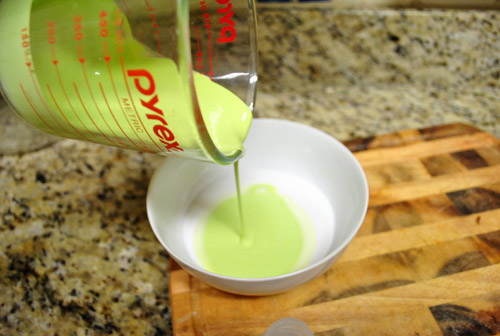
Then I just followed Kristy’s directions for the most part (admittedly not to the letter because I was also trying to adhere to the instructions on the back of my specific fabric medium, so I tried to walk the line between those and Kristy’s) and mixed one part latex paint and one part textile medium in a bowl. In order to get an even ratio I even got all type-A and dumped out the fabric painting medium into a measuring cup so I would know how much paint to add to keep the amounts equal. Here you can see that it was about a third of a cup:

Of course I accidentally dumped way too much paint into the measuring cup so I had to pour a good amount back into the can, but I was definitely happy that I wasn’t just trying to eye things (would’ve had way too much paint in the mix).
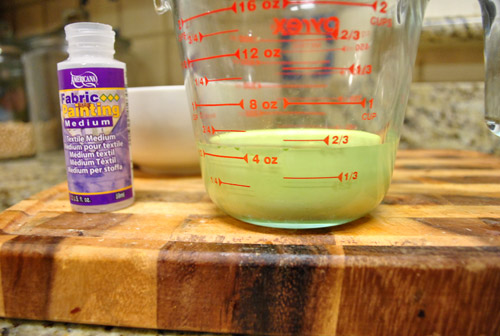
Eventually I got down to a third of a cup of latex paint and poured that into the third of a cup of fabric painting medium that I already had in the bowl.
And mixed that up with a brush that I had on hand. I was a little worried because the whole thing was looking pretty yellow but paint is always kind of an odd color until it dries and gets darker.
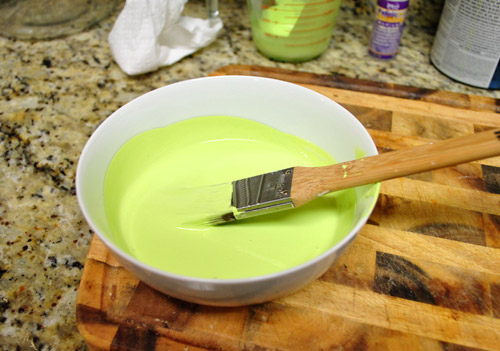
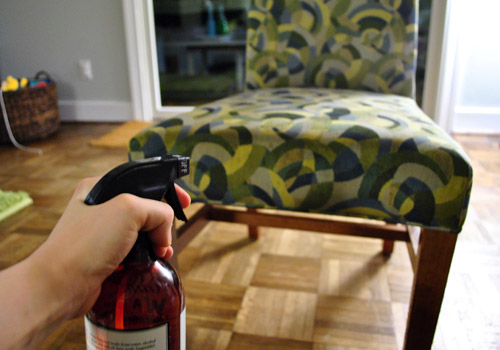
Then I added about a quarter of a cup of water to the bowl to thin things out a bit per Kristy’s suggestion. Next up was spraying down the chair with water (I reused an old cleaning bottle) so it was moist and ready for paint to glide over it evenly (instead of soaking up too much and getting all clumpy).
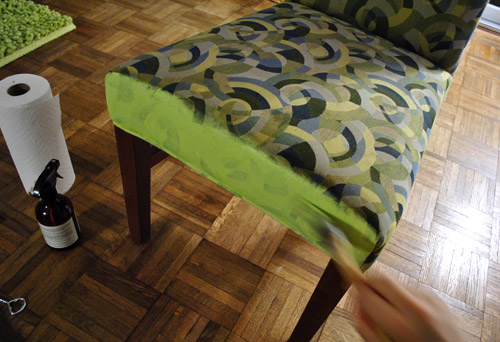
Here’s an in-progress painting shot that John grabbed over my shoulder as I went (I was too afraid of getting it wrong to stop and pose for a clear pic).
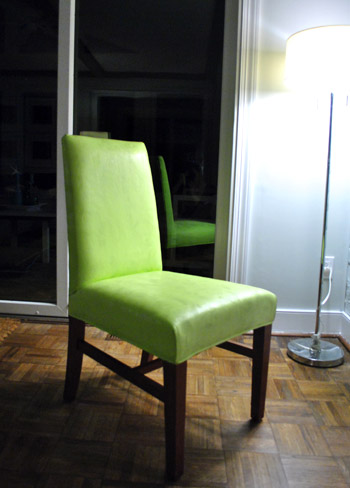
And here’s the after. Well actually I still had a few more steps left, hence the “wait a minute I have to hairdry the chair” title. John asked if I wanted to watch The Soup and I said, yup you guessed it: “wait a minute I have to hairdry the chair.” Which struck John as hilarious for some reason (I can’t imagine why) and he proclaimed that it had to be the title of this post.
The reason I was supposed to hairdry the chair was to set the textile medium (it needs heat, and when you can’t toss whatever you’re painting in the dryer, like a chair, you can apply heat with a hairdryer. But I reread the instructions on the textile medium tube and it said that I had to wait a day for the heat-setting step. So we watched The Soup and my crazy painted chair sat in the corner of the living room drying.
Here are a few first impressions:
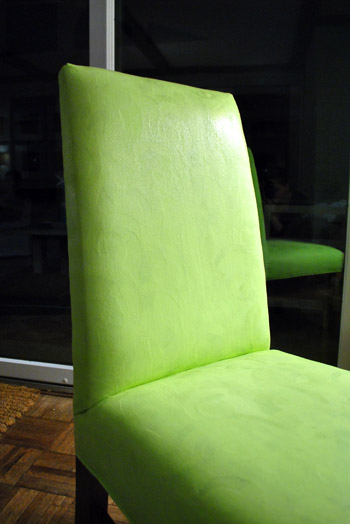
- It’s way too neon and not as apple green as I’d like (my fault since I chose the color, but that could be fixed with different paint).
- Man, that took forever! Over an hour and a half to paint one chair (I applied a few even coats for better coverage). That factors out to 12 solid hours to do all eight chairs.
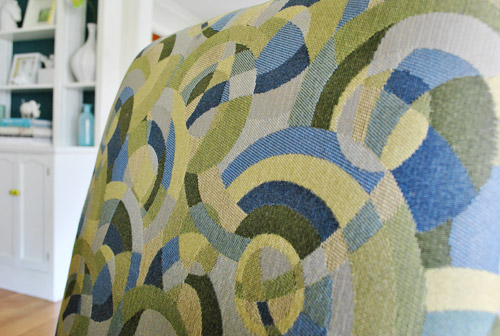
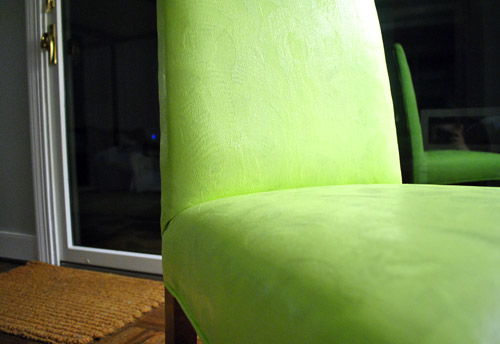
- It looks kinda cheap and those annoying swirls in the fabric still show through. See?
And here’s where we ended up after sleeping on it:
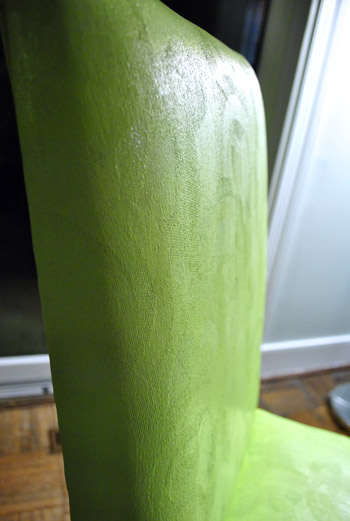
Slipcovering or reupholstering is a better solution for us since we’re not happy with the swirly texture that still shows through, the semi crunchy feeling (they’re not as smooth as vinyl, more like a rough burlap), and the odd look of painted seams (the flat parts of the chair don’t look as crazy, but the seams/folds in the corners just look gunky and unconvincing – as if they’ve very clearly been painted – since they have).
This method is obviously one of those it-depends-what-you’re-painting experiences. Because seriously, how amazing is that turquoise painted chair at the top of this post? I’ll save you the scrolling trouble. Here it is again (with a full tutorial here). So inspiring, right?
And although we didn’t have the same success, we’re glad that we tried this whole crazy process just to have it under our belts and share it with you guys (well, we didn’t end up applying the last coat of acrylic paint to finish things off because we decided to abort the mission, but I did later hairdry it to set it). And it’s definitely set for good, so for anyone wondering if a painted chair will rub off on the person who sits on it, nope. It’s just like how you can wear and even machine wash your painting clothes over and over again without worrying if they’ll smear. Once that paint is set into your shirt it’s hard and permanent (and the fabric medium is meant to help soften the paint so it’s less crunchy, in case you’re wondering about that additive).
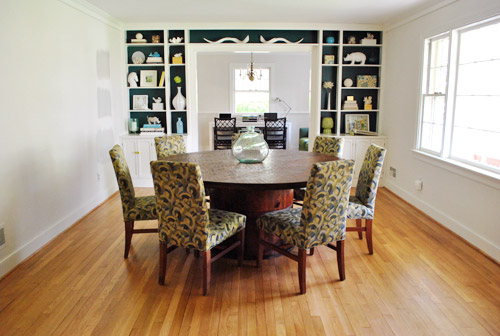
So as of right now the green painted chair is living in the crazy cluttered playroom while the other seven unpainted chairs are still hanging out in the dining room waiting for reupholstering or cheerful apple green slipcovers.
We’ll keep you guys posted as this crazy chair adventure continues. Who knows where we’ll end up (our guess is slipcovers but you never know)…
Psst- We’re talking about how kids never fail to want the only non-toy items within their reach (the remote, your cell phone, the keys, your sunglasses) and we’re divulging Clara’s very favorite (and admittedly very weird) not-a-toy toys over on BabyCenter.

Waller says
I would have never thought of painting fabric to make it a color that it is not. Especially a non solid color/ patterned fabric, that was already upholstered to something. Your braver or more crazy confident than me.
To me painting a chair like that is like saying a have a yellow lab but want a chocolate lab instead and painting him brown to only realize that my dog doesn’t look right and it was a crazy idea in the first place, then putting a sweater on him till it his hair grows out as plan B.
Them some crazy lady balls you have.
Kel says
Cracking up at “crazy lady balls”… :)
YoungHouseLove says
Haha, me too.
xo,
s
Hilary @ My So-Called Home says
Oh well, you win some you lose some. Good luck on learning to sew- funny because I just picked up a machine off Craigslist on Sunday and I’ve been watching YouTube videos, trying to figure out how to even load the thread! I believe a few trial and error days are in my future as well. I’ve also been updating our dining room:
http://www.mysocalledhome.com/2011/04/dining-room-update.html
and a corner of it will be turned into a sewing nook. Can’t wait to see what you guys come up with!
Manda says
Thanks for showing the attempt on this. I always see pieces I love on Craiglist but I’ve never done any reupholstery or slip covers, so I generally chicken out and don’t get them (don’t have the budget to have someone else do it for me). One of these days I’ll make the leap!
jbhat says
I am laughing to myself, wondering if the crazy-90s-hotel pattern would have shown through if you had primed the chair first with Kilz. : )
I vote slipcovers. But good for you for testing it out!
jbhat
AKMama says
Is that chair in the time out corner? :-p
YoungHouseLove says
Haha, bad chair.
xo,
s
Jessica says
Maybe instead of sewing a slipcover you can just drape fabric around the chairs and tie it up with some ribbon around the legs?! Similar to when the fairy God-Mothers tried to sew a dress for sleeping beauty my cutting a hole in the center of the fabric to make the bottom of my dress! And no worries I am a horrible sewer too – I try and I try, but I just can’t get that speed of the needle to stay consistent!!
sara says
I would suggest slipcovers, something you can take off and wash. no matter how hard you try, your kids will end up with something on the chair, at least a slipcover will be easier to clean…
Carla says
Slipcovers almost always look baggy and sloppy. I think a substantial table like that needs chairs that feel permanent and solid, instead of temporary as slipcovers tend to convey. So upholstery would be my choice. Lately I’ve come to love microfiber. It’s very durable and stain resistant, and the sueded material adds warmth and depth to a warm and would look great around your table. I’m thinking a deep apple green instead of something bright like the paint you chose for the chair. That would be gorgeous and the fabric would have stream well with your chunky green rug in the other room, which has a similar sueded effect.
Cheers!
Kel says
Good try with the painting! I agree though, slipcovers will be a 100% better choice for those particular chairs.
Don’t feel too bad about not being a natural sewer… it seems like you are a natural at about a million other things! Believe me, I am one of those people that looks at your blog and thinks, wow how did she do that? or wow how did she come up with that? :)
Good luck with the chairs though, I know you’ll figure out something beautiful.
- Sarah :-) says
I think the painting technique turned out really really well for such a patterned chair. I was worried that it wouldn’t cover all of the color variations, etc, but it did!
Recommendation for the slip covers/new fabric: Use something like a suede, if possible, for easy clean-up. You can pretty much clean ANYthing off of microfiber suede fabric. I have a big dog and he comes with big messes – but the suede couch that we had NEVER stained… it was so easy to clean and that type of fabric is super easy to work with, as well. :-) Good luck!
Rae says
I know that you’re not very thrilled about the idea of sewing, but it might be easier if you used another slipcover as a template. IKEA sells henriksdal (parsons chair) slipcovers that are pretty inexpensive. Who knows, if the slipcover fits perfectly, you could even purchase white ones and dye them that green color you’ve been coveting.
Kelcey M says
Sherry, don’t worry about people telling you it’s easy to sew – it’s like riding a bike, seems easy in retrospect once you know how, but it can be really frustrating while you’re learning. I hate it when people tell me that something is easy when I’m struggling with it, lol, like it will make you go, “Oh okay, well now I can do it.” But it is well-intentioned.
You know though, even brand new, awesomely-rated machines can be defective, so don’t automatically feel like it’s you. :)
Mary @ stylefyles says
I kind of love the color, heheh but do your thing ;)
Karla says
http://www.amazon.com/Sure-Fit-Cotton-Slipcover-Natural/dp/B000GUAVHQ
Add Rit dye to the shopping list.
YoungHouseLove says
Alas, we’re not down with the tie in the back. Just feels too “banquet hall” to us. But we have our eyes out for something with cleaner lines for sure!
xo,
s
gk says
hmm, i don’t like the banquet hall look either. but i feel like you could modify these somehow. shorten the ties and add buttons or something to give it a more tailored look in the back? just a thought.
i don’t sew (never took home ec, my mom didn’t know how to sew, etc). but i totally hear you on the frustration when everybody says “it’s so easy! you can do it!” sometimes it’s not that easy, and hearing people say it’s easy does not help – it just makes you feel like a big frustrated, failure! (er, maybe that’s just me?) regardless, hope you find some sewing classes that work out for you!
Jess says
Did you change something about how you’re displaying pictures on your site? I can’t see any of them anymore from work :(
YoungHouseLove says
Oh no! We didn’t change anything on our end so I bet your office just blocked them. So sorry! Anyone else having this issue? We wish there was something we could do.
xo,
s
NancyS says
I like the color – to bad it didn’t work out for you.
I have those printed instructions stashed away, just waiting to be used. I’ve often wondered what a chair would feel like, after being painted. RE: making your own slipcovers, I’ve seen people use nice pillow cases over the backs of their chairs……………
Caitlin says
Oh lord, I was reading this post and thought, that’s it, they’ve lost me on this one…then I scrolled through and realized you vetoed the chair paint. Thank goodness! Lesson learned :) Can’t wait to see the slipcover/upholstery results!
Bobbie Brown says
So glad to hear you guys aren’t digging it, because I am not either!!
Pamela says
Great effort, Sherry! I remember an episode on HGTV where the designer slipped a pillow case over the top of each dining room parson chair, & it looked really cute – a quick ‘n easy slip cover for the top (I think she may have also added a decorative touch around it, too, (ribbon?) but not positive). I don’t remember what she did with the seat part of the chairs, though. Anyhoo…guess that doesn’t really help you, since your 90’s fabric would still show on the seats, but it jogged my memory since I don’t sew either, and the episode remained in my “no-sew” brain. Ha! :)
Ling says
You guys are amazing. To read up on Kristy’s tutorial, buy the materials, take so many photos, write such detailed steps, and then say, “Ugh, not for me” yet still post it for the world to see takes commitment. It’s really inspiring to see you try out risky things that might end up failing in the end, and really inspiring that you post the failed ones anyway.
And I vote for slipcovers because then you can not only easily wash them, but also easily change the color down the line.
Lyndsay @ Mr. & Mrs. says
can’t wait to see you attempt slipcovers!
on another note, i was at Ikea yesterday and got to take a whirl on Karl….LOVE!!! So comfy and love the fabric. I think he may be the next big purchase we save up for!
Jessica says
ugh….sewing is my enemy! I remember being able to do it in home economics in high school, but maybe they threaded the machine for us back then or something. I have the exact problems you have….needle breaking, etc. It’s SO frustrating. Especially when you are a creative person, because it feels like it’s something you SHOULD be able to do! My BFF is an interior designer and she spends loads of time sewing, so I looked to her for advice (but, unfortunately, she lives 1,000 miles away at the moment :( ) She suggested watching videos on youtube. She said she still has to do that on occasion when she can’t get the needle threaded right or something like that….have you tried that approach at all?? I haven’t had a chance yet….but I’m hoping that will help! I’m just not the “join a sewing class solo” type of person….
YoungHouseLove says
Love it! I’m definitely a visual person so that might help a ton!
xo,
s
Claire says
Sherry, I’m joining the “you can do it” chorus, because when I think of all the DIY stuff I can’t do, I think of you Youngsters cheering ME on! (Is that weird?) :)
My current project is scraping two rooms worth of popcorn ceilings. Ugh.
Anyhow, I’m sure you’ll crack the sewing nut eventually! You’ve gotten some good advice here.
Jessica says
P.S. I love the blue painted chairs that Kristy did…..I have some old school chairs that are a very cool shape and material, but they are a hideous yellow color….so I’m incredibly inspired to paint them now!!! They were going to get tossed anyhow, so if it doesn’t work, no big deal….but I’m very excited to try it out!!
Diane says
Kudos to you for trying something that would NEVER have occurred to me. I bet a fabric with very little texture would be a better canvas, so to speak.
I think slipcovers have two incredible advantages over re-upholstering. One, they are much cheaper.
And two, they you could wash them! You’ve got a young kid who will be spilling food and drink for years to come. Plus you must surely have at least one future guest who will knock over a glass of wine due to sheer clumsiness. God knows and to my enduring shame and embarrassment, it’s my personal specialty.
Also, if you tire of apple green fabric in the future, iit would be easy enough to replace slipcovers.
Rebecca says
Totally worth the try. Thanks for posting this project and the link to the other blog. Seems like the fabric painting method could definitely work in the right situation. Nice to know it’s not too difficult.
Waller says
IDEA sells henriksdal (similar dimensions and look to your parsons chair) slipcovers that are pretty inexpensive. They even have a color that matches your sofa. Or you can buy the white one and use a green dye. If nothing else it may give you ideas how to slipcover your chair or buy one and use it as a template for your own. anyways good luck…
http://www.ikea.com/us/en/catalog/products/S09861429
YoungHouseLove says
Thanks so much!
xo,
s
Alissa says
With the various suggestions of having John give the sewing machine a try: my father-in-law is a pro with the sewing machine. He’s made various window treatments, pillows, all kinds of things. He’s also into woodworking (he’s made kitchen cabinets, etc) and very math-oriented. According to him, “the sewing machine is a power tool.”
YoungHouseLove says
Haha, I love it. We’ll have to see how John feels about giving sewing a try!
xo,
s
Jenny says
I second (or third or whatever?) the idea that maybe John should give the sewing machine a whirl! He seems pretty handy with tools. Though I’m sure that with time — and recovery from what sounds like frustrating first tries — you’ll get the hang of it.
Kerry says
What a great post! I know that I have had more than one DIY Re-do not go the way a planned.
I do think that apple green rooms will look awesome in that room!
PS – love The Soup!
Kristen says
Don’t know if anyone has said this, but you should grab a slip cover from IKEA (I think it’s the Hendriksdal Chair, but don’t hold me to it!) and use them as a template. Sometimes they have slip covers in the As Is section so you would get them for cheaper than usual!
Erin - Dwell & Tell says
You never would have known until you tried it, right? :) And maybe you’ll end up using this technique on some stenciled pillows or something now that you know about it.
I’m looking into sewing classes too… Recently bought a tiny $14 sewing machine from CVS to (hopefully) take a baby step in that direction.
Andrew says
What about slip covers like these?
http://www.homeofficereviews.net/wp-content/uploads/2011/04/Modern-Home-Office-Design.jpg
YoungHouseLove says
The long skirt is a bit too banquet-y for us (we want something casual) but something along those lines without the skirt would work like a charm!
xo,
s
Grier says
Reminds me of the Trading Spaces where they spray paint a couch hot pink.
I vote for slipcovers, but truthfully the chairs really don’t look that bad with the white walls and green in the bookcases. And the will hide ANYTHING that gets spilled on them! Trust me you want a print with kids!
carolinaheartstrings says
Yep! Nope do not like!!!!!
Lynn says
Perhaps someone has suggested this – I can’t read through so many responses and have a life too :). – I purchased an inexpensive cover, took it apart and used it for a pattern. It was easy and I was happy with the outcome. Another possibility is to barter. Trade with a friend to sew them and you could do mood boards or paint a room. Do you know any good sewers?
YoungHouseLove says
All my fabulous friends who sew live far away (like Katie Bower). Booo! Have to make friends with the new neighbors. Haha.
xo,
s
Ted says
As an aside, I’m an okay sewer by hand, but a lousy sewer by machine (my wife handles that much better). But, the way I learned to sew a straight line was to put a line of masking tape on scrap fabric and then learn to guide the needle down the edge of the masking tape. You waver over some, but you can still pull the tape off if you sew over it. Then try again. I can sew a fairly straight line and do basic things like hems. Anything else, including using any special function on our newer fancy machine I give to my wife!
lara says
i was worried the swirls would so through! thanks for reminding me about The Soup! gotta set up the tivo again. it started recording it EVERY time it aired.
Erin says
:( Are you guys taking a break from how many blogs you post each day? Seems like it’s only been one a day lately.
YoungHouseLove says
We do at least two posts a day three days a week and one post a day two days a week (8+ posts in a five day span ain’t bad, right?). And if we’re not posting you can be sure we’re hard at work on a project behind the scenes (today it’s the console table while Clara naps). It has been that way for a while, but you can read more about the whys here.
xo,
s
Andrea B says
You are brave. That would terrify me! But hey, at least you tried. Now you know for SURE you’d rather slipcover them for the time being. So that’s good! No second guessing. :)
Margreet says
Good you tried at least. Now you know how it works. I was wondering how painting uphulstered chairs would work out.
Are you sure about apple green though? I once had apple green bedroom walls(quite recently) and after putting the green on I just could not live with the color that I thought I liked. Ever since, I ban all apple green in my house. Perhaps slipcovers are a good idea. When you are fed up with the color you can at least machine dye them. Good luck!
YoungHouseLove says
Yup, I’m 100% sure about the apple green. I dream about it and wake up drooling. Just gotta see it through!
xo,
s
Anne L. says
No sewing needed if you reupholster. There’s more than a few good youtube tutorials. Check this one out – http://www.youtube.com/watch?v=RAMu7baekec as an example. If you fall in love with an incredible fabric that isn’t upholstery quality (i.e. too thin), you can use drapery lining as backing to give it more body. Good luck! Oh, and it will probably take longer than 1 1/2 hours per chair, but it will look way better than paint.
Annalea says
Fwiw, I like the textured look. I know it’s not leather (which is what I would do, personally . . . find some green leather at the thrift store or craigslist, and reupholster), but it’s not all that bad in the photos, either.
Ana White actually has a slipcover tutorial on her site somewhere, for chairs just like yours. You might want to check it out . . .
YoungHouseLove says
Oh yeah I love that ana-white slipcovering tutorial!
xo,
s
Shelley @ Single Stone Studios says
I love that you gave it a try. I paint fabric all the time in my art but never on furniture. I could imagine it would be a bit stiff.
Really looking forward to seeing what you do with slipcovers/reupohlstering! That’ll be a fun post to read :)
Susan says
Parson’s Chair Slipcover Tutorial:
http://www.etsy.com/listing/70261588/parsons-chair-slipcover-pdf-format
I’m sure U-Fab on Robinson would have some sort of green fabric you are looking for and for an excellent price too!
YoungHouseLove says
Thanks!
xo,
s
Stephanie says
Sherry, this is totally off subject, but I find it so funny you call it “hairdry”. Here in Louisville Kentucky, we call it “blowdry”. I know some people call it a hairdryer, but we call it a blowdryer. Weird, I know…..
YoungHouseLove says
Haha, that’s too funny. Must be the Jersey Girl in me.
xo,
s
julie says
I was thinking the same thing! then I thought maybe blowdry sounded off
maria says
have you all considered buying simple white slipcovers and dying them in the color of your choice instead of making them and hunting down that specific green fabric?
sewing is hard, i always fear that i am going to end up with a sewing needle breaking off and flying into my face!
good luck!
YoungHouseLove says
Yup, that’s probably the most doable option since I’m all for dyeing, just having a bit of a “moment” with the sewing machine. Haha.
xo,
s
Sayward says
Sherry, I’m with you on sewing. I’m pretty handy, and I’ve been dying to learn to sew. My mom, sister, nana, and aunts all do it. My mom went way over her budget to get me a beautiful Singer sewing machine this Christmas. I had visions of sewing everything in sight with the greatest of ease. I spent my whole Christmas break trying to work it, but had to keep taking it apart to untangle the thread, etc. It even drew blood. Twice. The machine’s been sitting in the backseat of my car ever since Christmas vacation still in the box – I haven’t even brought it in the house. I feel like I’m wasting my mom’s gift, but I need to muster the energy to figure this thing out. Everyone else tells me it’s easy and I’ll learn quickly. Nope. Let us know if a class or youtube video works for you!
Katie Truelove says
Ha! My biggest question was whether that paint would come off any any diners;) That teal chair looks awesome but I agree with you guys that the swirlies plus the high pitched color green are too much for your classy dining room in the making!
Lindsay says
These chairs really seem like a case of buying something other than what you really want. $25 vs. $100 isn’t that huge of a difference considering leather is wipeable and will hold up much better through the years. Plus the $25 doesn’t include the cost of making slipcovers. Also, the original leather chairs you posted just had the streamlined legs instead of the stretchers on these chairs which make the underside of your table look cluttered.
Have you considered cutting your losses and selling these and holding our for what you really want (just like you suggested in a recent post)?
YoungHouseLove says
No way! I could buy slipcovers for $30 and end up with $55 chairs! Which is a total of $440 for eight chairs instead of over $800! Anything close to 1K is scary. Haha. I’m all about the bones of something. Those chairs are exactly what we want when it comes to the bones, and we have a number of options (slipcovers, reupholstery, etc) to turn them into what we want. Just wanted to give the whole painting thing a try first. Even if it didn’t work, I’m happy to have it under my belt!
xo,
s