Painting your cabinets is a perfect way to makeover a dated kitchen without splurging on a big renovation. It doesn’t cost much and, with the proper preparation, your paint job will look great and last a long time. We’ve used the tutorial outlined below to paint cabinets in 4 separate kitchens (not to mention cabinets in other rooms too) so we’re confident it’s a DIY project that will work for you. Follow along below!

The kitchen featured in this tutorial is from our second house which had solid oak cabinets throughout (along with wood paneling!). So while steps focus specifically on painting wood cabinets, the process is similar for any cabinet material. You can also refer to our tutorials about painting already-painted cabinets and painting Ikea cabinets.
Steps To Painting Cabinets
Here is a brief overview of how to paint your kitchen cabinets. The process takes time, patience, and a little bit of elbow grease – but nothing is especially complicated or tiring. At worst, it’s just a bit repetitive – especially if you a big kitchen.
- Remove cabinet doors and hardware
- Patch cracks and holes (optional)
- Lightly sand all surfaces
- Apply a liquid deglosser
- Prime one coat
- Paint two coats
- Rehang cabinet doors
- Reinstall cabinet hardware
This project can be completed by one person but may go faster with help. Proper surface preparation is the key to success here, so don’t rush steps 2-5.
The overall time lime depends on the size of your kitchen, but even painting a small kitchen will span several days due to drying and curing time between coats. You also want to make sure you have ample space to spread out your cabinet doors, like in a garage or spare room.
How To Paint Cabinets Video Overview
You can see these steps in motion by watching the detailed video below. To view an abbreviated version of this process, you can see a quick version of painting cabinets on YouTube.
Note: You can also watch the video above on YouTube.
Supplies Needed To Paint Cabinets
The materials you’ll need to paint your kitchen cabinets aren’t much different from other painting projects. So you may have many of these supplies already on hand.
- Primer
- Paint (we recommend satin or semi-gloss finish)
- Small 4? or 6? foam rollers
- Roller trays
- Short, angled paint brush
- Drop cloths
- Painter’s tape
- Painter stands or tripods
- Electric sander & sandpaper
- Electric drill & driver
- Liquid deglosser
- Wood filler (optional)
- Putty knife (optional)
You could use a paint sprayer for this project, but we don’t feel it’s necessary. If you already own a paint sprayer and are comfortable using it, go for it. It can save time. But we’ve never regretted painting by hand instead.
What paint should I use to paint my cabinets?
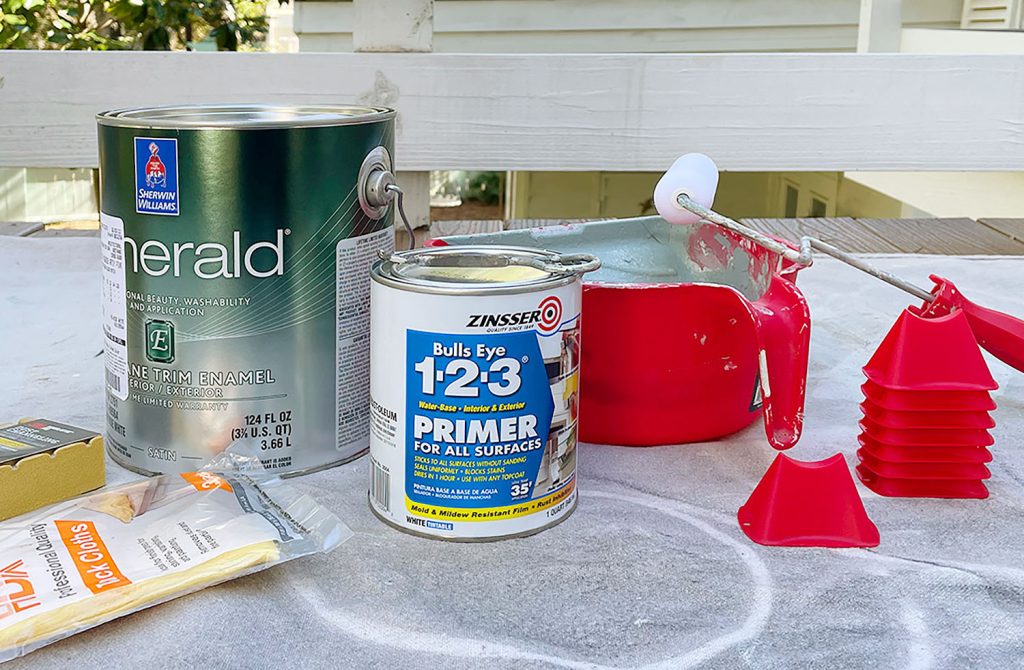
Water-based, latex paints formulated for cabinets or trim are best for painting kitchen cabinets. Oil-based paints used to be recommended, but are not necessary or practical for a DIYer. They are smelly, difficult to clean up, and can yellow over time. Also, water-based paints have come a long way and offer a similarly smooth and durable finish. Our favorite cabinet paints are Sherwin-Williams Emerald Urethane Trim Enamel and Benjamin Moore Advance. If you prefer a different brand, consult the paint desk expert for the best formula for your job. Buy the highest quality paint your budget allows.
Step 1: Remove cabinet doors & hardware
Carefully unscrew all cabinet doors from the frames using an electric driver. Remove existing hinges, knobs, pulls, or other hardware. If you are reusing this hardware, be sure to collect it in a bag or box for later. You may also want to label each door with painter’s tape (I.e. “lower left stove cabinet”) to help avoid confusion during reassambly.

You will also need to slide out any drawers from the frames. If possible, unscrew the drawer front from the box. You may also need to empty some drawers and cabinets. We don’t typically paint the inside of the cabinets, so most things can stay in place while you work. But take care to cover or temporarily move items while you sand, to keep them from getting dusty.
Step 2: Patch cracks and holes (optional)
You can skip this step if your cabinets are in good condition and you’re reusing the existing hardware placement. For our cabinets, however, we planned to swap the existing single-hole knobs for two-hole pulls. The existing hole was in the wrong place, so we used wood filler to patch all of the existing hardware holes before proceeding. We were also changes the hinges, so we patches the holes for those too on both the doors and frames.
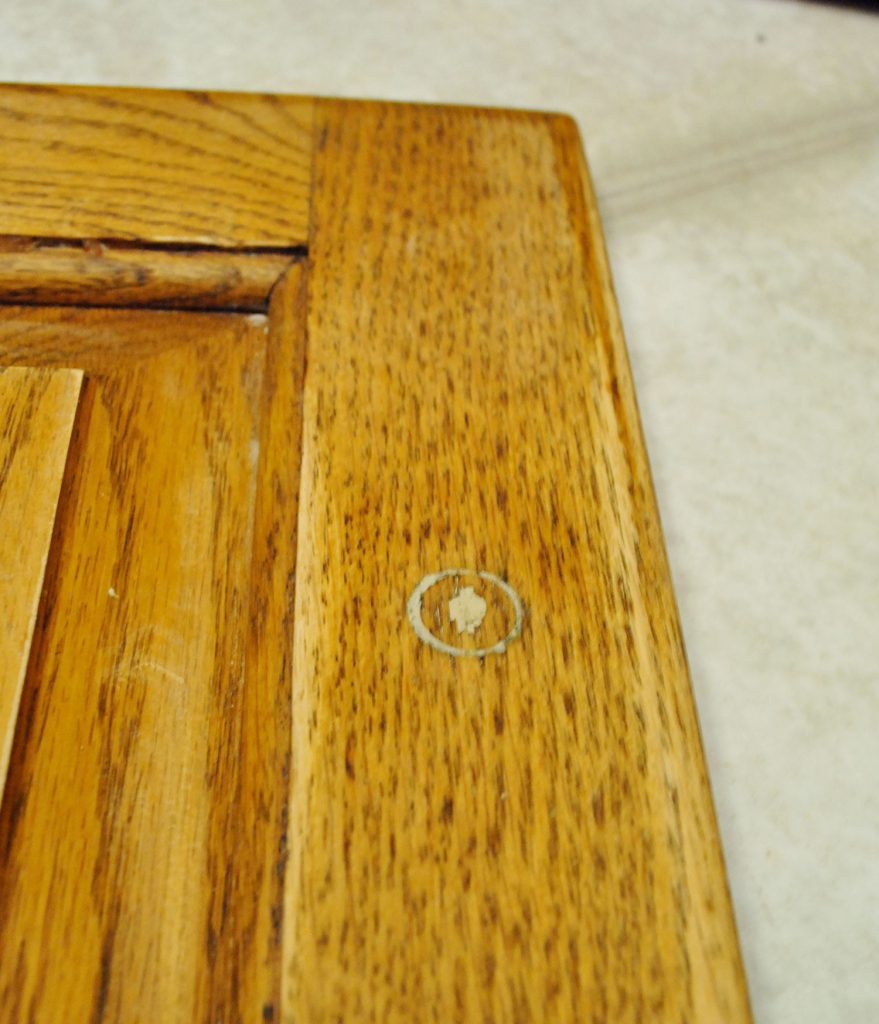
To apply the wood filler, use a putty knife to push it into the hole and smooth it. Once dried, sand off the excess. You may need to do a second coat, since it may shrink slightly as it dries.
Step 3: Lightly sand all surfaces
Prepping your wood cabinets for paint is the MOST IMPORTANT step if you want a long-lasting, durable result. Skipping the next few steps puts your paint job at risk of scratching or rubbing off, especially in high-traffic areas. So while this part is probably the most labor-intensive, please don’t shortchange it! We also have more detail in a dedicated post about prepping cabinets for paint. Here is an overview:
Use an electric sander and medium-grit sandpaper (like 120) to lightly sand every surface you will be painting. This means doors, drawer fronts, faces of cabinets, sides of cabinets, etc. You do NOT need to remove all of the existing finish. The goal is NOT to get it back to raw wood (although that it is okay). The goal is simply to rough up the surface enough to help primer and paint bond to it. You may need to hand sand small corners and nooks.
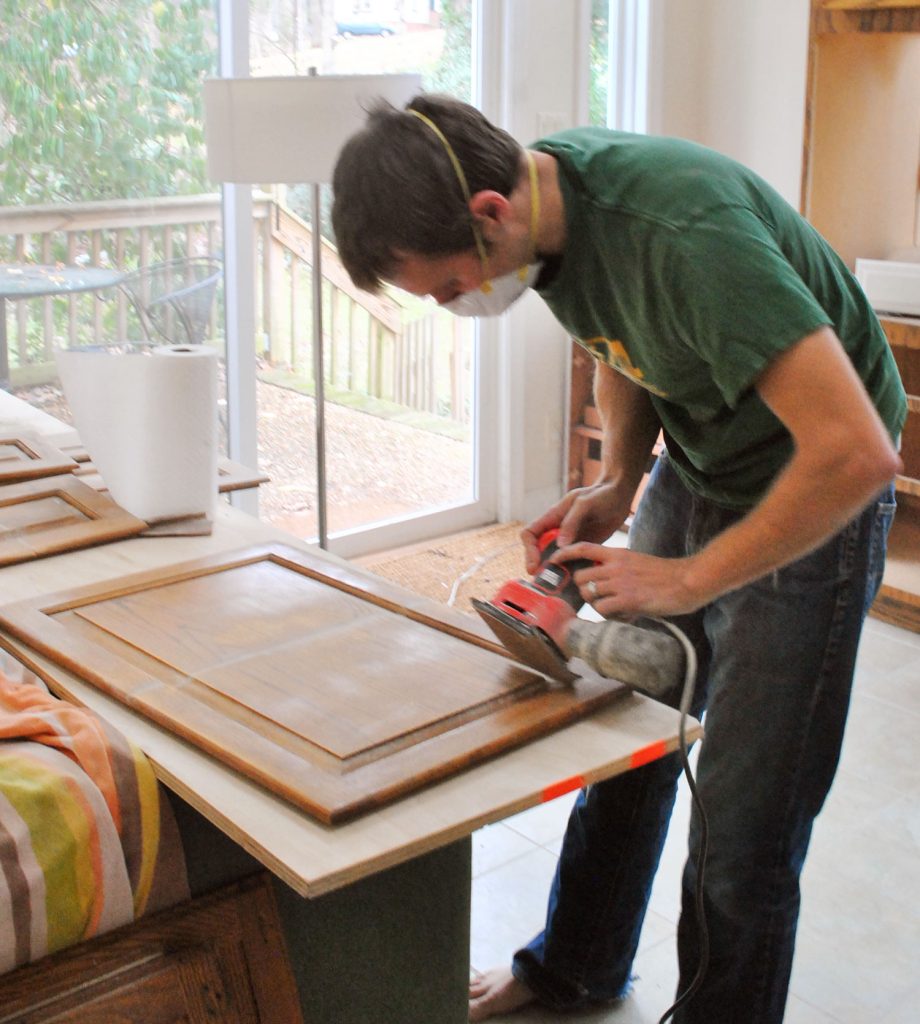
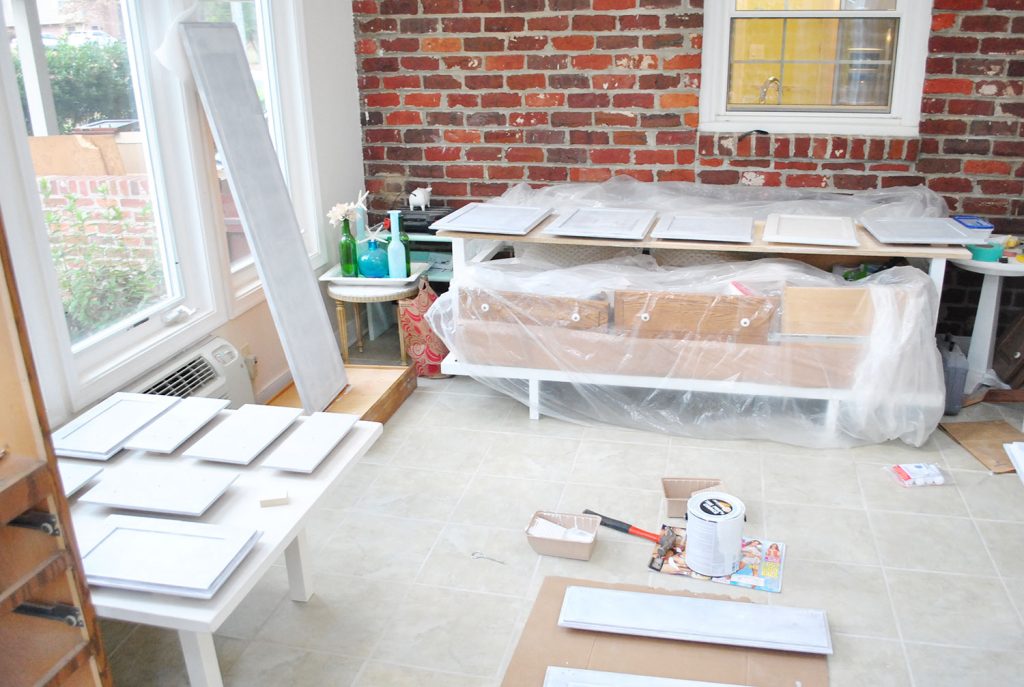
This process will be dusty, so try to do it outside or in a well-ventilated space (we did most of ours in our sunroom, above). When it comes time to sand the frames in place, cover items in your kitchen as needed to keep sanding dust from getting everywhere. After you’re done sanding, wipe your cabinets clean using a tack cloth.
Step 4: Apply a Liquid Deglosser
Liquid deglosser (sometimes called “liquid sandpaper”) helps etch the surface of your cabinets & frames, helping ensure a strong bond with the paint. Krud Kutter Gloss Off is our preferred deglosser. The one pictured below is difficult to find.
Some people use a liquid deglosser in place of sanding, but for wood cabinets we recommend doing both to be safe. It also helps remove any built-up grease or oil residue you may have missed while sanding, especially in nooks and crannies. You may also have heard of using a chemical called TSP (trisodium phosphate) instead. However, TSP is more of a cleaner than a deglosser, so we don’t recommend it.
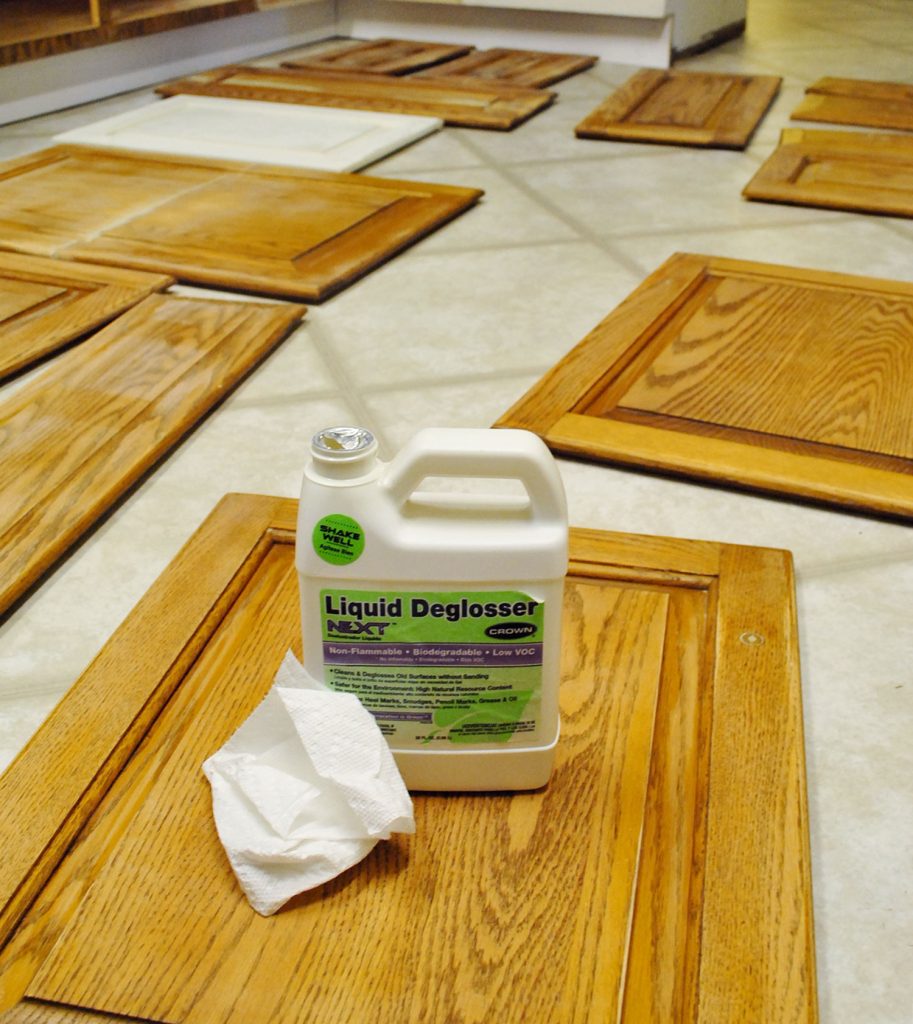
You can apply it with a rag or paper towel or put it in a spray bottle. It doesn’t need to be rinsed or wiped off. Just give it a few minutes to soak in. We sometimes do two applications to be safe.
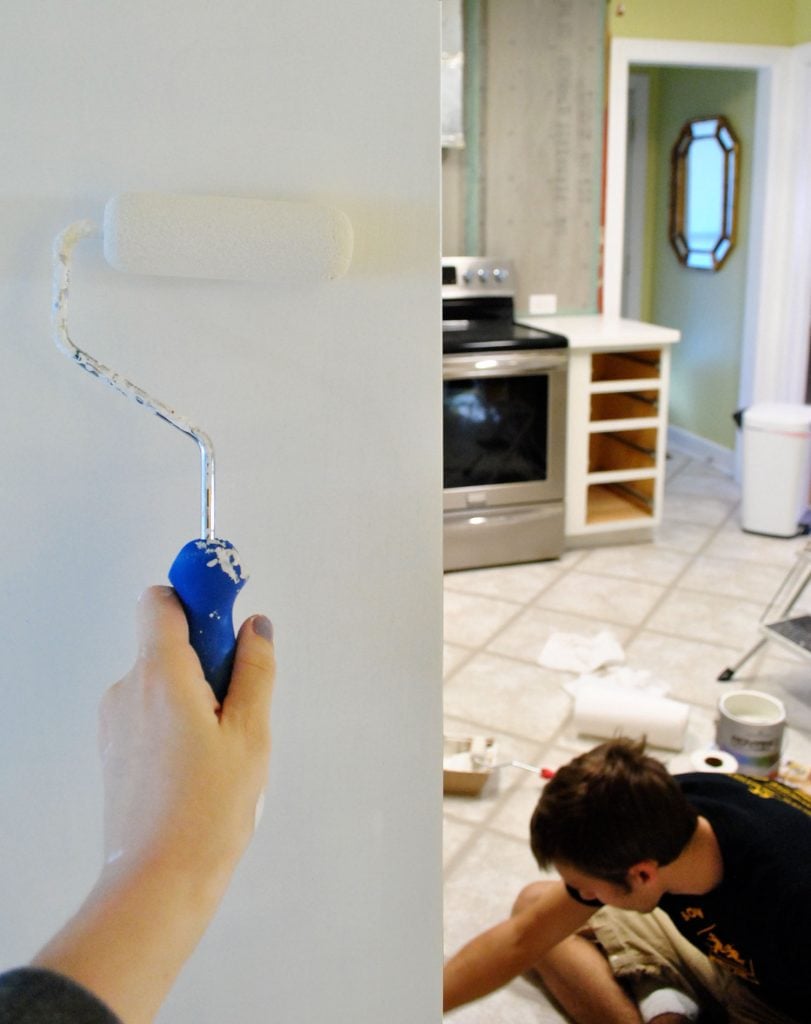
Step 5: Prime One Coat
The last prep step before painting is priming! Primer is a critical element to good coverage and a long-lasting finish. Do not skip it! We like a Zinsser all-surface primer. It can be used off-the-shelf if you are painting your cabinets white or another light color. For darker or more saturated paints, consider having your primer tinted to match.
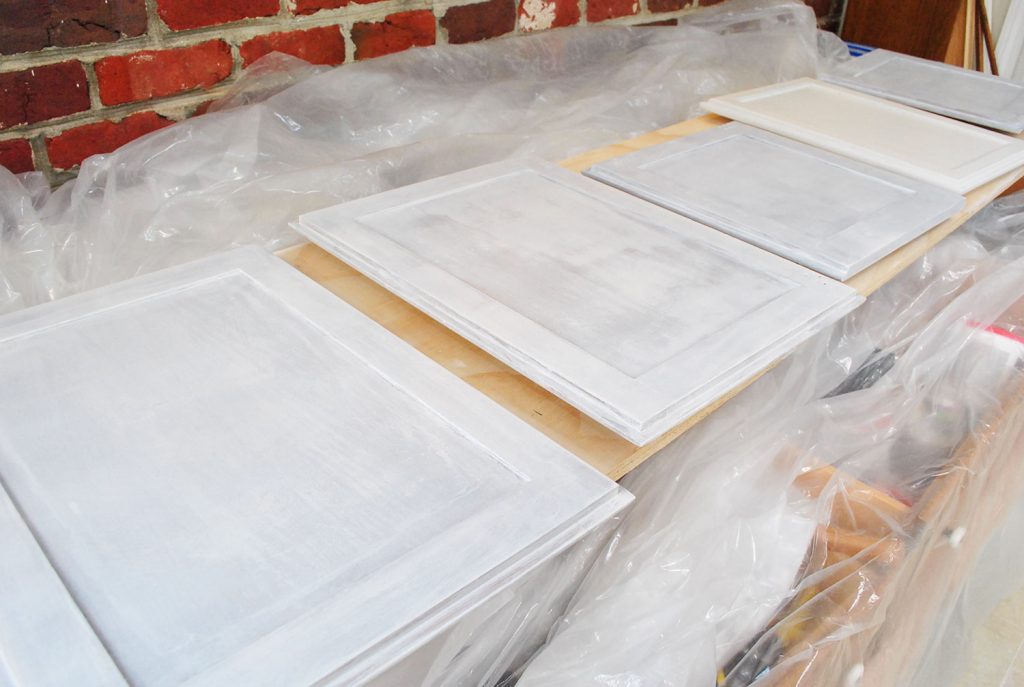
As you can see above, you’re not going for perfect coverage. Primer will be splotchy as it dries. This is okay. The main goal is to get a thin, smooth, and even coat. To do this, we recommend (1) using an angled paintbrush to get into edges or corners, then (2) using a small foam roller to remove brush strokes and coat the large, flat surfaces. Go slow and watch for drips along edges!
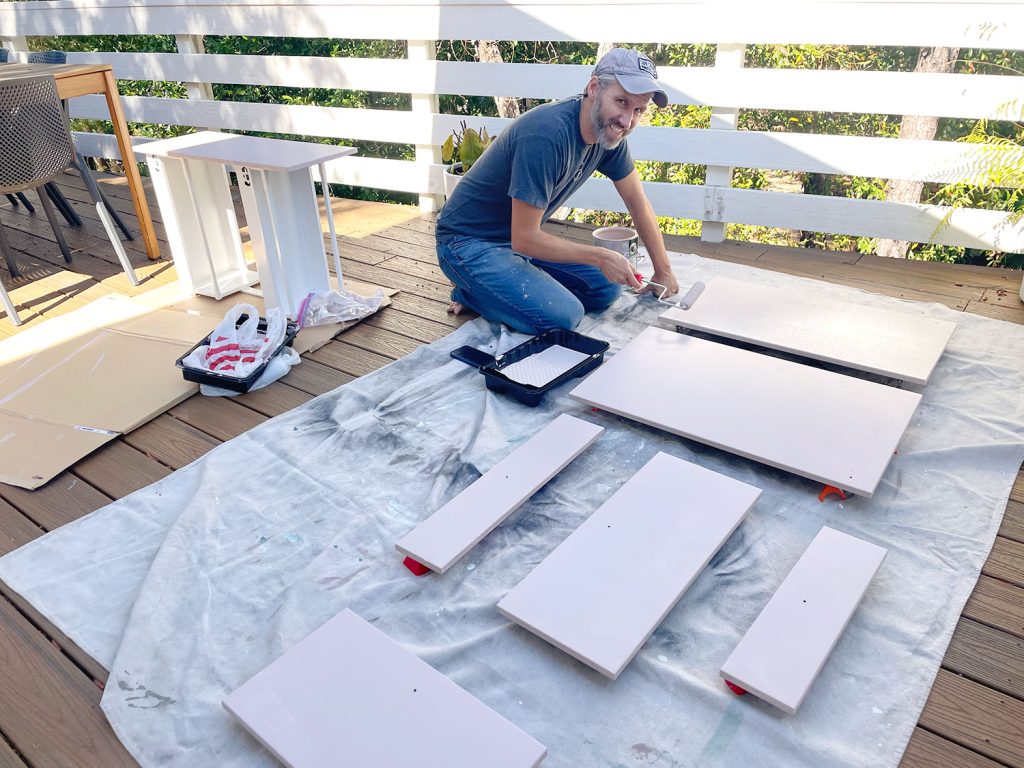
We suggest propping your doors off the ground with painter stands to make priming and painting easier. And if you’re painting both sides of your doors (which we think you should!) we’ve developed a specific order that helps minimize marks or dings on your freshly painted doors. It requires a bit of patience as you wait for one side to fully dry before flipping it over to do the other.
Don’t forget to do your cabinet frames and boxes too! You may want to use painter’s tape and drop cloths to protect walls, floors, appliances, and countertops.
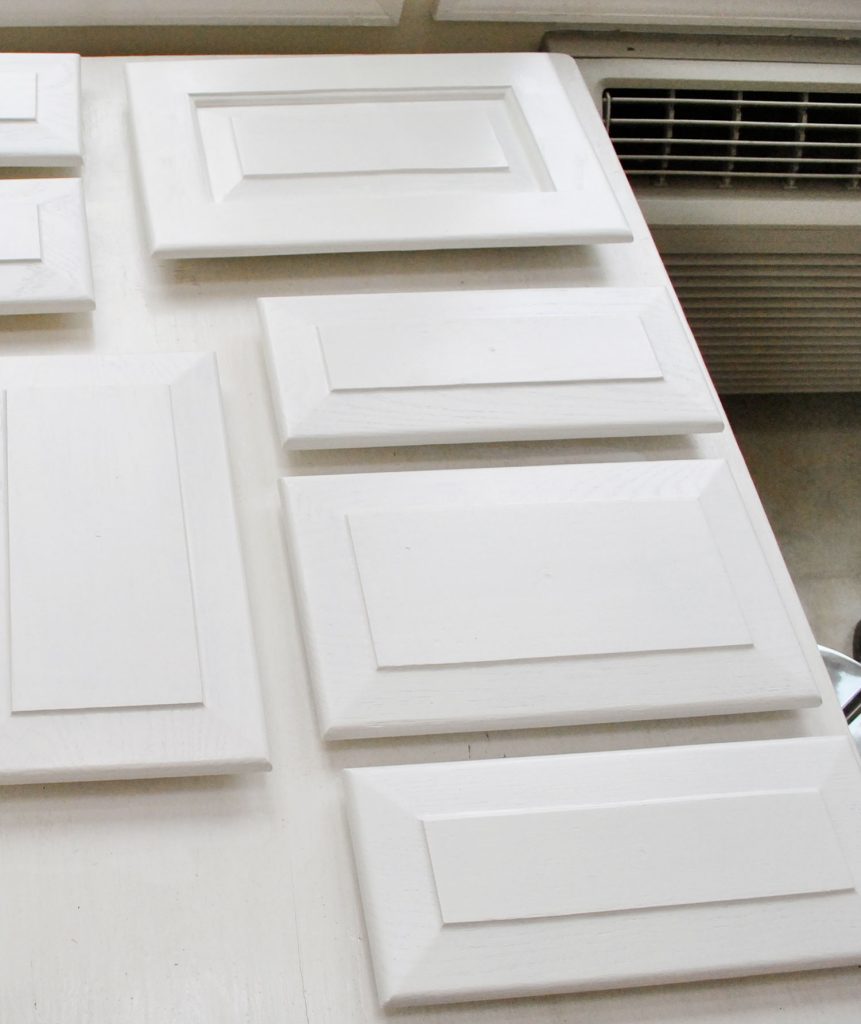
Step 5: Paint Two Coats
Once your primer coat has fully dried and cured (see the manufacturer’s instructions on the can for specific times), you may repeat this process with your chosen paint. We used the color Benjamin Moore Cloud Cover. Again, use a combination of a brush and foam rollers to get a smooth finish. The paint may look slightly textured from the foam roller, but it will even out as it dries. Just remember: your main goal is thin & even coats without drips!
As a rule of thumb, we do two coats of paint for any painting project. But it’s especially important with painting cabinets. More thin layers is stronger and less prone to scratches than one thick layer. Just be sure to allow enough dry time between coats before touching or recoating.
This part should be super satisfying. You’re finally seeing your hard work pay off and your vision come to life!
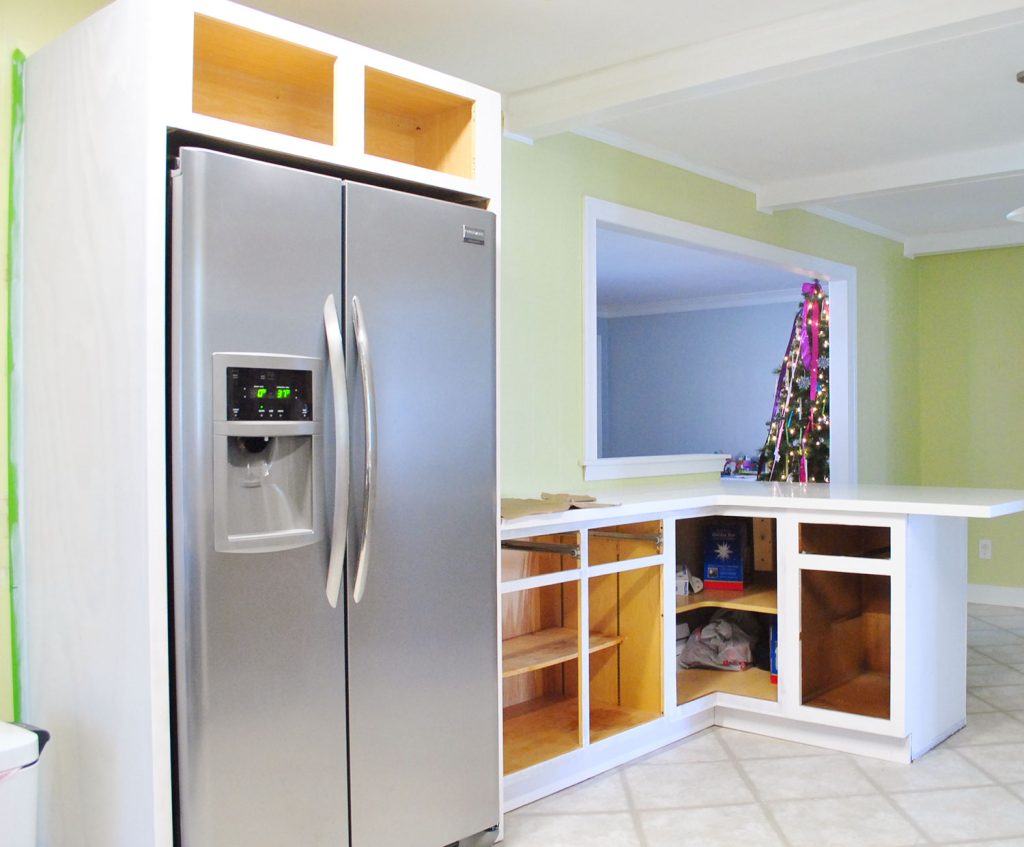
Step 7: Rehang cabinet doors
Once everything has fully dried, you can reassemble your kitchen. Screw hinges back on. Slide drawers back in place. You can even put things back in your cabinets.
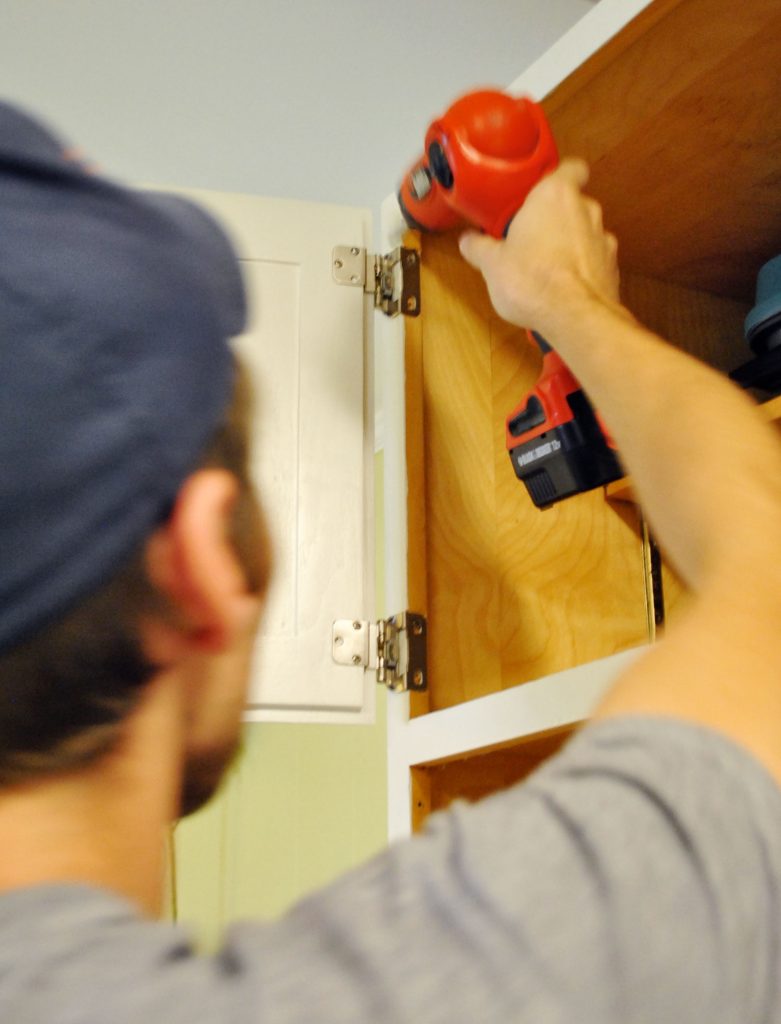
Things might get banged around in this process, so we often like to give our paint an extra day to cure before beginning. You’d hate to scuff up or scratch off the fresh paint right away!
Step 8: Reinstall cabinet hardware
At the same time, you can all reattached your cabinet knobs or pulls. However, this will be a bit more involve if you – like us – filled all of the old holes and need to make new ones.
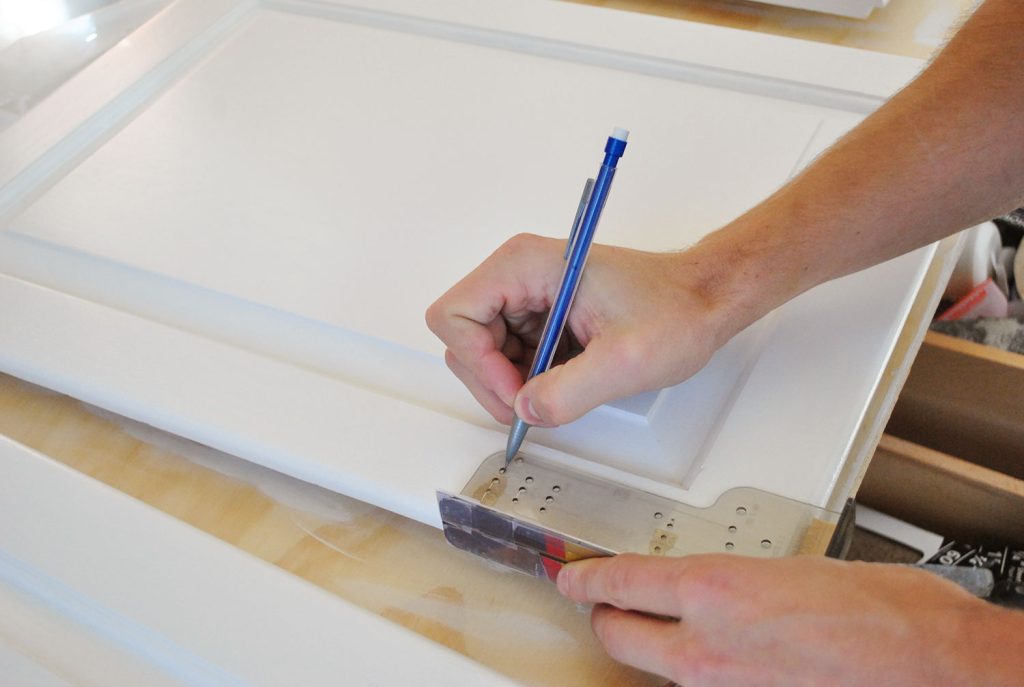
We have an entire post – with video! – dedicated to how to install cabinet hardware that will help you do this with precision and speed. But as you can see above, we highly recommend purchasing a hardware template for this step.
How long does it take to paint kitchen cabinets?
Painting these kitchen cabinets took us 15 days to complete. A lot of that time, however, was waiting for things to dry and cure. They were not 15 days of straight work! So while this isn’t a project you should expect to knock out in a weekend, it’s also not something you need to take 2 weeks off of work to complete. It can easily be done on nights and weekends, like we did. We even had a toddler at the time!
How much does painting cabinets cost?
Painting kitchen cabinets yourself is very affordable, especially compared to the alternative of hiring it out OR replacing your cabinets entirely. We completed this project in 2012 for just $300 and half was for new hinges and pulls. So if you are reusing your hardware, you can expect to spend even less. Here is a rough estimate of what you might spend to paint kitchen cabinets.
- Sandpaper: $10
- Liquid deglosser: $10
- Primer, 1 gallon: $30
- Paint, 1 gallon: $80 – $120
- Paint supplies (roller, brush, trays, etc): $40 – $60
- TOTAL COST: $170 – $230
If you don’t already own an electric sander or drill, those may cost you about $50 each. You can complete those tasks by hand to keep your budget down, but it will significantly increase your time and effort.
Other Cabinet Painting FAQs
Here are some other frequently asked questions about painting kitchen cabinets:
Do I need to apply a sealer or topcoat?
No, you do not need to apply a sealer, varnish, or polyurethane to your painted cabinets. Paints, especially those formulated for cabinets or trim, don’t require a protective topcoat. In fact, applying one could cause your color to yellow.
What finish paint should I use on cabinets?
We recommend using a satin or semi-gloss paint for a hard, wipeable finish on cabinets. Gloss or high-gloss paint can offer a sleek, modern look with high shine, but should be applied professionally with a paint sprayer to avoid brush or roller strokes. Matte, flat, or eggshell finishes will be harder to wipe clean.
What color should I paint my cabinets?
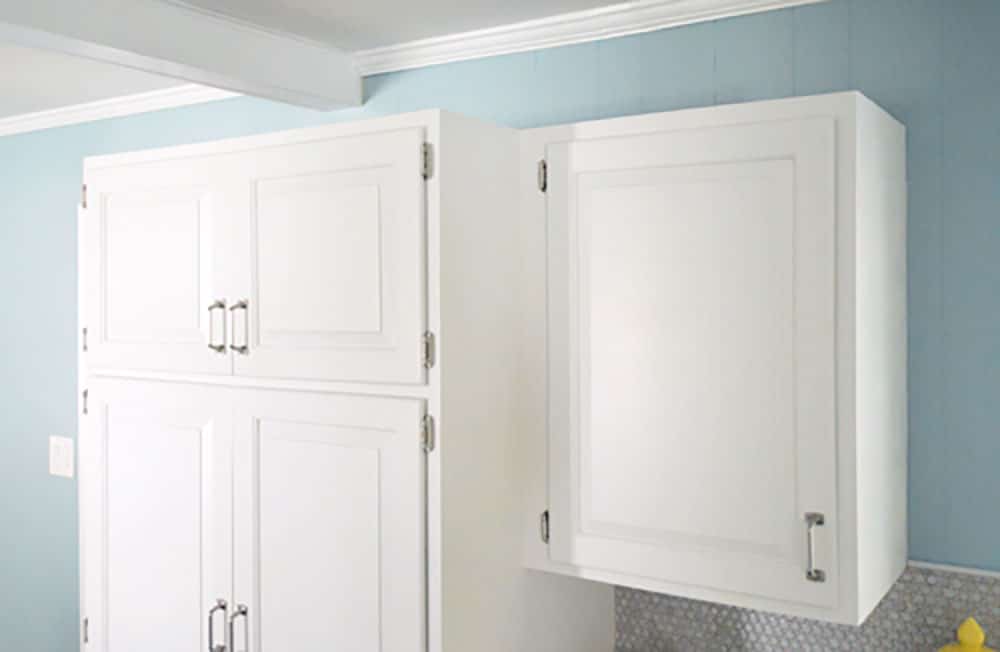
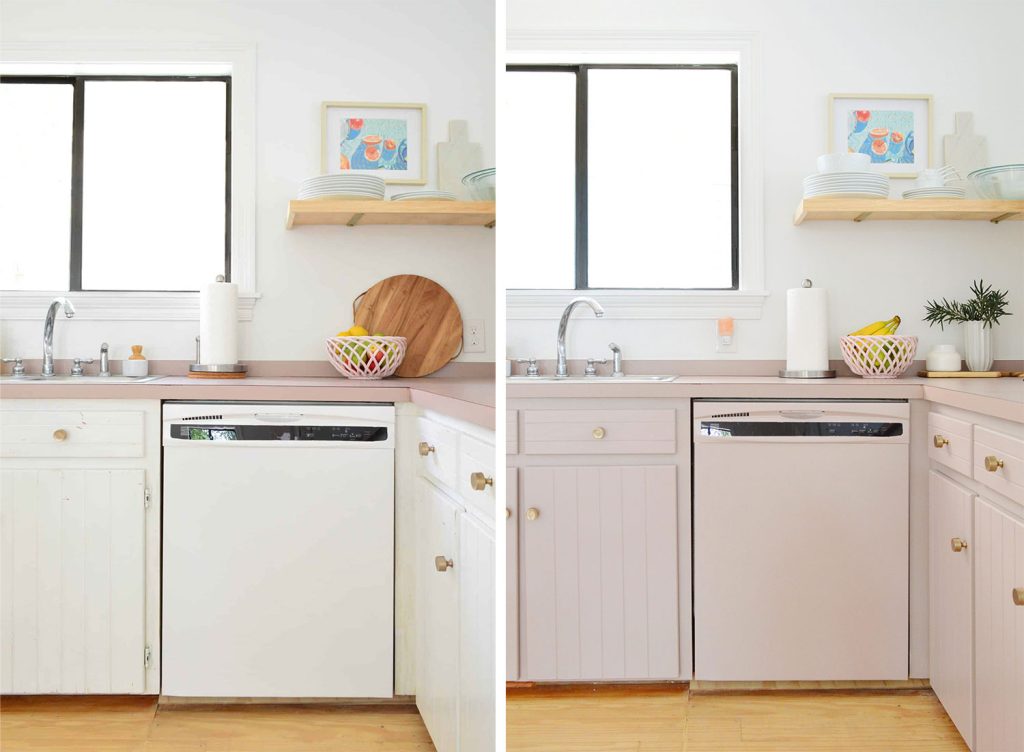
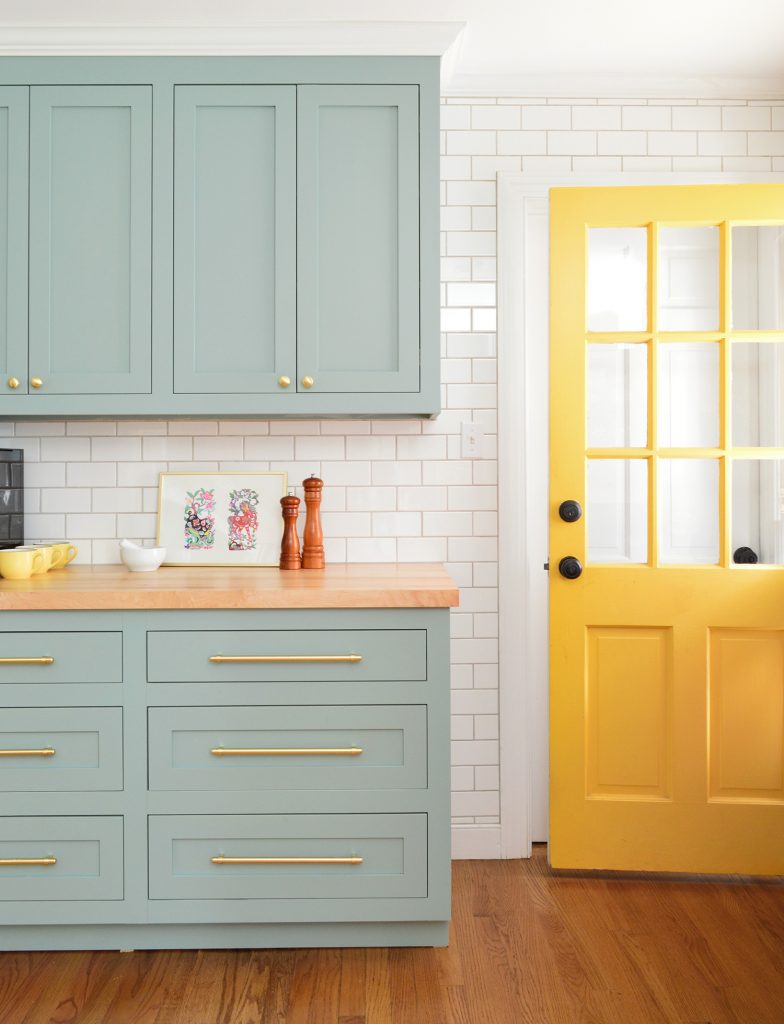
There is no limit to the colors you can paint kitchen cabinets! We love classic white cabinets, but colorful cabinets have also been trending lately – like our current cabinets (Artsy Pink by Sherwin-Williams) or our friends’ painted cabinets below (Halcyon Green by Sherwin-Williams).
We always recommend testing any color before proceeding. Colors often appear brighter or more saturated than they seem on a small swatch. Whites also can appear stark or cold, so we recommend something with subtle yellow or gray. Any of these expert’s favorite white paints work well on cabinets.
More Kitchen Cabinet Projects
Looking for other budget-friendly ways to update your kitchen? Here are some other projects you might be interested in:
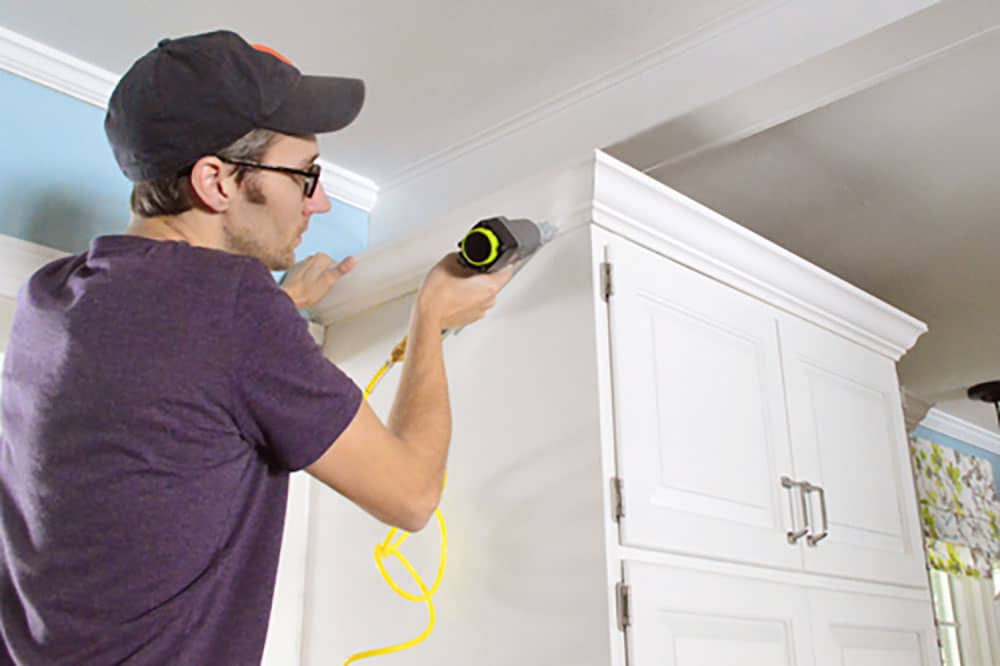
- How to Add Crown Molding To Cabinets
- How to Properly Prep Cabinets For Paint
- How To Paint Ikea Cabinets
- How to Install Kitchen Hardware
- Organizing a Small Kitchen
- Installing Hidden Ginges on Old Cabinets
- Staining Wood Cabinets Darker without Sanding
Update: Our painted cabinets are still holding up great. Check out a little update post here.
*This post contains affiliate links, so we may earn a small commission when you make a purchase through links on our site at no additional cost to you.

amyks says
Holy WOW! It looks simply amazing. Congratulations.
Suzy says
WOW! I love it! I can’t wait to see the finished product!
Can you come tackle my kitchen next? I haven’t yet built up the confidence to undertake this very same project!
Sarah says
Beautiful! Worth all the hard work…and I say leave the retro-fitted cabbies for now. If they bother you in 6 months then you can always redo them and post an update. Also, sad to see you leaving baby center, but glad we get similar posts here from time to time. You guys deserve the break, for sure!
Sherry from BC says
Wow! It looks amazing. Love the fresh clean look. My only quibble is with your blog layout. Would be lovely to have before and afters side by side to really feel the full effect as with my small screen I don’t always capture the before and after on the same page. You have done an amazing job in a surprisingly short time, though it probably doesn’t feel like it to you. And on a small budget. I can’t wait to see how you go about the new lighting with subsequent necessary patching. Ceiling patches are so difficult to make invisible. Hoping for some tips on that.
YoungHouseLove says
We have actually toyed with putting before and afters next to each other but the pics get about half as big which makes them a lot harder to see! Since it allows them to be much wider when they’re on top of each other, that’s our preferred method! Hope it helps!
xo,
s
Suzanne @The Wine{a}be says
A.Maz.Ing!!!
I’m so sharing this with my in-laws…they were just talking to me last week about wanting to repaint their kitchen cabs white. It will give them great insight!
Enjoy your new kitchen…can’t wait to see more!
Meredith says
AMAZING! Love it, love it, love it. It’s awesome watching your kitchen progress—so fun. :)
(Also, I think you want to read with Clara by the “refRigerator” not the “refigerator”).
YoungHouseLove says
Haha, it’s true. What the heck is a refigerator?
xo,
s
Gina @ Running to the Kitchen says
It looks absolutely amazing! Not that I expected any less ;) But seriously, I can’t get over how well the pieced together cabinets and seams came together to look once painted. Nice job guys!
Jessica F. says
Love it! All smiles here :)
Tara says
Gorgeous!! I can’t wait to see your kitchen as it transforms. Nice work! We painted our kitchen cabinets and got new countertops last March and are getting ready this month to add new flooring. It’s a tough job (we swore we’d never do it again after this time), but it’s totally worth it!
Rhonda says
What an amazing transformation. That must feel so good to have it finished. Are you gung ho to keep going or are you taking a breather?
YoungHouseLove says
We’re gung ho! Well, we’ll rest a few days and hopefully start on the backsplash next week!
xo,
s
Elisabeth@SimpleGreenishLiving says
Looks amazing! Nice work. So impressed that you guys reused your existing cabinetry to make this happen!
Erika says
Fantastic job! Still can’t believe what a difference it made. Enjoy your new lovely, bright, happy kitchen!
Andrea H Ross says
I will definitely be “borrowing” your type of paint choice. I have a barrister’s bookcase I bought on craigslist and have been trying to figure out what type of paint to use for that flawless finish because I really don’t want brush marks on it, seems like this paint and your careful painting achieved that!
Love the way its coming along! Good luck with the rest!
katie says
What a transformation! I love it!
Our kitchen has yucky two-tone 1970s oak / white cabinets with blue and yellow painted walls / wallpaper / wood paneling. I CAN NOT wait to do a similar transformation. Thanks so much for the informative, super-inspirational post. It’s great to see proof that one can make something beautiful from something ugly :)
How would you compare your steps to using one of the Rustoleum Transformations kit? Is that kit more of a short-cut that won’t hold up for the long haul like what you did?
YoungHouseLove says
We just had a lot more pros recommend this method than those kits (I think things that encourage skipping things like sanding can raise some eyebrows). We just like being extra thorough and also appreciated that this was a low-VOC approach too!
xo,
s
Laura B. says
The kitchen looks awesome!! Great job!
Dern – I thought it was going to be a tearful pregnancy announcement! Im sad to see there will be no more Baby Center posts, I hope you can kind of make up for it though using young house life though! I hope you find the balance you need!
YoungHouseLove says
Aw thanks Laura! We’re still a ways off from the Baby #2 train. Haha. I think that might throw us for a loop in the balance department too! Haha.
xo,
s
Lindsay says
Wow guys, well done!!
JanetL says
It really is exciting to watch the room slowly transform. I know the floors are last but I can’t wait to see them with the cabinets!
Fantastic job!
Ang says
OMG, I forgot to mention, I laughed loudly when I saw the faces on the cabinets! Hilarious!
Amy says
Looks great you guys! Worth all the work!
Jenny says
Looks fab!
Jen @ The Decor Scene says
Holy BRIGHTNESS Batgirl!!! If I didn’t know it was the same house, I wouldn’t know that is the same kitchen. Love it!!! It looks bigger and your added the peninsula. Crazy!!! You will be doing happy dances for awhile I’m sure! Enjoy your new brightness!!! ;)
Lani says
Oh my gosh, oh my gosh, oh my gosh! When I see your kitchen and house transformations, it so inspires me to go buy a fixer upper and have at it. You’ve both done such a beautiful job.
Thank you for sharing :)
Lani
Gretchen says
Oh my gosh! Thanks for sharing your valuable info! The cabinets look great.
laraffinee says
Thank You, thank you, thank you!!!! Your blog is so helpful to us do-it yourself- as-much-as-possiblers!!! Seriously, it is not just a cutesy site, but rather a really helpful, useful one! My kitchen cabinets have been waiting for me to get started, and I have been waiting for your step-by-step guidance, which is all together here! Although you probably know this, I just want to confirm how grateful I am that you two decided to do this blog. It created the kind of life you wanted and has been so useful and benefical to so many of us! Thank you!
YoungHouseLove says
Aw thanks so much. That’s so sweet of you to say.
xo,
s
Cindy says
I LOVE IT!! I would really love to paint our orangy oak cabinets white, but we have so many cabinets (I know, boo-hoo, right!) that it would be a big job. I just might do it this summer! p.s. John’s new tri-pod would really come in handy when you are doing video tutorials. That way, we could actually see YOU doing it!
Cindy says
I’m referring to puttying the holes, not the priming…because of course, we all say you PRIME that door like a pro!
YoungHouseLove says
Haha- that’s a good point. I have no idea why we didn’t use a tripod because holding things with my hand and trying to work and talk was clearly too much for me. Haha.
xo,
s
Elizabeth says
Thanks for all the detail! You’re so right; the painted cabinets definitely recede while the old kitchen comes in at you.
Holly says
Love it! We have cherry cabinets in our house and they are new. I’ve always wanted to paint them white but can’t justify it because the wood is really nice and new – however, this might have inspired me to go for it.
Paige says
Shut the front door! The room is completely amazeballs.
You said something about maybe changing the stools. Are you having second thoughts about the industrial look?
YoungHouseLove says
We just mentioned in the post about them that we might upholster the chair part or something (to cover those round plywood circles)! We definitely love the industrial look, though- that’s why we got them!
xo,
s
Kelly says
Am I the only one that think the stools slightly resemble E.T.?! :) Love the transformation, great job! I cannot believe it is the same kitchen. Looks completely different and bright!
YoungHouseLove says
Haha, phone home!
xo,
s
karen says
you guys are so helpful. i love you.
YoungHouseLove says
I love you right back Karen!
xo,
s
Elizabeth says
I laughed so hard at the prolonged pause after step 6: wait. The longer the pause went on, the more I laughed. The kitchen looks great. I am totally inspired.
Penny says
That part got me too. Also Sherry’s little song. “Dee dee-dee dee-dee dee-dee. Doot doot-doot doot-doot.”
Alison says
I love it!!!!!! It looks amazing!! I’m excited about what you are going to do with the barstools. As much as I like the biology lab look, I know you will be able to add much more character to them.
Jennifer @ Dimples and Tangles says
It looks fantastic…such a huge difference. You guys are amazing!
FYI, I have a fridge with that “stainless look but fingerprint resistant” look too, and it scratches. Now that there’s a scratch across mine, I see that it’s like a thin plastic silver looking film. Just be careful…
YoungHouseLove says
Aw man- that stinks! Thanks for the warning!
xo,
s
Sarah K says
If anyone ever doubted that you guys had AMAZING design vision , this should change their minds. It looks incredible. I really cannot believe the difference and I think I’ll be printing out before and afters of your house when we (someday) go house shopping. It will serve as a reminder how different a place can look with a little bit of paint and a lot of elbow grease!
Katie says
This is awesome!! Thank you for all the detailed steps. My husband and I are planning to paint our existing cabinets soon, and we have no idea what we’re doing, haha. Yours turned out fab so yeah, we’ll be following the Petersik method!
heather says
I would like to give you a high five because this looks so good and bright and airy and like a breath of fresh air, except I can’t because my arms are frozen to my side right now since I just came in from lunch and the high today is 21 degrees. It was approximately (exactly) 5.5 degrees without windchill when I woke up.
When I thaw out in the spring you promptly have a high-five coming you way.
YoungHouseLove says
Haha- I’ll be waiting for you to thaw to cash in on that high five.
xo,
s
Ruthie says
Amazing. I can see the heavenly glow of the clean crisp white cabinets! Even the cabinets you found and added in the peninsula look great!
I love the fresh green plants on the counters… Job choice idea #2… Professional Stagers??
YoungHouseLove says
Haha, I think I’d stage every kitchen with green apples! So happy looking!
xo,
s
Brittney Saffell says
It looks AWESOME!! What a transformation! I am just going to be honest. When you rigged up the cabinet doors, as in cutting them and then putting them back together to get the right size, I thought you were crazy. Completely and totally crazy! But they look wonderful. I just stared at my computer screen for a good 5 minutes and could not see a line in the picture….everything is a little blury now as I type this…staring at the computer screen may not have been my best idea…kidding :)
My husband and I actually just repainted our cabinets last month so I feel your pain. I still just walk into our kitchen to admire it :) Next is backsplash! High five for some white subway tile! Woo Woo
YoungHouseLove says
Haha, that’s funny! We usually can tell as we write a post like the door-cutting one that a good percentage of the folks reading will think we’re totally nuts! Haha. So glad it worked out for us this time! Although I have to admit, we’re just doing the whole trial and error thing, so things can totally bomb too! We just try to figure out as much as we can as we go!
xo,
s
Kelly says
I have 3 comments (ha! I actually wrote “cabinets” first and meant to write comments! teehee!)
1. I have to laugh at the number of times you write “Benjamin Moore’s Advance paint in Cloud Cover”. :o) In the past two days with all of the posts and comments, I’m guessing you can probably type it on a keyboard as fast as your name.
2. Like another poster said, I have to admit that I was skeptical from the time you painted the kitchen “grellow”. I seriously thought, okay, Sherry and I just DO NOT have the same taste. :o) And then with every step along the way, I started seeing it come together and now I’m AMAZED! It looks FANNNNNNNNNNNNN-TAST-IC!!!!
3. But, cabinets aside, WHAT THE HECK IS WITH THE CUTTING BOARD??? How does it work?? I love cabinets with secret pockets and features!! I think I may need to get me one of those pull-out-dillios!
Great job guys!! I am so addicted to your blog!
YoungHouseLove says
Haha, you’re cracking me up. The cutting board pulls out and can be used on the counter and then washed and tucked back in. Instead of leaning or stacking on things it just has a little hidden cubby on the top of the cabinet- which is actually pretty fun! It took us about three months to even discover it was there. It’s the James Bond of cutting boards.
xo,
s
Janette@The2Seasons says
Glad to see you ARE human. My daughter/blog partner and I were wondering this morning how you two do all that you do. So, I completely understand your need to stop writing the Baby Center blog entry. We have loved your kitchen’s progress. Jordan’s husband is almost over the fence on a thumbs up to our painting their kitchen cabinets. (I will be visiting them for a week this month). Your post today just might bring him over to Team White. Let’s hope!!!
Jessica says
AMAZING transformation. And you guys are so awesome for providing the step by step to perfectly painted cabinets. Our most likely original to the house (ie: made in the ’70’s) oak cabinets were painted white when we moved in, but the paint is totally wearing off around the handles and on the edges. I was fearing the re-painting process but now am much less apprehensive. Do you recommend totally stripping the paint first before priming or just a nice even sanding job?
I can only hope our kitchen looks as classy as yours when all the hard work is done :)
YoungHouseLove says
I would sand the heck outta it and use a good primer and paint and you should be set! Good luck!
xo
s
JS says
Yay!! Looks fantastic! Can’t wait to see the other updates (i’m really excited about the backsplash!)
Kathleen says
The kitchen looks great!! I have a question for the experts :) I’m trying to find ways to re-do my kitchen. Currently the cabinets are white and the counter-top is white. I was considering painting the cabinets brown. I’m trying to go with a coffee/red theme.
Do you think that would work? Or does white paint seem to be the way to go?
YoungHouseLove says
Ooh yes, rich chocolate cabinets can be amazing! You can even keep the uppers white like the counters and just take the lower ones to a nice dark chocolate color. Yum!
xo,
s
Kathleen says
Thanks Sherry :) Love your blog!
Sophie says
Love the new look of the cabinets! This a potentially really dumb question but I was wondering if you labelled the doors so you knew which door went where. Or was it easy to tell?
YoungHouseLove says
We actually laid them out in a specific order in the sunroom so when we did the hardware for each one and brought them back in, the order helped us place them! Hope that helps!
xo,
s
Kelly says
Oh, and just had to say that I smile and laugh every time I see those cabinet/eyeball/face pics. HA!
Annalea says
Oh W.O.W. Ole! Bravo! (Insert favorite cheering exclamation here.)
Funny/cute thing: Kylie Minogue’s “Do The Locomotion” just came on my iTunes. Wanna dance in your kitchen? I do! ;o) Let’s see a video of the YHL crew breakin’ it down . . . either now, or when everything’s complete. That would be rockin’ awesome. :o)
Have a fab day!
YoungHouseLove says
Haha- I do love that song…
xo,
s
Nikki Kelly says
Hey there refrigerator twin! I don’t know if you know this yet, but you can put magnets on your fridge (here’s proof, http://theambitiousprocrastinator.blogspot.com/2011/07/fancify-pictures-on-your-fridge.html . If I remember correctly doesn’t Clara have some alphabet magnets that used to be on your old fridge? Congrats on getting your cabinets back together btw!
Nikki @ the ambitious procrastinator
YoungHouseLove says
Haha, I’ve heard that! Might have to break those out…
xo,
s
Shelley says
Love the hardware! Perfect little industrial touch…I think they’ll be good friends with the stools :)
YoungHouseLove says
Oh yes, they’re totally BFFs already. They have so much in common. Haha.
xo,
s
kalibrooke says
It’s amazingly fantastic. Seriously. Those rich cork floors are going to own that place. Give yourselves several pats on the back for your vision and all that hard work…what an undertaking!
Nancy says
I just started reading your blog a two months ago and I must say what you guys have done is amazing. I really appreciate the budget breakdowns. Its encouraging to know you don’t have to spend a lot to make things look AMAZING! Great job!