Painting your cabinets is a perfect way to makeover a dated kitchen without splurging on a big renovation. It doesn’t cost much and, with the proper preparation, your paint job will look great and last a long time. We’ve used the tutorial outlined below to paint cabinets in 4 separate kitchens (not to mention cabinets in other rooms too) so we’re confident it’s a DIY project that will work for you. Follow along below!

The kitchen featured in this tutorial is from our second house which had solid oak cabinets throughout (along with wood paneling!). So while steps focus specifically on painting wood cabinets, the process is similar for any cabinet material. You can also refer to our tutorials about painting already-painted cabinets and painting Ikea cabinets.
Steps To Painting Cabinets
Here is a brief overview of how to paint your kitchen cabinets. The process takes time, patience, and a little bit of elbow grease – but nothing is especially complicated or tiring. At worst, it’s just a bit repetitive – especially if you a big kitchen.
- Remove cabinet doors and hardware
- Patch cracks and holes (optional)
- Lightly sand all surfaces
- Apply a liquid deglosser
- Prime one coat
- Paint two coats
- Rehang cabinet doors
- Reinstall cabinet hardware
This project can be completed by one person but may go faster with help. Proper surface preparation is the key to success here, so don’t rush steps 2-5.
The overall time lime depends on the size of your kitchen, but even painting a small kitchen will span several days due to drying and curing time between coats. You also want to make sure you have ample space to spread out your cabinet doors, like in a garage or spare room.
How To Paint Cabinets Video Overview
You can see these steps in motion by watching the detailed video below. To view an abbreviated version of this process, you can see a quick version of painting cabinets on YouTube.
Note: You can also watch the video above on YouTube.
Supplies Needed To Paint Cabinets
The materials you’ll need to paint your kitchen cabinets aren’t much different from other painting projects. So you may have many of these supplies already on hand.
- Primer
- Paint (we recommend satin or semi-gloss finish)
- Small 4? or 6? foam rollers
- Roller trays
- Short, angled paint brush
- Drop cloths
- Painter’s tape
- Painter stands or tripods
- Electric sander & sandpaper
- Electric drill & driver
- Liquid deglosser
- Wood filler (optional)
- Putty knife (optional)
You could use a paint sprayer for this project, but we don’t feel it’s necessary. If you already own a paint sprayer and are comfortable using it, go for it. It can save time. But we’ve never regretted painting by hand instead.
What paint should I use to paint my cabinets?
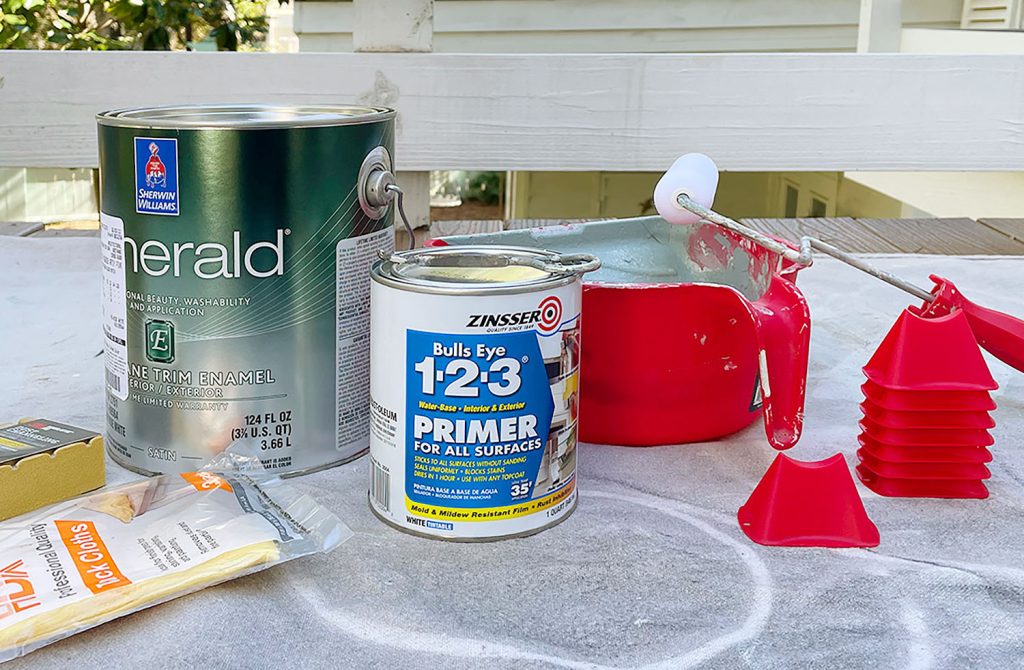
Water-based, latex paints formulated for cabinets or trim are best for painting kitchen cabinets. Oil-based paints used to be recommended, but are not necessary or practical for a DIYer. They are smelly, difficult to clean up, and can yellow over time. Also, water-based paints have come a long way and offer a similarly smooth and durable finish. Our favorite cabinet paints are Sherwin-Williams Emerald Urethane Trim Enamel and Benjamin Moore Advance. If you prefer a different brand, consult the paint desk expert for the best formula for your job. Buy the highest quality paint your budget allows.
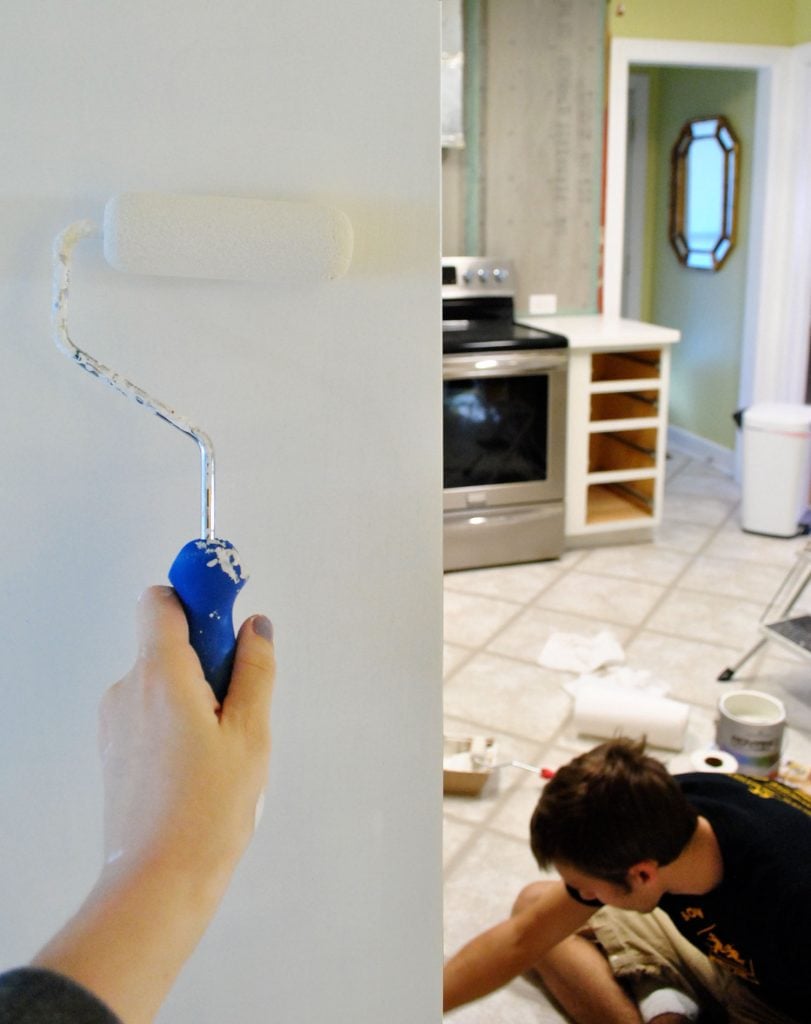
Step 1: Remove cabinet doors & hardware
Carefully unscrew all cabinet doors from the frames using an electric driver. Remove existing hinges, knobs, pulls, or other hardware. If you are reusing this hardware, be sure to collect it in a bag or box for later. You may also want to label each door with painter’s tape (I.e. “lower left stove cabinet”) to help avoid confusion during reassambly.

You will also need to slide out any drawers from the frames. If possible, unscrew the drawer front from the box. You may also need to empty some drawers and cabinets. We don’t typically paint the inside of the cabinets, so most things can stay in place while you work. But take care to cover or temporarily move items while you sand, to keep them from getting dusty.
Step 2: Patch cracks and holes (optional)
You can skip this step if your cabinets are in good condition and you’re reusing the existing hardware placement. For our cabinets, however, we planned to swap the existing single-hole knobs for two-hole pulls. The existing hole was in the wrong place, so we used wood filler to patch all of the existing hardware holes before proceeding. We were also changes the hinges, so we patches the holes for those too on both the doors and frames.
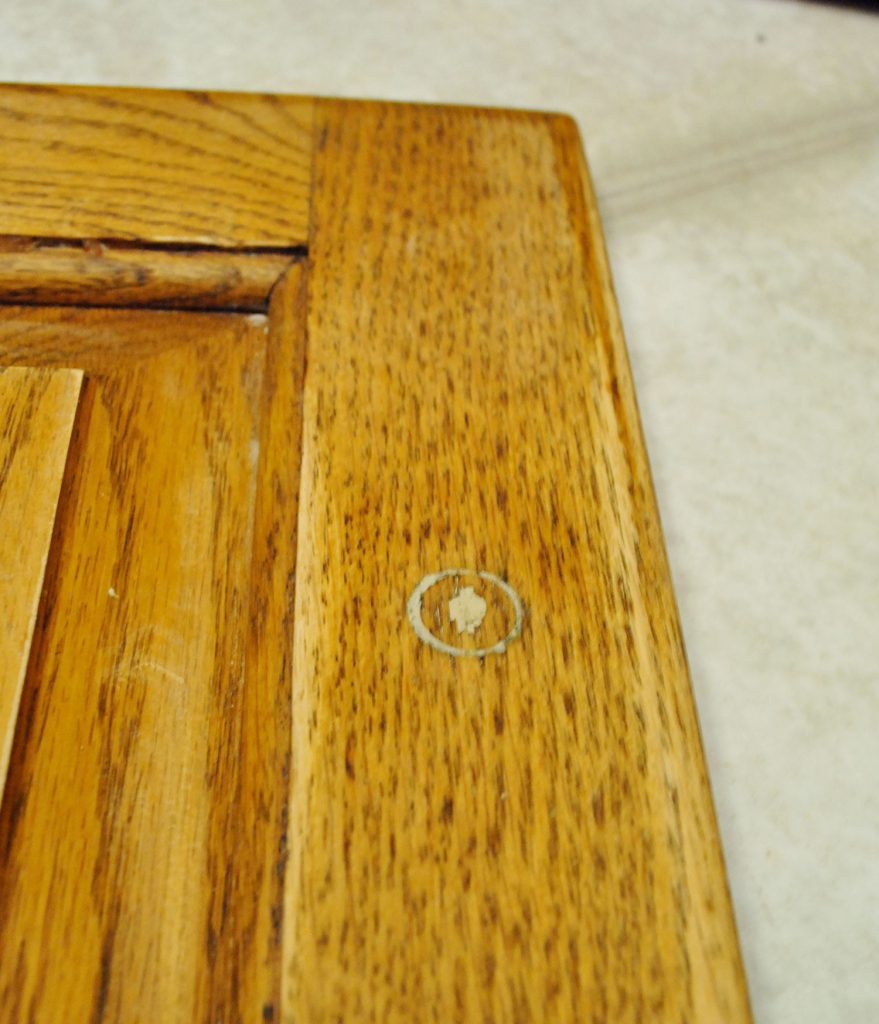
To apply the wood filler, use a putty knife to push it into the hole and smooth it. Once dried, sand off the excess. You may need to do a second coat, since it may shrink slightly as it dries.
Step 3: Lightly sand all surfaces
Prepping your wood cabinets for paint is the MOST IMPORTANT step if you want a long-lasting, durable result. Skipping the next few steps puts your paint job at risk of scratching or rubbing off, especially in high-traffic areas. So while this part is probably the most labor-intensive, please don’t shortchange it! We also have more detail in a dedicated post about prepping cabinets for paint. Here is an overview:
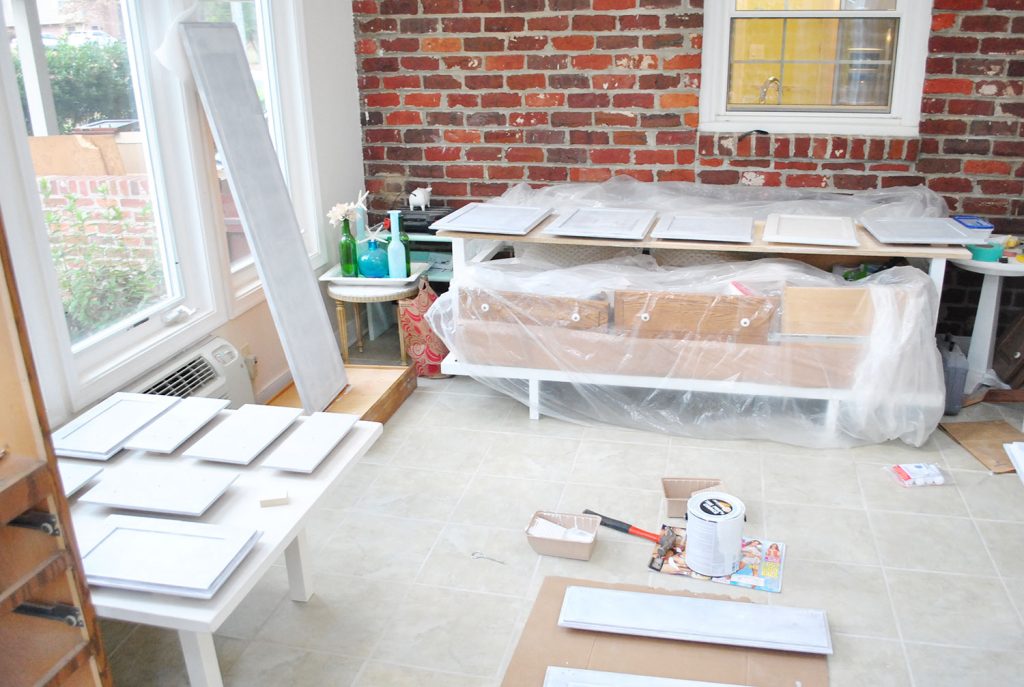
Use an electric sander and medium-grit sandpaper (like 120) to lightly sand every surface you will be painting. This means doors, drawer fronts, faces of cabinets, sides of cabinets, etc. You do NOT need to remove all of the existing finish. The goal is NOT to get it back to raw wood (although that it is okay). The goal is simply to rough up the surface enough to help primer and paint bond to it. You may need to hand sand small corners and nooks.
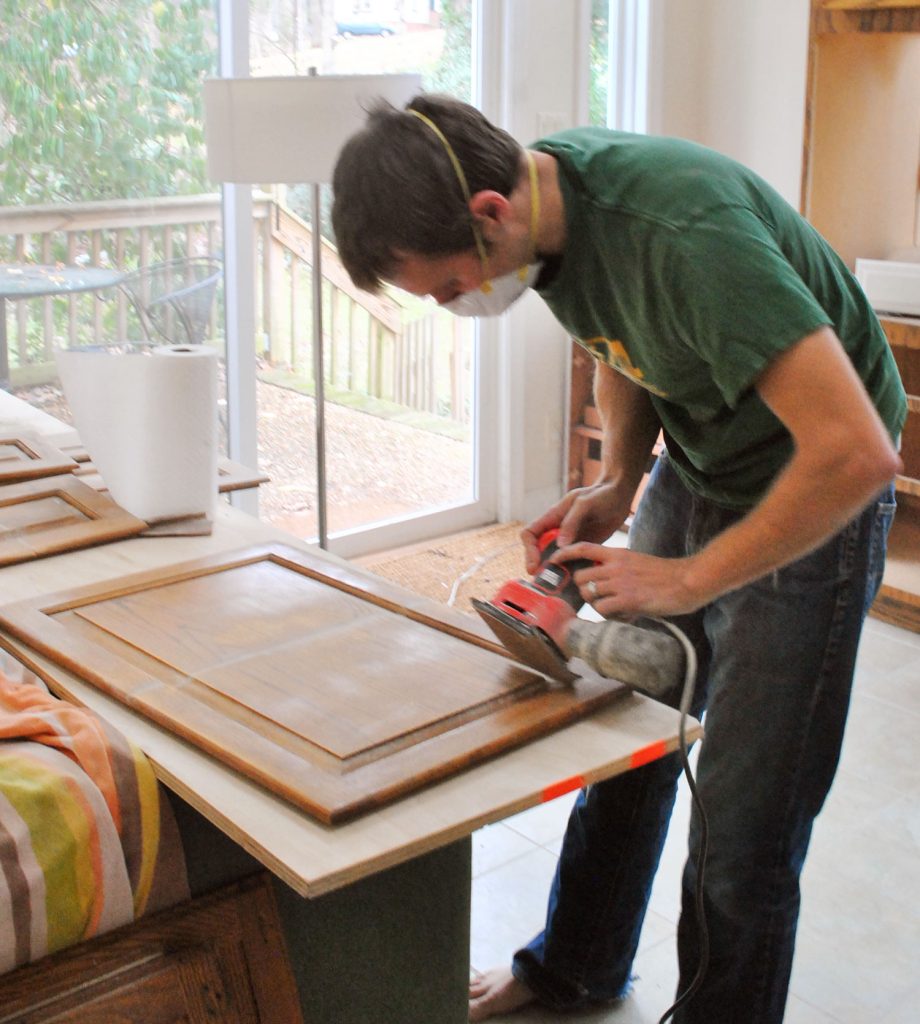
This process will be dusty, so try to do it outside or in a well-ventilated space (we did most of ours in our sunroom, above). When it comes time to sand the frames in place, cover items in your kitchen as needed to keep sanding dust from getting everywhere. After you’re done sanding, wipe your cabinets clean using a tack cloth.
Step 4: Apply a Liquid Deglosser
Liquid deglosser (sometimes called “liquid sandpaper”) helps etch the surface of your cabinets & frames, helping ensure a strong bond with the paint. Krud Kutter Gloss Off is our preferred deglosser. The one pictured below is difficult to find.
Some people use a liquid deglosser in place of sanding, but for wood cabinets we recommend doing both to be safe. It also helps remove any built-up grease or oil residue you may have missed while sanding, especially in nooks and crannies. You may also have heard of using a chemical called TSP (trisodium phosphate) instead. However, TSP is more of a cleaner than a deglosser, so we don’t recommend it.
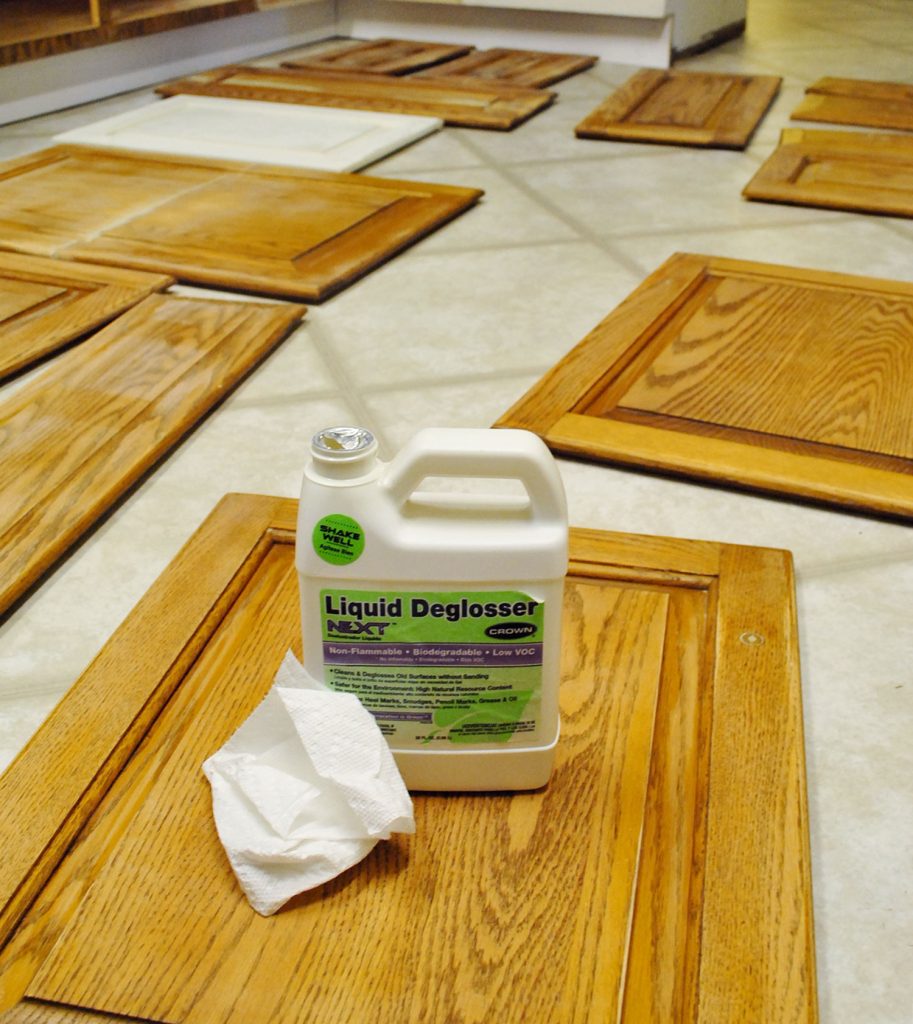
You can apply it with a rag or paper towel or put it in a spray bottle. It doesn’t need to be rinsed or wiped off. Just give it a few minutes to soak in. We sometimes do two applications to be safe.
Step 5: Prime One Coat
The last prep step before painting is priming! Primer is a critical element to good coverage and a long-lasting finish. Do not skip it! We like a Zinsser all-surface primer. It can be used off-the-shelf if you are painting your cabinets white or another light color. For darker or more saturated paints, consider having your primer tinted to match.
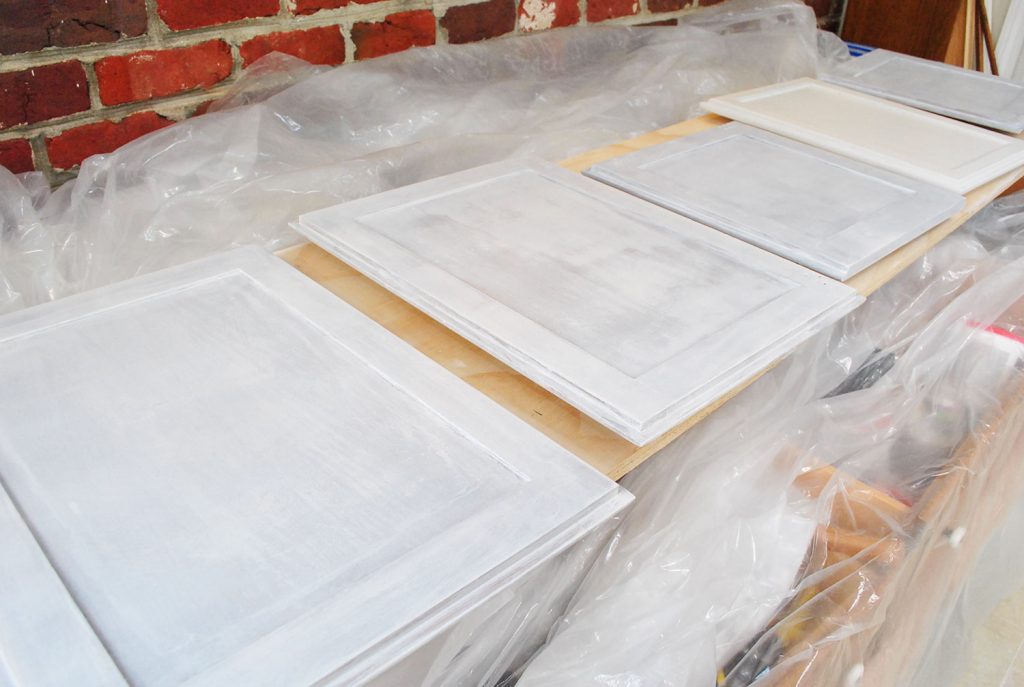
As you can see above, you’re not going for perfect coverage. Primer will be splotchy as it dries. This is okay. The main goal is to get a thin, smooth, and even coat. To do this, we recommend (1) using an angled paintbrush to get into edges or corners, then (2) using a small foam roller to remove brush strokes and coat the large, flat surfaces. Go slow and watch for drips along edges!
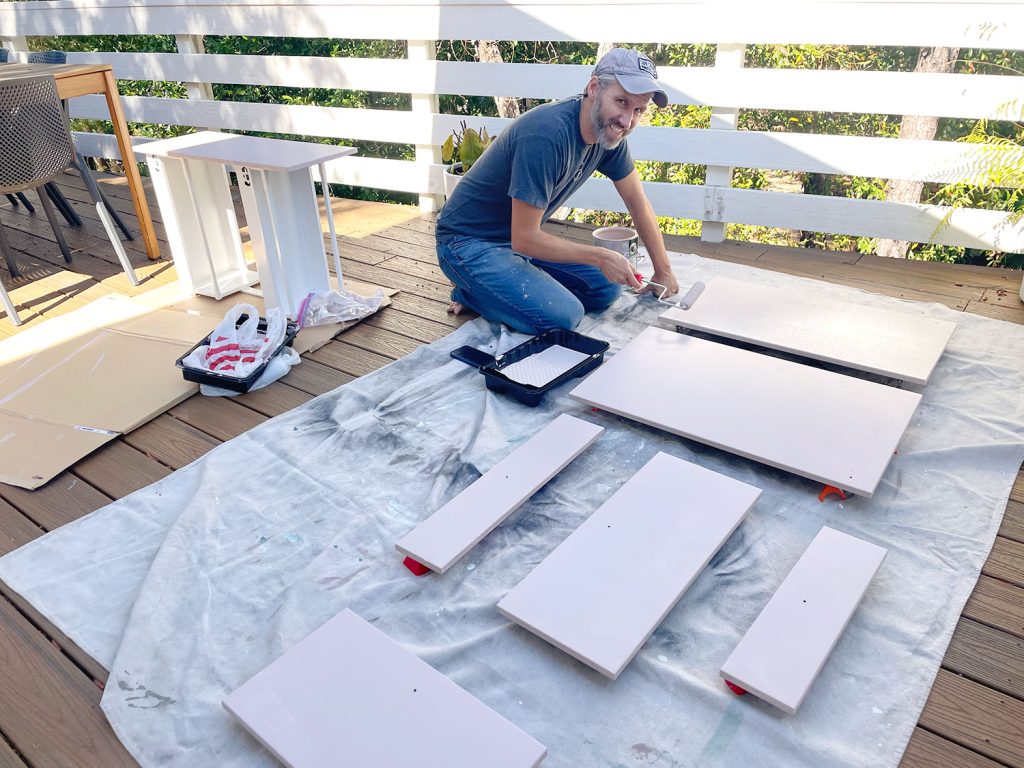
We suggest propping your doors off the ground with painter stands to make priming and painting easier. And if you’re painting both sides of your doors (which we think you should!) we’ve developed a specific order that helps minimize marks or dings on your freshly painted doors. It requires a bit of patience as you wait for one side to fully dry before flipping it over to do the other.
Don’t forget to do your cabinet frames and boxes too! You may want to use painter’s tape and drop cloths to protect walls, floors, appliances, and countertops.
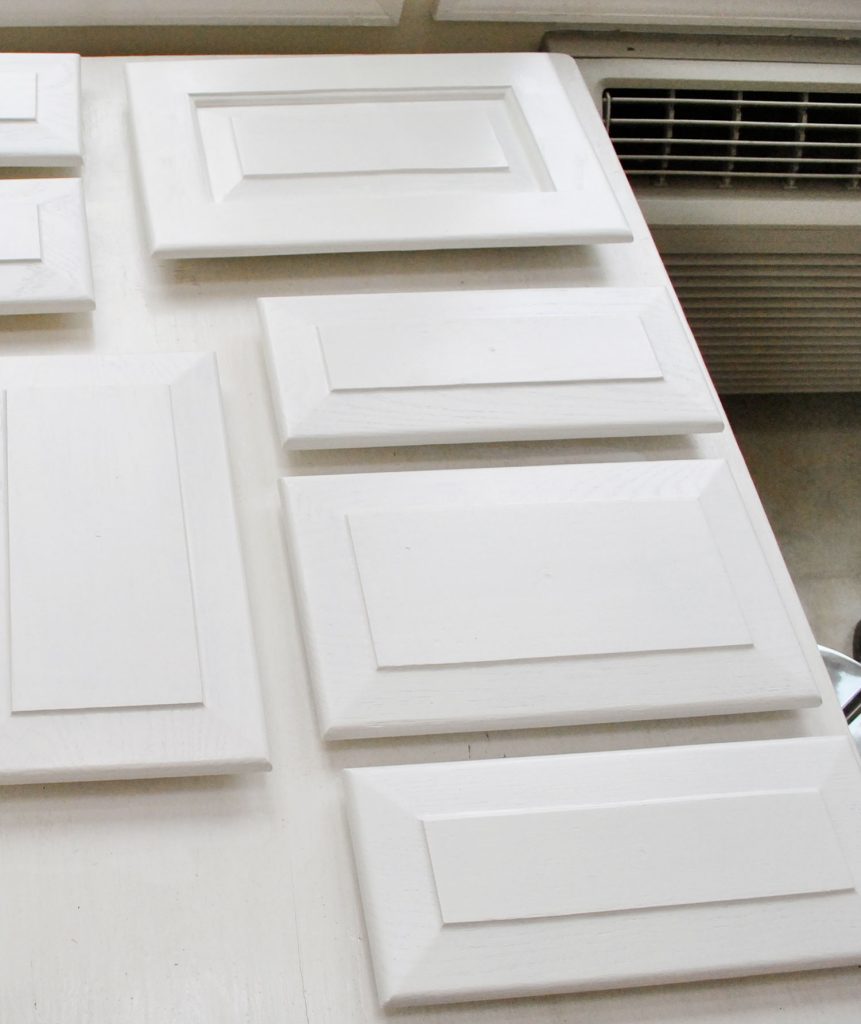
Step 5: Paint Two Coats
Once your primer coat has fully dried and cured (see the manufacturer’s instructions on the can for specific times), you may repeat this process with your chosen paint. We used the color Benjamin Moore Cloud Cover. Again, use a combination of a brush and foam rollers to get a smooth finish. The paint may look slightly textured from the foam roller, but it will even out as it dries. Just remember: your main goal is thin & even coats without drips!
As a rule of thumb, we do two coats of paint for any painting project. But it’s especially important with painting cabinets. More thin layers is stronger and less prone to scratches than one thick layer. Just be sure to allow enough dry time between coats before touching or recoating.
This part should be super satisfying. You’re finally seeing your hard work pay off and your vision come to life!
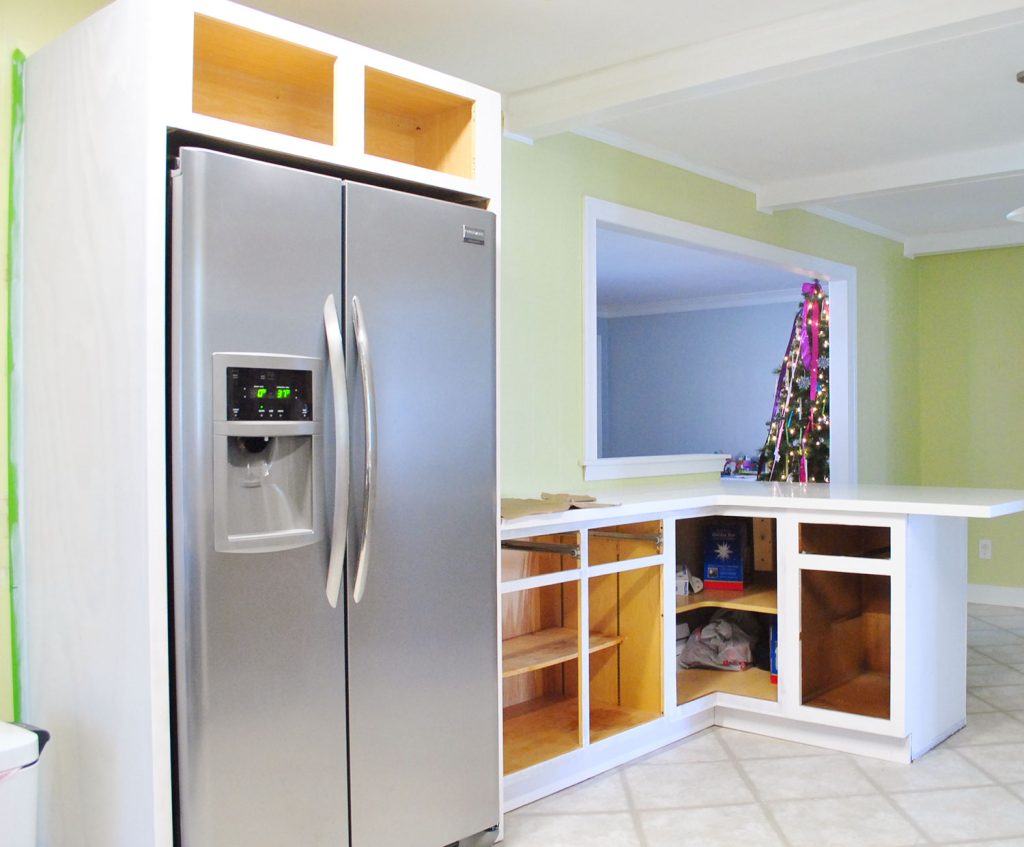
Step 7: Rehang cabinet doors
Once everything has fully dried, you can reassemble your kitchen. Screw hinges back on. Slide drawers back in place. You can even put things back in your cabinets.
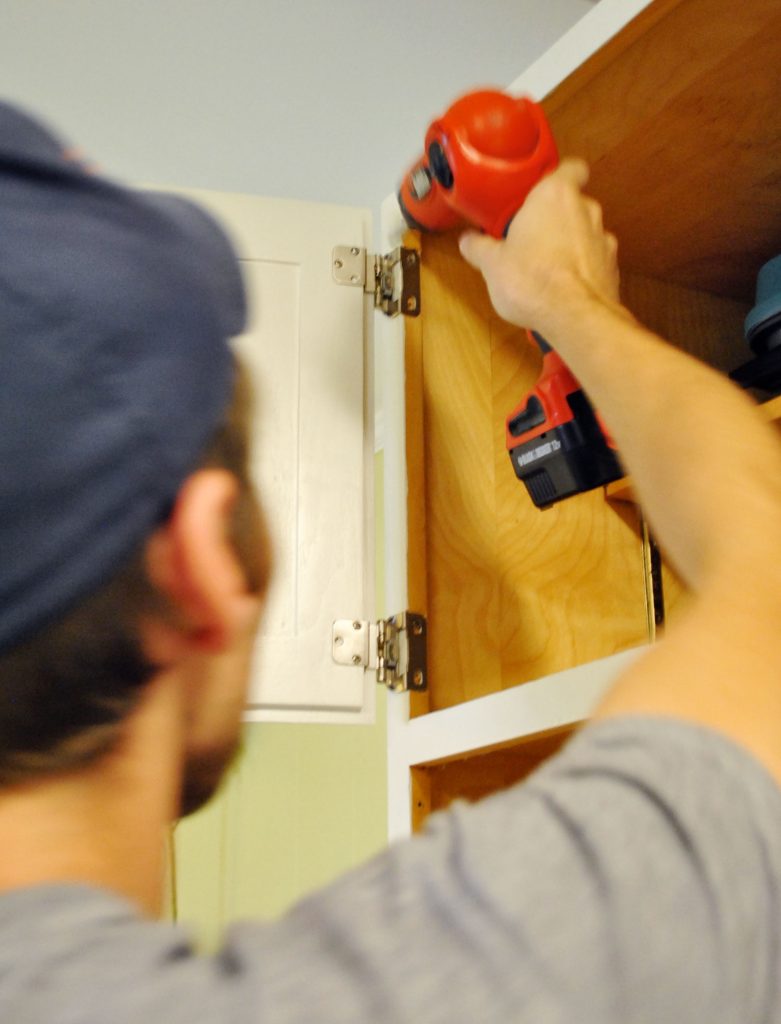
Things might get banged around in this process, so we often like to give our paint an extra day to cure before beginning. You’d hate to scuff up or scratch off the fresh paint right away!
Step 8: Reinstall cabinet hardware
At the same time, you can all reattached your cabinet knobs or pulls. However, this will be a bit more involve if you – like us – filled all of the old holes and need to make new ones.
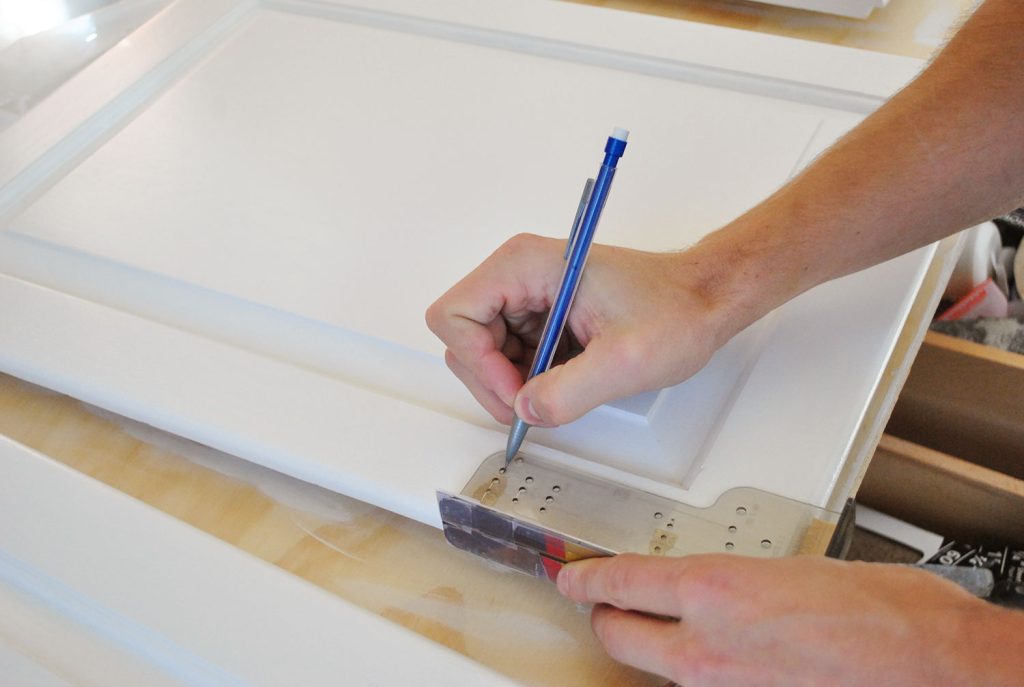
We have an entire post – with video! – dedicated to how to install cabinet hardware that will help you do this with precision and speed. But as you can see above, we highly recommend purchasing a hardware template for this step.
How long does it take to paint kitchen cabinets?
Painting these kitchen cabinets took us 15 days to complete. A lot of that time, however, was waiting for things to dry and cure. They were not 15 days of straight work! So while this isn’t a project you should expect to knock out in a weekend, it’s also not something you need to take 2 weeks off of work to complete. It can easily be done on nights and weekends, like we did. We even had a toddler at the time!
How much does painting cabinets cost?
Painting kitchen cabinets yourself is very affordable, especially compared to the alternative of hiring it out OR replacing your cabinets entirely. We completed this project in 2012 for just $300 and half was for new hinges and pulls. So if you are reusing your hardware, you can expect to spend even less. Here is a rough estimate of what you might spend to paint kitchen cabinets.
- Sandpaper: $10
- Liquid deglosser: $10
- Primer, 1 gallon: $30
- Paint, 1 gallon: $80 – $120
- Paint supplies (roller, brush, trays, etc): $40 – $60
- TOTAL COST: $170 – $230
If you don’t already own an electric sander or drill, those may cost you about $50 each. You can complete those tasks by hand to keep your budget down, but it will significantly increase your time and effort.
Other Cabinet Painting FAQs
Here are some other frequently asked questions about painting kitchen cabinets:
Do I need to apply a sealer or topcoat?
No, you do not need to apply a sealer, varnish, or polyurethane to your painted cabinets. Paints, especially those formulated for cabinets or trim, don’t require a protective topcoat. In fact, applying one could cause your color to yellow.
What finish paint should I use on cabinets?
We recommend using a satin or semi-gloss paint for a hard, wipeable finish on cabinets. Gloss or high-gloss paint can offer a sleek, modern look with high shine, but should be applied professionally with a paint sprayer to avoid brush or roller strokes. Matte, flat, or eggshell finishes will be harder to wipe clean.
What color should I paint my cabinets?
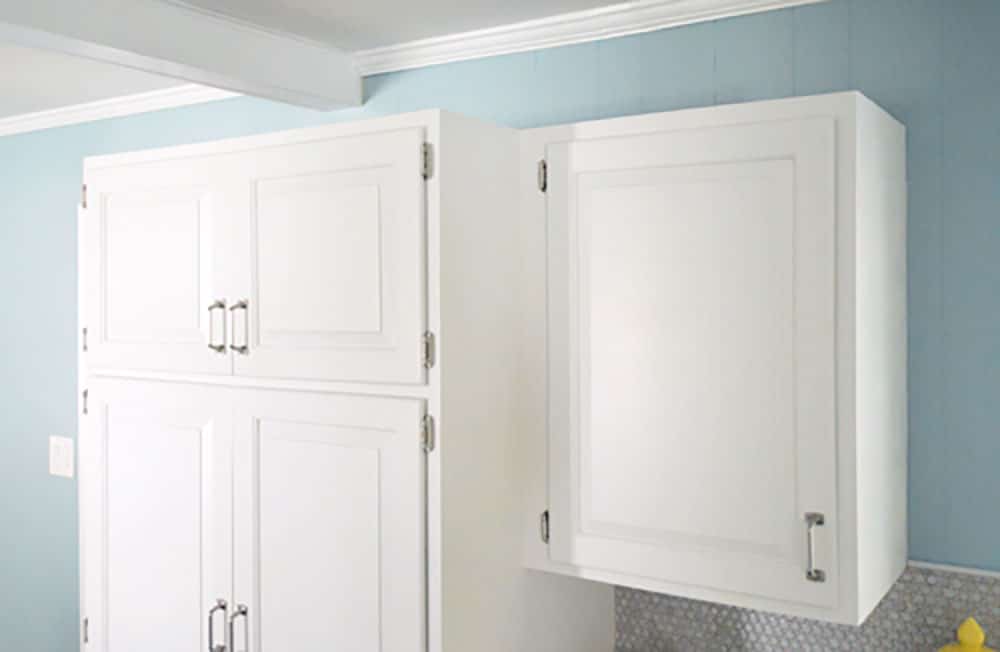
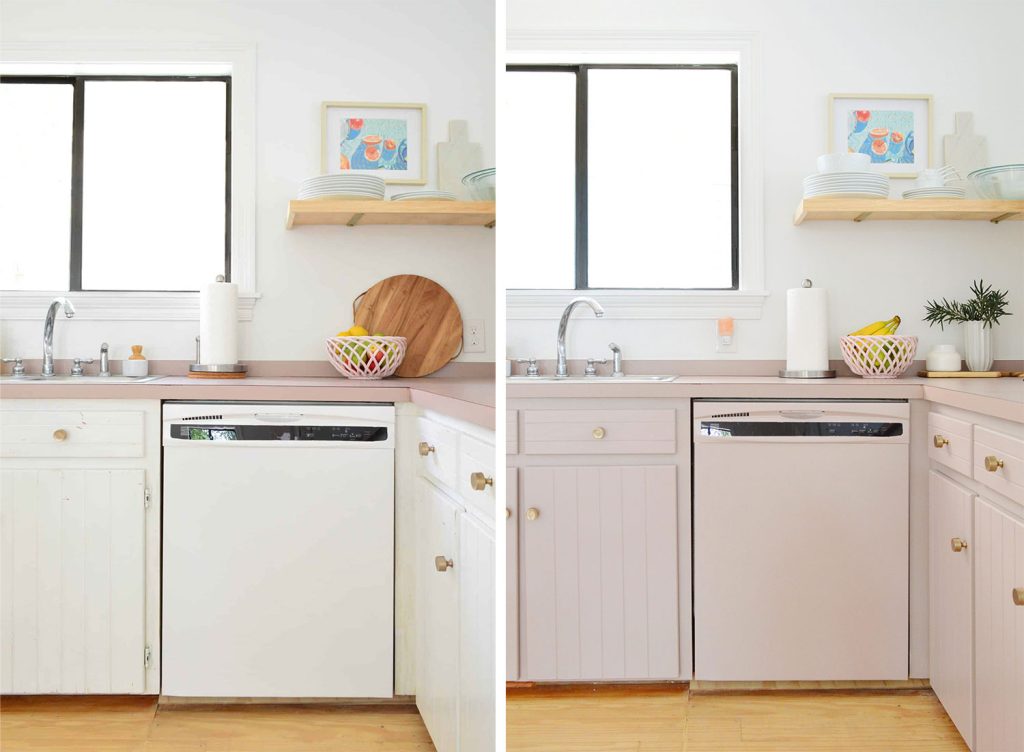
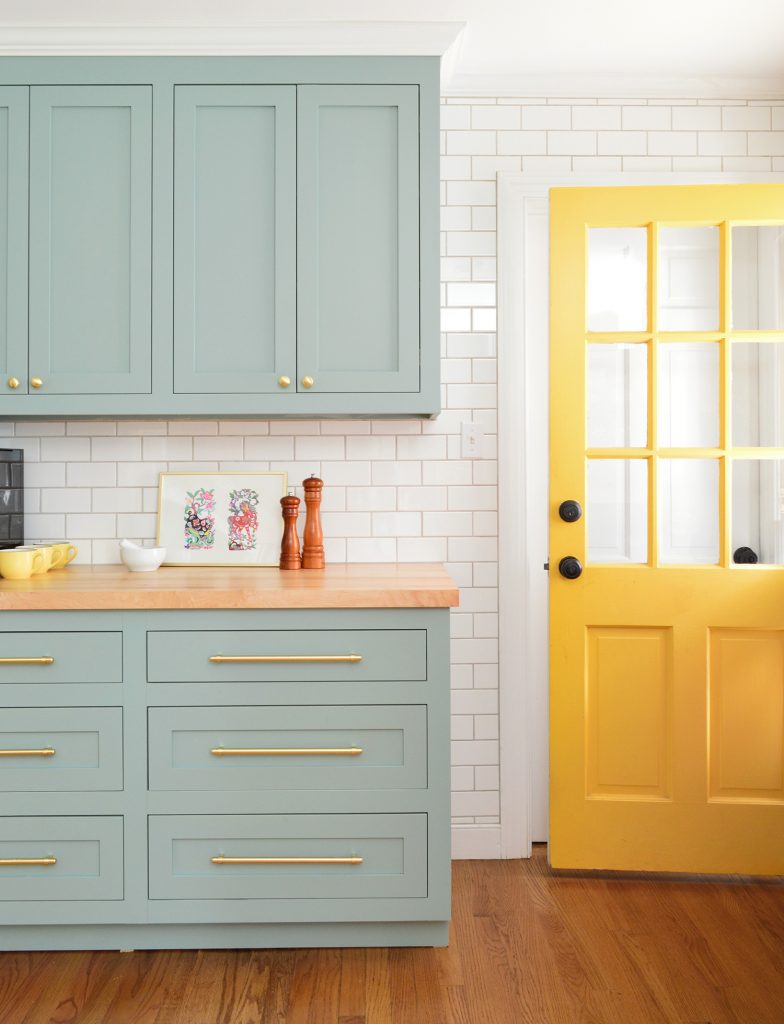
There is no limit to the colors you can paint kitchen cabinets! We love classic white cabinets, but colorful cabinets have also been trending lately – like our current cabinets (Artsy Pink by Sherwin-Williams) or our friends’ painted cabinets below (Halcyon Green by Sherwin-Williams).
We always recommend testing any color before proceeding. Colors often appear brighter or more saturated than they seem on a small swatch. Whites also can appear stark or cold, so we recommend something with subtle yellow or gray. Any of these expert’s favorite white paints work well on cabinets.
More Kitchen Cabinet Projects
Looking for other budget-friendly ways to update your kitchen? Here are some other projects you might be interested in:
- How to Add Crown Molding To Cabinets
- How to Properly Prep Cabinets For Paint
- How To Paint Ikea Cabinets
- How to Install Kitchen Hardware
- Organizing a Small Kitchen
- Installing Hidden Ginges on Old Cabinets
- Staining Wood Cabinets Darker without Sanding
Update: Our painted cabinets are still holding up great. Check out a little update post here.
*This post contains affiliate links, so we may earn a small commission when you make a purchase through links on our site at no additional cost to you.

Carrie Hriblan says
I would like to re-paint my kitchen cabinets. Currently, I have oak cabinets (probably cheap ones) that just have a little polyurethane on them. I have really enjoyed the pictures of the two toned cabinets. I love the tan and blue (earth tones). I’d also like to repaint my counter tops and put in a back splash. Our top set of cabinets have the arc in them and the bottoms are just plain squares. Do you have any suggestions on where I should begin? I Love your website by the way! :-)
YoungHouseLove says
I would just follow this tutorial when it comes down to where to begin- starting with bringing home swatches to see what you like best! Good luck!
xo,
s
Nena says
First, it looks great. Second, I would like to do a similar project on a much smaller kitchen, but don’t have two weeks. Could you compress the steps a bit by working in the morning and then the evening? Any thoughts would be great!
YoungHouseLove says
Oh yes, in our first house we primed and painted all of the cabinets in two days (one day of sanding/puttying/prep and one day of priming and painting – then after everything dried we just put it back up).
xo,
s
Reena says
This is way delayed response but I found this particular post because I’m looking to paint our built-ins. Being pregnant and having a 1 year old running around, definitely looking for low-VOC and quick drying. Sort of took oil-based primer off our list. After a bad experience with Home Depot’s recommendation (paint and primer in one), I went to a local paint store which happened to be a Sherwin Williams
The guy there recommended ProClassics Low VOC Waterborne Interior Acrylic (in semi-gloss, though it comes in all finishes). I was skeptical at his “no prime, no sand” song so I asked him to put some on a shelf I’d brought. He was also saying it was “self-leveling” to limit bubbles, brush strokes, etc left behind by novice (ahem, us) painters.
He glopped on a thick layer and left behind heavy brush strokes and sent me on my way to wait for it to dry. I was hugely skeptical. Two hours later, totally flat, beautiful gloss, and you could even see some of the pits and character of the underlying wood. I was totally impressed and no bleed-through at all.
Any experience/thoughts?
YoungHouseLove says
Wow that sounds awesome! I would go for it!
xo,
s
Rob says
We just started this project and so far so good.
Its been wicked hot here in S.C. Plus, I’m chubby, so its worse.
I definitely wasn’t feeliin’ sanding the doors out in the garage(hot!) or in our sun room (hotter!). To keep down the dust, I just slid my doors inside a clear lawn and leaf bag and sanded away. I was able to see my work, the bag caught what needed catching, and I didn’t get all shvitzy. Win, win!…win. You’re welcome America.
YoungHouseLove says
So smart!
xo
s
Julia says
Thank you for this post! We’re doing this project and I’m loving the results. Ben Moore Advance paint is awesome! Love your house, especially all your area rugs, btw. Keep up the great work!
Kim says
I’ve been referring back to this post a lot as we’re getting ready to paint our kitchen cabinets.
A contractor we know recommended that we just prime the doors, then paint them only once they were installed. He said we would definitely bang them up while we were installing them, so it would be easier to do that way. Did you consider that option, and if so, why did you decide against doing it that way?
P.S. Is there a way to search through the comments? I wanted to check to see if someone had already asked the same question…
Thanks!
YoungHouseLove says
We’ve actually never heard of that! We didn’t bang them up, we just installed them slowly and were gentle! Seemed easier to get a nice thin and even coat with them laying down than being hung (I’d worry about drips and getting paint on the hinges, etc).
xo,
s
Rohitha says
Hi guys,
You did a fantastic job with your kitchen,can you tell me if the wood grain is still visible through the painted cabinets? Did u have to do anything to smooth it out?
Thanks
Rohitha
YoungHouseLove says
Oh yes, it’s slightly visible. If you check out this post there’s a detail shot that shows the grain and talks about that. Hope it helps!
xo,
s
Maria says
Hi! I don’t even remember how I found your blog months ago but
I read you very often since I also follow you in facebook. Just want to thank you for this how to paint your kitchen cabinets tutorial! I already told my family I will paint ours white… they didn’t make any comments, lol
Juge says
I have these yucky oak cabinets and want to paint them white (they look just like yours before you painted). I cleaned all the cabinets with STP, then used a deglosser, then lightly sanded. I did a sample on the inside of one of my cabinets and it really hasn’t covered well.
Any thoughts?
YoungHouseLove says
Are you using primer for that sample or paint? Definitely don’t skip primer and you can do two coats if you need and then the paint should be great!
xo,
s
Angela Kintner says
I am planning on painting my kitchen cabinets. Can you tell me why you used BM Advance Paint rather than an oil based enamel?
Also, with the BM Advanced paint and the technique brush/roll technique that you used, how smooth is the finish?
Thank you so much!
YoungHouseLove says
The finish is great! Very smooth. As for why we used it, it’s a brewer formula and it’s self leveling and low VOC ( oil is really stinky!)
xo,
s
Jessica says
Question? My cabinets are already painted white, but they really need a new coat. Would the same process apply? The current coat of paint is so thick, you can peal it right off. I’m thinking I need to sand the doors down pretty good. Would you agree?
YoungHouseLove says
Yup, I would follow this tutorial since you want a stable surface for the paint so it won’t peel.
xo,
s
Liza O'Jack says
Hi, Love this cabinet painting instructions! Very helpful and inspiring! I want to vamp up my kitchen. Is there a way I can ask for your opinion of my kitchen ideas? I want to paint my cabinet white and possibly paint the counter to stainless steel from Thomas. LMK.
Thanks!!
–Liza
YoungHouseLove says
That sounds really gorgeous! I say go for it!
xo,
s
Tara says
I plan on painting my cabinets in the next few days and knew exactly where to go for advice! Great tutorial – thank you! I’m a little concerned about using the advance paint since it is a new product – has it held up good for y’all so far? Does it chip/ scratch easily?
YoungHouseLove says
Oh yes, it’s awesome! So far there’s not a chip or crack to be seen! We hear from lots of other folks who have used it and love it too!
xo,
s
Jenny says
I absolutely love your new kitchen – I’m planning to start painting our cupboards next weekend and absolutely love the “cloud cover”. My only questions is because I have white appliances (fridge and stove) do you think it’s too “off white” or would it still work? Thanks so much :)
YoungHouseLove says
I would bring home a ton of swatches (including Cloud Cover) and just hold it up and see how it reads in your space. It might work depending on the light, and if some other swatch looks better I’d just go with that one!
xo,
s
Leslie Wells says
Did you guys sand between coats? I’ve heard some people say that this is a good idea but didn’t know if it’s super necessary?
If I have a lot of grease build up on my cabinets should what should I clean them with that won’t interfere with the paint?
YoungHouseLove says
It never ever hurts but we usually don’t do it and just stick to thin and even applications so there aren’t any bumps or drips to sand. Good luck!
xo,
s
Nancy says
Looks amazing. After watching your videos, I think I just might be able to paint our cabinets. Thank you!
Stacey says
I realize this question is a bit belated, but I was looking back at this post because I really want to tackle our kitchen cabinets. My question is – our kitchen cabinet frames are not solid wood. Instead they’re lined on any exterior sides with thin strips of laminate (hopefully that description makes sense). I’m wondering whether we can sand/prime/paint the laminate strips the same way you would wood? Or do we need to treat them differently to ensure the paint adheres to them? Any advice would be appreciated!
Your kitchen looks beautiful – you must be loving it.
Thanks!
YoungHouseLove says
I would ask a paint pro at a place like Benjamin Moore or Sherwin Williams what they recommend for that. Hope it helps!
xo
s
Courtney says
Hey!
I’m planning on tackling my kitchen cabinets this winter…thanks for the tips! Did you guys use a poly or clear coat to protect the paint?!
YoungHouseLove says
Neither! This paint is formulated for cabs without needing a top coat (which can yellow or crack, so it’s nice to use something that’s all-in-one)
xo
s
Christina says
Hey guys! This question doesn’t pertain to painting cabinets…but to painting interior doors. Have ya’ll ever done this? If you have, do you remember what paint you used? Reason being, we painted our new interior doors (we replaced the awesome 1960’s hollow core doors that the previous owner cut the bottoms off to fit over the awesome shag carpe but now the wood floors are refinished they are SO high above the floor!) and now they make this terrible sticking, popping sound when we open them. I was wondering if the Benji Moore paint you used for cabs might do well ? It just seems as if the latex (low VOC) we used is sticking to itself…nothing like waking up the kiddos when you exit the loo :). Thanks for any help!! BTW…Granny sounds just awesome!
YoungHouseLove says
Oh yeah, I think it’d be great for that. Good luck!
xo
s
Michelle M. says
Your post put the seed in my head back in January and now I am really ready to get this project done! I have cleaned, sanded and deglossed. Now I’m ready to prime. My question is why did you all choose the Smart Prime and not the Benjamin Moore Advance Primer? Does the Advance Primer block stains as well? I’m ready to prime and I have found myself paralyzed! You both are amaze-balls and I sincerely thank you for all of your DIY advice. Can’t wait for the book!!
YoungHouseLove says
Oh yes, BM Advance primer would be awesome! Either one works. Hope it helps!
xo,
s
katie says
I am currently following this step by step on my cherry bathroom cabinets. Well…following it as closely as I can. I couldn’t find the exact primer at Home Depot, and my local Ben Moore looked at me like I was cray when I asked for “advanced” paint. So…I ended up with their Regal (I think?) in cloud cover. Everything seems to be going well so far, except that It is going to take me probably 5 coats to cover. Is that ok, or will it be too thick? Should I sand between coats?
YoungHouseLove says
Oh man, that sounds like it should work, but might be taking more coats. If it’s not smooth between coats I would sand, but if it’s nice I’d just keep up with the thin and even application.
xo
s
katie says
you are amazing for replying to me so quickly (at all really)! Thank you so much!
Ken says
Brushing Putty by Fine Paints of Europe (expensive!) covers the grain and makes the difference between a paint job and a professionally applied, factory-looking finish.
Tina says
I’m sad that I’m just now seeing this post! I have already started repainting our bathroom cabinet our guest bathroom (to update the look w/out spending tons of money!). Not sure what the cabinets are made of–but the house was built in ’95 and the previous owners painted them. We are going with black. I did sand all of the doors and the frames, but I did not use a foam brush, just a high quality paint brush. Should I go over it with a foam brush? Or will the paint look too thick? We also chose a paint from a home improvement store–this could be an issue as well! Thanks for any feedback you can provide!
YoungHouseLove says
Nah, I think you’re ok. A brush can work just as well as a foam roller as long as you didn’t goop it on (doesn’t sound like you did). Good luck!
xo,
s
Anjuli says
My husband and I are redoing our kitchen cabinets over the next two weeks, and looking at knobs/handles for our new cabinets. I noticed in your first house you had a combination of knobs and handles, in your current house you have only handles.
Do you prefer handles? And if so, why?
YoungHouseLove says
We didnt mind it either way- we just saw these handles and liked them this time, but we loved the pulls and handles at the old house too!
xo
s
Rob says
Quick question for you guys, did you fill the holes in the cabinets/frame for the hinges as well as the old hardware? I know you had all new hinges, but just wondering if you used the old holes with the new hinges.
Thanks!
YoungHouseLove says
Good question! I think we were able to use the old holes for the hinges so we didn’t fill those but we filled the cabinet hardware holes since those changed.
xo
s
Angela Kintner says
I’m sitting here looking at the ‘cloud cover’ swatch from BM. Trying to decide which white to go with for my cabinet overhaul. I like your kitchen in pictures but wonder how true to color the pics are on the monitor. Any tips on how to pick the best color? Please help me before I go insane!
YoungHouseLove says
I would get a test pot of that and a few others and paint it on poster board pieces of white paper and tape them up on the cabinets and stand back and see which one you like. Fool proof!
xo
s
Angela Kintner says
Thanks Sherry! You are awesome.
YoungHouseLove says
Aw, good luck with everything Angela!
xo
s
shelley says
Your kitchen looks amazing! My husband and I just moved and pained our kitchen cabinets. I watched your tutorials and wrote down everything you used and now we are one coat away from finishing!! I have one question though, how do you get the latex paint to keep from sticking? We’ve already had problems with the dry areas sticking to other dry areas and I’ve had experience with latex sticking to stuff and pullig off paint. Any suggestions? / what have you all done to keep it from happening?
YoungHouseLove says
Hmm, are things touching while you’re painting! I would keep that from happening for sure! You want it all to be 100% cure and dry before things touch so paint doesn’t pull off like that!
xo
s
Caroline says
Thanks, YHL! I’ve always loved this post, but after reading every.single.word. a billion times, we’re giving it a shot on our own kitchen this weekend! Fingers crossed!
YoungHouseLove says
Good luck Caroline! You can do it!
xo
s
Rachel says
Hi Sherry,
I’m currently repainting my kitchen cabinets (all 64 of them!!) and am not liking the “paint” feeling that it finishes with – it’s not as shiny and slick as un painted cabinets. You guys introduced me to Minwax for other projects and I love that it provides that nice finish – did you consider using that for the cabinets or anything similiar? If you didn’t, why not? Thanks!
YoungHouseLove says
Sealing cabinets after painting them isn’t what the pros do just because it can yellow or crack or have bubbles, so just getting a glossier better quality paint (ex: Ben Moore Advance paint in semi-gloss) will hopefully help give you that shiny and slick feeling (we did satin, so we have a lower sheen). Hope it helps!
xo
s
Lauren says
So, I’ve been reading your blog for a few years now and this is my very first comment! I absolutely LOVE checking your new posts each day..it gives me a lot of inspiration and encouragement to tackle projects on my own. I love seeing these posts about painting cabinets and trim. I’ve finally decided to paint all the oak-colored trim in our house, white. You have several projects you’ve done along the way…what kind/color of paint/primer would you recommend as of today? I’ve heard things about using Oil-Based primer and then painting over that with Semi-Gloss regular latex, in whichever color you choose…but I’m nervous to work with oil-based. I also have no clue where to start with choosing the right color! How long do you normally wait between coats? Any advice would be greatly appreciated :)
YoungHouseLove says
This exact mix of products in this post are our favorite! It’s the good stuff, so if you see us deviate it’s because we’re painting something we think is less precious, but for the cabinets we spared no expense. As for how long to wait, just read the can (BM Advance has awesome info on the can for you). Good luck- you can do it!
xo
s
Kim Gallagher says
We are just starting this project in our kitchen this weekend and would like to thank you for the inspirational tutorial. Strangely enough, I couldn’t find deglosser at Home Depot…two people directed me toward strippers and that just didn’t seem right. Anyway,we’re hoping our BMoore store has some in stock, but if not, what do you suggest? Is this an absolutely necessary step?
YoungHouseLove says
I would check with Ben Moore since I think they should have it! If not I’d ask a pro there what they recommend (they tend to be really on top of that stuff). Good luck!
xo
s
Melissa M says
Hi there,
Great tutorial. I am wondering if you had to sand between coats? I just bought some Advance Glossy paint for a wood dresser…
YoungHouseLove says
We just put it on super thin so it’s not drippy or bumpy and then we don’t find the need to sand.
xo
s
Kara says
We are trying to do the same thing with our cabinets. Do you remember how much primer and how much paint you ended up needing? More than 1 can each? We’re trying to get all the same products you used, but that primer and paint are only available if we order them online! Hope our kitchen transformation is half as impressive as yours! :)
YoungHouseLove says
Oh no, not even half a can of each. Definitely couldn’t have done it with a quart though. Hope it helps!
xo
s
Larissa says
I’m sure you’ve probably answered this somewhere…
Would you do go through the same process with cabinets that are already painted that need to be repainted?
Thanks!!!
YoungHouseLove says
Yup, every step is still necessary. Hope it helps!
xo,
s
Larissa says
Never mind! I just saw your answer to the same question. Thanks!!
Crystal says
I followed your directions, exactly and I’m having issues with the paint scraping off :(. It is so frustrating. Did yours do this at all? Do you put a clear coat finish on? I don’t know what to do, they look so pretty. Well, except for the paint scraping off.
YoungHouseLove says
Weird! Were yours painted before? If so, it’s possible they used oil-based paint and yours was water based so it’s flaking off from a chemical reaction. Otherwise I would just ask if you used deglosser and sanded them all before using the exact primer we mentioned since those three thing really seem to help with adhesion. Hope it helps!
xo
s
ara jane says
we are having some bookshelves/cabinets painted and are debating with our handyman about what kind of paint to use. he says that only oil-based paints will hold up over time for cabinets, but we feel pretty strongly about using something less toxic and stinky. since it’s now been a while since you painted these puppies, i’m wondering if you’re still happy with the paint. has it held up to wear and tear and clara/burger abuse? thanks!
YoungHouseLove says
Over a year later and not a chip or a crack! They’re holding up so well – we were just talking about how happy we are with them. And we’re tough on our cabinets. I can only vouch for the exact same primer and paint we used here though (a friend of mine used a different paint from another brand and within a few weeks it started chipping, ack!!). Hope it helps!
xo
s
Tara at Padded Tush Stats says
This looks amazing! Do you mind if I ask how much it costs to paint cabinets if I have absolutely no supplies or paint? I have no idea how to budget this but totally want to do it!
YoungHouseLove says
Hmm, I would just run to the hardware store and price everything out and add it up. It really depends on how fancy of a brush you get, there are different roller arms to choose from, etc. I’d guess that it would be hard to spend over $200 just painting cabinets (of course that doesn’t include the hinges and hardware you buy, which definitely can vary greatly in price). Hope it helps!
xo
s
Autumn says
This was the first thing I viewed on your page and it inspired me to do my own cabinets (huge pain), but I have now started a blog to keep track of my home endeavors as well as my black whole of debt, so thanks!
YoungHouseLove says
Aw thanks Autumn! Congrats and happy blogging!
xo
s
Ann says
We are painting our lovely 80s style builder basic oak cabinets white using your tutorial-so excited for light and bright! We have a one year old, so I’m a little concerned about the dust from sanding the cabinet frames. Did you use a palm sander or just sand paper for that? And what are your anti-dust tricks?
YoungHouseLove says
We taped off the whole room so it was in a bubble so none of the dust could get everywhere. That way it was contained and we kept Clara out of that area. We also sanded the doors in a sealed off sunroom (using a palm sander). Hope it helps!
xo
s
Danielle says
Hi Sherry & Jon!
I was wondering what I should do differently about painting/refinishing my kitchen cabinets if they are not made of oak but of that cheap particle board instead? Isnt that a very different process? Thanks!
YoungHouseLove says
I would bring a door or a drawer to the paint shop (like Benjamin Moore) and ask the paint pro there what they recommend. Hope it helps!
xo
s
Tamara says
I keep seeing pins about using liquid deglosser instead of sanding cabinets. What’s your take on this? I’ve been following your blog for a couple years and notice that you spend a lot of time sanding. We’ll be moving in July (5 more months!!) and first thing I’ll be doing is painting the kitchen and the cabinets. I want to do it right though, as this will be a fairly permanent change until we can save up to gut it completely (if ever). Thanks!
YoungHouseLove says
We actually use both steps (sanding and liquid deglosser) on our cabinets because we think each is extra insurance that your paint job will hold to the wood and not scrape or chip off as easily. So our thought is that you should do both if you have the time / money to do so, but if you’re in a situation where you can’t – like you live in an apartment or condo and don’t have space to sand – then you could skip the sanding step. But since we haven’t relied on liquid deglosser alone yet we prefer to do the sanding step whenever possible, just to be sure.
-John
Holly says
Hey Guys…We have oak cabinets in our kitchen, too. We want to sell our house and are thinking about updating our kitchen to help in re-sale. We are skeptical of painting the cabinets because of the ‘grain-showing’thru’ thing…. and our contractor suggested getting new doors…but painting the rest of the trim and cabinet parts that are left. Do you think that would look even more strange? With fresh new doors and other parts painted? Ugh…Your cabinets look great, I just wish I could look into the future and see ours done. Thanks in advance for your advice. :)
YoungHouseLove says
I totally think you could go either way. If you use good paint (we love Benjamin Moore Advance) it can look pro if you do it all, or you could use Advance for the backs and then get new doors and that would work too! Good luck!
xo
s
Betsy Clark says
Looks fantastic!! I love the bar stools, can you tell me where you found them and what they are called?
YoungHouseLove says
They were from a school supply store! Here’s that post for ya (the name is in the screen grab of the stool purchase): https://www.younghouselove.com/2011/12/stool-boom/
xo
s
Jenn says
Hey, guys
My husband has been painting our cabinets white. He’s almost done and he’s not happy with his work. He’s seriously been busting his butt and I feel bad for him.
Basically the doors have a lot of grain on some of them. He followed every step, sanding, sanding and sanding again. Priming. He’s a perfectionist. I don’t think they look that bad and I’m a perfectionist too. (Until 2 years ago I was a full-time Art Director – now I’m a SAHM)
Do you have any tips? It looks like some of your cabinets *maybe* have some grain on them as well?? We used the same technique and paint you did.
Thanks!
PS – I love your book! Got mine for Christmas.
YoungHouseLove says
Oh yes ours have a hint of grain but we don’t mind them looking like painted wood (we don’t want them to look plastic or anything!) so the key for us was just keeping it looking smooth and consistent. Using the exact self leveling paint (Adbance by Benjamin Moore) really seemed to help!
xo,
s
Danielle says
Hi guys!
I was wondering what steps would be different, or do you think its even possible to have a good turnout in painting kitchen cabinets that are not real wood or oak but are just that cheap particle board? I worry that if I begin this project, the paint wont be able to stick to the particle board since its so cheaply made. Boo! Can ya’ll help me with this one?? Thanks so much, I love what you guys do and cant wait to buy the book!
-Danielle
YoungHouseLove says
I would bring a cabinet door or drawer with you to a paint pro (the people at Benjamin Moore tend to know more than Lowe’s/Home Depot in my experience) and see what they recommend. Hope it helps!
xo
s
Kate says
Do you mind my asking how much primer and paint you needed for this project? I’m thinking of tacking a project (built-in cabinets & shelves) that I’m guessing are about 1/3 – 1/2 the area of your kitchen cabinets. Would a gallon of each be enough for that? Thank you!
YoungHouseLove says
Less than a gallon of each was all we needed! Better quality primer and paint goes further, so try to grab exactly what we used for the best results :)
xo
s
Becca says
Hi! I LOVE everything you both have done in your old and current house. I’ve been stalking your blog for a couple years now and am somewhat (but not creepy) obsessed. Lol. :0) I am fixing up our kitchen right now and would LOVE to copy your cabinet handles. I followed the link with no luck. :0( I was wondering if you could tell me what they are called exactly by what company? (If you don’t mind sharing.) ;0D
YoungHouseLove says
Oh no! Hmm, now I forget everything about them,but I think if you scroll back through these comments (I know there are a lot) we mention the name of the maker and might even have an alternate link or a product name for you to google. Hope it helps!
xo
s