Painting your cabinets is a perfect way to makeover a dated kitchen without splurging on a big renovation. It doesn’t cost much and, with the proper preparation, your paint job will look great and last a long time. We’ve used the tutorial outlined below to paint cabinets in 4 separate kitchens (not to mention cabinets in other rooms too) so we’re confident it’s a DIY project that will work for you. Follow along below!

The kitchen featured in this tutorial is from our second house which had solid oak cabinets throughout (along with wood paneling!). So while steps focus specifically on painting wood cabinets, the process is similar for any cabinet material. You can also refer to our tutorials about painting already-painted cabinets and painting Ikea cabinets.
Steps To Painting Cabinets
Here is a brief overview of how to paint your kitchen cabinets. The process takes time, patience, and a little bit of elbow grease – but nothing is especially complicated or tiring. At worst, it’s just a bit repetitive – especially if you a big kitchen.
- Remove cabinet doors and hardware
- Patch cracks and holes (optional)
- Lightly sand all surfaces
- Apply a liquid deglosser
- Prime one coat
- Paint two coats
- Rehang cabinet doors
- Reinstall cabinet hardware
This project can be completed by one person but may go faster with help. Proper surface preparation is the key to success here, so don’t rush steps 2-5.
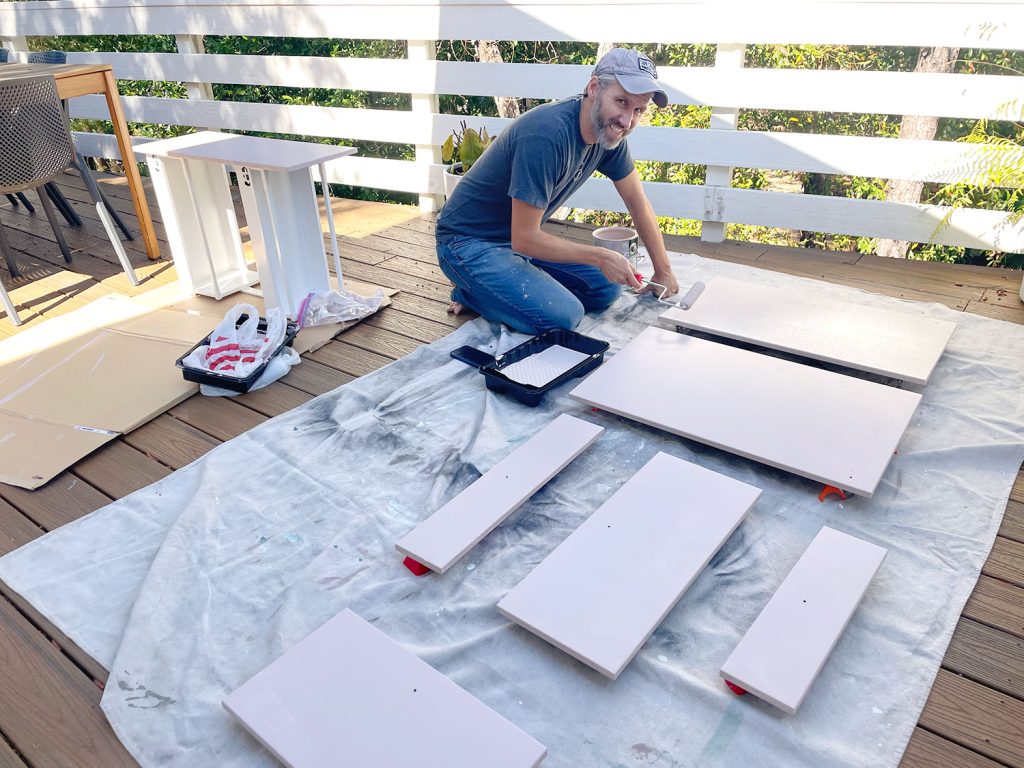
The overall time lime depends on the size of your kitchen, but even painting a small kitchen will span several days due to drying and curing time between coats. You also want to make sure you have ample space to spread out your cabinet doors, like in a garage or spare room.
How To Paint Cabinets Video Overview
You can see these steps in motion by watching the detailed video below. To view an abbreviated version of this process, you can see a quick version of painting cabinets on YouTube.
Note: You can also watch the video above on YouTube.
Supplies Needed To Paint Cabinets
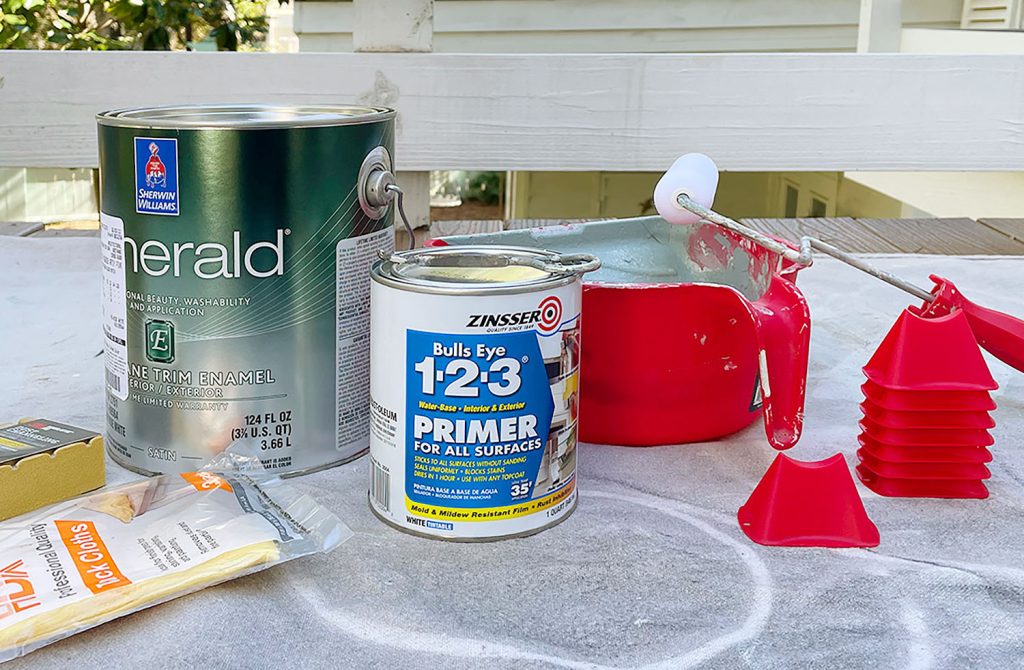
The materials you’ll need to paint your kitchen cabinets aren’t much different from other painting projects. So you may have many of these supplies already on hand.
- Primer
- Paint (we recommend satin or semi-gloss finish)
- Small 4? or 6? foam rollers
- Roller trays
- Short, angled paint brush
- Drop cloths
- Painter’s tape
- Painter stands or tripods
- Electric sander & sandpaper
- Electric drill & driver
- Liquid deglosser
- Wood filler (optional)
- Putty knife (optional)
You could use a paint sprayer for this project, but we don’t feel it’s necessary. If you already own a paint sprayer and are comfortable using it, go for it. It can save time. But we’ve never regretted painting by hand instead.
What paint should I use to paint my cabinets?
Water-based, latex paints formulated for cabinets or trim are best for painting kitchen cabinets. Oil-based paints used to be recommended, but are not necessary or practical for a DIYer. They are smelly, difficult to clean up, and can yellow over time. Also, water-based paints have come a long way and offer a similarly smooth and durable finish. Our favorite cabinet paints are Sherwin-Williams Emerald Urethane Trim Enamel and Benjamin Moore Advance. If you prefer a different brand, consult the paint desk expert for the best formula for your job. Buy the highest quality paint your budget allows.
Step 1: Remove cabinet doors & hardware
Carefully unscrew all cabinet doors from the frames using an electric driver. Remove existing hinges, knobs, pulls, or other hardware. If you are reusing this hardware, be sure to collect it in a bag or box for later. You may also want to label each door with painter’s tape (I.e. “lower left stove cabinet”) to help avoid confusion during reassambly.
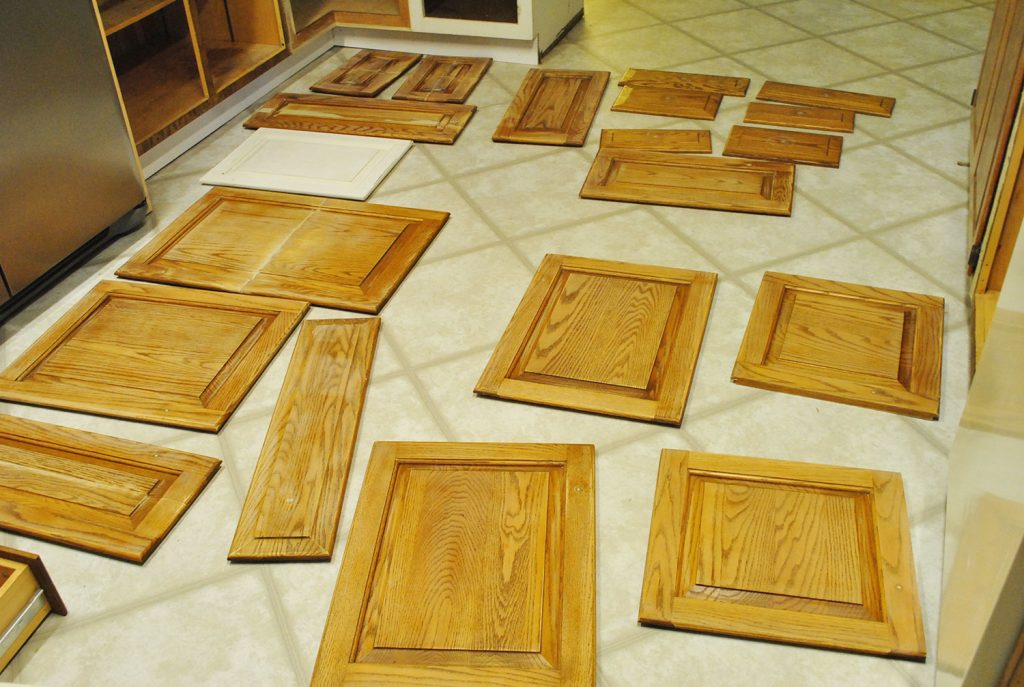
You will also need to slide out any drawers from the frames. If possible, unscrew the drawer front from the box. You may also need to empty some drawers and cabinets. We don’t typically paint the inside of the cabinets, so most things can stay in place while you work. But take care to cover or temporarily move items while you sand, to keep them from getting dusty.
Step 2: Patch cracks and holes (optional)
You can skip this step if your cabinets are in good condition and you’re reusing the existing hardware placement. For our cabinets, however, we planned to swap the existing single-hole knobs for two-hole pulls. The existing hole was in the wrong place, so we used wood filler to patch all of the existing hardware holes before proceeding. We were also changes the hinges, so we patches the holes for those too on both the doors and frames.
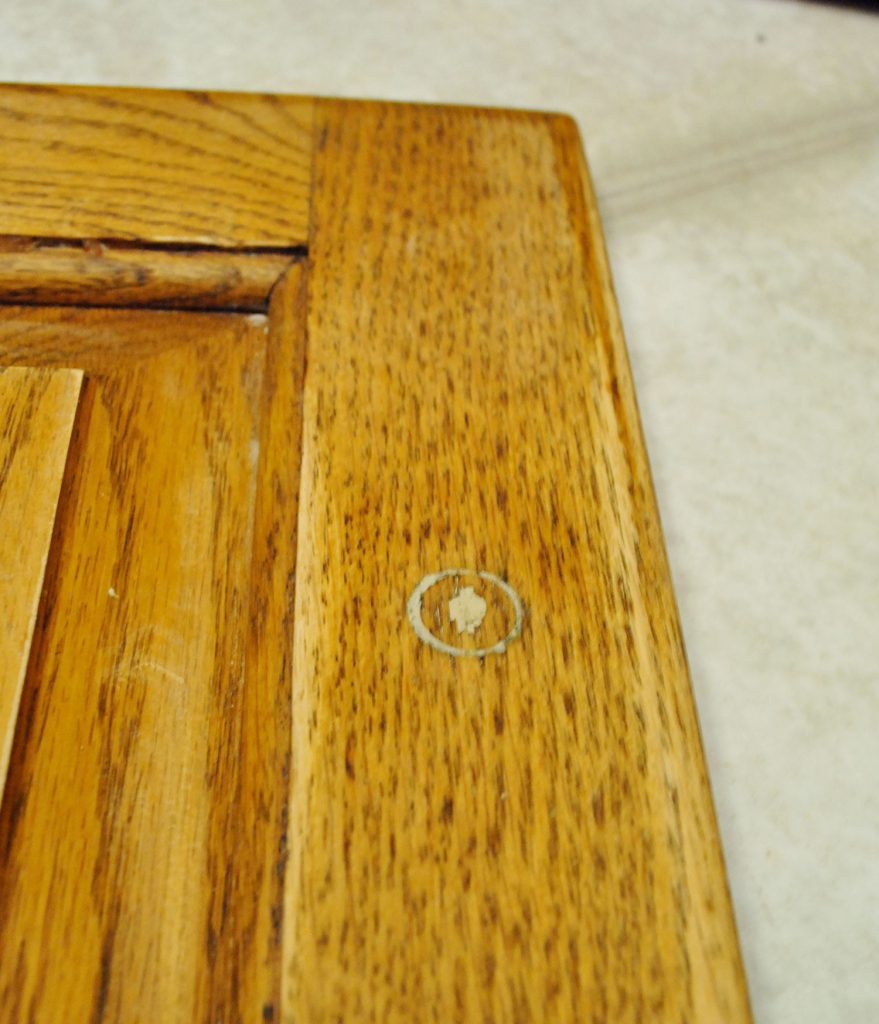
To apply the wood filler, use a putty knife to push it into the hole and smooth it. Once dried, sand off the excess. You may need to do a second coat, since it may shrink slightly as it dries.
Step 3: Lightly sand all surfaces
Prepping your wood cabinets for paint is the MOST IMPORTANT step if you want a long-lasting, durable result. Skipping the next few steps puts your paint job at risk of scratching or rubbing off, especially in high-traffic areas. So while this part is probably the most labor-intensive, please don’t shortchange it! We also have more detail in a dedicated post about prepping cabinets for paint. Here is an overview:
Use an electric sander and medium-grit sandpaper (like 120) to lightly sand every surface you will be painting. This means doors, drawer fronts, faces of cabinets, sides of cabinets, etc. You do NOT need to remove all of the existing finish. The goal is NOT to get it back to raw wood (although that it is okay). The goal is simply to rough up the surface enough to help primer and paint bond to it. You may need to hand sand small corners and nooks.
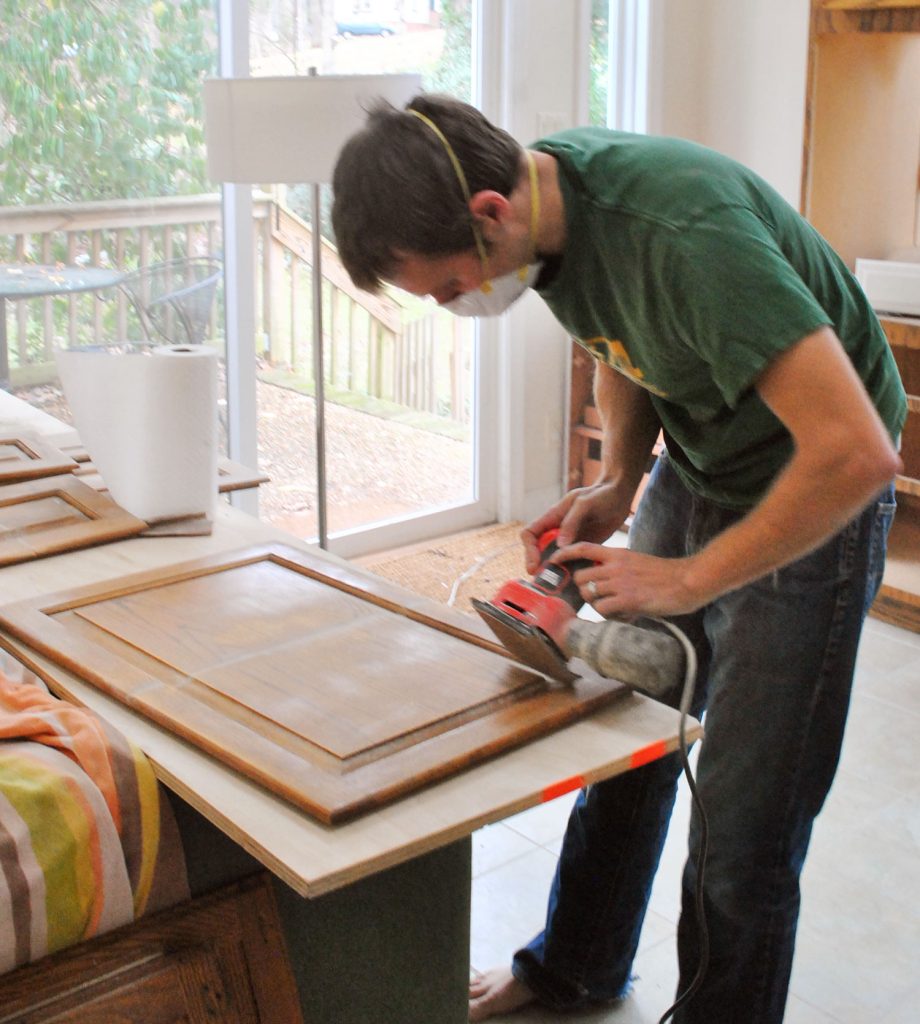
This process will be dusty, so try to do it outside or in a well-ventilated space (we did most of ours in our sunroom, above). When it comes time to sand the frames in place, cover items in your kitchen as needed to keep sanding dust from getting everywhere. After you’re done sanding, wipe your cabinets clean using a tack cloth.
Step 4: Apply a Liquid Deglosser
Liquid deglosser (sometimes called “liquid sandpaper”) helps etch the surface of your cabinets & frames, helping ensure a strong bond with the paint. Krud Kutter Gloss Off is our preferred deglosser. The one pictured below is difficult to find.
Some people use a liquid deglosser in place of sanding, but for wood cabinets we recommend doing both to be safe. It also helps remove any built-up grease or oil residue you may have missed while sanding, especially in nooks and crannies. You may also have heard of using a chemical called TSP (trisodium phosphate) instead. However, TSP is more of a cleaner than a deglosser, so we don’t recommend it.
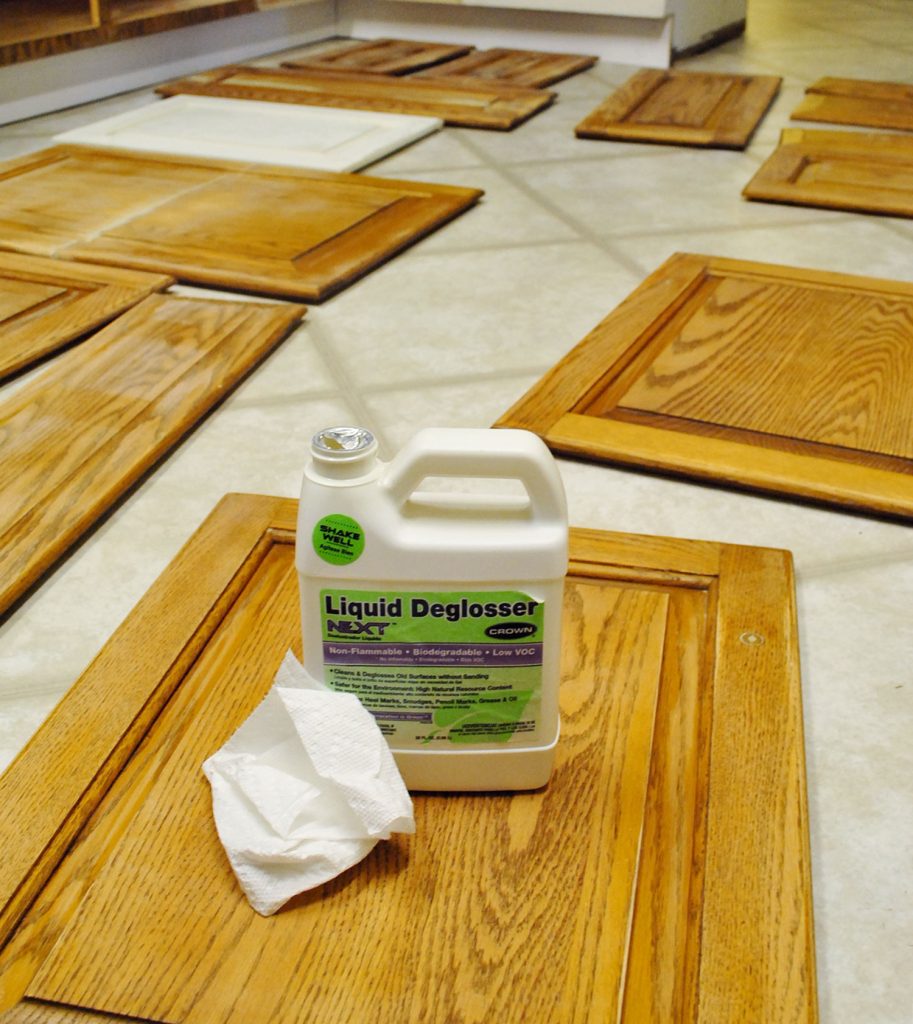
You can apply it with a rag or paper towel or put it in a spray bottle. It doesn’t need to be rinsed or wiped off. Just give it a few minutes to soak in. We sometimes do two applications to be safe.
Step 5: Prime One Coat
The last prep step before painting is priming! Primer is a critical element to good coverage and a long-lasting finish. Do not skip it! We like a Zinsser all-surface primer. It can be used off-the-shelf if you are painting your cabinets white or another light color. For darker or more saturated paints, consider having your primer tinted to match.
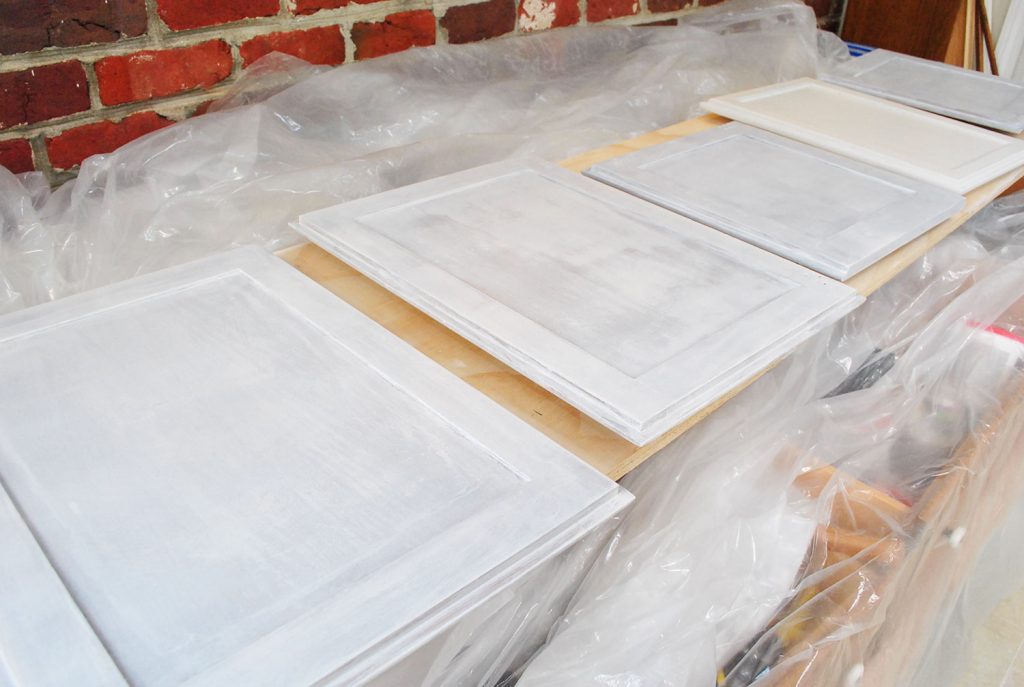
As you can see above, you’re not going for perfect coverage. Primer will be splotchy as it dries. This is okay. The main goal is to get a thin, smooth, and even coat. To do this, we recommend (1) using an angled paintbrush to get into edges or corners, then (2) using a small foam roller to remove brush strokes and coat the large, flat surfaces. Go slow and watch for drips along edges!
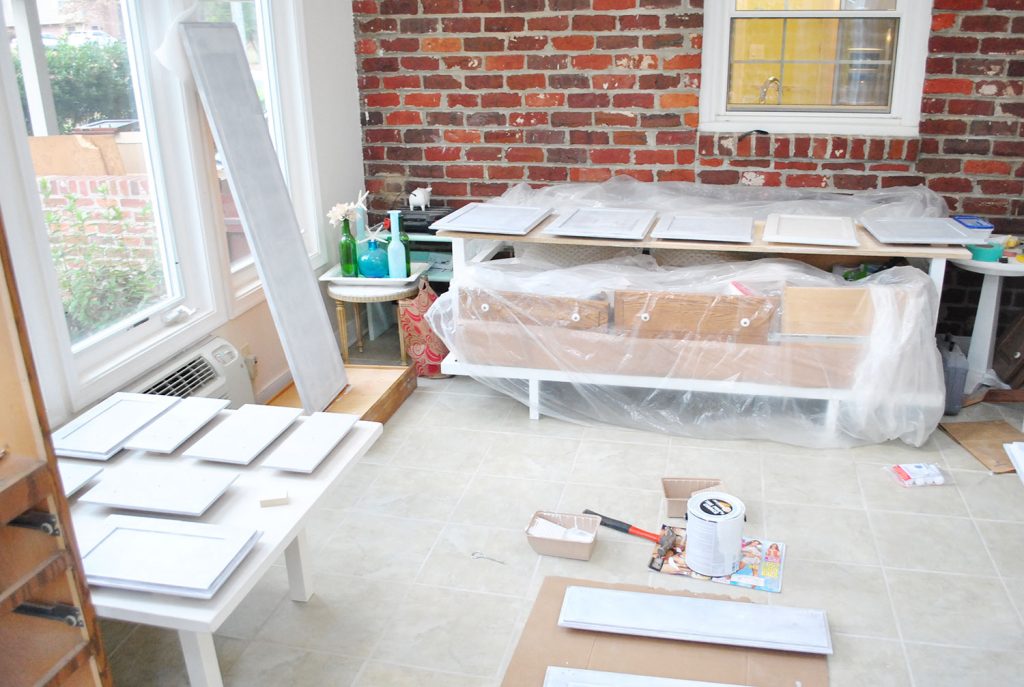
We suggest propping your doors off the ground with painter stands to make priming and painting easier. And if you’re painting both sides of your doors (which we think you should!) we’ve developed a specific order that helps minimize marks or dings on your freshly painted doors. It requires a bit of patience as you wait for one side to fully dry before flipping it over to do the other.
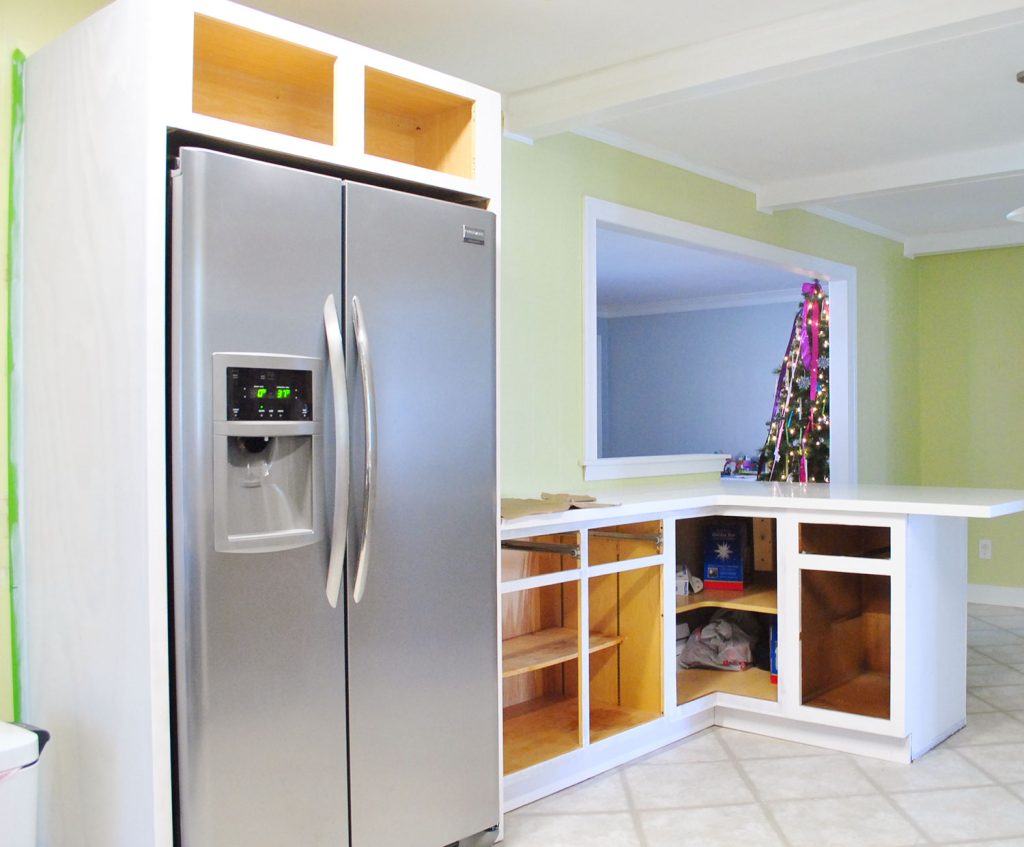
Don’t forget to do your cabinet frames and boxes too! You may want to use painter’s tape and drop cloths to protect walls, floors, appliances, and countertops.
Step 5: Paint Two Coats
Once your primer coat has fully dried and cured (see the manufacturer’s instructions on the can for specific times), you may repeat this process with your chosen paint. We used the color Benjamin Moore Cloud Cover. Again, use a combination of a brush and foam rollers to get a smooth finish. The paint may look slightly textured from the foam roller, but it will even out as it dries. Just remember: your main goal is thin & even coats without drips!
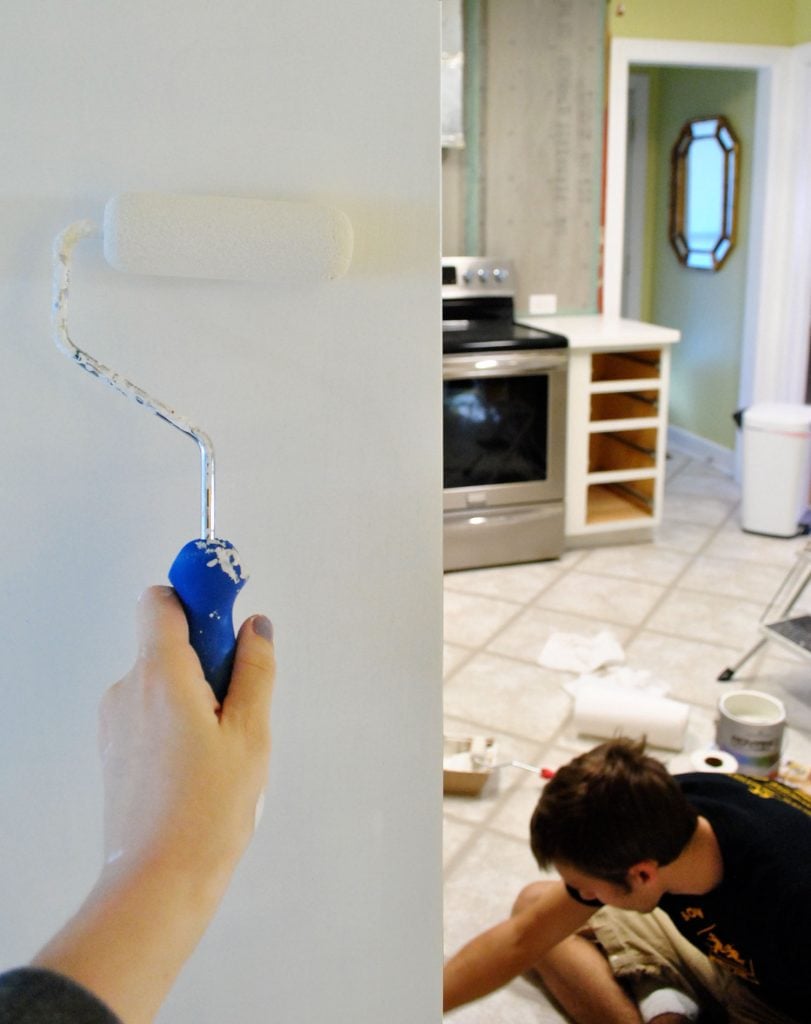
As a rule of thumb, we do two coats of paint for any painting project. But it’s especially important with painting cabinets. More thin layers is stronger and less prone to scratches than one thick layer. Just be sure to allow enough dry time between coats before touching or recoating.
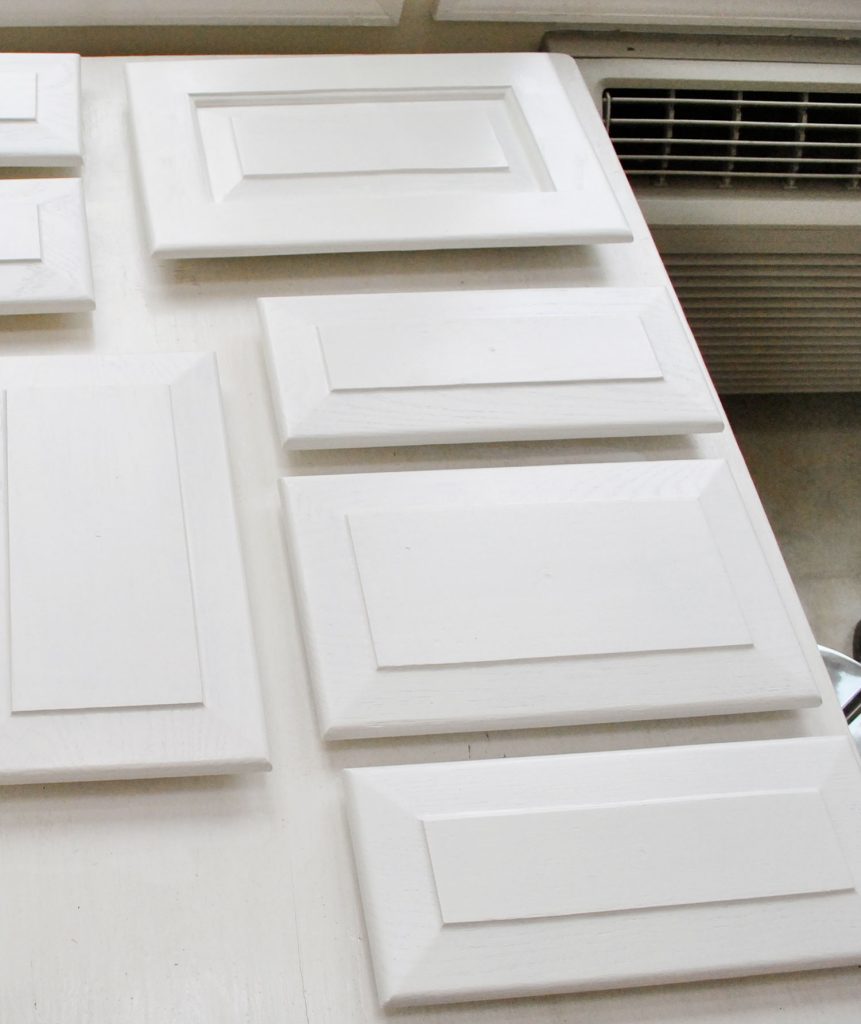
This part should be super satisfying. You’re finally seeing your hard work pay off and your vision come to life!
Step 7: Rehang cabinet doors
Once everything has fully dried, you can reassemble your kitchen. Screw hinges back on. Slide drawers back in place. You can even put things back in your cabinets.
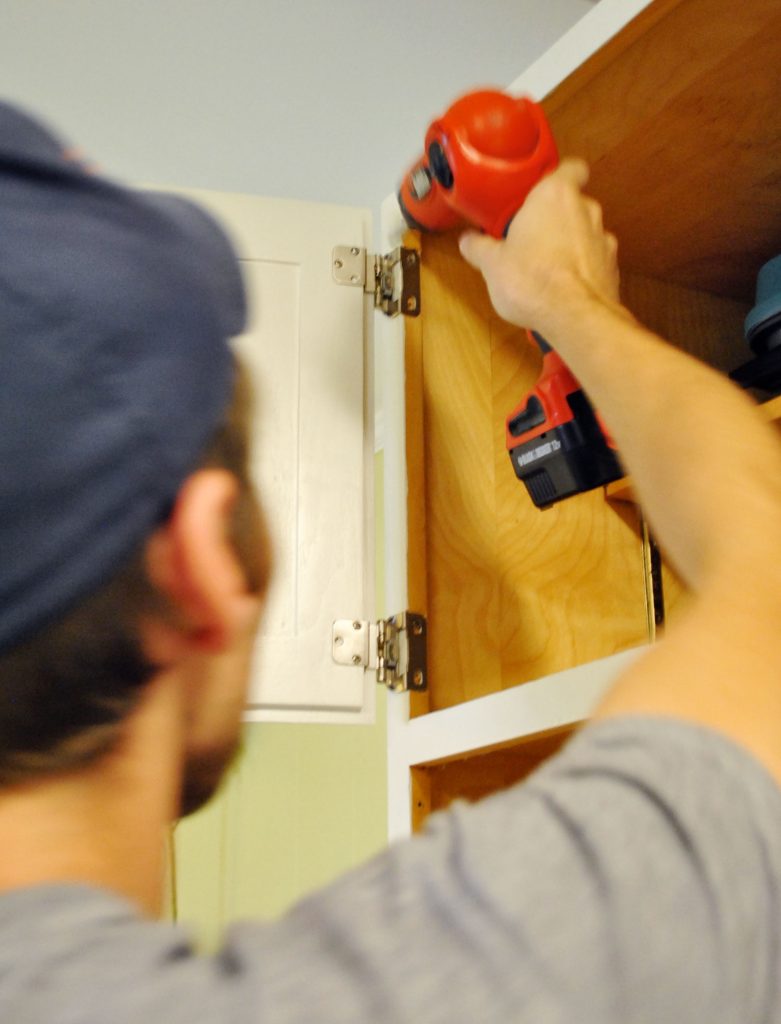
Things might get banged around in this process, so we often like to give our paint an extra day to cure before beginning. You’d hate to scuff up or scratch off the fresh paint right away!
Step 8: Reinstall cabinet hardware
At the same time, you can all reattached your cabinet knobs or pulls. However, this will be a bit more involve if you – like us – filled all of the old holes and need to make new ones.
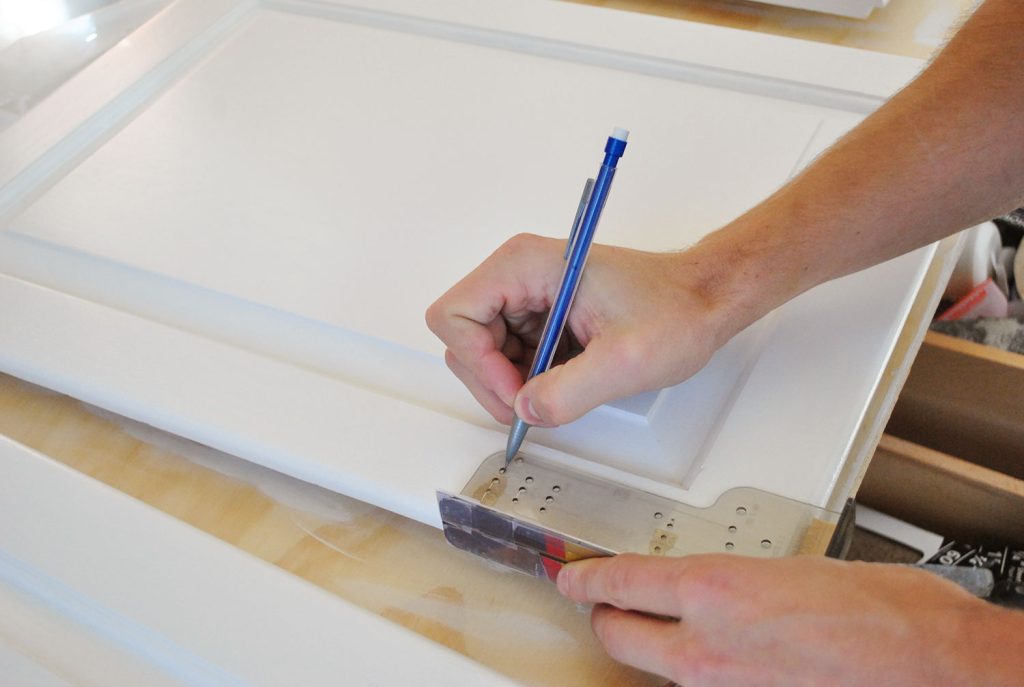
We have an entire post – with video! – dedicated to how to install cabinet hardware that will help you do this with precision and speed. But as you can see above, we highly recommend purchasing a hardware template for this step.
How long does it take to paint kitchen cabinets?
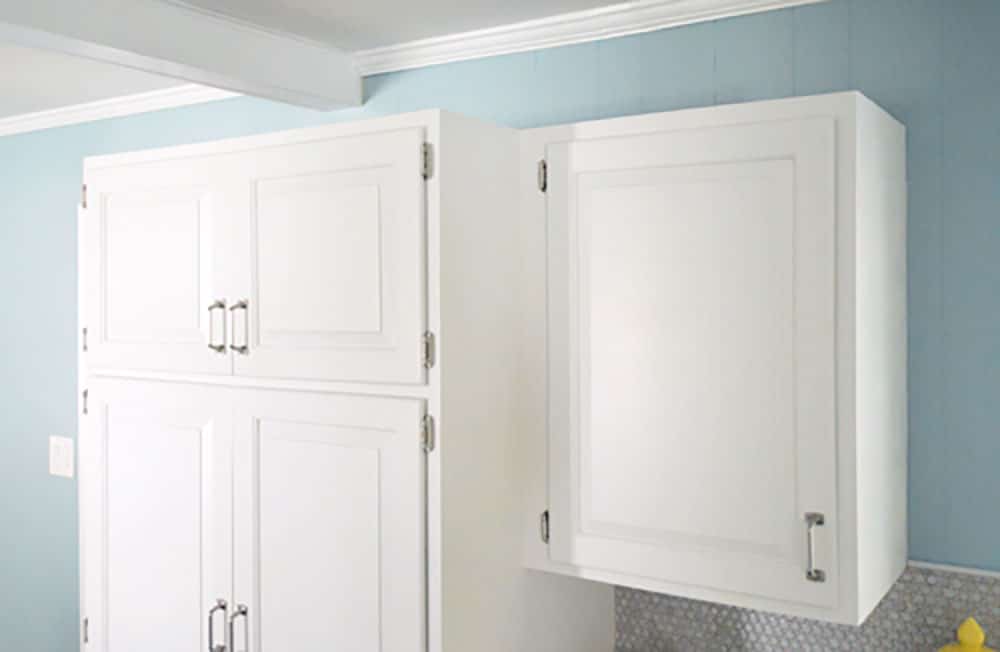
Painting these kitchen cabinets took us 15 days to complete. A lot of that time, however, was waiting for things to dry and cure. They were not 15 days of straight work! So while this isn’t a project you should expect to knock out in a weekend, it’s also not something you need to take 2 weeks off of work to complete. It can easily be done on nights and weekends, like we did. We even had a toddler at the time!
How much does painting cabinets cost?
Painting kitchen cabinets yourself is very affordable, especially compared to the alternative of hiring it out OR replacing your cabinets entirely. We completed this project in 2012 for just $300 and half was for new hinges and pulls. So if you are reusing your hardware, you can expect to spend even less. Here is a rough estimate of what you might spend to paint kitchen cabinets.
- Sandpaper: $10
- Liquid deglosser: $10
- Primer, 1 gallon: $30
- Paint, 1 gallon: $80 – $120
- Paint supplies (roller, brush, trays, etc): $40 – $60
- TOTAL COST: $170 – $230
If you don’t already own an electric sander or drill, those may cost you about $50 each. You can complete those tasks by hand to keep your budget down, but it will significantly increase your time and effort.
Other Cabinet Painting FAQs
Here are some other frequently asked questions about painting kitchen cabinets:
Do I need to apply a sealer or topcoat?
No, you do not need to apply a sealer, varnish, or polyurethane to your painted cabinets. Paints, especially those formulated for cabinets or trim, don’t require a protective topcoat. In fact, applying one could cause your color to yellow.
What finish paint should I use on cabinets?
We recommend using a satin or semi-gloss paint for a hard, wipeable finish on cabinets. Gloss or high-gloss paint can offer a sleek, modern look with high shine, but should be applied professionally with a paint sprayer to avoid brush or roller strokes. Matte, flat, or eggshell finishes will be harder to wipe clean.
What color should I paint my cabinets?
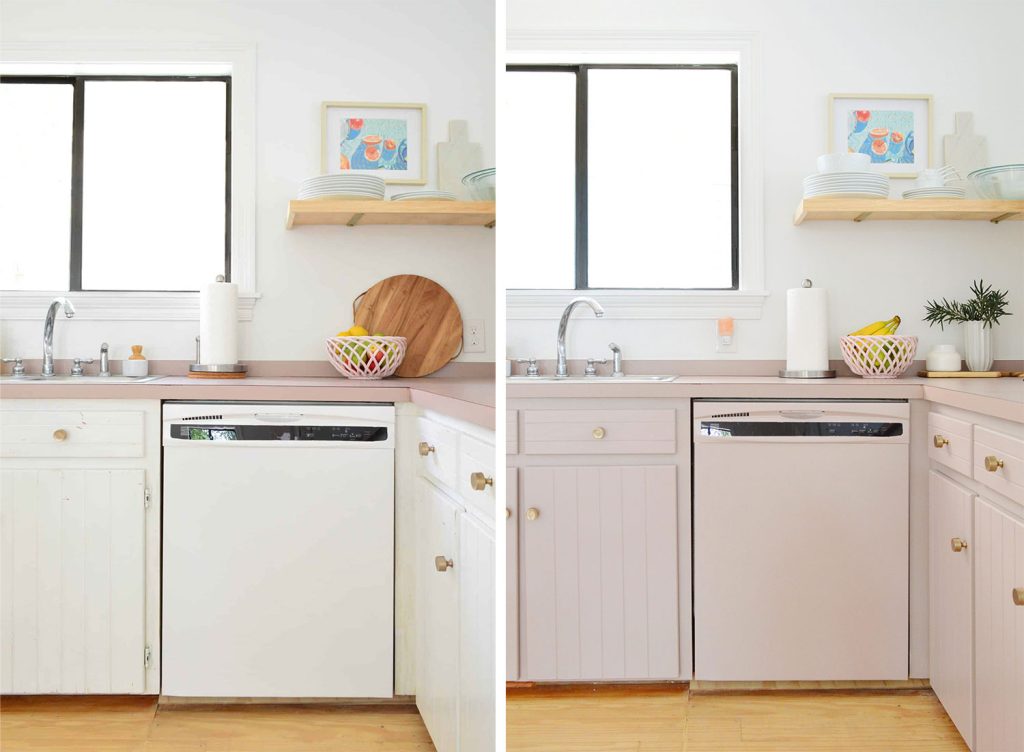
There is no limit to the colors you can paint kitchen cabinets! We love classic white cabinets, but colorful cabinets have also been trending lately – like our current cabinets (Artsy Pink by Sherwin-Williams) or our friends’ painted cabinets below (Halcyon Green by Sherwin-Williams).
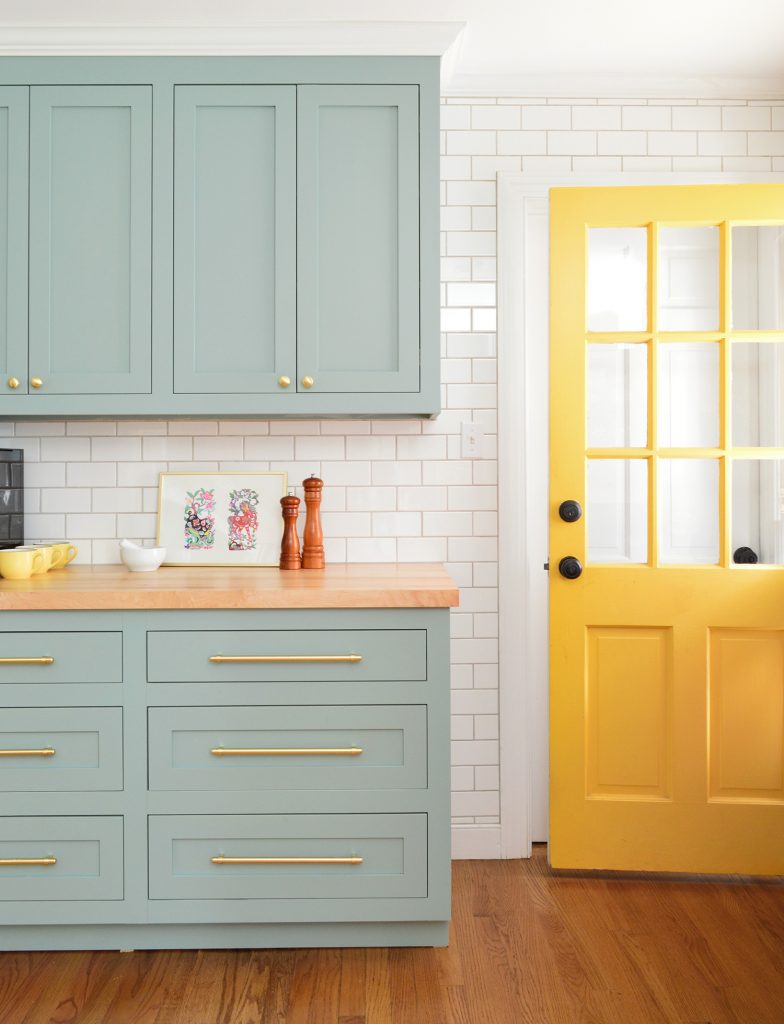
We always recommend testing any color before proceeding. Colors often appear brighter or more saturated than they seem on a small swatch. Whites also can appear stark or cold, so we recommend something with subtle yellow or gray. Any of these expert’s favorite white paints work well on cabinets.
More Kitchen Cabinet Projects
Looking for other budget-friendly ways to update your kitchen? Here are some other projects you might be interested in:
- How to Add Crown Molding To Cabinets
- How to Properly Prep Cabinets For Paint
- How To Paint Ikea Cabinets
- How to Install Kitchen Hardware
- Organizing a Small Kitchen
- Installing Hidden Ginges on Old Cabinets
- Staining Wood Cabinets Darker without Sanding
Update: Our painted cabinets are still holding up great. Check out a little update post here.
*This post contains affiliate links, so we may earn a small commission when you make a purchase through links on our site at no additional cost to you.

Andrea (Lil-Kid-Things) says
We will be embarking on a similar journey soon. I have been holding out for painters while my husband wants to DIY, therefore NOTHING is getting done. After reading your how-tos I am ready to do this!
Stacy says
Cabinets look great! Did you ever consider using the new Rustoleum cabinet refinishing kit? I am just curious as I have been eyeballing it for awhile. Any thoughts on that? Thanks – enjoy your site!
YoungHouseLove says
Yup, we thought about it but more pros that we talked to recommended the good primer + good paint method – which we loved since it was low-VOC and included steps like sanding (the kit skips that which makes a nervous nellie like me… well… nervous!) Haha.
xo,
s
Lauren L says
What a great post. It’s totally encouraging me to do our cabinets in our kitchen! Also, I LOVE that you guys still have your tree up. Three cheers for keepin it real! :D
Kate says
Looks AMAZING! Can’t wait to see the cork floors!
Jadie says
Um, I am pretty sure I already commented on this, but I was just looking over this post again…and am still in total, complete LOVE (and envy)! Great job!
Corrie says
I love the bar stools! Do you mind sharing where you got them?
YoungHouseLove says
They’re actually from a school supply store. Here’s that link for ya: https://www.younghouselove.com/2011/12/stool-boom/
xo,
s
Christy says
I am about to paint my kitchen cabinets as well. I was very excited that you posted step by step directions.
I do have a question. I was thinking about renting a spray gun to apply the primer and paint to the cabinets. Is there a reason why you used brushes and rollers rather then a spray gun?
I know it is a bit more messy but I was thinking that it would give me a more even/ smooth finish (no roller/brush marks) at least on the doors.
Thanks for your help! Your Kitchen is looking GREAT and has motivated me to get mine going as well. Thanks for the advise! :)
YoungHouseLove says
We have always been happy with the smooth and even finish that brushes and rollers give us so we worry that a spray gun could lead to drips or other inconsistencies (they take a bit of getting used to, so we just like using what we know works for us!).
xo,
s
Christy says
Thanks! I have an old cabinet that we moved out of the kitchen because we reworked the layout and I think I will use that one for a practice run.
Thanks again! :)
Jaya says
Hi guys- I just want to say thank you for the detailed instructions. We have one more smidge of wall paper left to go and then painting cabinets, here we come! I have read these posts multiple times the last few days, with the intensity of studying for the cpa exam! wood filler, sand- 60 and 200 grit and primer, small roller, angled brush. I should put this on a flash card! Thanks so much for the detailed instructions! Please know people are reading and using your instructions in real time :)Thanks again!
YoungHouseLove says
Aw, so glad. Good luck!
xo,
s
laraffinee says
I have been reading up on the paint you used, the Benjamin Moore Advance, and it is supposedly state of the art and all, but must be used correctly or it will peel off or be a mess. They say to work quickly with it and to do as little re-brushing or re-rolling as possible because it sets quickly and can actually ball up. You did work quickly in the video – were you keeping that pace because of the set time? , but you did re-brush and re-roll over the surface.. Any advice about working with this particular paint? What primer did you use with it? Thanks!
YoungHouseLove says
I didn’t find it any harder to work with than other paint, so I was moving fast in the video (probably 30% faster than normal) but when I went at my normal pace I didn’t have any issues. I used Zinsser Smart Prime with it and really liked that too. In general you don’t want to brush or roll over an area of paint that you’ve done a while back because it’ll start to cure and get gunked up, so I just tried to apply my little brush stuff and then my roller stuff as you saw in the video and then I moved on. No going back to retouch stuff until it was time for the next coat. Hope it helps!
xo,
s
Justin says
This is awesome!!
When sanding did you guys use a fine sand paper to finish it off and make it really smooth??
YoungHouseLove says
Yup! We did low grit first (about 60) and then did high grit (150-200).
xo,
s
Justin says
Thank you.. I will stop bothering you now!! ;)
I sure will be back though!! ;)
YoungHouseLove says
Haha- good luck!
xo,
s
Justin says
Okay. My wife wanted to know if guys cut out the hole in the wall out by yourself??
We are doing the same thing to open up the kitchen into the dining room..
YoungHouseLove says
We hired a licensed contractor since it was load bearing. Hope it helps!
xo,
s
Kerry V says
Hi guys;) did you have Home Depot mix your Cloud Cover or did you happen to go somewhere else? Thanks! Kerry getting ready to paint in Ohio;)
ps I painted my kitchen walls Native Soil by Behr , the trim is all white do you think Cloud Cover would look right or do you recommend another color for the caninets? I have 20 cabinets and an island. Along with 10 drawers.
Thank you so much!!!
YoungHouseLove says
We actually got it at a Benjamin Moore store here since we wanted it to be in Advance paint (their brand) since it’s supposed to hold up so well! So far, so good! Hope it helps. I think it’ll look great in your kitchen!
xo,
s
Debc says
Amazing work! What I also LOVE is your wall color, which I didn’t see mentioned. Care to share?
YoungHouseLove says
Thanks! It’s Sesame by Benjamin Moore. Hope it helps.
xo,
s
Kazie says
Your kitchen is looking amazing! I actually have nice cabinets they are just darker, this post has helped me get brave enough to try my cabinets I took one of my doors off and have tested the back of it. I have used the same paint as you but not the same primer ( the guy at the Benjamin moore paint store talked me out of your primer) I don’t know if I am just maybe a crappy painter but my cabinet is not as smooth as I would like or as smooth as yours look. Any ideas why ?? Do you think the primer would make the difference??
YoungHouseLove says
Aw man, ours are really smooth and we loved our primer (recommended by two cabinet painters along with the paint – it’s what they use). It might be your coats (you want thin thin thin and even coats of both primer and paint) that has made it not-as-smooth or maybe it’s the different primer. Hope it helps!
xo,
s
Betty819 says
Congrats on the great job you all did! We moved here 7 yrs. ago and the kitchen has dark cherry cabinets. They are not the best quality, in my opinion. We have tried to find a manufacturer’s name/logo on them and can’t..the hinges on some of the glass paneled doors, the screws are stripped and the cabinets don’t line up even..ABOUT your retrofit cabinet..the one that you couldn’t put a handle on it..is it a cabinet with a lazy susan inside? I don’t know the exact name for it but you can probably figure it out. If it is that type of cabinet, ours has like a bi-fold door on it with only one handle, Maybe you should have installed your handle on opposite side of the door and let the one cabinet open opposite from the others. Would that have worked without looking odd?
We replaced the laminate pink countertop with Quartz..and took down the pink tile or was it white with decorative tiles mixed in randomly with roses on them? I chose to go with plain white subway tile because the cost of the Quartz ate up our budget but DH wanted granite and he settled for Quartz and we are very happy. All our furniture in this house is dark cherry and I am sick of the dark color. I’d love to have the kitchen cabinets painted white but DH would never agree to it. This house was built in 1977 and has a dropped ceiling, plastic panels and 4 flourescent lights behind the dropped ceiling panels. It makes the kitchen ceiling so low and a good contractor has taken the dropped ceiling down, installed new light fixture, and some he built a soffit over the top of cabinet. Of course, painting was involved. I’m not sure if he replaced the ceiling wallboard or just painted it. I’m going to get him to give us an estimate. What he has done, adds height as well as brightness to the kitchen. What an improvement!
YoungHouseLove says
Oh yes, that could have worked too! It’s just a corner cabinet (no lazy susan) so there are a few ways to go with corner cabinets. We just added hardware to the lazy susan one that worked with that one and hardware that helped the doors in the other corner cabinet work the most intuitively. Sounds like your kitchen makeover has already turned out amazing and maybe since you don’t think your cabinets are in the best shape over time your hubby will agree to painting them! Good luck with everything!
xo,
s
Betty819 says
What a great gadget that template is..where in the store did you find that? Cabinet hardware? I could see it being useful with other projects.
YoungHouseLove says
Home Depot!
-John
Liz says
kitchen looks great! quick question: you have probably answered this one a thousand times, but, to be sure – we sanded, primed, and painted our kitchen cabinets white. unfortunately, the paint was not the right finish. would you recommend re-priming and repainting with b Moore paint? or could we just paint over with b Moore paint? thanks so much!
YoungHouseLove says
I would sand it all, degloss, prime, and paint with the same primer and paint we used! We love it so we wouldn’t use anything else!
xo,
s
Green DIY Guy says
Fantastic tutorial! Many thanks for this.
My wife and I are getting ready to paint our dated wooden cabinets and we used ya’lls article to get the list of required primers and paints etc.
I managed to order the Zinsser primer, brushes, rollers and some other minor stuff through Amazon.com!
Thanks again,
Martin & Katie
YoungHouseLove says
I just had to comment and say how funny that you guys are a “Martin & Katie.” My sister’s name is Katie and she’s married to a Martin!
-John
Andrea says
I am getting ready to redo my kitchen including painting my cabinets white and stumbled upon your blog. It’s the best info I’ve found! I am going to follow your lead to the T. I especially appreciate the bit on the hinges–I was considering a paint job on the hinges–my current ones are bronze and I would like brushed nickel. Oh, and your kitchen is BEAUTIFUL! Great job.
Aki Travis says
Your kitchen looks amazing! We want to paint our kitchen cabinets and wall too but we have a 5 month old baby so we aren’t sure if the paint will be harmful to our baby or not. Did you bring your baby to the kitchen after the paint was dry or did you wait until the smell was completely gone? Also, did you take her to the kitchen while you were still painting? Is it safe to do that? Thanks in advance!
YoungHouseLove says
It was low VOC paint, but not no VOC paint so my recommendation would be to wait for the paint to fully dry with fans and windows open before children are allowed in the room (which is good for them not touching it while it dries, too, haha).
xo
s
Stacy says
Where did you buy your Zinsser Smart Prime? My local Home Depot and Lowe’s don’t carry that formula.
YoungHouseLove says
We purchased ours at our local Benjamin Moore.
-John
Amanda says
Your cabinets look amazing, as does the completed kitchen! Congrats on finishing such a huge project.
Question for ya: I am using BM Advance to paint an old dresser. The brochure says to lightly sand in between coats with a fine fine fine grit. Did you guys do that? Your video suggests not, but wondering if you think it’s worth doing? Thanks!
YoungHouseLove says
We didn’t do that, but only because we apply super thin and even coats, so if you feel like your coat went on a little gloppy or drippy or has any areas you’d like to smooth out, it’s a great way to accomplish that!
xo,
s
Lauren says
We just started painting our old wooden cabinets white – they actually looked a lot like yours before. I am on day two, and the kitchen is a total wreck! It is so much work (we just finished sanding the frames and the doors and drawers have all been sanded and de-glossed), but we are excited to see how they turn out.
I just wanted to say thanks for the awesome tutorial, and that you guys are like my DIY gods :) You are so creative and your house(s) look amazing! I wish I had half as much motivation as you! Thanks again for the tutorial and the inspiration!
Lauren
YoungHouseLove says
Aw thanks so much Lauren!
xo,
s
Amanda says
Thanks, Sherry. I applied the first coat today and your video was SUPER helpful. The foam roller was key to getting the thin, even coat. I’ll see how it looks dried tomorrow. Thanks for giving such a detailed technique of how you did this, and for replying to my comment!
YoungHouseLove says
Sure thing! Good luck!
xo,
s
Coelle says
How well does cabinet paint that you can get from Lowes and Home Depot work that doesn’t require the primer, etc? I want to redo my cabinets in the place we are buying. The cabinets almost look exactly like yours.
Thanks! Coelle
YoungHouseLove says
I would worry about anything that doesn’t involve sanding and primer since that’s what adds up to long-term durability. The method we outlined in this post was the only one we trusted with our cabinets for the long haul (they’re holding up great, even when they get seriously slammed and banged and beat up!).
xo,
s
matt says
The link to the hardware is 404’ed. Can someone provide a link?
YoungHouseLove says
So sorry, it’s through myknobs.com and it’s made by Amerock. It’s the satin nickel finish. Hope it helps!
xo,
s
Kit Blair says
Wonderful site with great advice! We’re trying to make a decision on paint color for our new oak cabinets. Would like to keep them light without doing white. The general color scheme (walls, floor, etc) is very similar to the first kitchen on your original page (looks like a coffee with lots of cream in the picture). Since you keep such great records, can you tell us what cabinet color you used?
Thanks!
YoungHouseLove says
That was Brown Bag by Glidden. You might also want to check out Ashen Tan by Benjamin Moore (it’s the prettiest creamy light tan tone ever). Hope it helps!
xo,
s
Kit Blair says
Wow. Talk about instant gratification. I have my list and will pick up samples tomorrow. Thanks for the super fast response.
Kit
YoungHouseLove says
Good luck!
xo,
s
Laken says
Wow! That looks amazing!! We’re working on our kitchen too! Well, all of our house really but the kitchen needed it the most so that’s where we started!
Lisa says
Thanks for the recap. I really appreciated the update on your cabinets. I’m taking that plunge as we speak! Primer is on, hardware is ready to go. I just needed a little push to gear up for the paint! One quick question, whatever did you do with a microwave? I must have missed that detail and couldn’t find it in any photos I quickly searched out. I’m having the microwave dilemma myself. :)
YoungHouseLove says
Oh it’s hidden in the cabinet to the left of the sink. Here’s that post for ya: https://www.younghouselove.com/2011/12/goodbye-microwave-hello-microwave-cabinet/
xo,
s
Tami says
Quick question: would similar cabinet paint be the best to use for a high use dining table? Or would you recommend something else? You guys know your stuff so I’d love your insight!
YoungHouseLove says
Oh yes, I would definitely go with Advance. It’s awesome.
xo,
s
Patti says
Looks good. I will not have another white kitchen. I was constantly wiping down the cabinet doors everyday because you can see every bit of dirt and dust on the cabinets. It was a chore and I got to the point I hated cooking or doing anything in there.
YoungHouseLove says
Oh man that stinks! We had a white kitchen in our first house for nearly five years and never had any issues with the cabinets! I wonder if it’s a difference of how slick they are (maybe white textured cabinets hold dust and dirt more while it slides right off smoother ones?). So far we’ve had these white for the past 5+ months and they’re the same as the ones in our first house (no issues, thank goodness!).
xo,
s
Bella says
hi, good jobs guys…wish my husband could do that but he’s kind of not so handy at all. like a lot your kichen make-0ver…so bright and fresh.
YoungHouseLove says
Aw thanks Bella! We really think most people can do it! It’s sort of a long and tedious process but it’s not too complicated if you just go step by step!
xo,
s
Livvy says
Definitely going on Pinterest. Questions:
1. If time and money were not a consideration, would you paint the insides of your cabinets?
2. In your old house, you opted to replace the cabinets that you painted with new cabinets? Was that in any way related to your interest in having cabinets with white insides, or the potential resale value of your house?
3. Do you have any feedback from your network as to whether having two-tone cabinets affects the perception or value of one’s kitchen?
I’m doing to paint my oak kitchen white this year, but I’m hung-up on the 2-tone cabinet thing…
thanks!
YoungHouseLove says
1. I don’t think so, just because we don’t mind the two-tone look and for maintenance reasons it’s easier to keep the wood clean and not worry about dishes sticking or peeling off paint.
2. Oh no, we just completely redid the floor plan in the kitchen and couldn’t use the existing cabinets because we didn’t have more of them to make a u-shaped plan (they were also too shallow to fit our dinner dishes, haha).
3. It’s all personal preference- some folks might want wood inside since it won’t stick or peel while others might want the same color in the inside. On our new Kraft-maid cabinets in the first kitchen, all the drawers were actually wood inside- must be an industry standard thing!
xo,
s
Abbey says
Hello! I don’t *think* this was covered, but if it was, I apologize. I wanted to know how much paint (i.e. gallons) you needed for the cabinets. It is always so hard for me to estimate, and I believe I have a similar amount of cabinets. Thanks!
Abbey
YoungHouseLove says
Oh just one with lots leftover!
xo,
s
Peggy says
I sure wish I’d read this post more thoroughly a few weeks ago. I made a major mistake on my cabinets. I painted the oil-based polyurethane over my cream cabinets. It is now yellowing horribly! Any suggestions? I have primer and higher quality paint ready to go, but how should I prep to go over the polyurethane? Sanding? I also have the wallpaper beadboard on the front of the cabinets, so you can’t sand or steel wool that. HELP!! Love you guys!
YoungHouseLove says
I would sand it wherever you can and just prime and paint over it in places that you can’t sand. Good luck!
xo,
s
Peggy says
Oh thank you! I found some awesome primer at Sherwin-Williams that is the mother of all primers and it should work. Done with sanding and some priming, now it is time to hit the hay. Thanks for your response!
YoungHouseLove says
Sure thing, good luck!
xo,
s
EhubbsK says
Love that you have this tutorial! Sent over to my friend who was thinking about hiring the painting out – hopefully this convinces her that she can do it herself!
Rhapsody says
I’m thinking of painting my kitchen cabinets when I sell, but I’m not sure how to paint the interior of them — do I take them off the wall? Do cabinets come off/go on easily? Or can I paint them while they stay up?
YoungHouseLove says
They should come off the wall just by removing a few screws in the back and maybe sides. However, I would paint them in place if you’re able. It will make your task much easier, as rehanging cabinets can be a challenging job (it takes two people).
-John
Anna says
I keep re-reading this post for motivation to paint our kitchen cabinets… is everything still holding up well?
YoungHouseLove says
Yup, all is well!
xo,
s
Judy says
This kitchen looks great! We have a similar situation where we are thinking about being a bit “frugal”
and just painting our cabinets instead of buying new ones. The only difference is that the ones we have
now are already painted a cream color. So it might not even make sense that we paint them a different
color. You mentioned that you got new cabinets, did you get melamine cabinets? And where did you
purchase them?
YoungHouseLove says
We got “new” cabinets from a secondhand store called the Habitat For Humanity ReStore- so they were previously used (and one was even already painted) but we followed these steps and they all match and look brand new! Hope it helps!
xo,
s
Carol Frampton says
The link to your hardware, http://www.myknobs.com/hok53712g10.html, isn’t valid. Would it be possible for you to correct this?
thanks, Carol
YoungHouseLove says
So sorry, they no longer sell the same knobs we got, but they were by Amerock and were brushed nickel. Hope it helps!
xo,
s
Ellen Greeley says
We’ve been devouring your site, planning a little kitchen facelift. We’re just about ready to paint our cabinets and then realized you did your counters first. Is there a reason (order of operations)here? Would it matter if we painted cabinets first and then got counters a little later? Thanks!
YoungHouseLove says
We learned in our first kitchen that the cabinets going in scratched a few of the painted cabinets which then needed touch ups, so we opted to paint after since it was easy enough to tape off the counters.
xo,
s
remi says
love this post! thanks! my husband and I are about to tackle our very first house reno. and this helps immensely!! I apologize if you’ve already answered this, but I’ve read through as many comments as I can, and haven’t found an answer! I linked to this more recent post from your first cabinet painting post and in the first you said to use a wool or poly roller for painting, but in this one you used a foam….did you discover this was easier? better?
YoungHouseLove says
Yes small foam roller is our favorite! Nice and thin costs.
xo,
s
Kathy says
Why would you paint kitchen cabinets? Weren’t they all-wood? Isn’t wood better for resale?
YoungHouseLove says
It’s all personal preference! Many buyers want white painted cabs and many want wood- just like how some folks like a house with wood siding and others like brick!
xo,
s
Dane says
Love the cabinets! We are about to start this process as well… Quick question though. Did you paint the sides of the drawers? I see you left the inside of the cabinets unpainted, I but didn’t see any pics of the drawers… Thoughts?
Thanks!
YoungHouseLove says
We left them wood since the new Kraftmaid drawers that we bought in our first house (which were white on the outside) were wood on the inside (they really held up to a ton of banging that way!). Hope it helps!
xo,
s
Dane says
Sorry. Asked that question wrong. I was referring to the outside of the drawers…where the roller sits, which would be visible from the side when the drawer is pulled out.
Thanks for the quick reply!
YoungHouseLove says
Ohh, gotcha! We just did the drawer fronts (not the inside, or exterior sides) for a sort of two-tone wood effect. Oddly enough when the drawer is pulled out it looks great (maybe because the wood inside the drawer makes the wood outside of the sides make sense and look balanced?). Hope it helps!
xo,
s
Laura in Denver says
Thank you for such detailed instructions & encouragement. You gave me the courage to repaint an old oak medicine chest white (as a first step toward doing all the bathroom cabinets & maybe someday the kitchen). I love how you name products and go step by step.
YoungHouseLove says
So glad Laura!
xo,
s
Laura in Denver says
What finish did you use on the paint? The woman at my Benjamin Moore store recommended satin, but I’m wondering if I should have gone shinier. Then again, the glossier the finish, the less forgiving.
YoungHouseLove says
Yes, we did satin. Worked really well and wasn’t super shiny to see any flaws.
xo,
s
Matthew McGarity says
Great blog post — and it definitely inspires us. We are about to paint our cabinets white now! We will be sure to let you know how it turns out.
One question: you mentioned in the budget breakdown that you bought new hinges, but the post does not explain why — what was the reason for new hinges?
YoungHouseLove says
We just wanted a new finish (the old ones were brass and we went with brushed nickel hardware so we wanted hinges to match). Hope it helps!
xo,
s