Q: Is there any way you can do a basic room-painting tutorial? Y’all seem to get such good results in just a few hours, but most internet tutorials would have me believe I need to put in a whole weekend for good results. I’ve noticed y’all don’t cover the floors and don’t prime–I’d love to know what other steps you skip and which ones you think are crucial, and why. Do you remove things like outlet covers and curtain brackets, or paint around them? When painting a ceiling, do you remove the light fixture? I need the youngsters to walk me through it! -Charlotte
A: We’ve definitely gotten the question “how do you paint a room?” a bunch of times so here’s our method. This isn’t necessarily what will work best for everyone, but it’s how we tackle those quite regular room painting projects so we thought we’d share our tips and tricks in case they come in handy for anyone else out there.
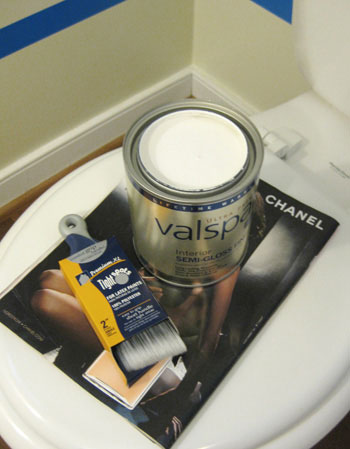
Tip #1: We like high quality rollers for smooth surfaces (for flat walls of course, if you have textured walls you should get the appropriate roller) and we only use brushes like the one mentioned here to cut in around windows, trim, ceilings, baseboard, and to paint corners that a roller can’t access (we don’t usually use painter’s tape when we tackle a room together since I love the control and the clean line of this paint brush while John is on roller duty). We also use short handled brushes like this to paint tight spots like behind a toilet.
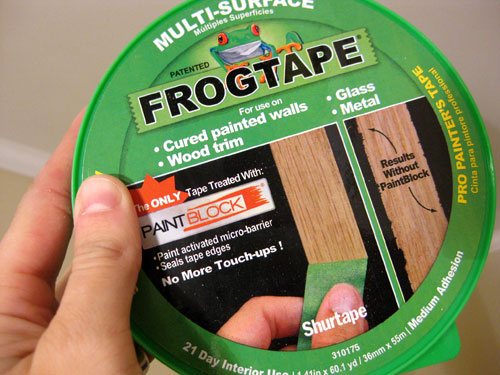
Tip #2: We never remove trim or baseboards to paint them or paint around them, but we do remove outlet covers and light switch covers most of the time (when we’re not being lazy) for the most professional result when it’s all said and done. We don’t remove curtain brackets (for fear of having a looser fit when we rehang them in the same hole) but we do remove the curtain panels and carefully paint around the area where the bracket meets the wall with our beloved short handled brush (anyone who is nervous about maintaining a steady hand can always tape off the brackets with blue tape or even Frog Tape (which we occasionally whip out, read more about it here). The same is true with light fixtures (we remove the pendant or shade if we can and then very carefully paint around the canopy or base for a seamless look).
Tip #3: We don’t use primer unless the wall is super saturated or dark (ex: chocolate or ruby red) or if we’re dealing with something that could bleed through like wood paneling (which may have been oiled, stained, etc- in which case you need to seal it with an oil-based primer before painting). Here’s a tutorial all about painting wood paneling– and while we’re at it, here’s one for painting brick. But if we’re painting a not-too-bright-or-saturated wall, we always just apply two thin and even coats (sometimes three in very rare cases) of latex paint. As for what brands we like, Behr and Benjamin Moore have been our favorites, but we often have colors by Valspar or Glidden color matched to those bases since we like a number of different paint chips from nearly every brand out there. We also loved using Mythic’s No-VOC paint for the nursery, Olympic’s No-VOC paint in the bathroom, and Home Depot’s Freshaire paint (in semi-gloss off the shelf white) for all of the trim and doors in our house.
Tip #4: Now for our highly controversial floor coverage info. We have wood floors and have been painting so long that we don’t use drop cloths, but you definitely should consider using something like a plastic tarp from your home improvement store or large pieces of cardboard to protect your floors if you’re not quite as experienced in the we-paint-something-every-weekend realm that we live in (especially if your floors are carpeted). We’ve found that after years of painting and repainting (see what we mean here) we don’t drip very often at all. And when we do, since our floors are wood and they’re sealed, we can just wipe the drip up as long as we don’t wait too long until it dries (in that case a drip can still be “popped” off but it’s a bit more time intensive).
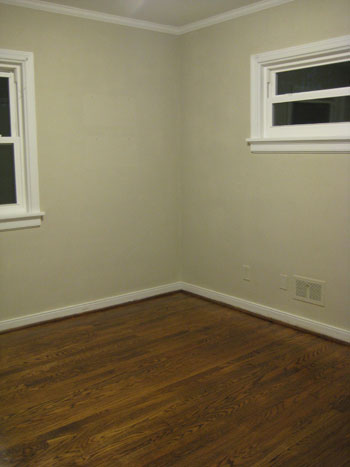
So in summary, our room painting process goes a little something like this:
Step 1: We bring home a bunch of swatches and tape them up to compare them and observe them in a variety of lighting situations over the course of a few days. After picking a winner we head to the home improvement store to get paint (usually a gallon of flat or satin stuff- read more about finishes here).
Step 2: Before hopping in the car we also take time to check if we have at least one roller (we like Purdy ones for flat surfaces), a clean 2″ angled brush (again we like Purdy brand stuff or the Sherwin Williams one we linked to above for trim painting), and a clean paint tray.
Step 3: We return home with our paint (and a roller or tray if we need one) and clear the room (removing furniture, rugs, art on the walls, curtains, etc).
Step 4: We lay out a large black garbage bag on the floor- the giant kind for bagging leaves, not the small kitchen gallon ones. This is the only floor protection that we implement (it’s where we lay the paint tray and our can of paint along with the lid and a few rags for wiping up floor drips). Alternatively, sometimes we use a large piece of cardboard that we have lying around (which is also where we place the paint tray, paint can, etc).
Step 5: We make sure the paint is stirred or shaken (it usually is if we get started right after retuning from the store where they’ve mixed the paint for us) and pour it into the paint tray that we’ve placed in a central location in the room on our black garbage bag or piece of cardboard.
Quick tip: Taking a nail and hammering a few holes around the lip of the lid of the paint can will keep excess paint from pooling in the lip and allow it to drip back down into the can (which results in easier clean-up and allows you to use every last drop of paint if you need to).
Step 6: John starts rolling and I cut in with my short handled 2″ angled brush. I carefully paint around trim, baseboards, ceiling moldings, and corners while John applies thin and even coats of paint with his roller (creating large W shapes on the wall as he goes to keep things looking seamless and smooth).
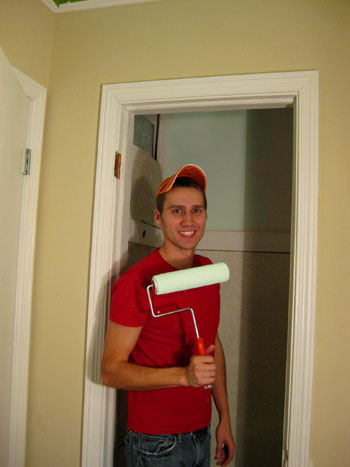
Step 7: We both finish our respective jobs at around the same time. By then the areas that we started on are usually dry and we can begin on coat number two (our plaster walls almost always call for two coats, no matter what brand of paint we use). If we worry that things are still a bit tackly (if it’s an especially humid day for example) we wait about 30-45 minutes and then go in for the second coat.
Quick tip: The key to banging out a quick paint job is to apply the second coat while you still have some steam so it’s all said and done within a few hours (and you don’t need to wash or replace your roller or your brush since there’s not a lot of lag time between coats).
Step 8: After coat number two (if we’re convinced we have full coverage, which we almost always do) we immediately wash our brushes and rollers and clean up the room. This helps keep our equipment in good shape (no ruined brushes or paint-filled trays to greet you the next morning). Plus it really allows you to relax instead of dreading the clean-up. Just get ‘er done. You’re in the home stretch!
Step 9: As for clean up, when we’re working with latex paint we just need water to clean our brushes and rollers (some people like to wash and reuse them while others toss them every time). We buy the recycled biodegradable paint trays for under a buck, so we just pour the remaining paint back into the paint can and toss those in the trash.
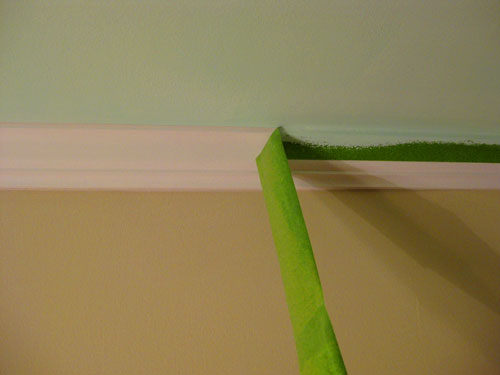
Quick tip: If you’ve taped off anything in your room with blue painters tape or Frog Tape, we recommend removing the tape as soon as you’re done with your paint job. Seriously, rip that stuff off the second you put down your brush (before the paint dries onto the tape which results in a less clean line than you’ll get if you peel it when it’s still wet).
Step 10: Then we just load in the room with the furniture and accessories that we’ve cleared out. It usually takes us around 2-3 hours from start to finish (starting from the point at which we return with the paint and supplies that we need).
And fret not if you don’t have a painting partner in crime, we’ve both done rooms all by ourselves in 4 hours or so. You can do it! So that’s the method that works for us. Anyone else out there care to share tips for people who might be virgin painters? Spill the wall painting beans.
Psst- Have other painting questions? Check out the painting section of our Projects page, which has a ton of extra info and ideas for ya.

ALittleBite says
I love, love, love the tip about making little holes on the pain can lip, it always gets so dirty and it doesn’t close properly anymore!
Cait @ Hernando House says
Thanks for the great tips (as always), guys! We won’t be painting rooms anytime soon, but it’s always nice to read how others tackle projects to get ideas!
Rachael says
Great tutorial! I paint by myself most of the time and have been known to change the colors of rooms while my hubby is at work LOL. I made up a room painting tutorial more geared towards solo painting if it is helpful:
http://lovelycraftyhome.wordpress.com/2010/08/02/tutorial-how-to-paint-a-wall/
Shannon says
So you guys don’t wait the recommended drying time for recoating from the can?! Brilliant, but do you see any drawbacks to that (longer dry time, more dents, etc.). That waiting time is what makes our projects take so long!
Also, how long do you wait before hanging stuff on the walls after painting?
Thanks again for the great info!
YoungHouseLove says
We haven’t experienced any drawbacks from waiting about 15-45 minutes between coats (since they’re thin and even the walls are totally dry to the touch by the time we restart). As for hanging things we usually give it 24 hours and we’re good to go. Hope it helps!
xo,
s
Amanda @ Our Humble A{Bowe}d says
Great tips! We paint often, too and we do most of the same things. Here’s a post about how we choose paint colors:
http://ourhumbleabowed.wordpress.com/2010/08/06/choosing-paint-colors/
Andrea @ Simple Organized Living says
Great post…I love your “Quick Tips”. I almost always paint solo; it’s not that bad and it really doesn’t take very long.
Also, I pour my unused paint into large 1/2 gallon plastic sour cream containers I get from a local restaurant. I peal the color label off the paint can and stick it to the sour cream container. Then, I cover the container with plastic wrap and put the lid on. This prevents any rusty build-up b/c there isn’t any metal. I’ve found that my paint stays better longer with this method. (and restaurants are usually pretty good about giving me containers if I ask!)
It’s simple and it helps keep my paint more organized–which I LOVE!!
Jessica @ How Sweet says
Thanks for the great tips guys!
Kim says
One important thing is to prime over any holes they have been filled or else the spackled spot will usually look different than the surrounding wall when all is said and done.
Julie says
The first time I painted my daughter’s room it was green with a pink stripe. I used a great tip that our painter had taught me years ago (because it seems that when I use painters tape it always bleeds). I painted the whole room green, taped, and then went over the tape lines again with green. That way, if anything bled through it was the right color. After it dried I painted the pink. When I pulled that tape off those lines were the cleanest you could ever remember – perfect for a type A personality like mine! Everyone asked how we got them so perfect.
Lindsay says
This is great – my husband is convinced that every time you paint a wall…you have to prime it. Now I can convince him that we can just paint away!! We have a very neutral house and are in the process of picking wall colors for the master bedroom (grey blue), family room (saturated grey/beige) and downstairs 1/2 bath / laundry room (some kind of green…maybe like your 1/2 bath!). Thank you :)
Christine B says
My hubby and I use Behr Ultra paint because it has primer and paint in one and it is AMAZING!
Virginia says
Great timing on this tutorial! I’m painting my Kitchen, Dining room, living room ad hallay next week!
Sassy says
I am so envious of your flat walls! Our textured walls mean multiple coats — I’ve been reduced to poking paint with a tiny artist’s brush into the dots of the old colour that pop up. If I could change only one thing about my house, it would be the textured walls. And I’ve tried every roller recommended for textured walls. But I love seeing the changes you two make so regularly.
Rayan - The Design Confidential says
This is almost identical to my painting routine. My only addition to this is that I also set my paint can in a plastic bin of some sort while it’s sitting on the plastic bag or drop cloth. I feel like it gives me a bit more protection for refilling a paint tray or moving it if necessary. It allows me to ‘reclaim’ any drips and excess that runs down the side between refills that I can’t catch with my brush. I like that extra level of containment. It also helps for carrying the paint can out of the room and to wherever it needs to then go when you are finished.
1956okie says
Great tips, guys! We also have wood floors and some lineoleum (ugh–a project for another day!), and I’ve had great luck taking off paint spots & splatters with a Mr. Clean Magic Eraser. It even took off some years-old paint spots that we’d given up on removing! You may have to scrub a bit, but it’s worked great for us and won’t scratch at all. You can even use it to scrub paint off your hands without rubbing your skin raw. I used one along with some Goo Gone to take oil-based paint off my hands with no problem…
CDobson says
I’m so glad I randomly decided to read this – even though it’s almost a year old! I immediately went to get my magic eraser and got off age-old paint from the linoleum in our basement half bath! I really can’t thank you enough!!!
Allyn says
I’ll second that tip about your favorite brush – I read that original post long ago, and have now used that brush when painting every room in our new house! I LOVE that brush!! It’s addictive. BEST TIP EVER!!
Christine B says
A tip for anyone who does like waiting the recommended wait time. . . refrigerate your paint trays, rollers and brushes. Keeping then in the fridge keeps the paint from drying and ready to go when you are ready for coat two.
Jen says
A tip for anyone who waits a day before painting the second coat — rather than trying to wash your roller or use a new one, just put the used roller in a large ziplock bag. Then you can use it again the next day, AND you don’t waste any of that paint, either!
Virginia says
Sherry,
I saw this the other day at my local Orange store and thought of you two. It’s got replaceable bristles, I’m just wondering if you’ve tried I yet?
http://www.homedepot.ca/webapp/wcs/stores/servlet/CatalogSearchResultView?D=978734&Ntt=978734&catalogId=10051&langId=-15&storeId=10051&Dx=mode+matchallpartial&Ntx=mode+matchall&N=0&Ntk=P_PartNumber
YoungHouseLove says
Hey Virginia,
Thanks for the link! We haven’t tried it yet but we’ll have to check it out!
xo,
s
Mike @HA says
Great tips! We also start the second coat as soon as the first is done. Totally defies the instructions but we’ve we no problems. I go back and forth on whether to tape. If it’s done right it gives a great straight line, but more often than not it gets little zig zags from where paint seeped under and looks worse than if I had done it by hand. We’ve painted 6 rooms in the last 4 months. Now that we got our living room furniture we can finish the last two! The only thing I’d add to your list is spackling and sanding any nail holes before you paint.
Amber says
I can tell by the relatively low number of comments so far that I’m one of the few working on Labor Day! I painted my laundry room yesterday and cut in along the ceiling for the first time… couldn’t bring myself to use so much painter’s tape. Don’t trust myself along the baseboards and window frames though!
mary-beth says
The crown molding in the house we bought has bumpy spots where the molding meets the textured walls, making it very hard to get a clean line when we paint the walls. Do you have any suggestions for getting a straight edge, even though the walls are moderately textured? Thanks for any suggestions!
YoungHouseLove says
Hey Mary-Beth,
Perhaps taping things off and then squishing a line of white paintable caulk against the tape and letting that dry and then painting (with the tape still in place) will give you a clean line? Good luck!
xo,
s
Laura says
I just came across this tutorial for painting textured walls on the Frog Tape website. I’m going to try it out this weekend!
http://www.frogtape.com/FrogTape%20How-To/How%20To%20Tape%20on%20Textures.aspx
YoungHouseLove says
Love that tip!
xo,
s
Devon says
Great tutorial! I do have one tip… If you don’t have time to do a second coat right away or if you are afraid paint will dry on your brush or roller just wrap them in a plastic grocery bag. This keeps them from drying out for DAYS! (Yes- I hate to admit leaving them for days…ok, weeks really. But it happens.) I always clean my brushes but toss my rollers when I’m done. It’s not worth the effort to clean those. Hope this helps- happy painting!
Handy Man, Crafty Woman says
Great tutorial. We’ve been painting for so long too, that we don’t cover our wood floors, either.
A tip that we’ve used is this: in between coats, wrap your roller in a plastic or large ziploc bag. It helps to keep the paint wet on the roller while you wait a bit for your paint to dry so you can do the next coat. Call us lazy, but it works for us!
AlissaH says
Awesome tips! We’ve quickly become painting pros as my husband and I have painted 10 rooms in our new house since May. The tip about the small angled brush has been invaluable and has saved us hours and hours of taping. I’m the cutting master and my husband rolls, and together we’re a pretty efficient team. Something that I ALWAYS have nearby when I’m doing the detail work around baseboards, ceilings, corners, etc., is a wet rag (I use an old washcloth). If I slip up and get some paint where it isn’t supposed to be, a quick swipe of the wet rag gets it off.
OwningSingle says
I love all the tips. If you spill paint or get some on your baseboards Mr. Clean wipes work wonders in wiping it off. Also, if you need to take a break or you don’t clean your brushes and rollers right away, wrap them in plastic or sit them in a plastic bag and this will keep them from getting hard until you clean them. You can do this with paint in the tray too if you need to take a break.
Charlotte says
Thanks so much for answering my question! I’m feeling much more confident now about painting my living room, and I’m happy to hear that my instinct to leave the curtain rods in place was right. I’m going to stop procrastinating and get this project crossed off my list!
YoungHouseLove says
You’re welcome! It seems like others are enjoying all the awesome tips everyone is sharing and we are too!
xo,
s
Lily says
I wish my hand was steady enough not to tape, but alas, I shake like crazy anytime I get a paint brush in my hand. And I have a cloth drop cloth that is 3 feet by 12 feet and I just drag it around to the side of the room I’m painting. Any drips hit that. It’s no trouble to throw that down and it keeps the floors tidy.
melanie says
i loooove your blog – although i just found it. your house is so beautiful, amazing work you have done.
my biggest dream is to have one too… and you’re giving me big inspirations.
keep it up.
blessings,
melanie
Wellies says
frog tape is such a lifesaver!
we just started painting my baby girls nursery [due in november!]
teenie xo
{esty shop} wellies.etsy.com
{blog} loveandwells.blogspot.com
Kelly says
Have you run into any issues with paint chipping off when not using primer? I decided not to prime when we first moved into our house because I was painting over light colored walls. Right away my new paint started chipping off everywhere. Now I’m in the process of repainting with primer and it’s much better!
YoungHouseLove says
Nope, no issues at all with paint chipping off! That must have been your foundation (plaster walls or skim coated walls) degrading, or the possibility that you painted latex paint over oil-based paint, which can peel or flake off. In that case, primer would really make a difference, which we’re glad you’ve discovered. Hope it helps!
xo,
s
Jenn C. says
Have y’all tried Pratt & Lambert paint? It’s what we use. It’s probably not rated “low VOC”, but the fumes are quite minimal.
YoungHouseLove says
We haven’t tried it but we hear that it’s really great quality stuff! Glad to hear that you like it!
xo,
s
Alisha says
My husband and I just painted our room, kitchen and dining, and front hall bathroom again this weekend. We have painted so much that we barely use drop cloths unless there is an odd angle ( such as our vaulted ceiling over the stove that had to be painted) we usually can control it pretty well. One thing we did differently though this time was did the edging first. It actually saved sooooo much time especially when you finally go to roll you don’t worry about getting too close and accidentally slipping into the ceiling or other wall that you may want to leave a certain color. Just a little tip! Also valspar rocks, I love their signature paint. It covered brown and red with one coat!
Monika says
Hey guys,
Thanks for the tips, I especially liked the one about the nail holes in the rim of the paint can, that’s where I find I get the biggest mess.
I also second the tip about wrapping brushes and rollers in plastic while you wait for the paint to dry between coats.
I was wondering if you have any tips for painting ceilings?
When you first moved into your house and started painting did you clean walls you hadn’t painted before with TSP or another cleaner? Did you prime the walls before you painted them for the first time?
Do you use kitchen/bath paint in areas of high humidity or heat or have you found it unnecessary?
Have a good Labour Day!
YoungHouseLove says
Hey Monika,
As for painting ceilings, we just use a roller extension rod to ease the strain on our back and are sure to wipe up drips as we go (since ceilings can cause floor drips to occur a bit more frequently). We just dusted the walls with a microfiber cloth before painting when we moved in (no priming or TSP) and we had no problems. As for the kitchen and bathroom, we just use semi-gloss paint, but kitchen/bath paint also does the trick!
xo,
s
Rob O. says
I just recently tried – and sang praises for Frog Tape. Like you, Dede & I have painted so much that we don’t usually bother taping or draping dropcloths on the floor. We just keep a damped “MEDIC!” rag handy for ocassional dribbles or goofs and clean them up lightning quick. But our new house has loads of fancy baseboard and gorgeous crown molding that’s much trickier to paint up against than a flat ceiling. The Frog Tape has worked wonders in some of those areas and in the kitchen around the cabinets.
I’ve learned along the way that it’s well worth investing in a couple of quality brushes and that a painter’s comb is worth its weight in gold for cleaning those brushes thoroughly and quickly.
Laura (Blogging Over Thyme) says
Thank you for taking the time to write this post! This is exactly what I need in order to tackle a paint project this fall.
Lynn says
TIP:: Forgive me if this was already mentioned, but if you HAVE to leave the paint and brushes over night (like you didnt have time to finish the job and desperately need to stop painting, cover the WHOLE tray with a trash bag and tuck the open end under. (we put out paint brushes in large zip lock baggies).It keeps everything good as new over night. We did this every night in differnt rooms after we moved into our new house…never had a problem. There was jut no way we could clean up completely every night knowing we would be doing the same this again in the AM. Hope this helps!
ashley says
I’m always a solo painter :( In fact I just painted the biggest room in our house this weekend for the second time in less than a year and a half.
If you paint solo I suggest cutting in the trim and windows first by hand (If you think that you can’t do it by hand, try! It’s so much better than messing with tape). After cutting in (two coats) I do two coats on the walls which is easy compared to the cutting in.
I used to do one wall at a time, cut in then roll the walls, but then the paint starts to dry in the roller pan or small container for the trim. When you go to use it you get semi dry paint globs on your roller or brush.
I tried a 2 inch angled brush this weekend and hated it. I’m sticking with my 1.5 inch angled Purdy brush for trim :)
Rebecca (Craving Simplicity) says
This is really helpful! Thanks!
Struggler says
4 hours for a solo painter? I’m off to slit my wrists.
I just spent 3.5 days painting a pretty small room.
Day 1: prep work (removing switches etc, washing down the walls), 2 coats on the ceiling, trip to Home Depot for paint.
Day 2: edging (1.5 hours), rollering (2 hours at least)
Day 3: ditto for second coat, second trip to Home Depot as was teeny bit short on paint
Day 4: painting the wooden trim, looking for bits on the walls I’d missed, repairing the bits that had leaked under the tape.
Honestly, you guys, I’m pleased for you, but I could just crawl into a corner and die right now.
YoungHouseLove says
Hey Struggler,
We’ve totally encountered home improvement projects that take waaaaay more time than they should. Sometimes things just go awry (and you’re a teensy bit short on paint and find yourself making 500 trips to Home Depot). Trust us, we’ve been there. But fear not- you’ll get so much better with practice! Seriously you’ll get faster each time you tackle something!
xo,
s
Kelli says
You did a lot of prep.( as you should have) As they say, “It’s not the painting…it’s the prep.”
Give yourself some credit for doing it. I get paid very well for doing this job. ( on a crew of two or more) You did it yourself and saved yourself money! So what how long it took?
Actually a non-pro doing all of the prep AND the ceiling in a day is pretty good!
Belle says
I have a GI-NORMOUS living area that takes 6 hours for one coat (and I’m a reasonably fast painter!) plus extra for cutting in.
So my tip is: If you don’t think you can do the room in one day, decide EXACTLY the space you’re doing (ie 2 walls) and do those two walls. That way you stop at the end of the second wall and still have the energy to clean up; rather than hating things and fgeeling like you’ve let yourself down for not finishing all four walls. Set a goal and work to it – if you don’t know where you’re going, you won’t know when you get there!
Rob O. says
Another coupla tips: We religiously use one of those little plastic shielf thingies to keep paint from getting into the rim of the can. The key trick is to make sure to clip this onto the -inside- of the can opening (as shown on the mfr’s website) rather than the outside:
http://www.flexiproducts.com/
And we cover our paint tray with plastic if we’re going to stop painting for even a couple of minutes. It keeps your paint fresher and helps prevent paint from setting up in your rollers and/or brushes.
We have about 15 so new pre-primed, 6-panel interior doors that need to be painted. I’ve been really, really tempted to try one of those Wagner sprayers and they’re well-rated by Family Handyman magazine, but can’t convince myself that the time and mess savings will be worth it after the cleanup. I’d love to hear some real world feedback from anyone who’s had any experience with these electric sprayers:
http://www.wagnerspraytech.com/portal/wagner_controlspray_double_duty_spray,303685,747.html
Halley (Blunder Construction) says
I’ve seen so many commercials where people seem to spend days upon days laboring over painting a single room. They all could really use this article!
peggy says
PAINT ME.
Debkb says
To Rob O.
I have an electric sprayer though not the one you linked to I will sing it’s praises to anybody that will listen. If you have that many doors to paint I would highly recommend getting one even if you never use it again. I’ve brushed/rolled six panel doors and no matter how fast you paint you can never get from interior panels to side rails and stiles without lap marks. Ask me how I know. I’ve even painted the panels one day and done the rest the next day and still wasn’t happy.
Cleaning the sprayer isn’t any worse than brushes, rollers and trays.
I’ve used mine to paint things that would take hours and hours with rollers/brushes and been done and cleaned up in probably 1/4 the time!
Erin says
I have textured walls in my house. I don’t see too many tips on painting textured walls but here’s what I’ve learned:
1) You must use a 3/8″ nap roller to get the best results
2) To get a clean line between the ceiling and the wall you must seal the tape line with painters caulk or glaze otherwise the paint seeps underneath the tape and it’s very messy looking.
Laura says
Excellent post! Something so seemingly simple like painting a room can seem really daunting at times. We are about to tackle painting our home and getting rid of our dreadful builder beige. Having a step by step guide makes it seem a little less scary. :)
bfish says
There are a lot of great tricks here. Like others when not finished for the night, I wrap up paint brush and roller. I refrigerate them, after wrapping the brush’s bristles in a damp paper towel (after painting it “dry”). I pour out everything left in the roller tray back into the can and clean out the remains with the brush and wash the tray, rather than trying to cover up and save the paint in it til next day.
To the poster who was having problems with paint not sticking, sometimes in a pre-owned home you’re not as fortunate as John and Sherry to get clean walls. That’s where the time-consuming part comes in. You need to thoroughly wash the walls with TSP solution and let them dry before painting. This is especially important if the room has been used by smokers, house had/has oil heat, or fireplace was in use in the room.
Now if you really want to make a production out a painting project, buy an old house with wallpaper (pre-removable vinyl type), especially if there are multiple layers and/or it’s been painted over. Removing wallpaper, washing off the glue, spot sanding and repairing walls is a beast of a job! In this situation, I would use primer before applying color because you have bare plaster. Any job that involves unfinished sheetrock (say you’ve relocated a door opening) must be primed before painting too.
Re: when to apply second coat — I agree that by the time you’ve painted the whole thing the place you started is dry enough to go over again. This advice is no good, however, for some other paint jobs such as floors. A painter we used painted successive coats in a day on our front porch floor and it’s a disaster. Almost all of the paint is wrinkled and is coming off in many places.
Devon says
Paint me!
Zoe Feast says
Great post, while it is ideal to get everything painted in one go this is not always possible. Instead of cleaning your brushes and rollers wrap them in plastic wrap until the next time you have time to paint. This stops them drying out and they are good for your next painting session.
I have just moved into a new house and am currently painting a huge basement that has dark wood paneling (was there ever a time that stuff looked good??!) It is taking me a lot longer than I would like … I have been at the project on and off for a week now. I wrap my brushes and rollers each time and they are still going strong.