Happy New Year!!! (that sentiment will make sense in a little while – hold tight)
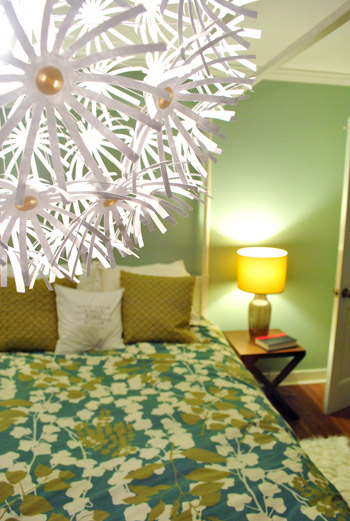
The time had come to bid adieu to the fan in our bedroom so we could introduce a light fixture with a bit more interest.
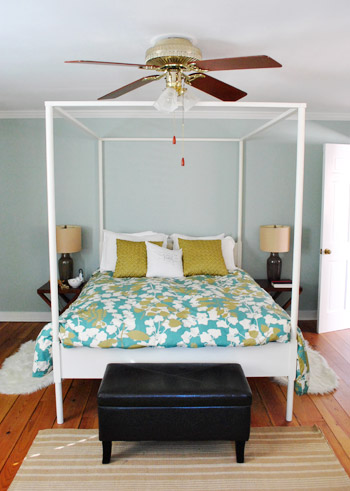
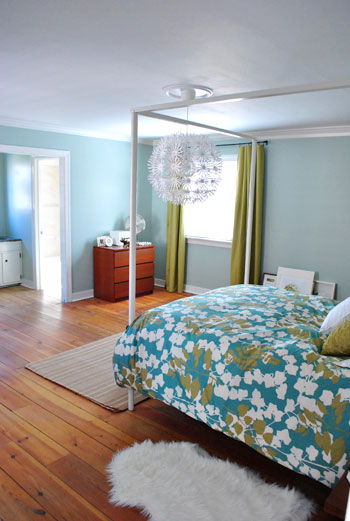
Hold on fan lovers. Put the pitchforks (or fan blades?) down and let me explain. We also removed the ceiling fan in our first home’s bedroom and picked up a high-powered Hunter table fan that did the trick, which we plan to use regularly in the warmer months here as well. It’s not that we’re anti fan – my wife likes to make the beyond corny joke that we’re “fan fans” – but we just like them to be well placed so form and function collide into a big beautiful fan-tastic situation. Like the fan in our sunroom (and the one in our last house’s sunroom) which we’d never dream of removing. But when it came to the bedroom the our big old ceiling fan certainly wasn’t playing nice with Ed the Bed:
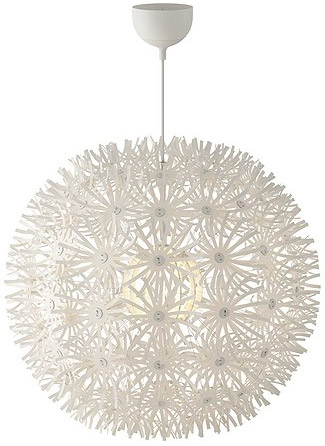
As for its replacement, on a recent trip to Ikea we picked up this guy: the Maskros pendant lamp (it comes in two sizes, but the bigger one would have practically been Sherry-sized, so we went for the smaller one that’s still 22 inches in diameter). It felt like a good “statement piece” for the bedroom (and only ran us 50 beans) so we were psyched that we finally pulled the trigger and made it ours after a few months of pining. We realize that this is one of those polarizing purchases, but it makes us smile like crazy so we said yes to something fun.
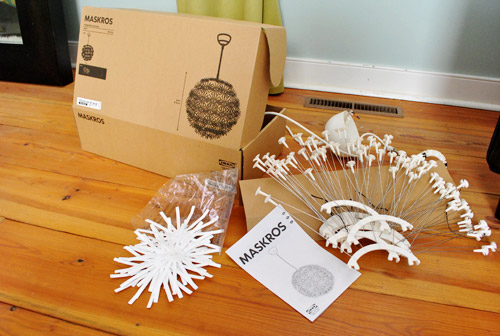
And although it was quite the statement piece when hanging in Ikea, when it arrived home with us, the only statement it was making was “put me together.”
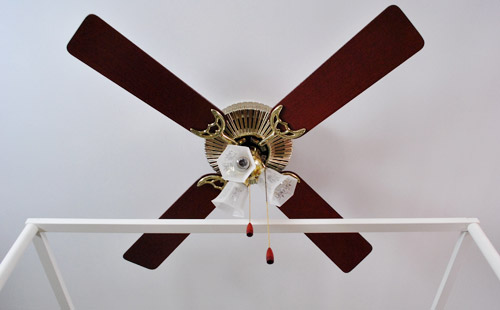
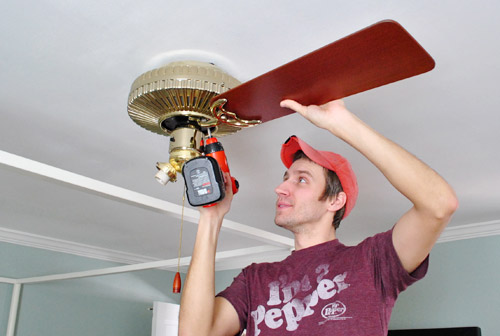
But first the ol’ fan had to come down. So with the electricity to the entire house turned off (we’re safety freaks like that) I went to work disassembling it – a process that I’m pretty well versed at in at this point in my life. Though I have only recently discovered that it’s much easier to remove all of the blades first (so you don’t end up whacking yourself in the head while trying to disconnect the rest of it from the fixture box).
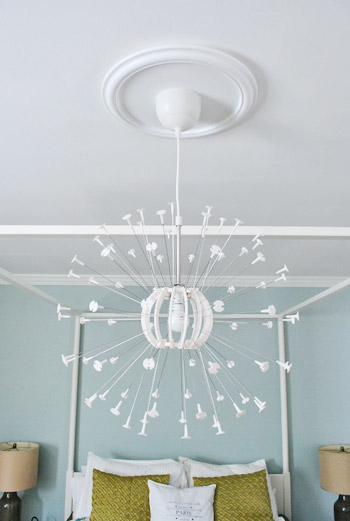
Unfortunately, removing the fan revealed some less than perfect ceiling behind it. Unfinished paint and what looked like a square patch panel that wasn’t sitting flush with the rest of the ceiling. Bummer.
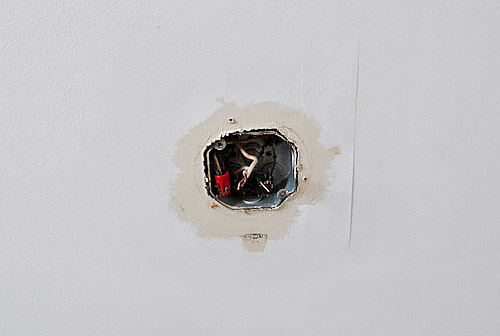
So I decided to borrow a solution from Clara’s damaged ceiling dilemma and darted out to Home Depot to buy yet another ceiling medallion for $19. You can read more about the super-easy ceiling medallion installation process in this post.
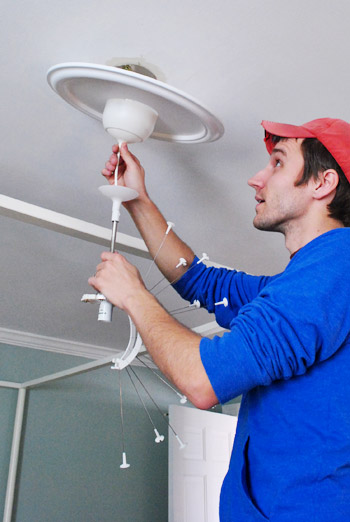
Technically you’re not supposed to attach any of the “spokes” to the fixture until after it’s secured to the ceiling. But since we needed to strategically hang it low enough to sit under Ed’s top rail, but high enough to not look ridiculous, we used a couple of attached spokes to approximate its finished size and find the perfect hanging height.
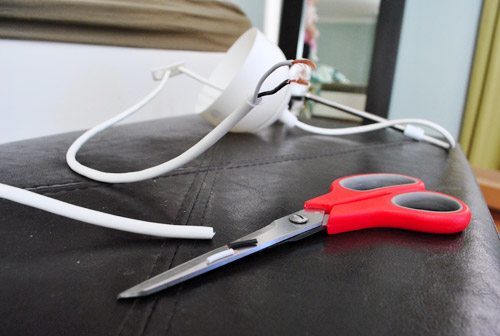
Oh and Ikea suggests just coiling the extra wire inside of the cup at the top of the fixture, but I opted to cut the wire closer to our desired length by taking some scissors to the cord and then stripping the ends of the now-shortened wires.
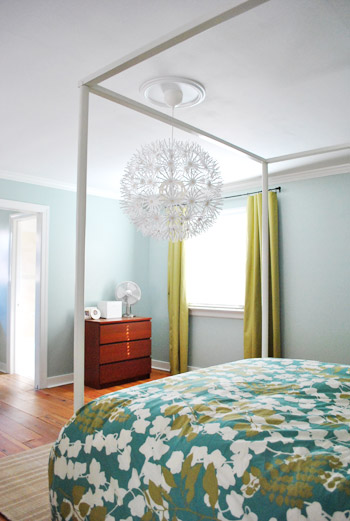
So here it is completely hooked up with all of the spokes attached. We realized at this point that we were glad we used the ceiling medallion because it made the fixture look a bit more substantial and balanced, instead of hanging a giant ball from a little nub in the middle of the ceiling. Plus, if we ever paint the ceiling it’ll add even more detail and polish.
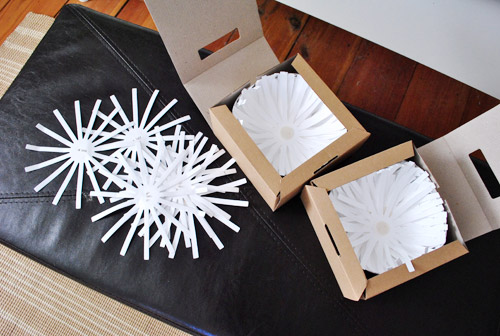
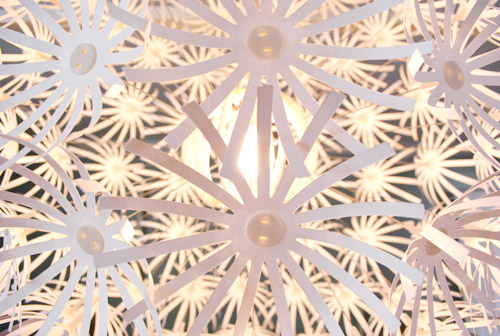
Of course we still had to attached the 82 (yep, 82) paper “flowers” that came in the set. They really are just paper asterisk-thingies that are pre-cut and pre-hole-punched to snap into place. So theoretically you could color them or replace them entirely with your own desired shape if you wanted to – and had the patience to make 82 of them. We briefly debated “going rogue” and spraying the back of them a color, but we liked the clean white look (crazy shape and size + classic color = love for us sometimes). Oh and you can also see how Ikea packaged them in small boxes to help curl the edges outward in this pic below:
Here’s the light with the first few rows of flowers attached, starting to look more like what we saw in the showroom…

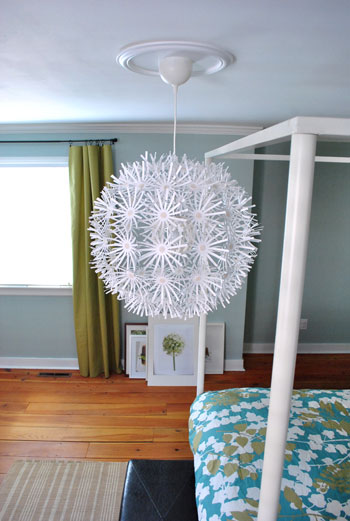
After about 10 minutes we had all 82 attached and were left with this. Ta-dah! We were more than a little relieved that it didn’t take five hundred years to assemble (which was kind of the fear after we opened the box).
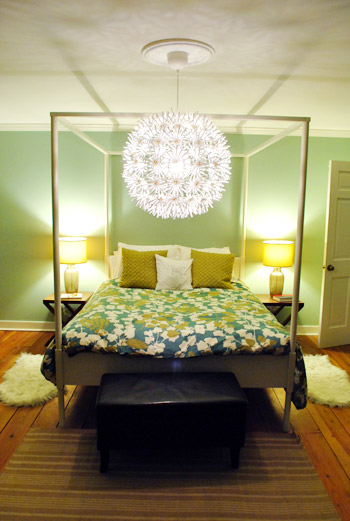
We’ll admit that at first it felt a bit bigger than we expected (it looked a lot smaller in the giant warehouse that is Ikea when we first laid eyes on it), but once we add things like a larger 8 x 10 rug under Ed (instead of three smaller they’re-there-because-we-have-them rugs) and some art on the walls, there will be more scale slash balance going on. And even without future items like a big cushy rug, it only took a few hours for it to totally grow on us. As in every time we walk into the room we grin. And about 50% of the time we actually high five. It’s just so much fun. And if you can’t have a little fun in the privacy of your own bedroom, where can you have it? Wait, that came out wrong.
It’s definitely the playful wow kind of “statement piece” that we were looking for. And although from the angle above it looks like it’s snuggled right up in Ed’s business, you can see from the pic above that they aren’t actually touching at all. And even though it hangs low in the room (the bulb sits just above my eye level), we love that we can get away with that because it’s an area that we’ll never walk through (because of Ed and the bench at his footboard). Take that 8 foot ceilings! We defy you.

As much as we love how crisp and soft it looks during the daylight, it looks like our own little Times Square New Year’s Eve ball at night. Sherry loves to walk into the room at night and say “3… 2… 1” and flick on the light while squealing “Happy New Year!”
It only accepts a 40 watt bulb, so it’s definitely not something that’ll flood your room with light, but for us it’s the perfect addition to the soft and moody lighting that we’ve already got going on thanks to our recently added side table lamps and the light over the vanity in our bedroom’s sink nook.
Plus, it is soooo cool to look at from bed. We didn’t even consider this POV when picking it, but when our heads hit the pillow it’s perfectly reflected in our bathroom mirror. How’s that for a nice added bonus? Oh, and I’m sorry ladies, but me and my sexy socked feet are taken (Sherry’s a lucky lady).
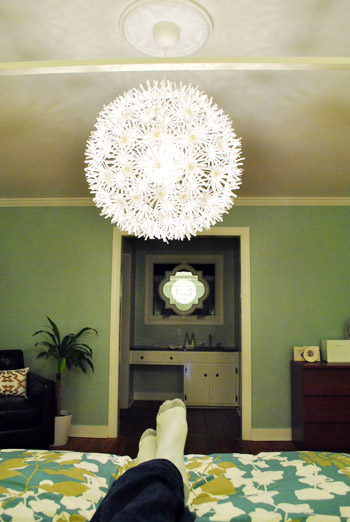
Oh and the light is centered in the room (and on that doorway and the bed) so the slight left-ish shift that you see above is just thanks to the angle of the shot that I snapped.
So there you have it. The little big slice of “hey now” that we added to our bedroom. It certainly doesn’t make us miss the old fan (which we’re donating to the ReStore) and it never fails to make us giddy. What can I say? Warning: pun coming. It lights my fire. Oh, and we should mention that Clara is crazy fascinated by the flowers themselves. We’d let her get near them if we could trust her not to put one of the paper flowers in a death grip and tear it off towards her mouth. So for now it’s just for looking.
Do any of you own Mr Maskros yourselves? Or are there any other dramatic and large-scaled light fixtures that you’re into lately?
Psst- There have been a few requests for more photos from other angles, so here they are:

Clara likey.
Update: Things definitely take some time to shake out around here. So if you wanna see how Ed the Bed and our new light evolved, click here and here. Ah tweaks. Gotta love ’em!

Coco says
Any idea or guesses if this could be hacked to be a flush mounted lamp? I would love to put this in my triplet’s nursery as I’m sure they’d like it. Problem is it would go in the center of the room and need to be a flush mounted light.
YoungHouseLove says
I’m not sure that could be done since it’s a sphere and not a dome-ish half sphere (the way the spokes attach would make that quite a job). Maybe check it out in person to see what you think? Anyone else have the light and think it can be done? Feel free to share suggestions with Coco!
xo,
s
Carrye says
I stumbled upon this today…not sure if you’ve seen! http://www.chictip.com/dream-homes/modern-dream-homes-fredensborg-house-by-norm-architects
YoungHouseLove says
Wahooooo! Love it!
xo,
s
Rene' says
I fell in LOVE with that light when I saw it at IKEA. We are going to get it for our dining room. Seeing it in your room makes me want it even more! :)
As you probably know, it isn’t the best feng shui to have something hanging over you while you sleep so the other suggestions to move the light over the bed probably wouldn’t be best. I think it looks great where it is and I bet is looks even more fantastic in person!
Kaitlin says
I’ve been lusting after this light for several months since the first time I saw it at Ikea. I finally bought it and talked hubby into installing it in our bedroom, BUT for some reason he can’t get the white cup part to be flush to the ceiling. Does that make sense? The cup part is supposed to go over the silver plate that attaches to the ceiling, right? Admittedly, hubby is not wondeful at these kinds of projects. But right now, the cup part of ours isn’t even touching the ceiling! Would a medallion help that? Any ideas on what our problem is?
Kaitlin says
Oh nevermind! I just went in and fixed it! Hubby must have been having a bad day that afternoon :)
YoungHouseLove says
Wahoo! You go girl.
xo,
s
JT says
Thank you for the links, good to see that you attempted to correct the design flaws. Thanks immensely for sharing your work in progress, I can see the house and rooms are not “done”, they are evolving.
Also thanks for telling me not to follow your blog, but please if you are putting your work on the web, you have to be able to absorb the criticism & with style. Telling someone to go jump! when they express an opinion, is a bit rude! Especially when you take steps to amend those same issues.
I feel no pressure to follow you, but will for entertainment.
xoxo
JT
YoungHouseLove says
Perfect. Happy to have you.
xo,
s
Marcia says
Hi John and Sherry. Sorry for commenting on an older post, but I have a question which just came up for me. My husband and I are replacing the fan in our bedroom with a drum shade light. My problem is there are two switches on the wall – one for the light and one for the fan. We know we will cap and tape the fan wire, but we’re not sure what to do with the second switch. Did you have two switches? If so, what did you do? If not, what do you recommend?
YoungHouseLove says
We didn’t have two switches (we had pull chains to activate the fan and the light, which were on one switch) so we’re actually not sure what to do. Maybe try calling an electrician to hear what they would recommend and see if it’s something you can DIY or a project you just want to pay them like $100 to do? Good luck!
xo,
s
J R says
I just got this post in my blog reader. Lo and behold! A picture of your bedroom light fixture at work in an apartment in Stockholm: http://feedproxy.google.com/~r/FreshInspirationForYourHome/~3/onnsEQsFuDA/
YoungHouseLove says
Oh my gosh I love it!
xo,
s
Kylie says
My husband & I purchased this light over the weekend for our master bedroom & installed it today. We cannot for the life of us get the white plastic to completely cover the silver plate that goes over the wires. I suggested the medallion to my husband like you guys used, but we’re a bit confused as to how the medallion actually attatches to the ceiling with this particular fixture. Read the post on the medallion in Clara’s room too, but still confused. Any light you could shed would be really appreciated! Thanks for the inspiration!! :)
YoungHouseLove says
Hmm, I think the issue is that the silver canopy (or plate as you call it) isn’t supposed to remain there with this fixture. The white bubble thing at the top of the Ikea light is the new canopy (or plate) so the silver one remains off and the white “cup” at the top of the Ikea fixture becomes flush with the ceiling so the wires are contained behind that. Hope it helps!
xo,
s
Robin @ Our Semi Organic Life says
Okay so this is really late (and random) but I saw this and thought I’d post it on here. I think you mentioned how other accessories/colors etc could be added and I found a photo! http://www.stylemepretty.com/2011/04/06/wedding-colors-yellow-black-from-studio-b-event-designs/?utm_source=feedburner&utm_medium=feed&utm_campaign=Feed%3A+typepad%2Fstyle_me_pretty+%28Style+Me+Pretty%3A+The+Ultimate+Wedding+Blog%29&utm_content=Google+Reader
just scroll halfway down and check out how they added a little yellow!
YoungHouseLove says
AMAZING! Wow. Thanks for sharing the link!
xo,
s
sarah says
Amy Butler has the same light fixture but spray painted gold
http://littlegreennotebook.blogspot.com/2011/05/amy-butlers-chandelier.html
YoungHouseLove says
Love it!
xo,
s
Gina says
I saw this at Ikea, but wasn’t moved until I started seeing it in action in homes on the blogosphere- I love the way the quatrefoil mirror frames it out…I’ve noticed it getting modified to glam it up too here http://www.apartmenttherapy.com/la/inspiration/simple-is-better-amy-butlers-gold-maskros-146489 and now here (this next hack is particularly AHHH-MAZING, don’t you think??) http://littlegreennotebook.blogspot.com/2011/05/diy-sputnik-chandelier.html
YoungHouseLove says
Yes! So amazing!
xo,
s
Holli says
Your room looks beautiful! We purchased this same pendant lamp for our dining room. We are having trouble making the ceiling cup clasp (for lack of a better word) to the metal plate on the ceiling. I know you used a medallion, but how did you make it flush? I sent an email to Ikea but haven’t heard back. Any advice would be greatly appreciated.
YoungHouseLove says
It just sort of snapped in place if you pushed it up and pulled the cord. Maybe the mechanism is jammed or broken on yours? Anyone have a better way of describing it for Holli?
xo,
s
Victoria says
Hey! I finally bought this light! It’s all assembled and ready to go, but the area for the bulb does not look at all like it is meant for a screw-in light bulb. It has a connecter like that of a giant Christmas light. Kind of flat. Do you know where you can get lights for this besides IKEA? I live nowhere near one!
YoungHouseLove says
Aw man, I think Ikea is the only place we’ve gotten them. Maybe try amazon.com or even try ordering them from ikea.com? Maybe ebay too?
xo,
s
Natalie says
Hi! Just got the Maskros for my room and love it just as much as yall do! But, I noticed that the bulb I got for it (from Ikea) looks different then the one you have. Mine looks like a chandelier bulb where as yours looks more round. I was just wondering what kind it was? And also did it give off more light? Mine is just so dim I can barely call it a light. Absolutely Love your blog btw!! Thank you for any help!
YoungHouseLove says
Ours is an ikea bulb too, maybe they just sell different sizes and shapes? It’s a 40 watt bulb I think, if that helps. It doesn’t give off much light but I hear if you put a CFL in it’ll be really bright (because something that uses 40-60 watts can put off way more light – like 100+ watts). Hope it helps!
xo,
s
Kristine Stoner says
How did you get the Maskros to flush mount? Thanks!!
YoungHouseLove says
We just sort of pushed the plate up against the wall after we installed it and it worked. Followed normal instructions (although we used a ceiling medallion it was the same method). Hope it helps!
xo,
s
Lori says
I just installed this in my daughter’s room. It looks really good and she loves it! I had one question. Did you have a hard time getting the base flush with the ceiling or in your case the ceiling medallion? I can see a little gap where it won’t stay flush with the ceiling.
YoungHouseLove says
We’ve heard from others with that issue, but ours was fine! I wonder if some of them are glitchy. We just pushed it up and it stuck there.
xo
s