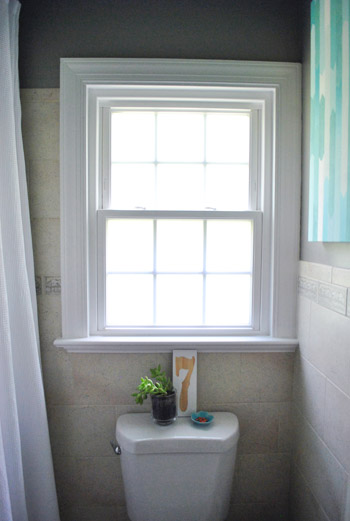
This post is actually about three bathroom updates, the first of which concerns this baby – the window. Aka the anti-privacy device located conveniently above the place that we do our most private business.
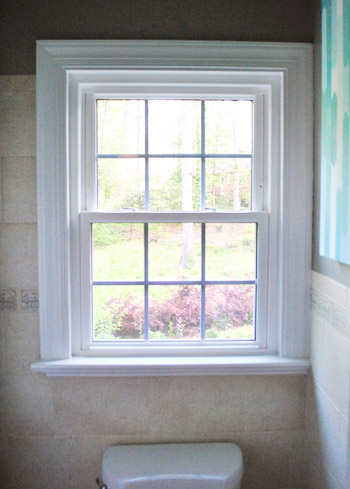
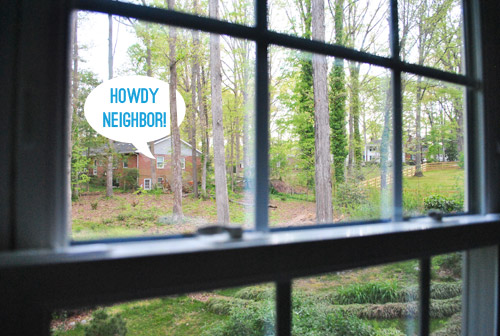
It’s kinda ridiculous that we haven’t done anything to it sooner, considering the window is nearly a straight shot view to the neighbor’s house. It’s not like we live right on top of each other – heck, we’re not even sure they can see much from this distance (we can’t see anything in their tiny far-away windows) but it’s still just a little odd to see this whenever we step out of the shower or whenever I’m standing up doing my man business.
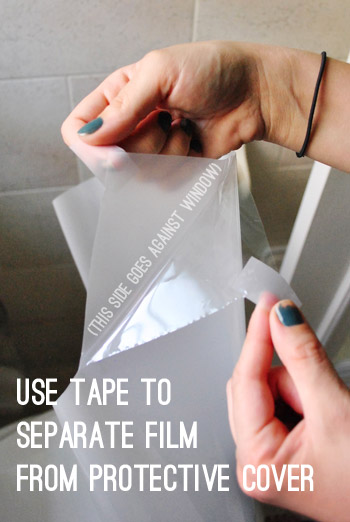
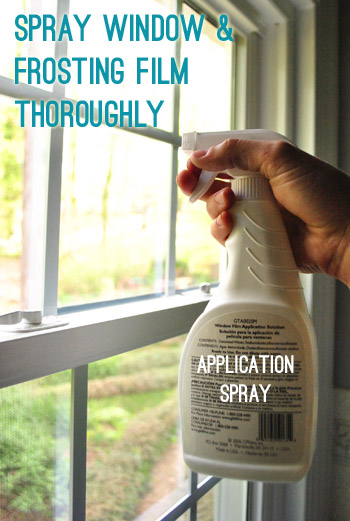
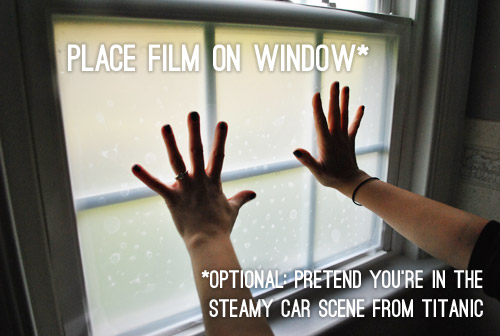
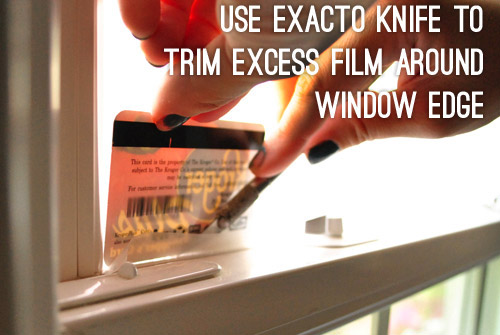
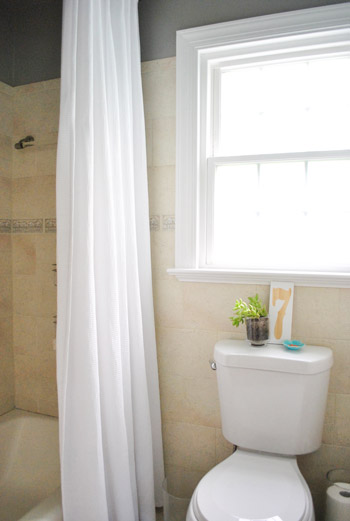
So to get some privacy coverage while maintaining maximum light in the room, we decided to frost it using our tried-and-true frosting film technique (we’ve had luck with this stuff from Home Depot). In this instance this was a $0 project for us because we already had all of the supplies on hand (we had some leftover frosting film, but normally it’s about $19 for a giant tube that can do a bunch of windows and even large glass doors). Oh and it bears mentioning that this window has mullions update: just learned they’re actually muntins (those white criss-cross things) that are encased between the glass, so they don’t stick out. So although it looks like we would have to cut 12 rectangles of frosting film, we just needed two since these are sneaky interior ones.
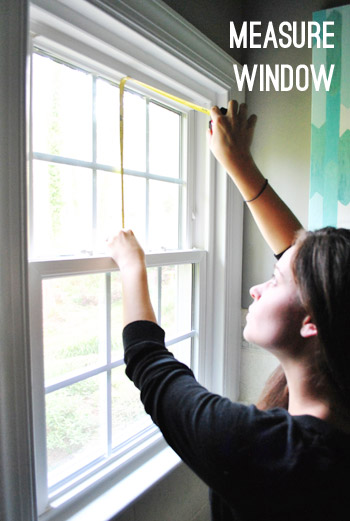
You can see the whole process on video below (or here on YouTube), but it’s actually of a different window in another bathroom. So just continue below the video for the photographic tutorial for this space.
You’ve seen us frost the side door in our current house this way and we gave a more thorough tutorial when doing the basement windows of our old house. So rather than rehash the step-by-step descriptions again, I figured we’d mix things up and take you through the process with pictures and captions only. Here goes nothing…


And now for the big finish…
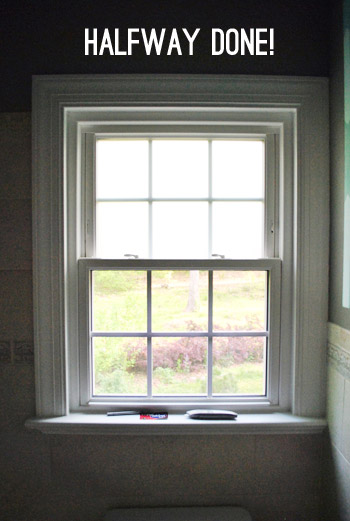
Feel free to click over to this post and this post for more detailed how-to-use-frosting-film instructions. Oh and I realize it’s a bit hard to tell in these pictures (since the window kinda gets blown out anyways), so here’s our best attempt at showing the difference via photos:
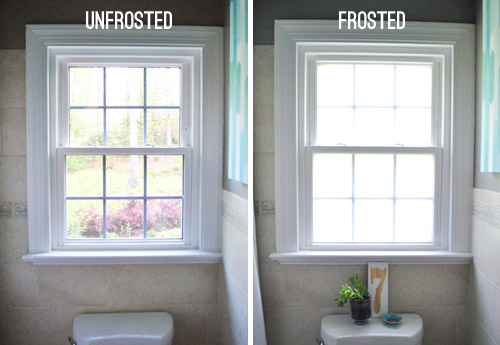
You probably won’t notice it in photos going forward, but just know that every time you look at pictures like the one below – it means we’re no longer putting on a show for the neighbors. Hooray for leftover frosting film and a zero dolla project.
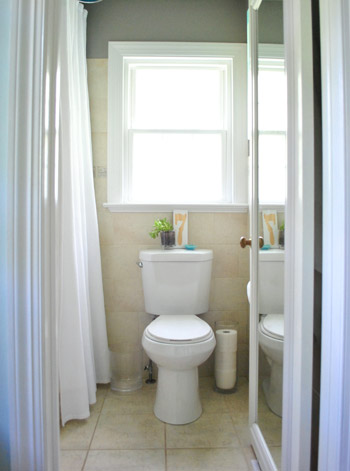
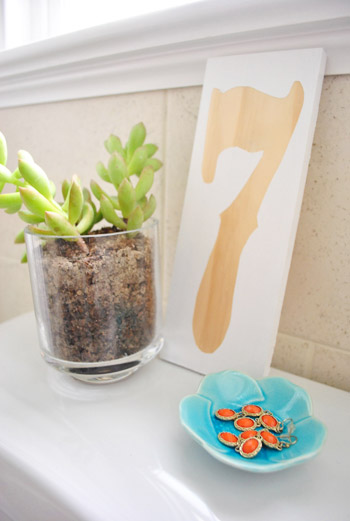
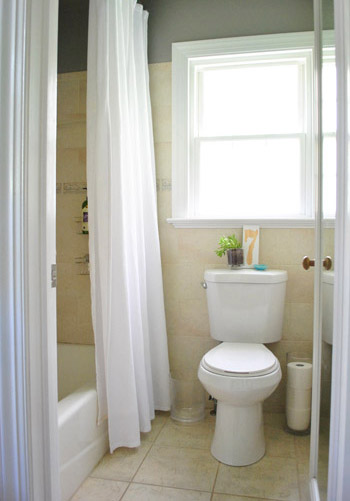
Oh and you’ve probably noticed some additions to the top of the toilet tank. You can thank Sherry for that.
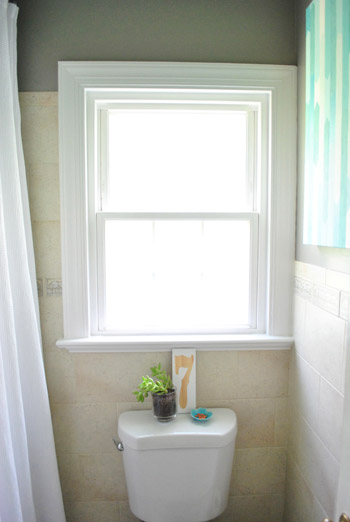
She brought in one of the potted succulents she made here and we DIYed that 7 art a while back (here).
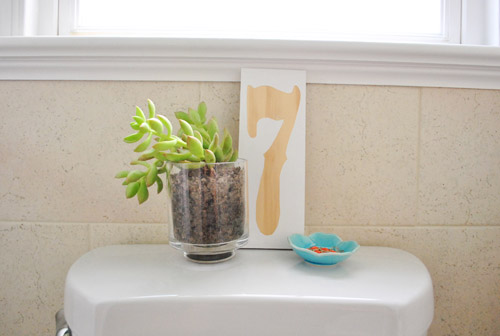
She also threw down a little dish to catch the earrings she often forgets are still on until just seconds before hopping into the shower (she used to rest them on the toilet or the windowsill but worried they’d get lost). Now they have a spot to hold them hostage. You know her and drop-spots. They make her all smiley.
You’ve probably figured out by now what the “frosting” and “tanking” parts of this post title refer to. Any guesses about the sucking? Keep it clean, folks.
Let’s look behind curtain #1 for the answer.
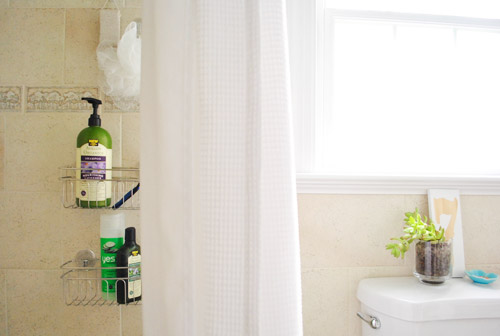
It’s our new suction-cup-tacular shower storage. We opted to ditch our over-the-showerhead caddy because it was practically visible from the bedroom door. Yup, it was quite the eyesore. So we wanted to do something more subtle on this other side that would mostly be hidden by the curtain from nearly all angles of the room (we keep the curtain about one third of the way closed when we’re not actually showering… or two-thirds of the way open if you’re an optimist). So this stuff can all hide behind that panel of fabric, out of view (unless you’re standing in the shower looking at it straight on, like the picture above and below.
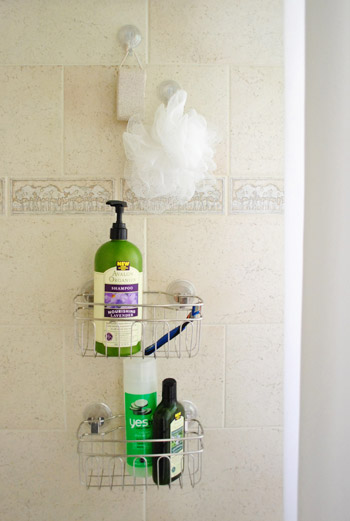
We’ve had mixed luck with suction cup storage before, but these guys from Bed Bath & Beyond had some sort of extra-strength locking system that gave us the confidence to give it a go. They have a hard outer-cup around the suction cup inside and you have to sort of swivel them to install them to supposedly lock them in place. So far, so good. Even with two steamy showers under our belts (they also stood the overnight test, which means we didn’t awake to the sound of crashing down in the bathroom).
We got two hooks…

…and two baskets (which also had the locking suction cups) for a grand total of $22 after handing over four coupons. Gotta love that BB&B lets you use one for each item that you’re buying and they never expire.
I know it’s weird to be excited about hidden shampoo and razor storage, but for a tiny room that we’re in at least five times a day, it really does make a pretty decent difference. The room feels less cluttered and college-shower-y.
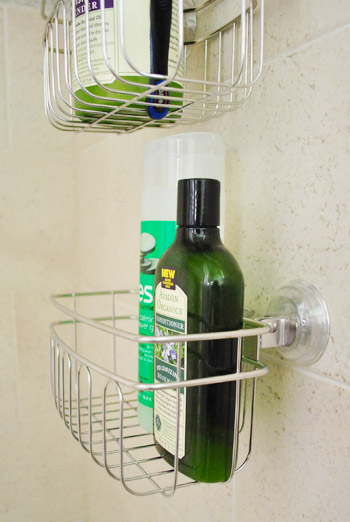
Oh and a reader mentioned they had hanging baskets that were hung over their faucet that fell off the wall and turned on the water and covered the drain so their house flooded (so sad!) – so for safety reasons it’s best not to hang these over the faucet. We like the other side of the shower for them since they’re behind the curtain and you don’t get sprayed in the face when you’re grabbing stuff out of them.
So there ya have it: a frosted window, a spruced up toilet tank and some hidden storage sucking it up on the shower wall. All for twenty two beans.
Here’s our updated to-do list:
paint the walls so they have some contrastreplace the boob lightpaint the cream trim whitehang some bathroom-friendly artcraigslist the toilet and replace it with a classic white onedo something to add privacy to the windownix the ugly and cluttered showerhead caddy- remove the door so we can shave the bottom to allow for a rug/bathmat (and add a door stopper so it doesn’t squash the art)
- replace the border tile around the room (maybe in phase 2?)
- move the blue pendant light to hang centered in front of the window
- replace the floor tile down the road (just to break things up since there’s so much of it)
Anyone else have a favorite privacy method for the window in their bathroom? Or a go-to item for the top of the toilet tank? Or a perfect solution for storing all of their shower necessities?
Psst- To follow this bathroom sprucing project from the start, check out this planning post, this painting post, this light-swapping post, this art and trim-painting post, and this toilet-updating post.

Marina says
Hi, you have a great website. In my house we have a window above the bath-shouwer. I would like to install horizontal blinds over the windw (2-inch fauzx) aand cover the blinds with a shower curtain when we shower. I cannot come up with a better idea. What do you think? Keep writing !!
Marina in brossard, Quebec
YoungHouseLove says
Sounds like a great plan! Good luck with everything!
xo,
s
Janelle says
I have that same type of suction cups in my shower, though I picked them up at Target. I hang loofahs and washcloths on them, and end up having to re-hang them about once a month, but they’re cheap and mostly functional, so I have no complaints about it.
Pixie says
Oh, I love the suction cup storage! I have an over the shower head holder but the shower head pipe is at a wonky angle and it keeps sliding down, slipping here, there…it’s driving me batty!
Emily says
I am a little late to this post, but I thought I would share the fix I used for our shower storage. We just have a heavy duty command hook on opposite side of the shower spout and then hang an over the spout basket over the hook. It has been going strong for almost 4 years now and works great for us!
YoungHouseLove says
Love that!
xo
s
Jean says
We have a window in our bathroom that one could see straight through the bathroom, so I just put up a half curtain. That way we get privacy without losing the light. It’s navy and white and also adds some needed drama to my nearly all white bathroom.
YoungHouseLove says
Sounds really sweet!
xo,
s
Jme says
Perfect timing! Our new (old) house has casement windows, and the white faux wood blind I purchased for the bathroom never hangs properly because of the crank. I had considered privacy film but was nervous to try. Thanks for the motivation!
Katie says
How are the suction cups holding up? Our shower doesn’t allow for a hanging caddy so I’m considering getting some of these same baskets. Thanks!
YoungHouseLove says
Still working for us!
xo,
s
HollyN says
How does this film look from the outside? We have old 1960’s front door with 9 glass panes on the top half. We cannot decide what type of window treatment to use. It currently has an old set of wood blinds on the inside to give us privacy but they’re looking worn. We’re thinking maybe a roman shade, but I’m concerned how that will look from the outside.
YoungHouseLove says
It looks great from the outside- just a soft diffused look, like frosted glass.
xo,
s
Rachel says
Just curious…have you tested the privacy from outside? Even at night? Curious…I am thinking about using this product at my house, but I am nervous about the “night” coverage.
YoungHouseLove says
Oh yes, unless you press body parts against it, there’s no privacy breech. Haha. Thankfully the toilet is there, so we’re always a few feet away from the window, so we’re just blurry shadows.
xo,
s
Amylynn says
Hope I’m not repeating, but I wondered how the film is holding up with the humidity of the shower. I am thinking of doing this on my glass shower door, and wondered if the film will peel. Any advice? Our bathroom is pretty open (which is the problem) so the humidity will be less concentrated, I hope. :)
YoungHouseLove says
Still going strong! We have never had issues with it peeling in a bathroom or basement (we’ve used it in both places). Hope it helps.
xo,
s
E.A.K says
LOVE your site – it will forever be my “go-to” site for making my ‘builder grade house’ funky!!!
Hey do you think you could cut patterns into the film with a stencil and exacto knife? We have a long rectangle window bordering our front door (spans from floor to ceiling) and when people come to ring our doorbell – they can see into our entire house. But it’s great natural light – so I wondered how to stop people from seeing our Sat morning pj dance party’s (with our 2 year old) but still allow us to soak up the good light?
YoungHouseLove says
Oh yes I think you can! I’ve seen cool projects like that on pinterest! Hope it helps!
xo
s
Aaron Clifford says
Great tutorial! This is the most useful tutorial I’ve read in the past month! Thank you very much.
Kara says
Our bedroom is a converted garage with an enormous bay window – in the driveway! I shall be signing over a paycheck for frosting film this weekend and hopefully cease feeling like I’m undressing in a car. But if Jack Dawson shows up, I’m peeling it off!