We can officially stick a fork in it, guys. Well, Sherry actually stuck an oversized fauz clam shell in it, but that’s doesn’t roll off the tongue quite as well. Either way, the fireplace makeover is complete.
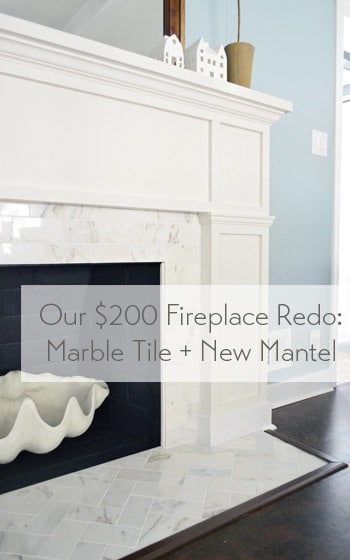
To back up a smidge, you saw us devise a plan for this little refacing makeover, add some marble subway tile and then build out around it. Reminder: fireplace code is different in every area (and requirements vary if it’s wood burning or if it has a gas insert, etc) so it’s a good idea to check that before going nuts on your fireplace.
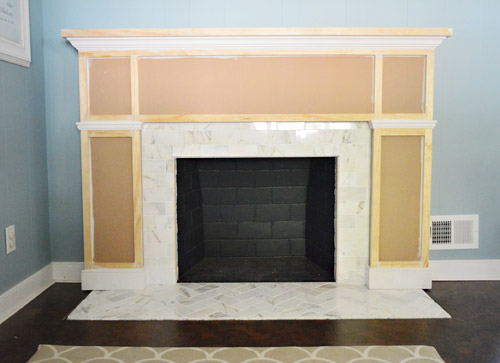
Our fireplace is non-working (we’d love to add a gas insert and even double-side it down the road) but for this phase of the process all that was left was to add some primer and paint.
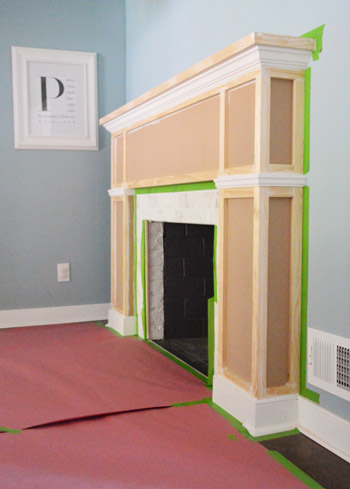
I’ll spare you the play-by-play of the painting process because it wasn’t all that exciting. First we primed (using what we already had on hand) then painted the whole thing with Benjamin Moore’s Cloud Cover since it’s what’s on the nearby cabinets (and because we had some leftover). After that we did some touch-ups, like giving the firebox itself a fresh coat of its original color (Benjamin Moore’s Temptation) Note: use fireplace-approved high heat paint if you have a working fireplace.
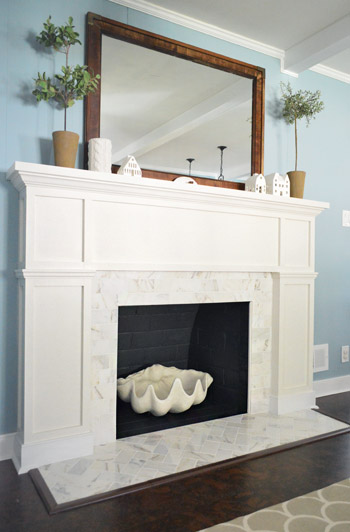
And after giving it a couple of days to “cure” we put everything back so that we could call this puppy complete. And it’s a puppy that I kind of want to curl up with (yes, Sherry pets it).
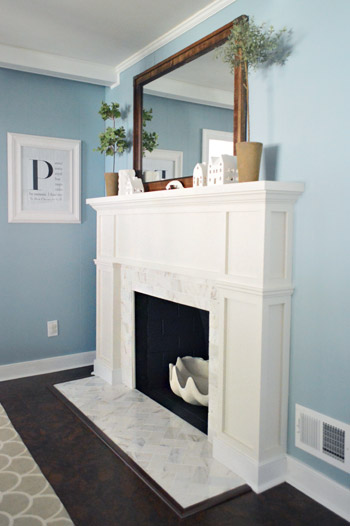
Update: A few folks are asking if we considered widening the tiled heath to match the width of the built-out sides of the fireplace – we did, but since it’s just a bit of shoe molding (which also extends around all of our cabinets) it didn’t bother us enough to rip up cork to make it happen. Perhaps down the line we’ll paint the brown floor trim white to make it appear wider if it bothers us :)
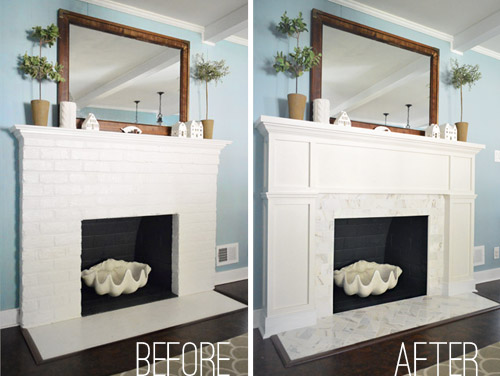
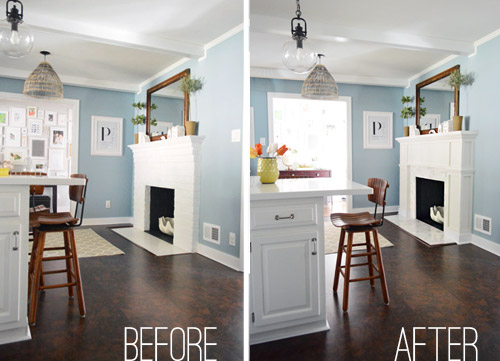
Here’s an obligatory before and after for ya:
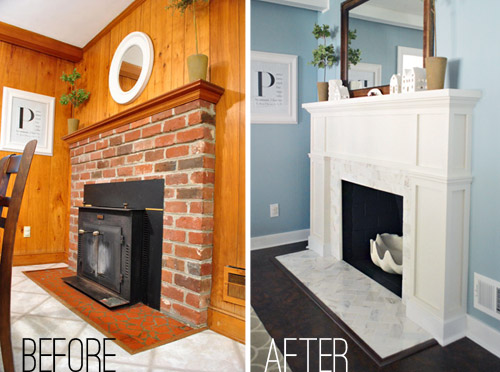
But I much prefer this one, which shows what the fireplace looked like when we bought our house back in 2010…
Since the painting step didn’t cost us any extra money (we used supplies that we already owned), the total cost for the project is just the addition of the two budgets we’ve already shared (tiling was $99 and building out was $98.75) but here’s the full breakdown:
- Cement board (2 sheets): $16
- Masonry screws: already owned
- Liquid Nails Heavy Duty: $2
- Subway tile: $5.50/sq ft, totaling $70
- Thinset: already owned
- Tiling tools (saw, trowel, float, etc): already owned
- Grout: $11
- Tile sealer: already owned
- MDF frame: $35
- Mantle top: $17
- Crown, baseboard, & decorative trim: $22.75
- 1 x 2″ boxes: $24
- TOTAL: $197.75 (* thanks to holiday gift cards from the family we only spent $147.75 – but without gift cards or already owned supplies this might be a $250 upgrade)
Definitely not our cheapest project, but we love it. The herringbone marble tile and the tailored built-out surround looks pretty darn expensive (at least in our humble opinion). We’ve never had a tiled fireplace so we suddenly feel very swanky indeed. Perchance I’ll start sporting an ascot.
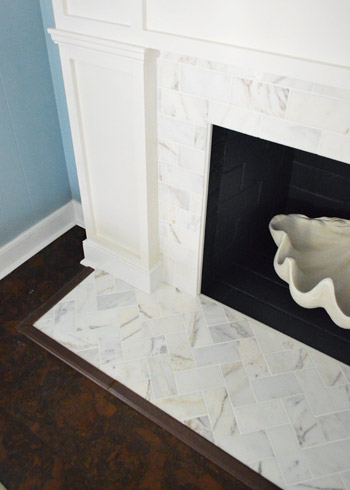
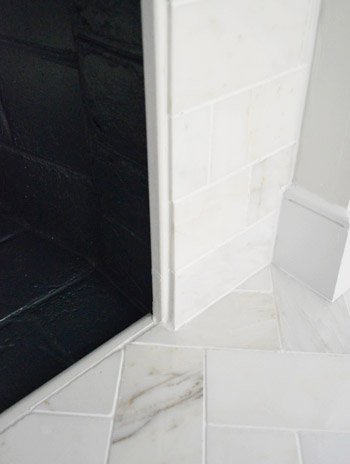
Some of you were curious about how we concealed the exposed edge of the cement board around the firebox. We just used a piece of trim that we had in our scrap pile (it’s slightly rounded on both sides). Before grouting we glued it in place to provide a clean edge to grout up against and now it’s painted to match everything else. Obviously for a functioning wood-burning fireplace that’s no bueno, so you’d probably want to use something like this. And if we ever convert our fireplace to a wood-burning one (which is unlikely since it would require a ton of chimney work) we’ll just pop out the wood trim and install tile edge pieces.
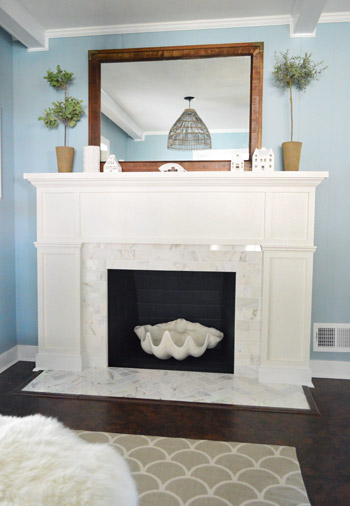
Now back to the gratuitous after shots.
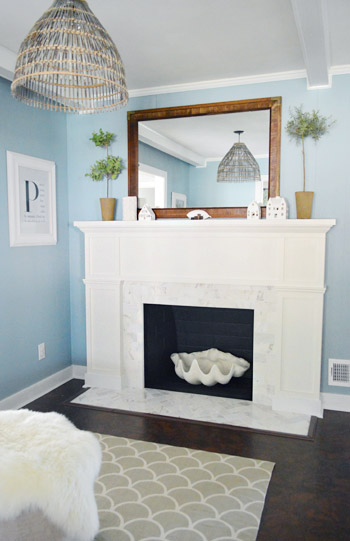
Ok, one more and we’re done.
Just this guy and I’m out.
Oh wait, here’s a good comparison shot that shows how the original fireplace was pretty thin and even a little top-heavy, while the new chunkier tiled-and-framed-out version feels more “focal-point-ish.” In person has even more dimension (unfortunately photos of a white-ish surround with white-ish tile don’t depict all the texture and interest that they have in real life).
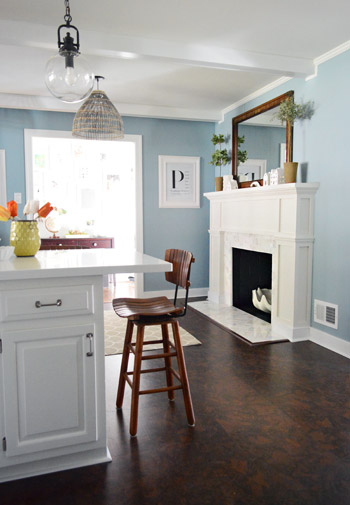
But perhaps best of all, our wall of penny tile on the other side of the room no longer feels like it’s “the fancy wall” while the rest of the kitchen struggles to keep up. The herringbone marble fireplace finally gives the penny tile a run for its money, in the best possible way. According to Sherry “it’s a swank-off in our kitchen.” Fireplace vs. wall o’ penny tile. Who will win? It’s anyone’s guess. (Spoiler alert: Sherry says the wall of penny tile wins because she pets it slightly more than the marble but it’s very close.)

So that’s the end of our little fireplace update. We’re really glad to have it done and are looking forward to some porch and carport updates. So come on end-of-March snow, give it a rest so we can get outside and start working! What are you guys doing? Any tiling, mantel building, priming, or painting? What about placing giant clam shells around the house? Any of that going on? That’s all in a days work for my lady.
P.S. If you want to read about this makeover from the beginning, check out our planning process, how we tiled and how we built out the wood frame around it.
Update – Wanna know where we got something in our house or what paint colors we used? Just click on this button:


Lauren says
Totally gorgeous! Cozy ‘n edgy all at the same time.
I also projected a quiet ‘Penny Can!’ when I read about your penny tile, ha! :)
YoungHouseLove says
Haha, never let Penny Can die!
xo
s
Marcia V. of Precious Style says
Man, that new fireplace is everything! So good.
YoungHouseLove says
Thanks Marcia!
xo
s
Donna white says
The fireplace is cool..oh, I mean hot, hot baby! The clam shell is gorgeous and I want one. Did Sherry buy a faux one and paint it white to match the fireplace??
Donna
YoungHouseLove says
Haha, it actually came that way from Joss & Main about a year ago!
xo
s
Nevette says
Wow, I saw the original original photo from 2010 (!) and I realized that I’ve been reading your blog for over 3 years! Thanks so much for the glimpse into your DIY life! I love everything about your blog, and best of all, I only feel a tiny bit stalker-y for reading it for this long!
Keep up the good work! :)
YoungHouseLove says
Aw thanks so much Nevette!
xo
s
Page says
Love the clam shell! I’m also quite impressed that you can get your kitchen clean enough to photograph on a regular basis.
Lisa says
Regarding the piece that you used for the top of the mantel, is it solid wood or something else? How thick is it? I’m in need of very thick solid wood for the top of my mantel; and I can’t find any. Could you please tell me where you purchased yours?
YoungHouseLove says
You can read more (and see more) about the mantel construction in this post: https://www.younghouselove.com/2013/03/fireplace-makeover-the-build-out/
But basically it’s a 1×10 board that we framed out with 1x2s to give it a thicker appearance. If you didn’t want to do that, you could also try using framing lumber.
-John
Leslie says
Lovely! That is an amazing transformation.
Hugh says
This is really good. The Georgian style mantlepiece would probably cost at least £1,000 if you bought new and didn’t make yourself. Well done!
YoungHouseLove says
Wow, thanks so much Hugh!
xo
s
acvargis says
Could you please post an after pic from further back? Like your dining room? I LOVE this upgrade and its prob one of my faves ever – it looks incredible!!
And Im really loving the paint colour. Stupendous job you guys :):):) I wish I could pay you guys to do the same for my fireplace! But I live very far away so thats prob a no go. As in the other hemisphere far away. :( *sigh*
YoungHouseLove says
Aw thanks! We’ll have to snap more photos and share them soon :)
xo
s
Howard says
Wow, incredible work on the fireplace. I’ve never seen one with a clam inside, it’s kind of ironic to think of an aquatic object living in a fireplace. I love it!
bright and beautiful says
nice work! I love the look of your new fireplace – it truly appears high-end. You’ve inspired me to update my own :) Thanks for sharing these tips!
Susie says
I was wondering if you could tell me the bluefish paint color in the room with the fireplace redo?? It is beautiful!
YoungHouseLove says
Hope she drops in with that info for ya!
xo
s
Cate says
Did you upgrade your bar stools? A restaurant in town that just opened has the lab style ones that I thought I remembered seeing here.
YoungHouseLove says
We later found some wood ones on Craigslist we couldn’t resist (they swivel) so those got traded out. The metal ones were fun too though!
xo
s
kristin says
Beautiful, classic and elegant. I am planning bedroom fireplace redo. Do you have a reference you could forward me on how to do a herringbone tile pattern? Where on earth do you start?
Thank you!
YoungHouseLove says
Here’s that post for you: https://www.younghouselove.com/2013/03/fireplace-makeover-sublime-subway/
xo
s
Rebecca says
We followed this and it worked out very well!
http://aspectideas.com/aspect-installation-instructions/herringbone-installation
Aston_B says
I just love the use of dark grey, that looks beautiful :)
I think the combination of the snow white surrounding and dark grey brick is simply stunning. Thanks for sharing such a wonderful post, glad I came across this charm!
Allie says
Love this fireplace! It has definitely given me some inspiration… Do you have the final overall dimensions? Total height, width + height of the tile surround, and width + depth of the hearth would be very helpful!
Shell says
Hi there. We recently used marble around our new fireplace surround. I wanted to know if you sealed your marble … Our fire place will have an insert and will therefore be used quite a bit, but I’m worried the marble will darken if we seal them. Any thoughts on that? Thanks :-)