We learned with our first kitchen that building in your fridge is a huge help in making a kitchen look fancy schmancy. And at the moment our floating fridge was looking pretty much the exact opposite.
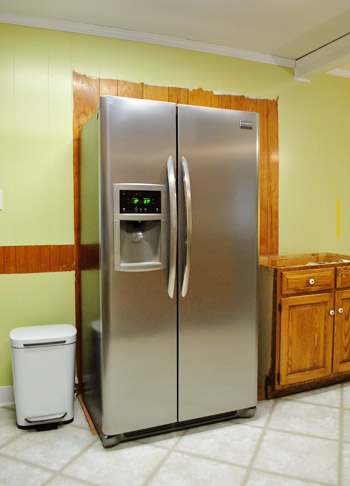
That’s where an also less than schmancy $19 cabinet from the Habitat For Humanity ReStore (mentioned yesterday) came in handy. It’s 12″ tall and 36″ wide, the exact width of our fridge. And when you take off the don’t-match doors (we’re hoping to retrofit extra existing doors to make it seamlessly match the other cabinets later), it starts to look more like a workable piece of cabinetry to sit atop our refrigerator.
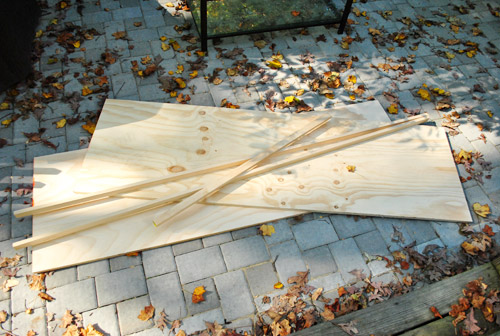
For the sides of our built-in fridge, I picked up two 4′ x 8′ pieces of plywood that the Lowe’s guy recommended for cabinet work (he said it’s the same stuff they sell folks who get theirs built-in by pros as part of their kitchen installation process). They even cut it to size for me right in the wood cutting area, which was a huge help. The planks were still too big for our Altima so I rented the $19 Lowe’s truck to get it home. The truck rental, fridge planks, plus a few 1 x 2″ pieces of pine trim brought my grand total to about $90. Good thing that ReStore cabinet was cheap ($19).
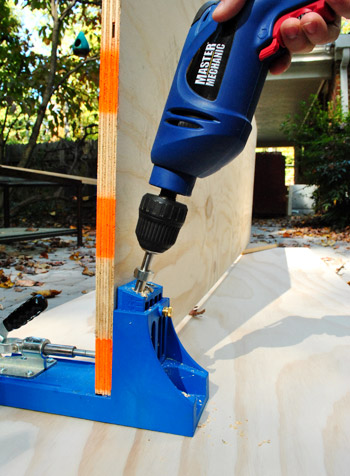
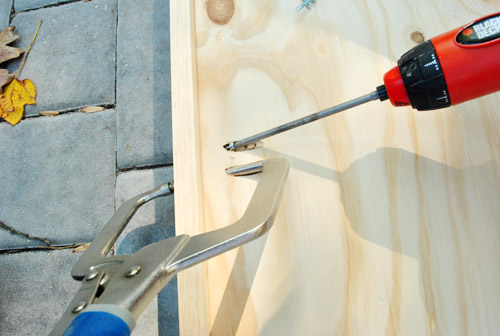
The point of the trim pine was to make the front edge look more finished and a bit more substantial looking. So I broke out my trusty Kreg jig and drilled a bunch of holes down one edge of both plywood pieces.
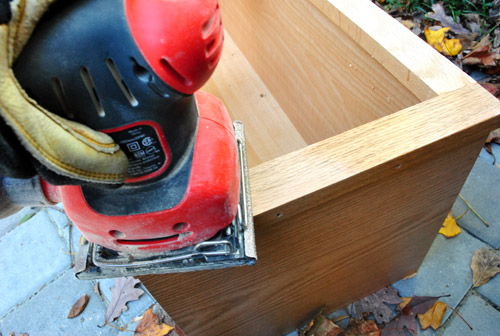
With my holes drilled, I sanded both sides of the plywood to make sure they were smooth. And while I was at it I sanded the finish off the front of the cabinet so it’s primer/paint ready (we’ll tackle it when we tackle the rest of our existing cabinets after the counters get installed so nothing gets chipped or scratched off during that stage).
Then I carefully clamped and screwed the pine trim to the plywood piece so that the edges were flush. Having been around block with my Kreg by now, I’ve learned that it’s sometimes helpful to drill a second hole just to put the special Kreg clamp into. This is me trying to think ahead.
Eventually (note that I didn’t say “soon” – this part took me about an hour) I had the trim attached just the way I wanted on both pieces of plywood.
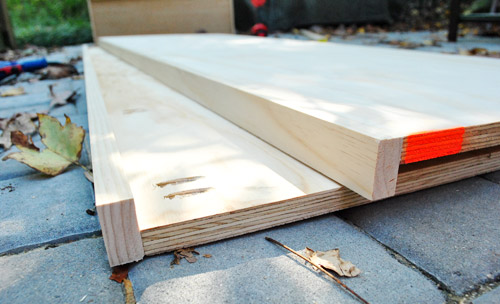
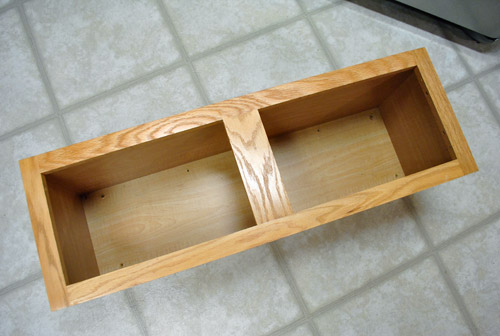
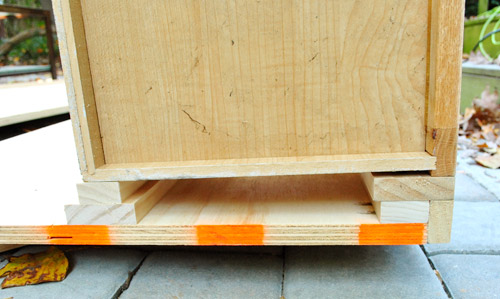
Attaching the cabinet took some thinking ahead too. Since we wanted the cabinet to sit flush with the trim (not behind it) and needed the opening to be slightly wider than our fridge (which was the same width as the cabinet) – I had to add some filler pieces (aka, leftover scraps). One stack of scrap wood went up at the front of the cabinet and the other was located at the back (neither of which would be seen at all once it was all installed).
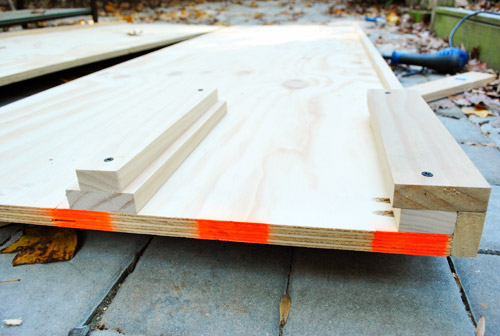
Here’s the same view with the cabinet sitting on it, to give you a better idea of why the filler was needed (I ended up adding a wooden shim to make sure the cabinet sat 100% straight).
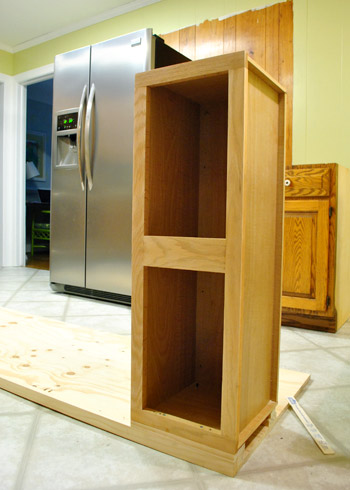
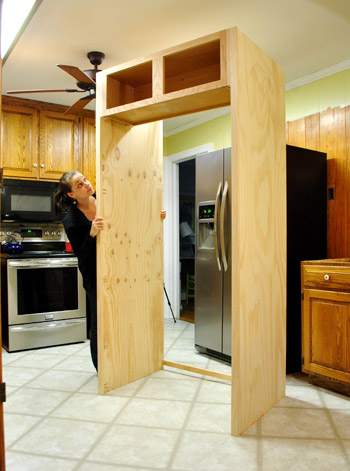
We didn’t actually attach the cabinet until we got everything back inside, since I wasn’t about to try to maneuver this whole thing from my patio-workspace through a few doors and into the kitchen. So here we are in the kitchen, with the cabinet screwed to one of the plywood sides. Here’s where Sherry put Clara down for a nap and came in to help.
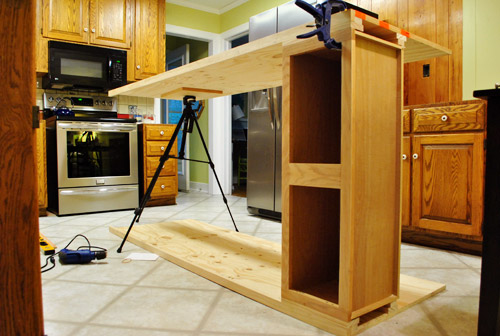
We brought in the second side and used our camera tripod as makeshift jack to hold it in place while we screwed it all together, checking and double checking that everything was square and level.
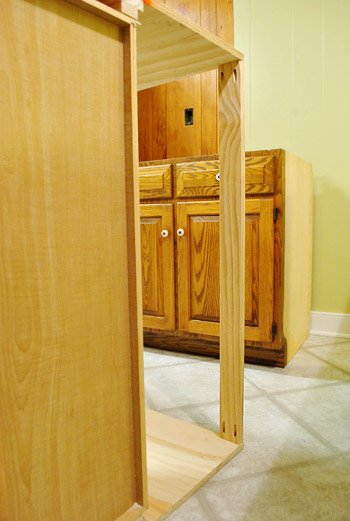
Before standing it up we added a spare board across the back to help keep everything straight and supported from front to back. It’s also the board we later drilled through to screw the whole thing into the wall (didn’t want it falling over on anyone!). We also put a similar plank of wood across the bottom (again to keep things square and to allow us to screw the whole piece into the wall).
Then we heave-ho’d it up to a nice standing position…
… and slid it into place (after temporarily removing the bottom support slat so we could slide it over the fridge like a slipcover).
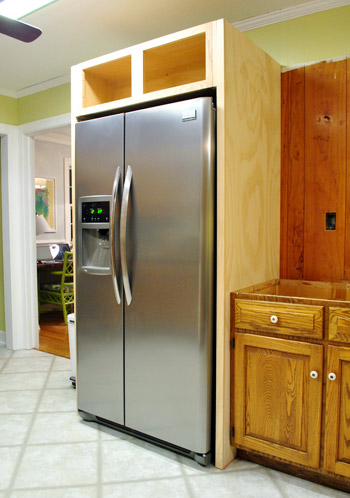
We’re not saying “ta-da!” quite yet, since there’s still lots to be done to it. Like priming and painting it, priming and painting the paneling behind it, adding matching doors, adding molding around the top, adding trim around the bottom, etc. But for now, we’re enjoying one pretty noticeable step towards making the kitchen look a lot more pulled together.

It’s definitely an upgrade from the un-built-in version, right?
Oh and if you scroll back up to the built-in pic above this one, you’ll notice that the fridge sticks out just a smidge from the wooden sides. That’s just a functional thing (it can slide a bit farther in, but the doors wouldn’t open as wide as we needed them to in order to access certain slide-out fridge drawers without hitting the wood frame). But it’s nice because the new built-in sides block all of the black coloring on both sides of the fridge – so all that’s visible is the stainless front (and a smidge of the sides of the doors – which are still stainless). It’s definitely going to be a huge upgrade to have a custom looking fridge setup along with the flush front cabinet up top (our old above-fridge cabinet was set about 6″ back, so it was a lot harder to access).
So that’s the latest slow but steady kitchen progress. Next on the agenda is attempting to finalize the placement of the peninsula (we still need one more cabinet to complete that area) by the end of this week so that we can finalize the placement of the giant eight foot doorway to the dining room that we’ll be adding with the help of a pro (which we hope to begin sometime next week!). Is it next week yet? Should be interesting/scary/exciting/dusty. As always, we’ll keep you posted!
Psst- We’re over on BabyCenter sharing an update on how we organize and store Clara’s outgrown clothes. And we’d love to hear your storage secrets on the subject.

Alexis says
Do you recommend the Kreg “Master System”? Looking on Amazon now and the Master is $40 more than the other.
YoungHouseLove says
I have the “Master System” and do enjoy it, but the main thing that I use out of it (over the regular kit) is the clamp. So you could save the $40 and just spend it $30-ish on a clamp instead. I actually use the right-angle clamp more than the flat faced one that comes in the Master System. Hope that helps!
-John
Erin says
Did you ever end up putting trim around the top of the fridge built-in? Looking at the pictures of your finished kitchen I can’t really tell but I’m guessing no? We’re getting ready to do this to our frige this weekend so I’m just trying to decide if the top trim is really necessary.
Thanks for this tutorial! We plan to follow step-by-step! :)
YoungHouseLove says
We actually meant to and then held it up and didn’t think it looked as good as the sleek and clean look without it, but we still sometimes think about it, so we’ll keep you posted if we ever tackle it!
xo
s
Christy says
I can’t tell you how excited I was when I found this particular section of your blog. I have been looking for about a year now for directions on how to build a surround for my fridge to give it that built in look. I had a basic idea of how I THOUGHT I would go about doing it but it’s soooo much better to see how someone else has done it! My thanks for posting this many many times over!
LauraCinIndy says
I know I’m going way back but could you please tell me the thickness of the plywood John used for the fridge built in? My husband is following Johns tutorial but can’t find that info. He thinks its 3/4 inch but wants to make sure it’s not 1/2 inch. Thank you for any help!
YoungHouseLove says
I think it was 3/4″ plywood and then I put a 1 x 2 on the face of it to make it look thicker.
-John
Sergio says
What a great job!!!! I´d love to see how the counter top was replaced, do you have any images or explanation on the materials used for that?
Thanks
YoungHouseLove says
We just got that installed for free through Lowe’s (there’s no added fee for them to install it and they did a great job).
xo
s