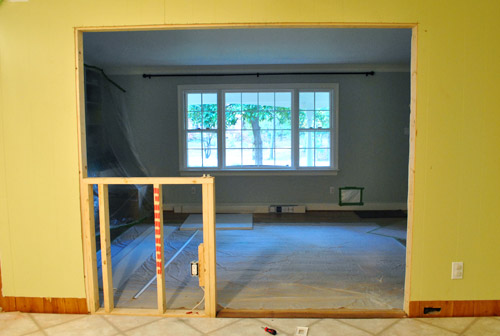
The wall is down (more here). Drywall is up (more here). Time for trim.
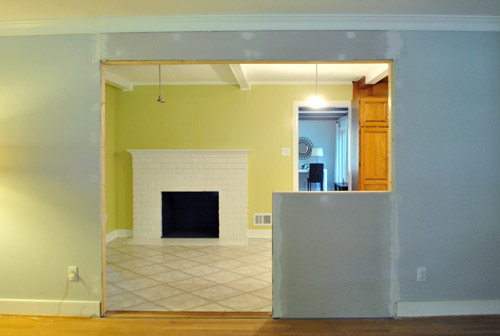
I actually kinda enjoy doing trim. Despite it requiring lots of focus and attention to detail, it’s very satisfying to see all of those rough edges turn into crisp white borders. But before I could get to trim, I actually had to take care of the ledge on our half wall and the door jambs first.
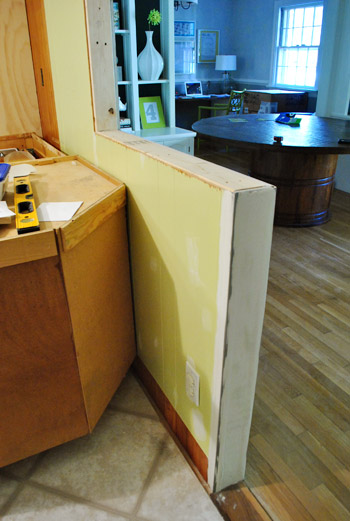
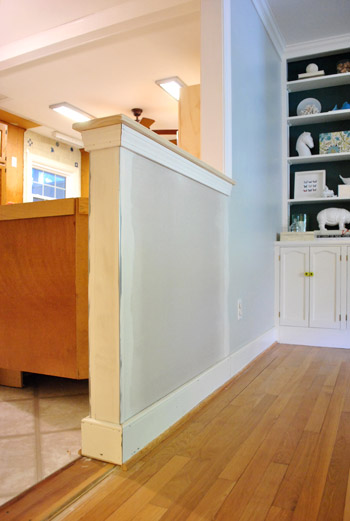
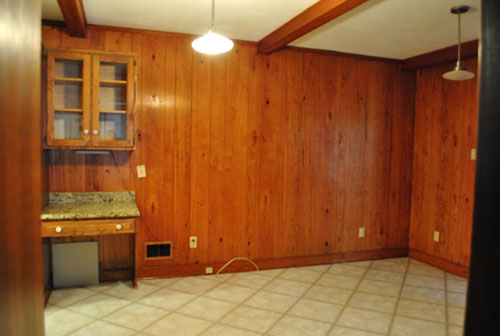
Our neighbors recently had a similar wall opening project done in their house (these guys), and we really liked how they treated their half-walls with a wood platform on top and trim beneath to dress it up a bit. It looks really finished and balanced and is also a great place to set stuff out when entertaining (like a few small dishes of nuts or candy or some pre poured drinks). So we bought this basic plank of pine that’s eight inches wide and four feet long to use for the top ledge.
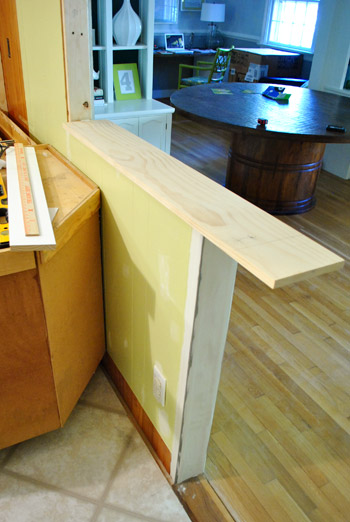
Obviously it needs to fit a bit better than that. On one end we just sliced it a bit shorter, but on the other we actually wanted to notch it over the wall so in the end it would have the same amount of overhang on each side (we had to factor in that it would have to extend beyond the trim on the inside angle, so it’ll look crazy long until we add that a bit further down the page). So we both measured and marked the wood (twice, to avoid any weird little mistakes)…
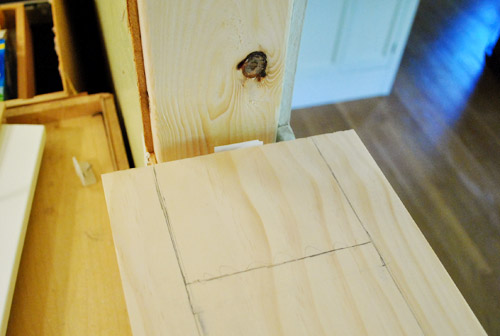
…and I ran outside to make the cuts in our driveway (using a jigsaw to cut the notch and a miter saw to get a straight edge on the other end).
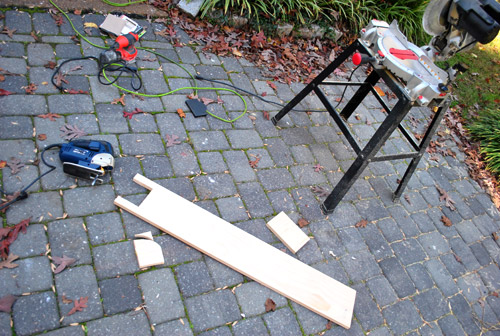
Before installing it, I also sanded down all of the edges to make them a bit softer. No one wants to slice their arm on a sharp corner walking through our new opening now do they?

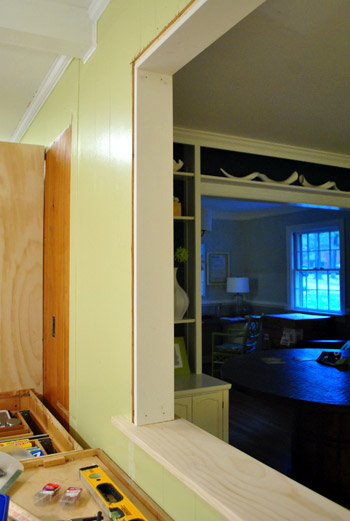
Fit-wise, we got lucky. Perfect on the first try. This was either a very good omen for the rest of my trim cutting, or a sign that it can only go downhill from here. See how it looks oddly long here? That’s just because there’s no trim on either side, which will end with just a slight overhang of the ledge under it to ground it like many of the windows in our house.
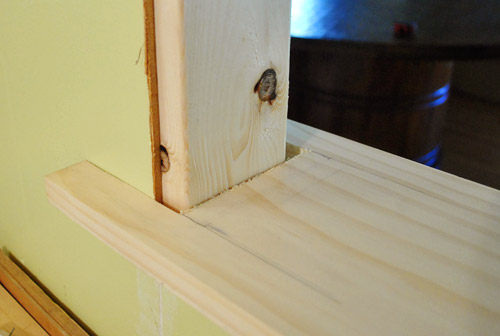
With a couple of nails on either end, we hammered that guy right into the frame and it was set (we’ll eventually prime and paint it white like the trim). Then we could begin to set the door jamb in on top of it.
Fortunately our doorway was a standard jamb width of 4 5/8″ so I could rely on this pre-packaged door jamb kit they sell at Lowe’s for about $18. Well, not completely. It was meant for a normal-sized doorway (aka a 3ft opening) so I had to buy another $6 side piece to help extend my top jamb.
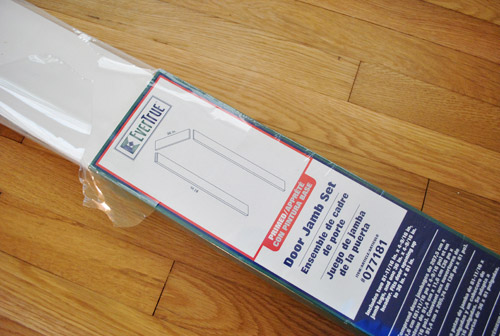
The reason you install a jamb over the wood that frames the opening is because the jamb is wider so it covers the sides of the drywall and paneling so that once the trim is added the entire opening is seamless and sealed (so you can’t peer beyond the wood framing piece from the side and see the side of the drywall).
The instructions said to assemble the jamb first and then lean it into the doorway as one piece. That didn’t seem very practical given our unique situation (aka: our uniquely sized opening), so we hung each jamb piece separately and it worked out really well. I cut the short side of the doorway first then together we held it in place and nailed it in with some finishing nails.
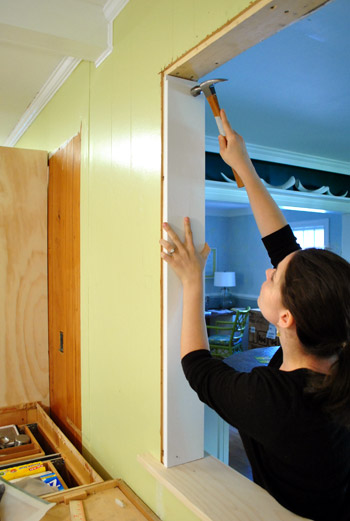
Then we slid in the short side of the top jamb and hammered again. It was finally starting to look kinda like a doorway. And trim would definitely seal the deal.
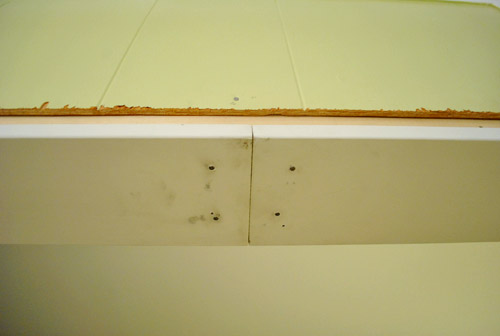
Here’s where we had to line up the two pieces of the top jamb. Ideally we’d love to have one piece, but we couldn’t find a 92″ piece. Fortunately caulk and paint will make this look pretty darn seamless. Especially since I took a minute to sink every finishing nail’s head into the jamb with a nail punch (it’s a cheap little manual tool explained more here).
With the top on and the other side hammered in place, the jamb was officially done. So with that and the ledge checked off of our list, we could officially turn our attention to the trim.
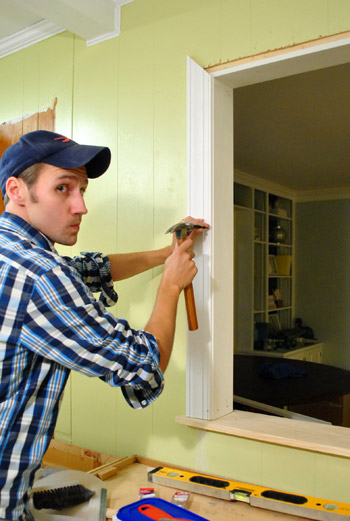
I’m not gonna go into crazy step-by-step trim installation here (you can read all about that when we re-trimmed our old bathroom). As usual it involved lots of measuring, cutting it on an angle with my miter saw, and hammering it carefully into place (using a nail punch to manually sink the finish nails to keep the trim ding-proof). This happened on all three sides of the doorway, in both the kitchen and dining room sides of the opening.
We also added some slightly smaller trim under the ledge to beef it up a little bit because:
- we had seen our neighbors treat their half-walls this way and liked how it looked
- the big picture window in the dining room along with many other windows in our house are treated the same way (with a ledge on the bottom that’s grounded by some slightly smaller trim)

In addition to installing trim around both sides of the doorway, we also had to reinstall a bunch of baseboard that had to come out during demo. Fortunately enough of it was intact enough that I didn’t have to buy anything new. Some the paint got scraped off during the removal and rehanging process, but once everything is caulked and painted again no one should be the wiser.
Some of this baseboard and quarter round may have to come up again when we do the floor, so we left some of it unfinished (like the quarter round where the transition will go after it’s added). But we tried to complete most of it so that it looks as polished as possible during our construction phase (which will last the next couple of months).
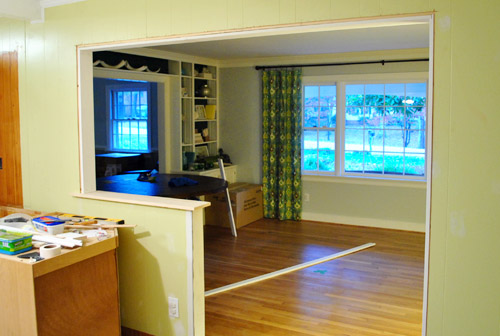
So here’s the room from both sides with the finished trim. Definitely looking more doorway-like, eh? Remember we’ll be painting the wood ledge white like the trim so it’s more integrated.
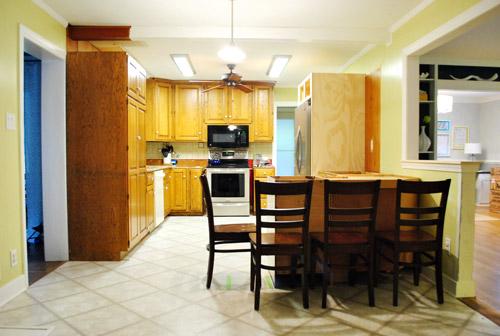
Now to make it look a bit more like a kitchen and dining room, we’ve moved furniture back in! Although the chairs in the kitchen are just placeholders (we’ll get some counter-height stools that are a bit lighter looking – maybe even acrylic or something to keep things from feeling too heavy or wood-riddled). So excuse the chaos and busyness of things that are out of place and soon-to-be changed (it’s a lot crazier and busier than it’ll look in the end).
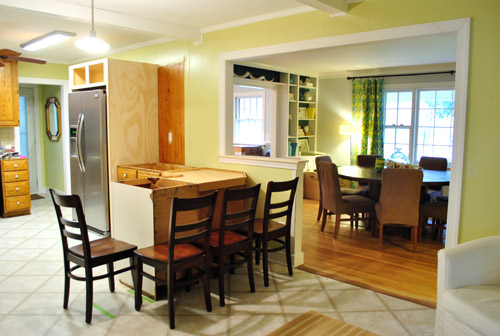
Of course there are still missing counters, walls, and trim that need to be painted, kitchen cabinets that need to be painted, and we have a million other kitchen updates to do (lighting, flooring, backsplash, yadda yadda yadda).
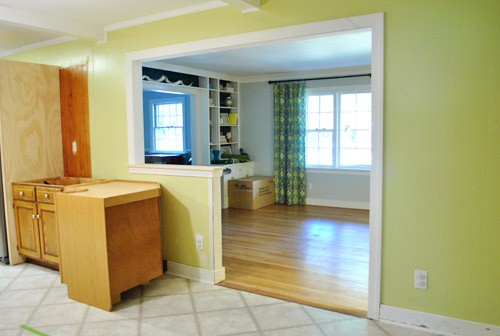
You might also notice that we acquired our last cabinet for the peninsula. Woot. See him there on the end? Guess how much it cost? Rhymes with “dero zollars.”
It’s from the ReStore, and no we didn’t steal it. When I told the guy I was looking for an 18″ base cabinet, he said they had one out back I could have for free. Apparently the donor left them outside where they endured a light rainstorm before the ReStore noticed them. So even though they hadn’t gotten damaged, it was against their policy to sell them. So why not take it home and give it a try? We gave it a couple of days in the carport/sunroom to ensure that it had aired out and wasn’t damp or anything. Then we looked it over and it checked out a-okay (no water damage/mold, etc). And the bonus? It’s the closest match to our existing cabinet doors and drawers that we’ve seen (the doors and drawer are beveled so they’re half-sunk, making them the same thickness as all of our half-sunk doors and drawers).
Oh and see the tape lines in the pic above? The first one marked where the peninsula would end and the second one marks where the 12″ counter overhang will end- so we can try to picture it as the rest of the room comes together.
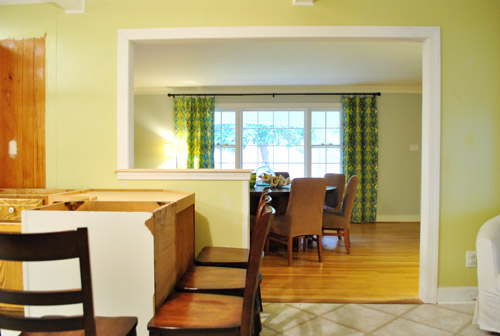
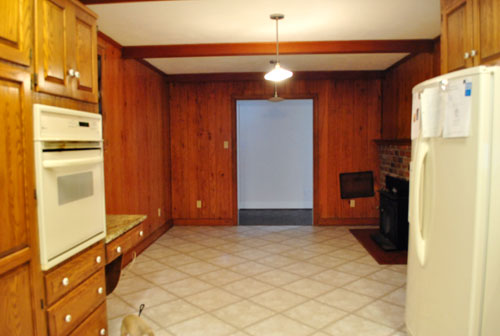
Here are a few more shots to show you how much the opening is a game-changer around here. Even with full chaos going on, it’s such a difference. It’s so nice to have more daylight in the kitchen thanks to the opening. And once we paint the cabinets and install our new white counters it’ll be even lighter in there (with mocha cork floors to ground things).
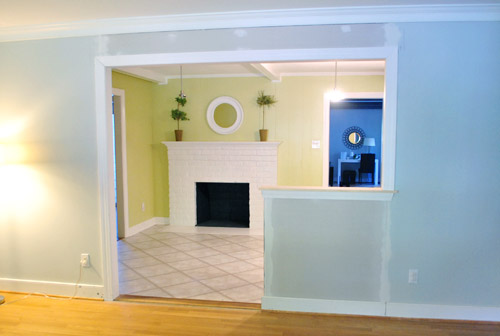
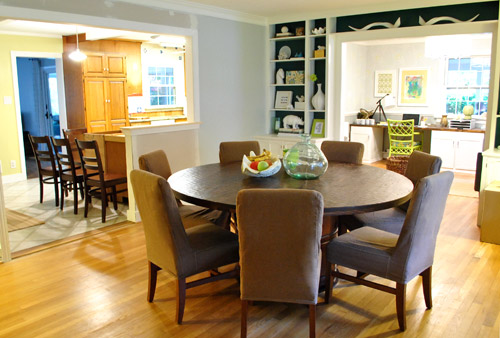
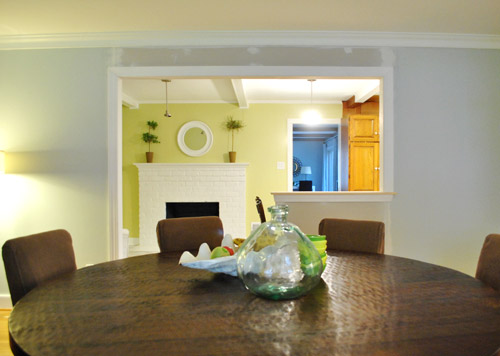
Here’s a shot through the opening now that there’s trim and the table is back and we re-hung the curtains. We love how the opening lines up so well with our big picture window in there.
Here’s the other direction. Now we can enjoy the fireplace from the dining room.
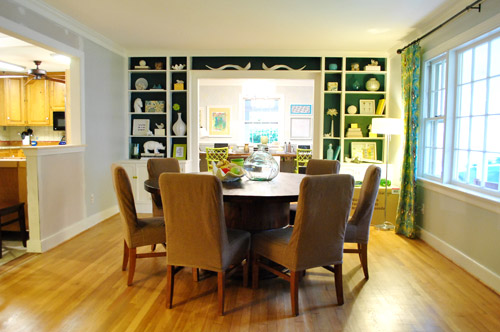
Here’s another shot looking past the dining room into the office. Ignore the abundance of odd items on the dining table (a faux clam fruit bowl, a stack of serving bowls, and a big clear vase) and the big box and floor lamp near the curtains on the right (they’re not permanent of course – just need to add a big chandelier over the table and install the new dishwasher in the box). So it looks crazier than it eventually will when things are settled.
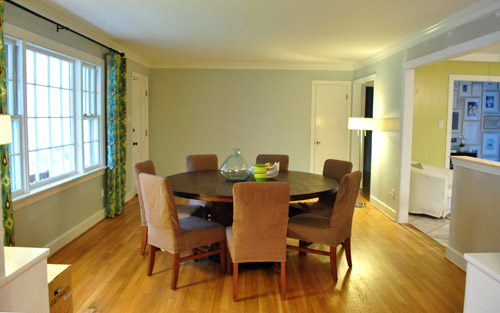
Here’s that room from the other direction (still need to add a big buffet with some large art over it and a nice sized rug to anchor the entryway area (among other things).
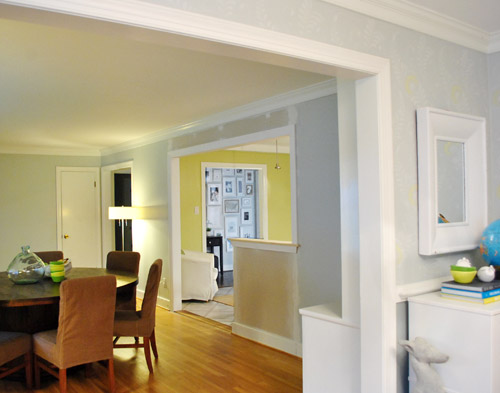
One of the coolest “bonus views” that we gained was the peekaboo into the hallway frame wall all the way from the office. It’s so nice to see the sunny avocado kitchen framing the view.
We sadly didn’t manage to get any photos of Burger running through the new doorway (the little guy was a blur), but here’s Clara loving the new route.
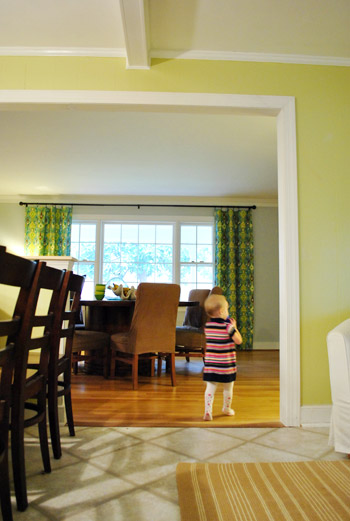
She’s such a quick adapter. She just sees something new, smiles, and tries it out. A day later it’s old hat. Like it’s always been there. Although we’d argue that it should have always been there anyway. Burger is completely used to the new flow too. He cuts through there all the time.
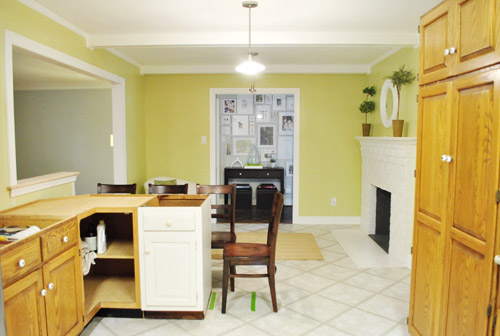
Oh and since we always love taking a look back, here are some older shots from similar angles to some of the ones above taken right after we moved in last December:
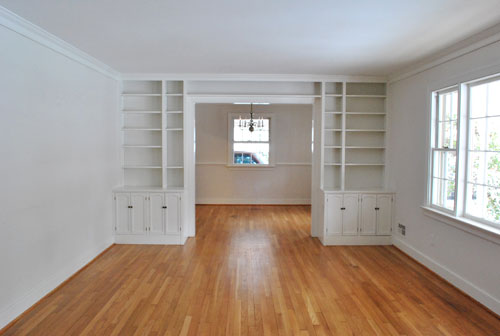
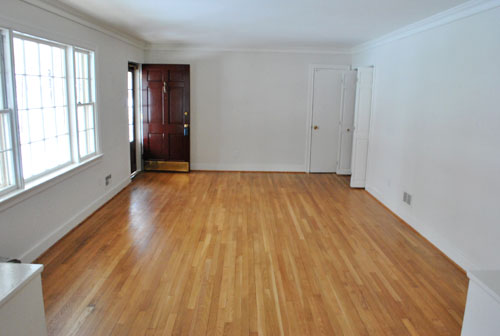
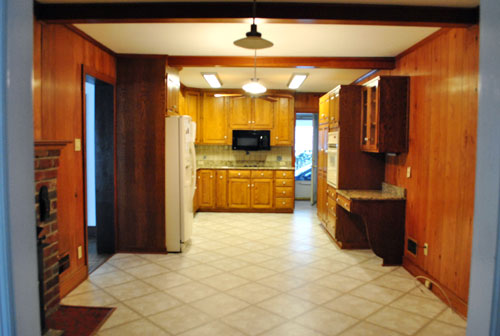
What a difference eleven months can make, huh? Still have lots to do, but it’s getting there one day at a time.
Oh and when it comes to costs, finishing the entire opening ourselves was $90 (that includes doing drywall, adding door jambs and the ledge, and adding trim on both sides of the opening). It would have been $250 to pay the contractor to do that stuff, so we’re thrilled that we could take it from here…
… and save 160 big ones.
What did you guys do this weekend? Any other door jam, ledge, and trim stuff going on? Any standing around and gazing lovingly at a new doorway? There was a fair amount of that going on here.

Michelle Bauer says
I may have missed it, but did you all have to put a threshold in on the floor? When we tore out a wall there was no hardwood under it so we had to piece together wood flooring…just curious!!!
YoungHouseLove says
That’s just an extra piece of paneling that we kept after the doorway was cut out (we flipped it over with the unpainted side up and cut it down so it could be nailed right into the gap to keep things flush and semi-finished looking until we add the cork!
xo,
s
Cassandra says
Maybe you thought of this and I missed it in one of the posts but I was thinking that a similar half wall would be neat at the door in the dining room to make a small entry area but still the open feel…whatcha think???
YoungHouseLove says
We love the open thing when you enter (although some folks love more of a cozy vestibule feeling) so we’re thinking about adding a buffet on that wall with some big art and a rug to define that space and hopefully that’ll keep it open but still visually separated. We’ll have to see where we end up though!
xo,
s
Lou says
I have to admit, before you put the temporary chairs there, this WHOLE TIME all that doorway has looked like to me is one of those “L” shaped tetris pieces… You know- the one that is always the opposite of the one you need? Now, though, it makes sense.
Monika says
When you guys first showed pictures of the opening between the kitchen and the dining room, I had a hard time envisioning the half wall. Now that you’ve added the trim and you posted that picture of how the fireplace looks from the dining room, I totally get it!
I’m really looking forward to seeing the next phase of the kitchen project.
Shannon Rosan says
So inspirational! This makes me want to tackle knocking down the wall that separates our kitchen from our living room!
kristen says
Wow!! It looks incredible! I wasn’t sure I was going to like it at first, but I LOVE it! I dream of opening up our house (specifically our kitchen) but I’d never have the forethought you two have. I cant’ wait to see it finished! It makes it look like an entirely different house!
deena says
Crap John that’s incredible! I usually just leave the channel on HGTV and I wish they’d give you a show!
Emily says
i love the trim below the cut-out! we have some friends who cut out a little pass-through in their kitchen and we always thought it looked bad/weird. apparently all they needed to do was add trim! brilliant!
Mary says
Wow! Wow! Wow! You guys inspire me every day!
Chelsea & Kyle says
Keep it up, it looks amazing so far! Such a change when you painted the dining room grellow, I think aside from the new door opening, the paint made such a huge impact on the space!
Ikl says
Have u thought about doing the top of the ledge in the penny tile you piked to tie in the backsplash
YoungHouseLove says
Yes! It’s a possibility but we’re not sure if it’s too much! We’ll have to see…
xo,
s
Katherine says
I have to admit, I really wasn’t a fan of the original idea to knock the wall out….but apparently I am a visual person, because I now love it!! Totally understand your vision now! Looks amazing, can’t wait to see the following steps!!
Lindsey says
Woo hoo! I am finally “getting” the peninsula concept now that the wall is up and trimmed. I was so like “huh?” for the last few weeks.
Obviousy I’m a visual learner, haha. It looks fab!
Katy says
This might seem pretty random, but I love the way the moss has grown into the cracks on your patio. It makes the patio look like it’s been there forever now (in a good way). So cozy. :)
Lauren Fraga says
Y’all, this looks so AWESOME! Can’t wait to see the rest!
statia says
So much more light!! I’ve been dying to get to my local ReStore. I love that place.
Erin says
Looks great! It looks surprisingly like the extra wide opening with little half wall that was between our old 100 farmhouse kitchen and living room. We even had the wooden ledge. This is going to be hard to explain, and maybe you did this and I can’t tell- but the only difference in ours was that the inside of the doorway from the ledge down to the floor was also trimmed out and painted white- it was wood all the way down and trimmed on the side. From pics I can’t tell if yours is drywall or another door jam. Ours was trimmed out on the bottom half exactly like the floor to ceiling side. It was awesome because you know how door openings can get banged up- especially at toddler height- it was easy to keep it clean and not dinged up. Other than that- it looks just like our last home, man I miss that big opening in my kitchen! But anyhow, you guys are doing a terrific job, it’s come a LONG way so far!
YoungHouseLove says
Yeah, we researched some pics and looked at lots of other half walls and they all seemed to have trim only on the doorway openings and were just clean right angles around the half wall. So we pondered it and thought that trim coming down on the half wall might be too much since we had the ledge and the trim under that (might look like a checkerboard of trim if we added more going vertically under the legde and ledge-trim). So we opted to go without. Here’s hoping it doesn’t get too banged up! If it does we can always revisit the trim + jamb idea for sure!
xo,
s
Jennifer says
I’ve followed your blog for a long time but rarely post. This was the first thing you both have done that I for sure thought I wouldn’t like, but I LOVE it! It looks like that opening was always supposed to be there. Nice work!
blythe says
100% AWESOME! I love this. Huge huge difference.
Brady says
It’s looks so great!
nikki says
fantastic job! i can envision how when the peninsula is fully installed, the fireplace will be just about dead center in the opening (stuff like that makes me happy). i really like how the whole house opens up (but now you’ll need to keep your kitchen clean ;-) )
Tamryn says
YHL never stops inspiring me. Looks great!
Violeta S. says
This is beautiful! It’s amazing what a little wooden trim can do. Great job :)
Carla Mahony says
I am loving following the progress on this, the difference is amazing!! You guys are impressing the pants off me (not in a creepy way ;) )
Kate says
love love LOVE it! So much light!
Sally @ Us+House=Home says
Wow, just wow. So inspirational, guys!
Sarah says
Will the floors be at uneven levels after you lay the cork flooring in the kitchen?
Sarah xx
YoungHouseLove says
We learned that under the vinyl tile there is an asbestos lining, which can’t be removed (pros recommend floating flooring over it to seal it in for the safest outcome) so we have no choice but to float the cork. It’s thin though, so the kitchen will only be about one centimeter higher than the rest of the flooring, and we’ll use a slight and subtle transition so it hopefully won’t be too big of a deal (we had something like that in our last house too). We hear as long as the step-up is under half an inch it’s all good so here’s hoping!
xo,
s
Ilana says
These acrylic bar stools are a little on the pricey side, but look great and have positive reviews.
http://www.cb2.com/dining-chairs-barstools/furniture/vapor-barstools/f4967
YoungHouseLove says
We’ve heard great things about them too! Definitely one possibility!
xo,
s
Lauren says
AMAZING what a difference the opening makes! genius. Can’t wait to follow all the progress and see the result
Elizabeth says
This is AMAZING!! I am totally obsessed and it isn’t even my house! I feel like you can tell how much lighter and brighter the kitchen is just from these pics. I know y’all are loving it!!
Joanna says
I have to say that although I have never left a comment, I have been following you guys for quite some time now. And I pretty much talk about your blog weekly with friends and family. Up until recently, I never really thought of myself as a DIY person…but then when I saw how easy you guys make it seem I have been having more and more ideas about what I can do! It is quite exciting!!!
But by far my most favorite thing you have done to your house is opening this wall. It is such a simple idea but it has done SO much and I am incredibly in love with it! I can’t wait to see it when it is all done!
YoungHouseLove says
Aw thanks Joanna!
xo,
s
Brandan WH says
My word! I was exhuasted just reading this post. You did a fantastic job. Hope you’ve allowed yourself a nice pat on the back, fist pump or whatever you do. This is going to be fabulous!
Jenn @My Southwestern Life says
We repaired a leaky bathtub faucet! lol Looks like your weekend was a lot more exciting. You guys did an amazing job on the trim!
YoungHouseLove says
Haha- that’s just as satisfying though! Congrats!
xo,
s
drew says
Do the splurge and buy the brad nailer and compressor. You will be amazed how wonderful it is. The compressor will also be handy for airing tires, beach balls etc.
YoungHouseLove says
That does sound fun!
xo,
s
Kelly says
All of your hard work has REALLY paid off. Congrats on the great results! In the future it would be great to see some side-by-side before and after shots so we can really ooh and ahh!
Lelanie Slater says
You guys have done such a great job! I am always amazed at your ingenuity and how hard you guys actually work on all these projects. It is turning into a lovely feature. Wow!It’s very inspiring.
Jenn says
I have no idea how you accomplish so much with a little (active) cutie pie running around; impressive life and work balancing! I’ve been meaning to ask where you acquired your dining room table, it is FABULOUS! Also wanted to let you know I’m inspired by your built-ins in your dining room and will be creating a similar look in my home office. Did you add them or were they already there when you purchased your house? Any tips on effective planning for built-ins?
Lastly, ditto Latoya @ The Scotts Crib! On your way to Columbia, please stop by my house in Charlotte, NC :0)
YoungHouseLove says
We were so lucky to inherit those built-ins, but maybe try googling around for “how to build built-in bookcases” for a tutorial? As for the table, here’s that story: https://www.younghouselove.com/2011/02/table-talk/
xo,
s
Keri Beth says
This is really a true home changer!
I love busting out walls for that open awesomeness!
Bethany says
wa-HOO! way to go! looks amazing!!!!!!
Cris says
It is looking great! That was a good idea to make the notch on one end!
Maura says
All I can say is WOW, you guys are amazing!!!
Jennifer says
You (Sherry & John) sound surprised!? I am loving all the openness and light. It looks amazing and I am NOT surprised! Nice work you guys!!
Can’t wait to see more!
AmandaonMaui says
Hey! It’s really coming together, isn’t it? I dig it.
Christy says
On the corner of your half wall where the wood paneling from the kitchen meets the skinny piece of drywall, are you going to be using a little strip of molding? Or did you just use caulk and mud to seal it and then you’ll just paint a straight line like it was 2 pieces of drywall? We’re actually going to be having a similar situation in our kitchen pretty soon :) Thanks!
YoungHouseLove says
We’ll just be using soft gray paint on the dining room side and the threshold side of the half wall and green paint on the kitchen side (we thought more molding under the ledge and the trim under it might be too much)! We’ll share pics when we paint for ya!
xo,
s
Naomi says
Looks AMAZING – like it was meant to be!
Kelly says
This looks AMAZING! A total transformation – you guys really rocked it!
Have you considered using the old glass-front upper cabinet next to the fridge, but rather than leaving it as-is, you could cut out the side and install glass there, too, essentially making it feel open on both the front and the side? It would fix the “people at the stools don’t want to stare at the side of cabinet” problem AND add more storage for pretty things!
YoungHouseLove says
We’d love to make that happen except it’s the wrong size (too small to work with the base cabinet under it, so it would look wonky- so sad). Just talked about that possibility this weekend though! So sad about the size…
xo,
s
Charles says
Amazing stuff!
I’m Not sure I’m pumped up enough yet to tackle a similar project quite yet.. but it’s more promising thanks to your efforts!
I would note that maybe you misunderstood the term “Topless Bar” – just sayin’ ha, ha.
Congrats on the progress!
YoungHouseLove says
Haha, nice one. High five.
xo,
s
Allison says
I’m so very curious….are the previous owners getting glimpses of the transformation taking place? Do you think they are interested in what your are doing? I’ve always wanted to go back to our old homes and see what the new owners have done.
YoungHouseLove says
We have heard that they read our blog (sometimes I get facebook messages from them!). Apparently they enjoy watching everything go down (they joke they don’t have to do any work but they get to see the house transform- hahah). Love that they’re so cool about watching us change their old house for our family!
xo,
s
Sara says
wow! what a difference. it looks great!
Kacie says
WoW! I’m so impressed. It’s looking great and I can’t believe how quickly you guys are bringing it together!
Kacie
http://www.acollectionofpassions.com/