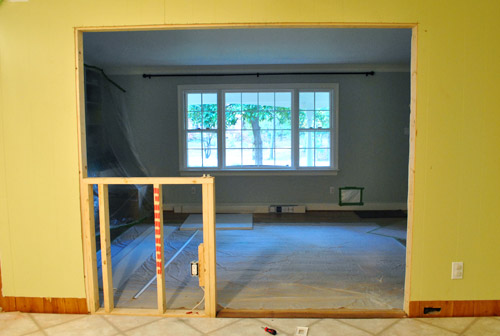
The wall is down (more here). Drywall is up (more here). Time for trim.
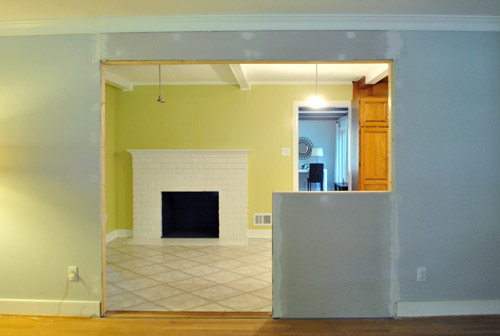
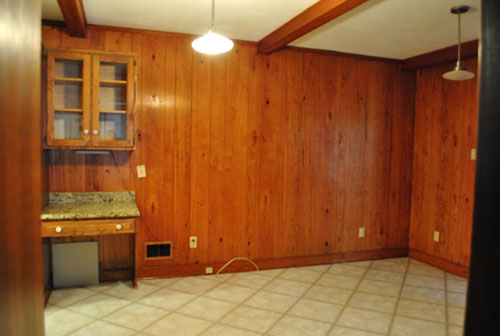
I actually kinda enjoy doing trim. Despite it requiring lots of focus and attention to detail, it’s very satisfying to see all of those rough edges turn into crisp white borders. But before I could get to trim, I actually had to take care of the ledge on our half wall and the door jambs first.
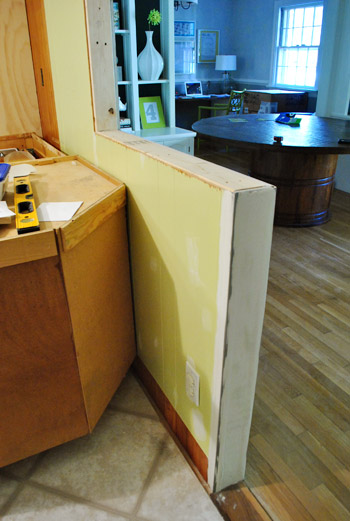
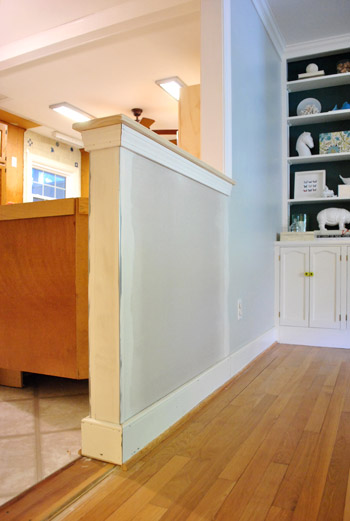
Our neighbors recently had a similar wall opening project done in their house (these guys), and we really liked how they treated their half-walls with a wood platform on top and trim beneath to dress it up a bit. It looks really finished and balanced and is also a great place to set stuff out when entertaining (like a few small dishes of nuts or candy or some pre poured drinks). So we bought this basic plank of pine that’s eight inches wide and four feet long to use for the top ledge.
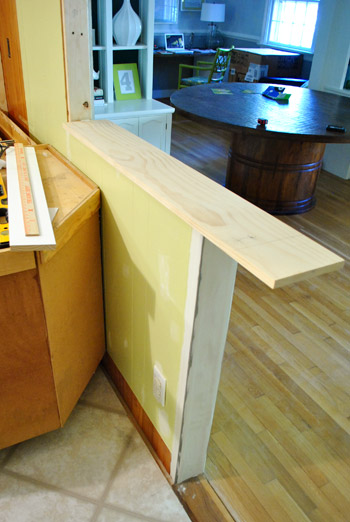
Obviously it needs to fit a bit better than that. On one end we just sliced it a bit shorter, but on the other we actually wanted to notch it over the wall so in the end it would have the same amount of overhang on each side (we had to factor in that it would have to extend beyond the trim on the inside angle, so it’ll look crazy long until we add that a bit further down the page). So we both measured and marked the wood (twice, to avoid any weird little mistakes)…
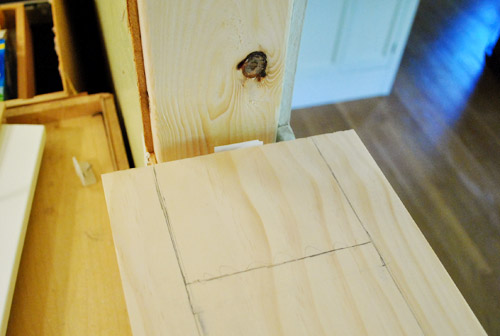
…and I ran outside to make the cuts in our driveway (using a jigsaw to cut the notch and a miter saw to get a straight edge on the other end).
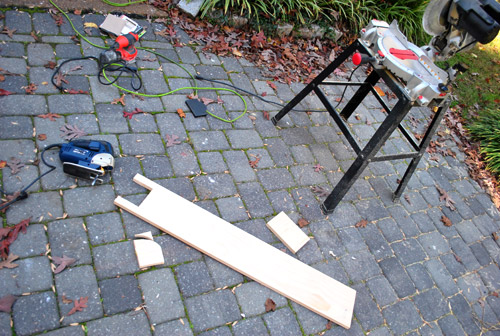
Before installing it, I also sanded down all of the edges to make them a bit softer. No one wants to slice their arm on a sharp corner walking through our new opening now do they?

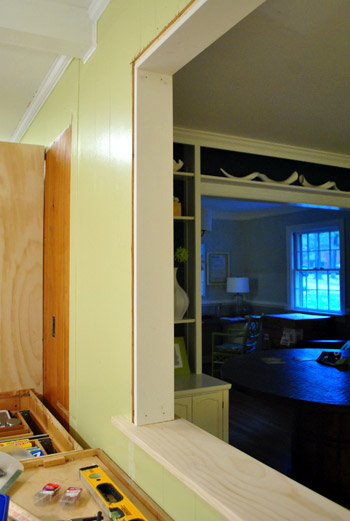
Fit-wise, we got lucky. Perfect on the first try. This was either a very good omen for the rest of my trim cutting, or a sign that it can only go downhill from here. See how it looks oddly long here? That’s just because there’s no trim on either side, which will end with just a slight overhang of the ledge under it to ground it like many of the windows in our house.
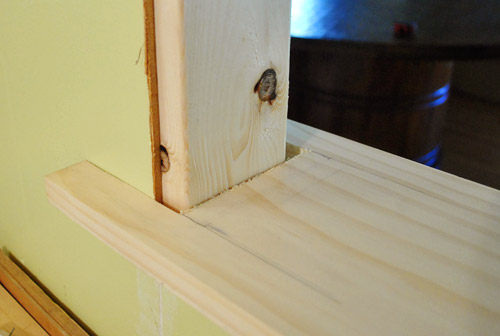
With a couple of nails on either end, we hammered that guy right into the frame and it was set (we’ll eventually prime and paint it white like the trim). Then we could begin to set the door jamb in on top of it.
Fortunately our doorway was a standard jamb width of 4 5/8″ so I could rely on this pre-packaged door jamb kit they sell at Lowe’s for about $18. Well, not completely. It was meant for a normal-sized doorway (aka a 3ft opening) so I had to buy another $6 side piece to help extend my top jamb.
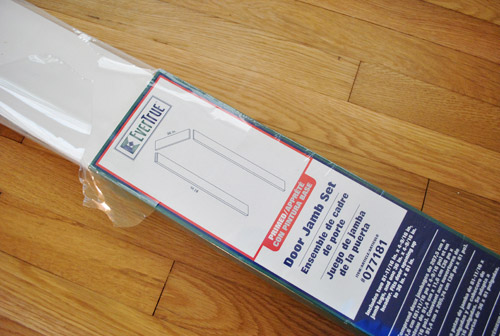
The reason you install a jamb over the wood that frames the opening is because the jamb is wider so it covers the sides of the drywall and paneling so that once the trim is added the entire opening is seamless and sealed (so you can’t peer beyond the wood framing piece from the side and see the side of the drywall).
The instructions said to assemble the jamb first and then lean it into the doorway as one piece. That didn’t seem very practical given our unique situation (aka: our uniquely sized opening), so we hung each jamb piece separately and it worked out really well. I cut the short side of the doorway first then together we held it in place and nailed it in with some finishing nails.
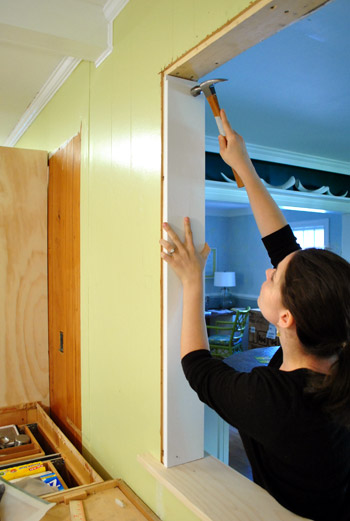
Then we slid in the short side of the top jamb and hammered again. It was finally starting to look kinda like a doorway. And trim would definitely seal the deal.
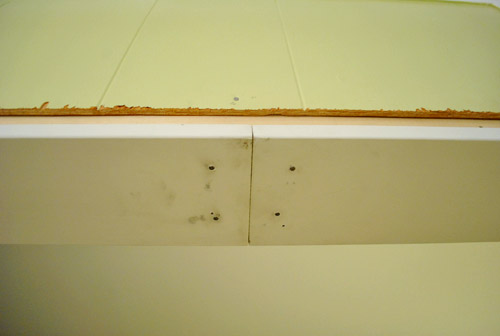
Here’s where we had to line up the two pieces of the top jamb. Ideally we’d love to have one piece, but we couldn’t find a 92″ piece. Fortunately caulk and paint will make this look pretty darn seamless. Especially since I took a minute to sink every finishing nail’s head into the jamb with a nail punch (it’s a cheap little manual tool explained more here).
With the top on and the other side hammered in place, the jamb was officially done. So with that and the ledge checked off of our list, we could officially turn our attention to the trim.
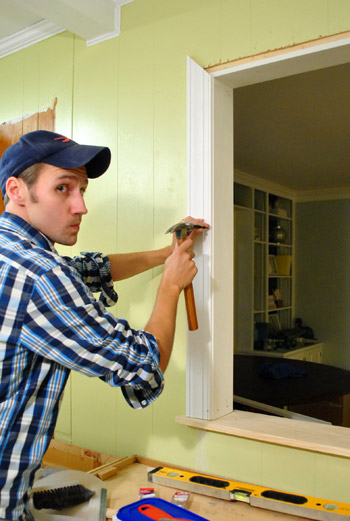
I’m not gonna go into crazy step-by-step trim installation here (you can read all about that when we re-trimmed our old bathroom). As usual it involved lots of measuring, cutting it on an angle with my miter saw, and hammering it carefully into place (using a nail punch to manually sink the finish nails to keep the trim ding-proof). This happened on all three sides of the doorway, in both the kitchen and dining room sides of the opening.
We also added some slightly smaller trim under the ledge to beef it up a little bit because:
- we had seen our neighbors treat their half-walls this way and liked how it looked
- the big picture window in the dining room along with many other windows in our house are treated the same way (with a ledge on the bottom that’s grounded by some slightly smaller trim)

In addition to installing trim around both sides of the doorway, we also had to reinstall a bunch of baseboard that had to come out during demo. Fortunately enough of it was intact enough that I didn’t have to buy anything new. Some the paint got scraped off during the removal and rehanging process, but once everything is caulked and painted again no one should be the wiser.
Some of this baseboard and quarter round may have to come up again when we do the floor, so we left some of it unfinished (like the quarter round where the transition will go after it’s added). But we tried to complete most of it so that it looks as polished as possible during our construction phase (which will last the next couple of months).
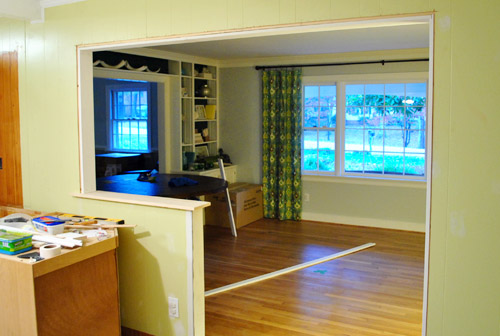
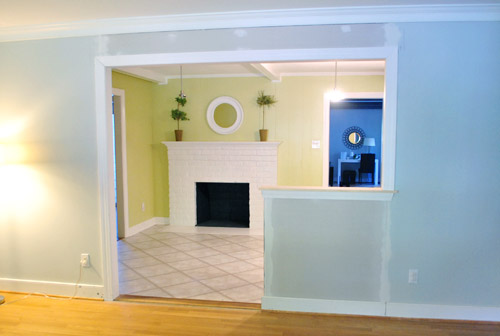
So here’s the room from both sides with the finished trim. Definitely looking more doorway-like, eh? Remember we’ll be painting the wood ledge white like the trim so it’s more integrated.
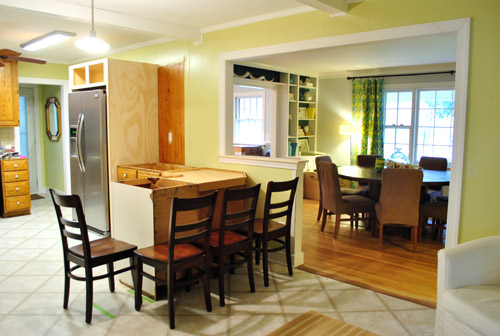
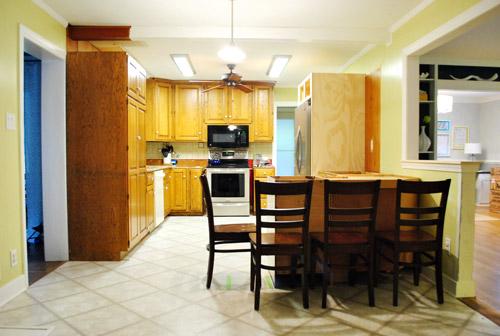
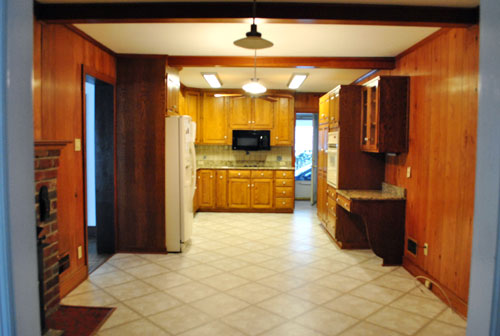
Now to make it look a bit more like a kitchen and dining room, we’ve moved furniture back in! Although the chairs in the kitchen are just placeholders (we’ll get some counter-height stools that are a bit lighter looking – maybe even acrylic or something to keep things from feeling too heavy or wood-riddled). So excuse the chaos and busyness of things that are out of place and soon-to-be changed (it’s a lot crazier and busier than it’ll look in the end).
Of course there are still missing counters, walls, and trim that need to be painted, kitchen cabinets that need to be painted, and we have a million other kitchen updates to do (lighting, flooring, backsplash, yadda yadda yadda).
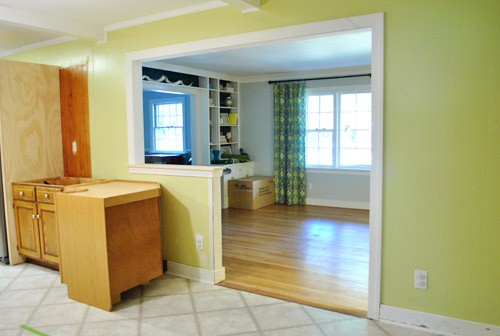
You might also notice that we acquired our last cabinet for the peninsula. Woot. See him there on the end? Guess how much it cost? Rhymes with “dero zollars.”
It’s from the ReStore, and no we didn’t steal it. When I told the guy I was looking for an 18″ base cabinet, he said they had one out back I could have for free. Apparently the donor left them outside where they endured a light rainstorm before the ReStore noticed them. So even though they hadn’t gotten damaged, it was against their policy to sell them. So why not take it home and give it a try? We gave it a couple of days in the carport/sunroom to ensure that it had aired out and wasn’t damp or anything. Then we looked it over and it checked out a-okay (no water damage/mold, etc). And the bonus? It’s the closest match to our existing cabinet doors and drawers that we’ve seen (the doors and drawer are beveled so they’re half-sunk, making them the same thickness as all of our half-sunk doors and drawers).
Oh and see the tape lines in the pic above? The first one marked where the peninsula would end and the second one marks where the 12″ counter overhang will end- so we can try to picture it as the rest of the room comes together.
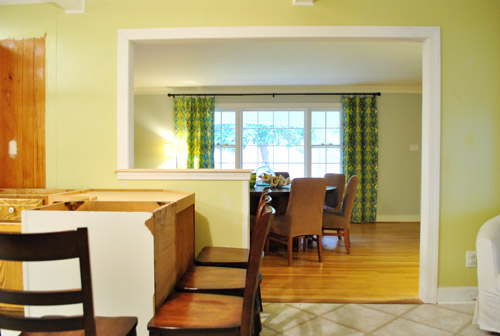
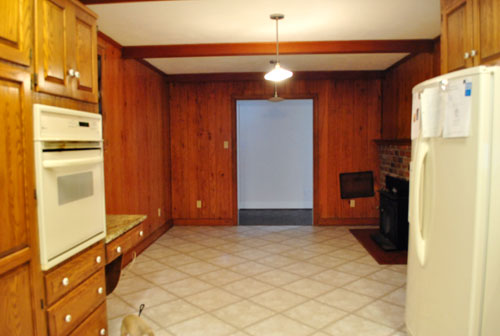
Here are a few more shots to show you how much the opening is a game-changer around here. Even with full chaos going on, it’s such a difference. It’s so nice to have more daylight in the kitchen thanks to the opening. And once we paint the cabinets and install our new white counters it’ll be even lighter in there (with mocha cork floors to ground things).
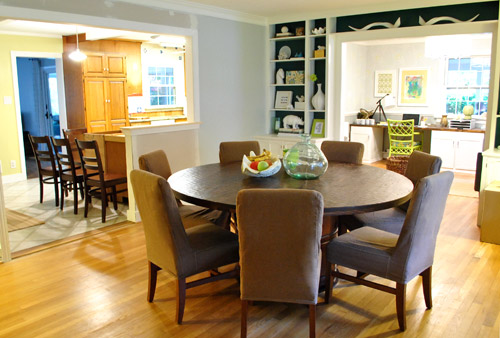
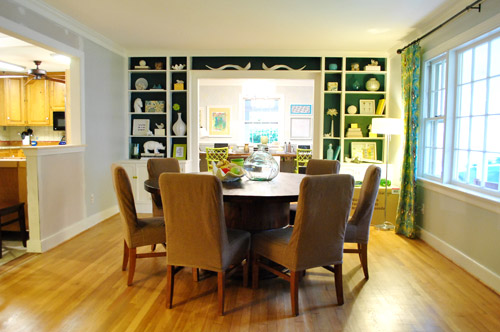
Here’s a shot through the opening now that there’s trim and the table is back and we re-hung the curtains. We love how the opening lines up so well with our big picture window in there.
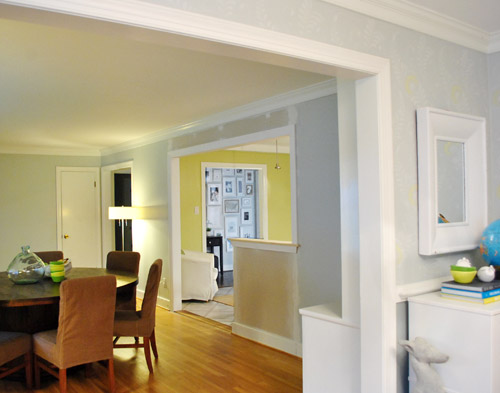
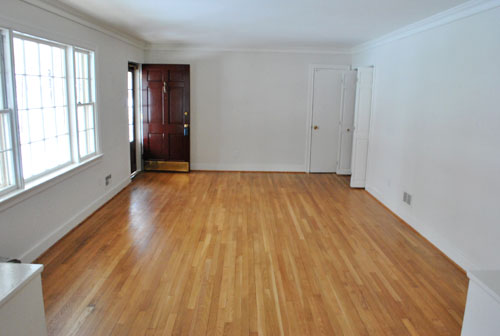
Here’s the other direction. Now we can enjoy the fireplace from the dining room.
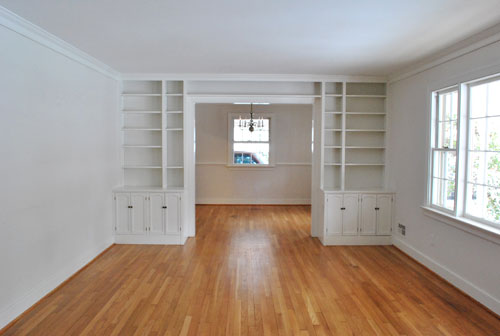
Here’s another shot looking past the dining room into the office. Ignore the abundance of odd items on the dining table (a faux clam fruit bowl, a stack of serving bowls, and a big clear vase) and the big box and floor lamp near the curtains on the right (they’re not permanent of course – just need to add a big chandelier over the table and install the new dishwasher in the box). So it looks crazier than it eventually will when things are settled.
Here’s that room from the other direction (still need to add a big buffet with some large art over it and a nice sized rug to anchor the entryway area (among other things).
One of the coolest “bonus views” that we gained was the peekaboo into the hallway frame wall all the way from the office. It’s so nice to see the sunny avocado kitchen framing the view.
We sadly didn’t manage to get any photos of Burger running through the new doorway (the little guy was a blur), but here’s Clara loving the new route.
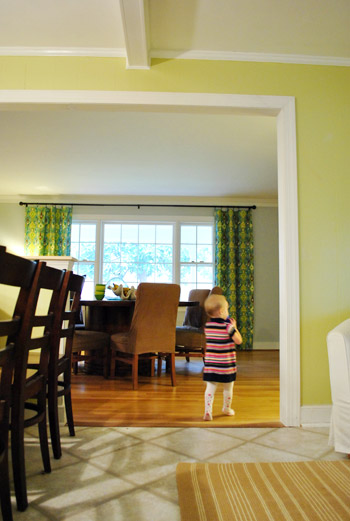
She’s such a quick adapter. She just sees something new, smiles, and tries it out. A day later it’s old hat. Like it’s always been there. Although we’d argue that it should have always been there anyway. Burger is completely used to the new flow too. He cuts through there all the time.
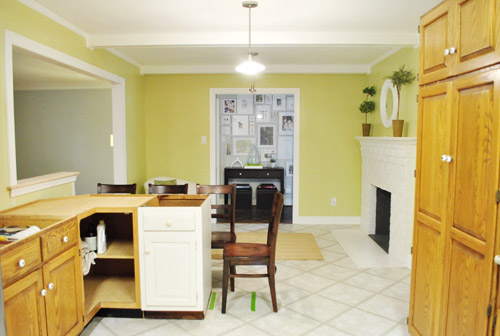
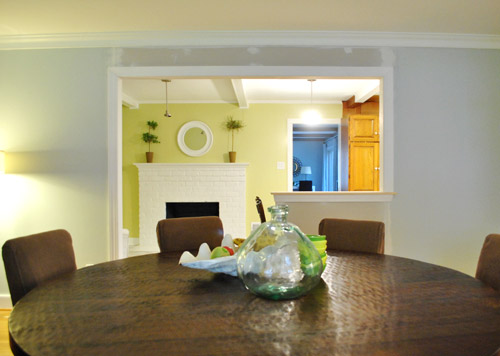
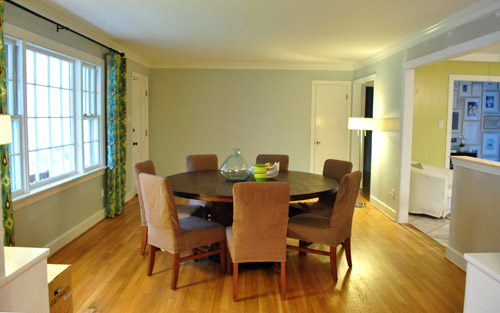
Oh and since we always love taking a look back, here are some older shots from similar angles to some of the ones above taken right after we moved in last December:
What a difference eleven months can make, huh? Still have lots to do, but it’s getting there one day at a time.
Oh and when it comes to costs, finishing the entire opening ourselves was $90 (that includes doing drywall, adding door jambs and the ledge, and adding trim on both sides of the opening). It would have been $250 to pay the contractor to do that stuff, so we’re thrilled that we could take it from here…
… and save 160 big ones.
What did you guys do this weekend? Any other door jam, ledge, and trim stuff going on? Any standing around and gazing lovingly at a new doorway? There was a fair amount of that going on here.

Erin J says
It’s looking so nice! I love that you scored a FREE cabinet!! Have you thought about what it might look like if you stained the ledge dark like the floor/ dining room table? Just a thought :)
Keep up the good work!!
YoungHouseLove says
We did think about that for a sec, but we like how the white will tie into other doorways nearby and even the fireplace mantel! We figure it’ll be nice for the eye to move beyond the half-wall so we don’t mind keeping the emphasis off of it!
xo,
s
Kiran @ KiranTarun.com says
That seriously looks gorg!! I love the wood platform fit and trim idea. Makes everything look so seamless and neat. Love love love the opening to the dining room!!
erin says
looks… freaking… awesome…
Desiree says
WOW! Looks amazing you guys!
Lea Lindsay says
Gotta admit I wasn’t sure about the half wall in the opening, but after you guys got the drywall, ledge and trim installed, I became a believer. Don’t know why I doubted your instincts. Silly me. BTW…did you notice your new opening kinda sorta looks like a “7”?
YoungHouseLove says
Haha- yes… or a P! A big monogram hidden in our house. Haha.
xo,
s
Jenny says
It is looking so awesome!! Your before and after shots are totally inspiring, as always!
Jeannie says
That is really looking fabulous!
Kate says
Awesome! I love that you can take full advantage of the sunlight from that big window now. Lookin’ good!
Francine says
Show us a view where you are standing on your head and take a shot! That should cover the very last angle you missed. lol
YoungHouseLove says
Haha- will do!
xo,
s
Laura says
wow it looks so good..way to go!!
Ashley says
Excellent decision!
Rhiannon Nicole says
It looks AMAZING, guys! The kitchen and dining room look like brand new spaces. I can hardly believe how everything looked when you moved in versus what things look like now. Keep up the fab work :)
Relevant Notes says
It looks fantastic!
BrookeJ says
Looks fantastic, amazing job you two!
Mackenzie says
Holy guacamole! Looks great :) This is the flow your house was supposed to have all along! Whoop whoop x2 for S&J!
Amy @ A New Old House says
This looks great- what a huge difference!
I really like how you thought to notch out the ledge piece so that it extends past the trim… makes it look like it was always there!
Erin says
Everything is coming along beautifully! My sister and I can’t wait until you’re finished.
Lynn says
Sherry–I ORB’ed all the hardware on my front door this weekend. Ive been DYING to tell you since Saturday! I came to work and said to my friend (who also reads your blog), ‘I need to tell Sherry about my ORB’ing!’ I LOVE how it turned out. SO updated and sleek. The tiny little shimmers make my heart swoon. Thanks for the tutorial, and introducing me to the world of ORB. :)
YoungHouseLove says
Yay! So glad!
xo,
s
Abbey_S. says
J&S, Not sure if anyone has commented on this, but from your electronic renderings you posted a few weeks ago, it looked like the edge of the counter and the pony wall would be level with each other. What changed your mind about the ledge being slightly higher?
YoungHouseLove says
We just thought a lot about how we wanted the peninsula to feel distinctly on the kitchen side of the space as opposed to floating between both rooms and visually looking “closer” or more crowded around the dining table, so we thought a smidge of separation would be nice- and we’d gain the ledge which we love the look of (it mimics other window and door trim along with things like the nearby fireplace mantel).
xo,
s
Nicole says
We just moved into a 50 year old ranch a month ago. All of the trim is wood right now and there are some scratches I’ve noticed too. Do you have any suggestions on how to mask them in order to have them looking nice after a coat of white semi gloss?
Your kitchen is going to finally have a tan! That natural light must be wonderful!
YoungHouseLove says
I would lightly sand them and use some sort of thick oil-based primer followed by self leveling paint (like Ben Moore’s Advance paint). That way it’ll hopefully look a lot less scratched once you’re done!
xo,
s
Nicole says
Yay! Thanks!! :)
Yulia says
Is it weird that I’ve been waiting all weekend to see an update? Looks great! It was worth the wait!!!
You guys seem to have a knack for doing things in stages. In my house we would have waited to paint the walls until after all the demo was done. Of course that means that we have to live with ugliness longer. I’m curious if you do it your way because the blog world is impatient.
YoungHouseLove says
Haha- we actually didn’t paint the walls yet! Planning to do it soon though. We just want to do it all at once, so we’re waiting to set the final cabinet (the pantry) in the kitchen and then we can prime and paint the paneled wallls that are wood and the weird half-painted ceiling beam and all the drywall that still needs to be painted!
xo,
s
Yulia says
I meant that you painted your kitchen and dining rooms long ago, but now they need to be touched up. In my house We would have lived with unpainted ugly paneled walls and would not have painted the long dining room wall until the new doorway was created. Yeah, we’re lazy like that!
YoungHouseLove says
Haha- oh yes! That was just because we couldn’t live a day longer with that dark paneling and those odd paint swatches on the dining room (which we did live with for something like six months- haha).
xo,
s
Haley says
It all looks so awesome! I’m wicked impressed….plus, I love the shots of Clara
Gina @ Running to the Kitchen says
It’s looking awesome! I love the shot from the dining room, with all the furniture in it’s real place. Can’t wait for you guys to finish it all up!
Candice says
I was waiting on pins and needles all weekend to see what you had accomplished. Then when I signed on to see and there was no update at 7 a.m. (Arizona time) I got all bummed out. I started to get ready for work and came back to my computer and all was right with the world because your daily update was there in all its glory. I was late for work (to be honest, I am late every day) because I had to read the details and see the photos. Everything looks great and I can’t wait to see what’s next on the drawing board.
GreenInOC says
Unbelievable!
That’s a lot of detailed work – I didn’t understand about 87.32% of it so all those pictures helped!
Have you thought about putting a chalkboard on the open side on the peninsula for Clara and future kiddies to draw on while you all hang out in there. I bet you could score a free one to hang or just paint one on.
As I was reading this post I wonder if with a huge project like this you feel pressured to move faster – I know I would!
YoungHouseLove says
It could definitely be fun to work in a chalkboard somewhere! As for pressure, we felt it a lot more in our first house when we wanted everything to be done, done, done every time we had company coming over. Now we have somehow realized that we’re never done and one part of the house is usually in ruins so we just embrace it. Haha. We like to just take things one day at a time to avoid getting overwhelmed, and it’s nice not to put silly pressure on yourself (as if our family loves us any less when they see unpainted drywall).
xo,
s
Laura says
Looks really great, guys! You guys have a really good eye for this stuff. It’s hard to picture just how great an impact such a project can have, and honestly, if not done right it could have looked really awkward. But no, looks perfect and like it was always there. I bet the old owners are fascinated by this. :)
Laura says
I meant to ask, do you think this type of renovation increases the value of the house?
YoungHouseLove says
Yup, I think anything that makes a house feel bigger, brighter, and more functional is appealing to buyers. Anything dark, dated, or closed in is harder to sell according to most realtors.
xo,
s
Traci E says
Oh wow, it looks so good!
Ruthie says
Lovely! Are you planning on replacing the paneling in the kitchen eventually? or just going to stick with the painted look?
YoungHouseLove says
We like painted paneling so it stays! In our first house we had painted paneling in the den and loved the subtle texture that it added. It certainly doesn’t bother us enough to gut out all the cabinets in the kitchen and open that can of worms (there’s no drywall or plaster behind it – just studs – so it would be quite the job).
xo,
s
Ruthie says
Makes sense! It’s so amazing how painting it looks so different from the original thing and most people are concerned with shiny stainless steel appliances and granite countertops anyway (for re-sale). Way to go!
Susannah says
Everything looks GREAT! The before and “in progress” photos are unbelievable. I am so impressed with your ability to visualize how things will look after a big change.
My weekend was spent repainting a freecycled bookcase a lovely semi-gloss white and spray painting our gold 90s doorknobs and front door hardware ORB (thank you, S, for the spray painting tips via email). HUGE improvement already! My husband came home from work and could not believe they were the same knobs. He was sure I had gone out and bought a whole new set of knobs. Hurray!
Melanie says
Kudos to you! Onward and upward!
Hilary says
Great job guys! Keep it up – love these posts :)
Lauren says
Looking good, kids!
I know you’ll be painting the wood white, but I must say that I love the way it looks with the natural wood. But that’s just me.
As always, I’m super excited for you guys. I know it’s a lot of work, but what a sense of accomplishment you will have after it is all done!
You should definitely sit at your new countertop and have a glass of “mommy juice” (AKA wine), as we call it at our house, to celebrate!
Ashley @ sunnysideshlee.com says
Lookin great guys!
Stephanie says
I love the detailed post, but what I LOVE even more (every time I see it) is the fact that the new wall opening makes the fireplace seem centered and intentional. You guys are so smart with the planning! Great job!
Laura says
That looks so great! You two are geniuses! =)
Brooke says
It looks so great, and like all the best improvements, it definitely looks like the house was meant be that way all along. Can’t wait to see how the kitchen progresses!
Lindsey says
Looks amazing, can’t wait to see more!!
Becky says
That looks amazing! What a difference. Good job!
Christie says
I love that you worked with the asymmetry of the fireplace, and made it perfectly intentional with your kitchen floorplan.
We just finished designing our little house, and I know there are things (especially asymmetry) that couldn’t be helped due to small square footage. But I also know that since we are building it slowly (i.e. debt-free, pay as we go), that any weird design issues that pop up can be designed to be better than first glance.
Ashley L. says
Looks amazing!!! : )
Kelly says
Whoah Nelly! It looks phenomenal!
However, I’m extremely disappointed you missed the golden opportunity to use the post title: Pump Up the Jamb
YoungHouseLove says
Oh. No. He Di’int.
John is beside himself with grief.
xo,
s
Jessica says
Oh my goodness, that is an awesome title. Looks like another doorway will have to be created somewhere. :)
Sayward says
I had the exact same thought!
sally says
Sorry – totally unrelated comment but I wasn’t sure where to send it except as a comment to a recent article. Go to:
http://www.amazon.com/molly-mutt-Midnight-Train-Duvet/dp/B005KRR560/ref=pd_sim_sbs_petsupplies_8
and look at the dog bed that is similar in colors to Sue the Napkin!
sal
YoungHouseLove says
Haha- hilarious! Love it.
xo,
s
Leigh says
Your kitchen is looking awesome! I love all the updates. You guys are seriously making me want to redo our home, but we rent so I think that would be frowned upon.
Jess M. says
THAT LOOKS AMAZING!! Nicely done you two :D
Ashley says
this looks fantastic already!!
Suesan says
It’s coming together quite nicely. Since you asked, this weekend I patched some holes in the laundry room from some electrical work we did. I sanded and then painted. I switched the light switch to a lighted one so we can see it because it’s so dark in that room and the light switch is opposite the door. I replaced the two-handled kitchen faucet with a single handle and then adapted (drilled new holes and chiseled off pieces) the utility sink to hold the old kitchen sink. I painted my youngest son’s room to cover yellow, orange, blue and green paint (what were those owners thinking)? I caulked the molding after, shooting some more nails in to hold it better and then hung curtains in his room. I did all of this myself as my sweetheart was busy helping people move, replacing the muffler and then repairing the broken brake line from fixing the muffler (d’oh!), and then building steps up the hill to the front of the house. For added kicks this morning, we installed the plumbing for the utility sink. So, it was a busy weekend and I may be sporting a DIY-hangover.
YoungHouseLove says
Holy cow- you were so busy! I love it! And I can totally relate to a DIY hangover.
xo,
s
Melissa Evans says
Holy transformation!!! such a GREAT great GREAT job you guys have done so far! it’s AWESOME!!
Amy says
Shut up! (said with the Elaine shove)
It is a.m.a.z.i.n.g!!!!!!!!
I love the picture of Clara the best, total sweetie!
Emily@ Tales of Fruit and Cake says
We aren’t quite to trim yet, but this weekend we build a shed. At 20 weeks pregnant you won’t believe my contribution to the effort!
Roofing.
Yeah, I’m crazy!
YoungHouseLove says
Wow. You go girl!
xo,
s