Some aspects of this kitchen remodel are certainly less exciting than others – especially when compared to having just opened the wall up. But alas, these things must be done. Including a few that we wanted to accomplish before the countertop guy came to template for our new counters (that’s something we want done accurately, after all).
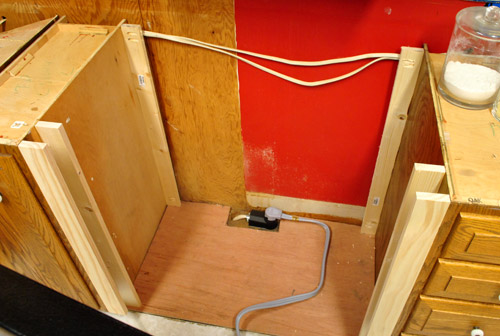
First on our list of little things was filling the gaps next to our stove.
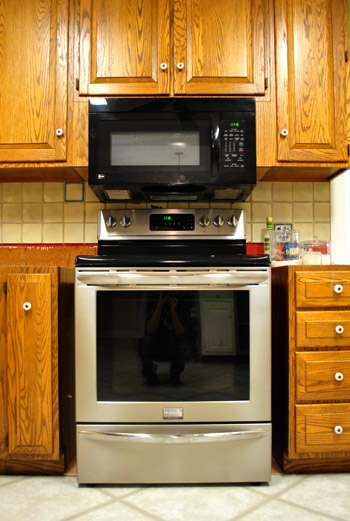
The base cabinet that we removed was 36″ wide, but the stove is only about 30″ leaving a little under 3″ of nothingness on either side. Since you can’t squeeze much function into two and 3/4ths inches (almost every pull-out drawer was 3″ or more), we decided just to put in filler pieces of wood. Oh and for anyone wondering why we didn’t scoot the stove to one side and add a wider pull out drawer, if we didn’t leave the stove centered the hood would be off-center, which would mean widening the ceiling hole (= drama). Plus none of the thin slide out drawers had doors that looked like our existing ones anyway, so it was just not worth the money/trouble. And although we thought about some sort of ornate leg or braided detail, we ultimately decided that we wanted other things like the wall of penny tile backsplash to be the star (along with items on our floating shelves), so two thin and basic filler pieces of wood were our final pick.
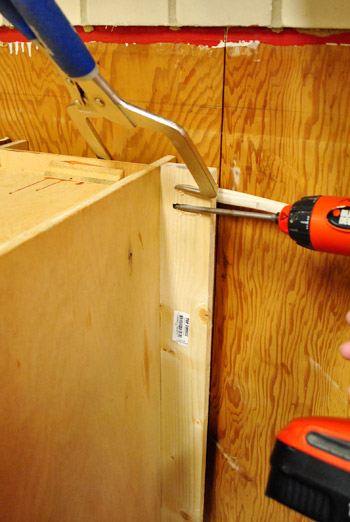
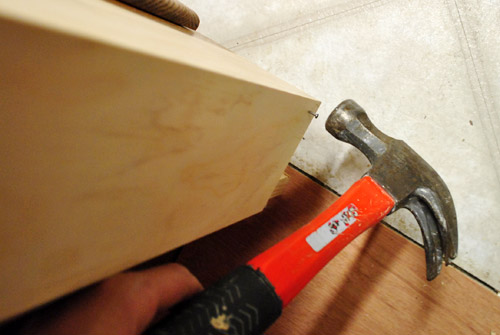
I grabbed a few pine “project boards” at Lowe’s, cut them to size, and drilled some pilot holes with my Kreg jig before screwing them carefully into place.

Obviously we needed the fillers at the front to visually fill the gap, but we also decided to put one at the back in case the counter guy needed it for support:
In total, each side had three separate filler pieces. We probably could’ve gotten away with two, but it’s not like the boards were breaking the bank (I spent about $11 total on this entire project – which is at least $100 cheaper than some sort of pull out dealie).
Here are both sides done (ready for the stove to slide back into place):
Not bad, eh? Once the counters are on and the cabinets are primed and painted no one will even notice them. Especially since many of the other base cabinets in our kitchen already have fillers in the 2.5″ range.
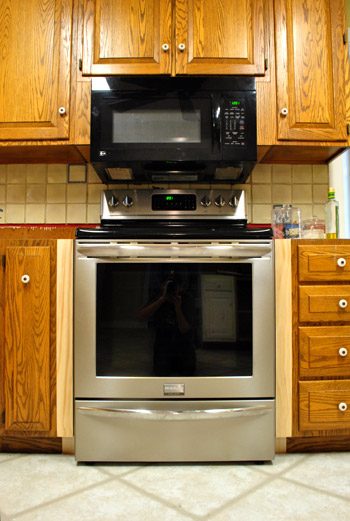
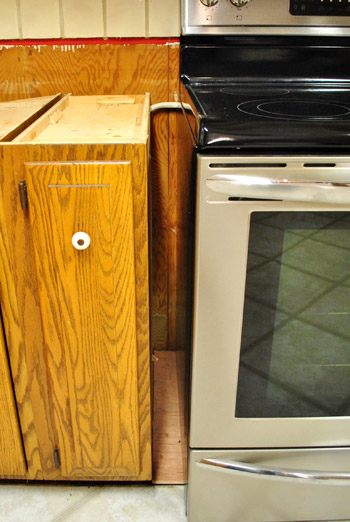
Then we stepped a little closer and put on our Picky Pants and we saw that there was still a noticeable gap. Guess we’ve gotta go buy a bigger stove…
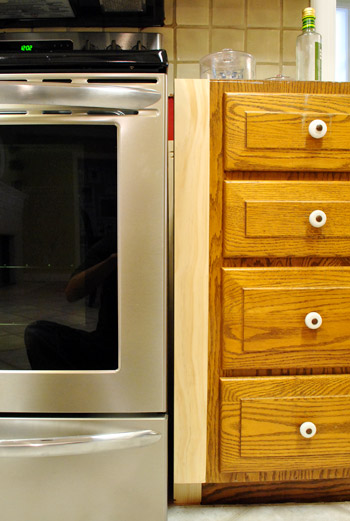
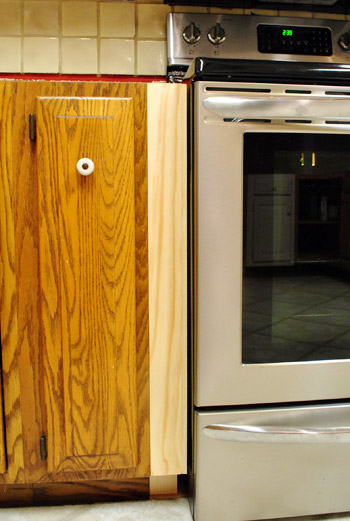
Kidding. Obviously I just needed to add one more sliver of filler wood. The gap was just over 1/4 of an inch, and I knew we could do better. So I headed back out to Lowe’s a grabbed a couple of these.
It’s a 3/8″ thick project board that fit perfectly into my slightly-too-big gap, thank goodness (though they added $4 to my total budget, now breaking the bank at $15). So I nailed those two suckers in place, being super sensitive to keeping them flush with my other filler piece along the front.
Here’s what they looked like on both sides. I didn’t bother putting them any further than the first two panels since they were strictly aesthetic.
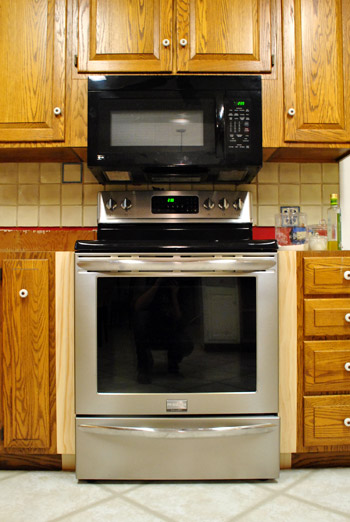
Then we just slid the stove back in. MUCH better. I know it’s hard to tell in the pic below, but trust us that it’s just about as snug as we’d ever want it (any closer it would be hard to get the stove in and out). Oh and once we demo the tile from behind the stove it’ll be able to push back against the wall a bit more for a more flush look. And once we add the toe kick across the front of all the cabinets the bottom will be seamless too.
So with that done…
… our next little task was over on the peninsula.
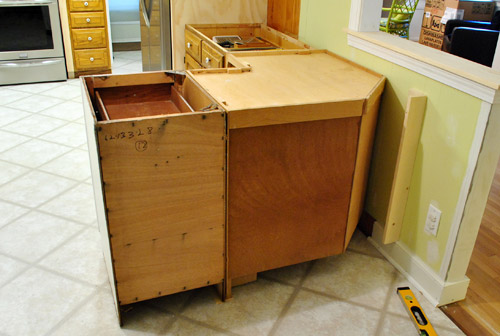
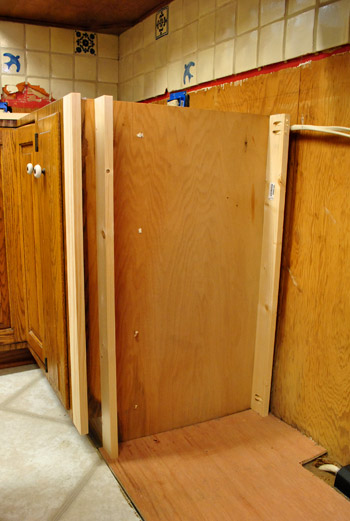
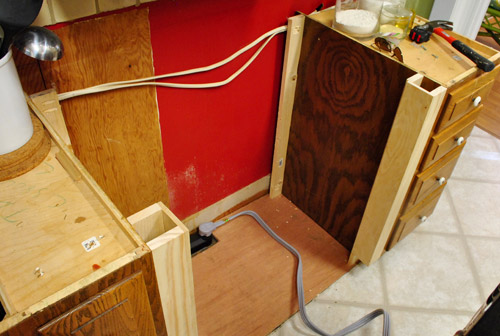
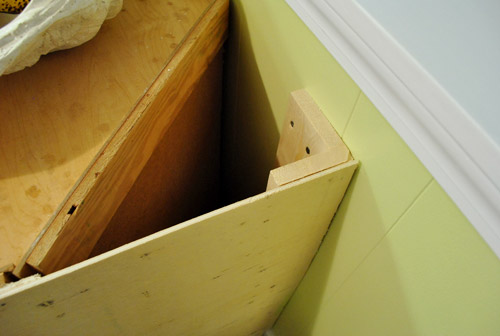
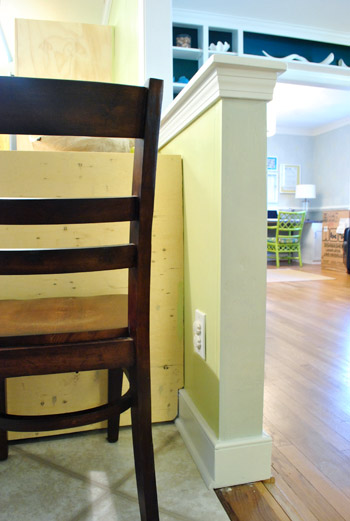
Since we don’t want the guy templating the counters to think we want an angled corner or anything, we wanted to attach a flat panel on the back of the entire peninsula. It’s something we’d have to do eventually, so why not tackle it while we wait for counters? You can see in the photo above that I had already attached a little corner piece to anchor the panel against the half wall. Here it is a little closer:
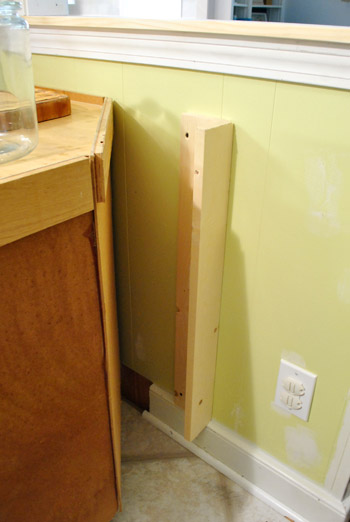
It’s basically just two scrap pieces of wood that I screwed together at a 90-degree angle using my jig. Then I screwed it into the wall so that the flat edge would be flush with the back of the cabinets. Then I was ready to attach my plywood panel.
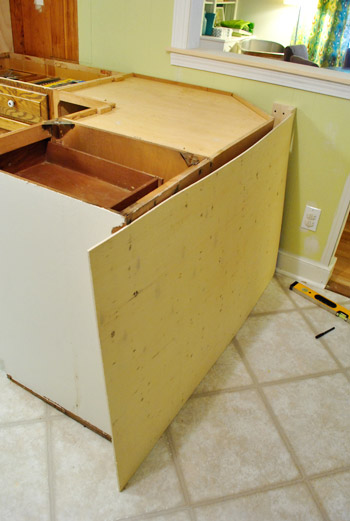
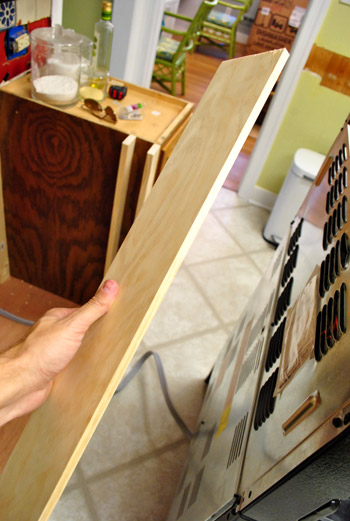
I actually bought this piece of wood back when I got the plywood for our refrigerator built-in so I could transport it in my rented Lowe’s truck (how’s that for thinking ahead!). It’s just a thin piece of “utility plywood” that the Lowe’s guy recommended. It was a whopping $9. They had cut it to size for me in the wood cutting area, but because we had later switched from a 21″ end cabinet to an 18″ end cabinet I had 3″ of overhang that I had to cut off with my jigsaw.
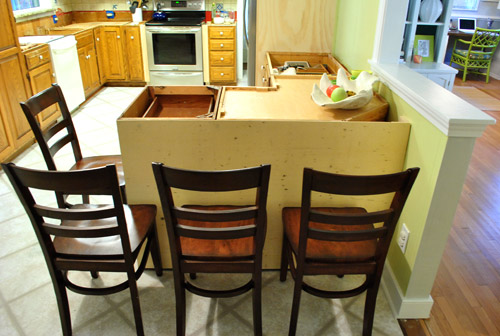
So here it is all cut and nailed into place:
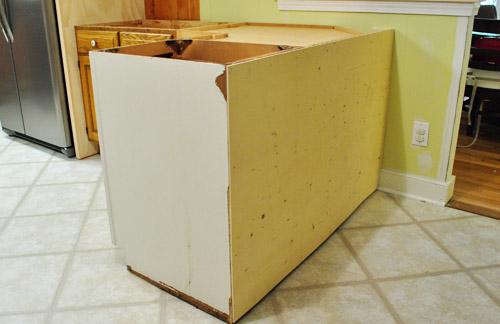
Not very exciting looking, we know. Eventually we’ll be adding trim – baseboards, corner pieces and maybe even a three paneled board and batten look. Not sure yet. Oh, and it will of course get painted to match the cabinets. But for now it accomplishes the goal of squaring off that corner for the countertop measuring festivities (it’ll have a 12″ overhang of Corian on two sides to accommodate four stools).
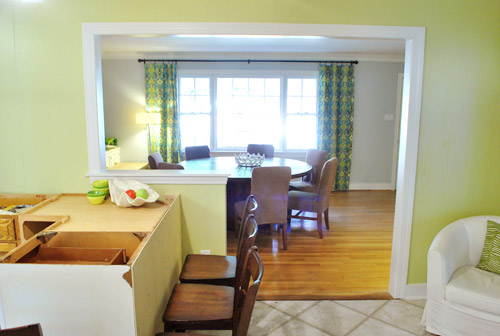
Can you sort of start to see how it’s coming together? Of course the chairs are placeholder and we hope to get some lighter looking stools (maybe made of acrylic for a nice airy feeling).
Oh, and do you notice the other thing that we did in the picture above? I’ll give you a hint. It starts with a “p” and ends with “aint touch ups.”
Obviously paint was not a critical step for the counter templating process, but it was more for our sanity (and we had it all on hand so it was free). There’s still lots to be painted (um, hello cabinets – but those have to wait until we get our counters in to avoid dings). So we got busy painting the raw trim, drywall, and paneling leftover from the pantry/fridge shuffle and wall opening. It really does make our exceedingly unfinished kitchen look a smidge less unfinished.
You’ll notice that we opted to paint the inside edge of the half wall light grey like the dining room. We figured it’d be weird to carry the grellow that’s on the kitchen paneling over since the side of the half-wall is drywall (like the light gray dining room). The soft grey is much more subtle and almost looks white like the rest of the door jamb, so it works nicely.
Oh and don’t mind the drip on the “temporary threshold.” That’s actually just a piece of paneling that we had leftover from the wall opening project that we cut down, flipped painted-side-down, and nailed in to bridge the gap that was created by removing the wall. It’ll eventually get covered with cork and we’ll add a very small threshold to join the cork to the original hardwood (just like we did in our first house where the original hardwoods met the new ones that we added to half of the house).
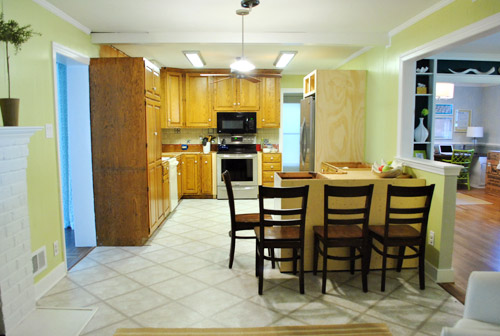
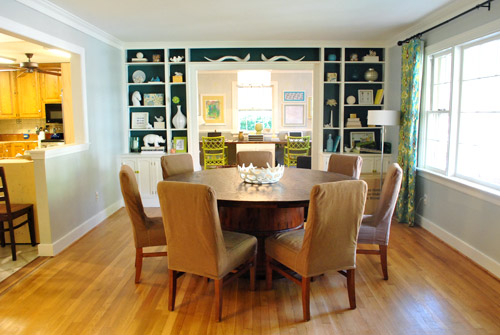
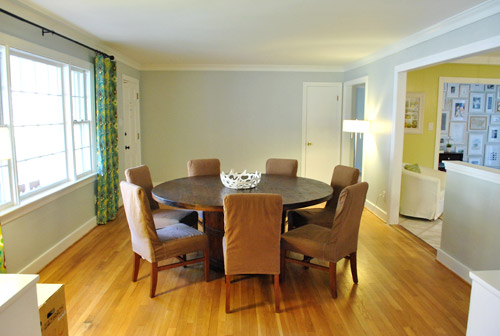
Now here are a bunch of “after painting” pictures of the kitchen and dining room (since it’s the closest thing we’ll have to a polished after for at least a few months). But ignore the two oddly placed floor lamps in the dining room (we can’t wait to get a big chandelier for over the dining table) along with the new microwave box sitting near the built ins (the new dishwasher box is hanging out in the office until install time).

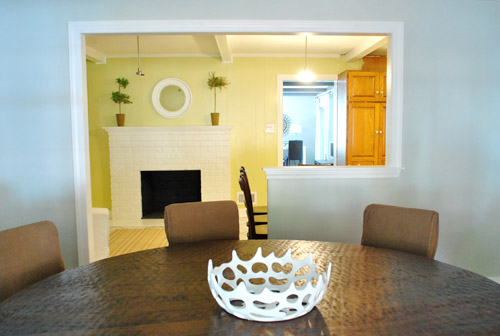
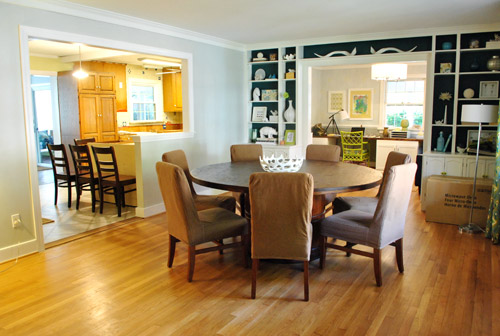
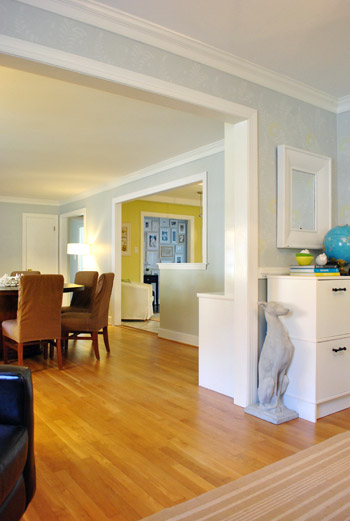
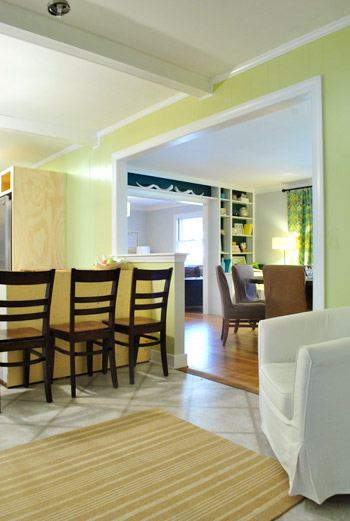
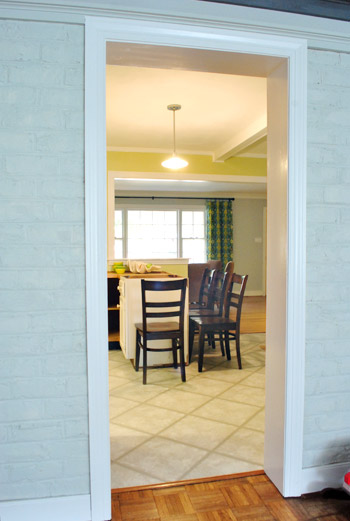
Oh, and although it’s not the most glamorous angle, a few folks requested a view from the living room, so here it is. We love that we can see the giant picture window from the back of the house. Widening this doorway would definitely be a nice change, but having widened a former-exterior brick wall in our first house we know it’s a messy and not necessarily easy job (this used to be the back of our house before they added an addition, which means it’s hugely load bearing and could be a big ol’ can of worms). So for now it’s on our “maybe someday list.” Although sometimes we think we’ll appreciate the privacy in the living room since it’s not a big wide-open straight shot from the front window to the back of the house.
Wow, that was a lot of pictures for a post about little things like filling gaps around the stove, nailing a panel to the peninsula, and doing some paint touch ups. I counted an even 30 photos. Guess we’ve been a bit trigger happy with the camera lately. Must have something to do with that glorious new doorway of ours. And yes, we still walk into the kitchen and grin at it like fools.
What little updates or small progress have you made on projects around your house? Any last minute tasks that you’re trying to bang out before this weekend or Thanksgiving?
Psst- We announced this week’s giveaway winner. Click here to see if it’s you.

Lindsey says
I had to laugh when I saw the clam shell bowl on the peninsula. Sherry just couldn’t help herself from styling it! Am I right? You guys make me laugh :)
YoungHouseLove says
That guy used to live on the counters that are now gone. Haha. Had to put the fruit bowl somewhere! Haha.
xo,
s
Nan says
Just an idea for anyone else with a similar extra space issue. In my parent’s house they have a small hinged door where they can store cookie sheets, etc in the space beside the oven. Makes some extra storage space!
YoungHouseLove says
Cute!
xo,
s
heather says
We have one of those in our kitchen now, and I am enamored with it. It’s the only idea I would take from our current kitchen to our new kitchen. Ours even has a divider down the center so you can put cutting boards on one side and cookie sheets on the other.
Jen says
Ok – I’ve seen a few people mention that the opening in the door looks like a “P” but from the opposite side its a “7”!
YoungHouseLove says
Haha, never thought about that. Love it!
xo,
s
Serina says
You guys are freakin’ animals (in a most lovingly positive way, that is) :) I finally finished painting the den this past weekend that’s been half painted for, hmm, let’s see, going on two months now. Now it’s time for the fun part – furniture arrangement (and I better get on it before the relatives arrive next week)!!!
http://applesforolive.wordpress.com/2011/09/22/den-progress-painting/
YoungHouseLove says
Looking good! Love that color!
xo,
s
Heather says
It is looking great!!! I love watching it progress- you guys do a great job of including all the small stuff, which is interesting to someone like me who has never done a project like this, but would love to someday soon! Love the acrylic stool idea too! And, is that a new bowl on the dining room table? I need one like it- where did you get it!?
YoungHouseLove says
That was from Joss and Main a while ago. Love it!
xo,
s
Hilary @ My So-Called Home says
Love how everything is coming together and I agree all the little details make a huge difference.
We’re making great progress on our kitchen reno- cabinets up, pendant bought, and granite goes in Black Friday! You can check out our progress here:
http://www.mysocalledhome.com/2011/11/kitchen-pendant-and-sneak-peek.html
YoungHouseLove says
Wahoo! Looking good!
xo,
s
Sarah says
don’t know if you’ve already mentioned it before, but will you be replacing the granite window sill (above where your sink was) with the corian? or with wood?
YoungHouseLove says
It’ll just be wood like the one in our first kitchen.
xo,
s
Melanie says
Just an ‘answering comments’ thought. I’ve seen the same questions over and over in just the two pages of comments that are currently up. Is it difficult to update a blog post? I was just thinking that if you seem to be getting a couple of similar questions you could update the post at the end for the people who don’t read it as soon as it’s up.
For example, if I read today’s post at lunchtime, I may want to post a question asking you why you didn’t paint your halfwall door-edge white, or why you wouldn’t paint your cabinets first just because I didn’t have time to scroll through the 7 pages of comments that will inevitably be there by that time. But if there was a little update at the end, I would know that it had been asked and answered. Just a thought!
YoungHouseLove says
Love that idea! Would love to remember to do that with common questions!
xo,
s
Gracie says
Looking good! Though, I am a little confused to see that John put up the plywood in the back of the peninsula already. I thought those cabinets were just kinda sitting there for the moment so you could get an idea of the layout. Are they permanently in place? Are they attached to the floor or anything?
YoungHouseLove says
They have officially been set (drilled into the half wall and into each other)!
xo,
s
Katie J. says
ok, 1. this is really coming together nicely and looks pretty cool.
and 2. had to laugh at the styled uncountered topped peninsula (green bowls, white shell). :)
Larissa says
I laughed at the same thing!
Michelle says
LOVE all the work you’ve done. It’s an incedible transformation. So homey.
If you decide you want to sell your current kitchen table and chairs, let me now! :)
YoungHouseLove says
We definitely do plan to Craigslist those. Will keep you guys posted!
xo,
s
Becky S. says
I might be interested in your granite for our really small kitchen if/when you post it on CL…when you post things do you usually announce it via Twitter, Facebook, or your blog?
YoungHouseLove says
Yes! I’ll share a link to anything that we craigslist- usually as a p.s. to a post at the very bottom!
xo,
s
Ann Marie says
Wow guys! It’s really coming together! I’m always impressed with your ability to find solutions to little problems that the rest of us would just throw our hands in the air and say, “forget it!” ;-)
Teresa says
Looks great!! :) Your Before and After pics are going to be stunningly different!!
I am currently trying to mock up our living room so that I can make a decision on how to install cabinets for a more built-in look for the TV. I finally got the OK from the hubs to do a reclaimed wood wall… so my plan is to have a “plan” by Thanksgiving!! Oh and my sister-in-law and I have decided to do a table scape for Thanksgiving this year on a budget… fun fun!!
Kate says
Hi guys! Everything looks so great. We are on a pretty similar timeline with our kitchen too. The countertop gets templated on Monday. Thank you so much for the floor break down a month ago. I know you guys didn’t end up going with the whitewashed pine pergo, but we did and LOVE it. Any chance you guys want to do a weekend seminar series on basic home improvement stuff? I’m incredibly envious of John’s power tool skills and too scared to teach myself!
YoungHouseLove says
Haha that would be fun someday! But you can totally figure those things out! YouTube has some awesome video tutorials.
xo,
s
anne says
this is gonna be awesome!! looks great so far too :)
Kim says
Love the kitchen reno – really opens up the space!
On another note, your butterfly artwork is now available through Graham & Brown! I’d like to think that they saw it on your blog, and decided to capitalize on it:
http://www.grahambrown.com/us/new-wall-art
-KW
YoungHouseLove says
Haha that’s really cute! I’ve seen a lot of similar versions on Pinterest and etsy too! Butterflies are the new black.
xo,
s
partyofsix says
Are you going to install the cork flooring before the cabinets are fully installed or afterwards?
YoungHouseLove says
Scroll back for that info (it’s a common question today). Hope it helps!
xo,
s
Amelia R. says
It’s all in the details, isn’t it? Seriously, with that paint on your half wall, it looks meant-to-be. Seamless and perfect! And the little filler strips really finish off the stove cabinets nicely. Once you get paint over there, it’ll look perfectly built-in.
One question: why not install the dishwasher before the countertops go in?
YoungHouseLove says
We need to wait to do the floor and slide in the dishwasher and fridge so it runs under them.
xo,
s
Eelie says
Everything looks like it’s coming together so nicely (and fast)!
Where did you get that gorgeous white bowl on the dining room table?
YoungHouseLove says
That’s from Joss and Main a while back. Love it!
xo,
s
Eelie says
Nevermind! See you answered that already like 20 times. Trying to make your life a little easier…
Emma says
Looks great! It’s great that you’re getting all of the “little things” out of the way. The little things quickly turn into a BIG thing if you don’t keep up with them.
jordan says
Looking great!!! way to go! Just curious about why you chose to add that 4th barstool overhang on the penisula? Obviously, it adds more seating, just looks a little crowded for your streamlined taste.
YoungHouseLove says
Once the stools are white or acrylic we thing it’ll be nice and airy. We just like feeding Clara on a right angle (as opposed to right next to us on the same line) so it was a functional choice for us!
xo,
s
heyruthie says
thanks for the pic of the “gray wall.” what I *really* wanted to see was if John had coped the plywood around the baseboards. and he did. i know it sounds weird, but for those of us whose skills are way behind yours, could you ever do a tutorial for using the jigsaw to make cuts like that?
YoungHouseLove says
John just uses the miter saw to cut 45 degree angles and nail things in place. Hope it helps!
xo,
s
Becky says
This looks so awesome already!! It looks like it has always been there. Love it! Also I wanted to say Kudos to you guys for recycling your old cabinets…I can’t wait to see the finished product; I know it will look fabulous.
Meagain says
Awesome job with the kitchen…coming along nicely.
Are you still pleased with your dining room chairs? There’s something about them that just doesn’t seem right…the colour, the fit of the slip covers (they seem too big)…I don’t know…I was looking at the pictures shown above and something seems off…missing sleekness or what not.
YoungHouseLove says
They’re comfy and easy care! Might dye them a deeper color someday (like dark plum) for fun!
xo,
s
Kelly says
Would you all consider sconces on the walls flanking the opening to the frame collage hall? It might be a good way to bring some light into those tight corners!
YoungHouseLove says
We definitely plan to redo lighting in there! Sconces could be fun!
xo,
s
Patti says
I love the way your plans come together! I look at these posts like a lesson for my design-challenged self, they really help :) The thing I’d like to get done before Thanksgiving is to cut my dining room curtain panels in half and hem the seams. I think I’ve been putting it off so long because I’m afraid to cut those curtains! First time sew-er here so this may be a major project!
Sophie from France says
I love that your opening looks like a giant P (for Petersiks?)
Good job guys!
YoungHouseLove says
Haha, it’s our little hidden family monogram!
xo,
s
Hannah says
Just had an idea after looking at your pictures of your new peninsula-when my dad built my parents house back in the day my family created a time capsule (each of us choose one thing to put in and a note, I think) to be placed in a box. Then we put the box the small extra space that we had on our peninsula (just like you do right by your half wall). We put the time capsule in before the countertops went on and we are planning to leave it for the next person who buys the house : ) Although, I did ask my mom recently if we could take it out and look at it! Your empty peninsula space brought back memories :)
YoungHouseLove says
Love that idea! We’re so down.
xo,
s
Lindsay says
This stuff is exciting to me! I love the nitty-gritty details.
diana says
Great progress every day! I love how the rug migrated from the office to the kitchen lounge and back to the office and back to the lounge! That’s Sherry styling the pictures, isn’t she?
YoungHouseLove says
I actually have two of them! One used to be in the third bedroom and the kitchen of our first house!
xo,
s
Emily says
As far as widening the livingroom door… please leave it small. Our house growing up was very wide and open and airy and… there was literally no where to go when company came over. Your conversation became the whole house’s conversation. In fact, all three of us kids rarely had company over once we were in our teens and beyond. It was just never conducive to entertaining for one person in the house. Give your future selves a place to escape with or away from the company.
diana says
P. S. And the knobs are in a medicated coma, aren’t they? Like, they stare, but they don’t register anything anymore around them!
Hannah says
It’s looking great. The paint touch ups really helped add polish, but is there a reason you didn’t touch up the grellow over the pantry and along that wall? Are you waiting to mount the microwave?
Hannah says
Also, did you pull out the fridge/fridge cabinet and paint behind it? Or did you not worry about it since it doesn’t show?
One last question (sorry, I’m full of them today): what is the deal with all the plywood-looking stuff behind the stove area? It looks like it sticks up above the cabinet area. Is that going to affect your backsplash installation?
YoungHouseLove says
We just paint what’s ultimately going to visible to save our sanity. Haha. As for the plywood, that’s what they used to set the existing backsplash so we might have to demo it out and use fresh backer behind the tile. Not sure til we do a full backsplash removal.
xo,
s
YoungHouseLove says
Yup, there will be new backsplash and cabinetry there, so we didn’t want to waste time painting what would be covered.
xo,
s
Lauren says
Wow it is looking AMAZING! Just touching up the paint made such a difference. I was grinning like a fool scrolling through the pictures. SO EXCITING!
Katrina says
Thanks for the tips on making the stove look built / flush with the counters we’ll be doing this to ours too! :)
Christine says
Oh my goodness, this looks so utterly fantastic! I can’t believe how keen an eye you both have and how your vision really shines through the final project. So so impressed! I have a question about your microwave – did you say you were planning to nook it like your last kitchen? We tucked ours in a pantry and had the electrician place a plug at the back of the shelf. At present, yours looks really close to your stove top – I think code usually call for 30″ or something like that? Maybe there is more space than the photos show. I have heard that the underside of the microwave (fan, lights, etc.) can melt if it is too close to the stove top. Keep up the good work and happy belated birthday!
YoungHouseLove says
Oh yes it’s not to code do we will be hanging a vent hood over the stove (at code height) and building in our new microwave next to the pantry like we did in our first house.
xo,
s
Erin says
I love what you guys have done, but I think bar stools would look better at the corner island. I also think your dinning room needs a little more pizzazz like a HUGE canvas painting on the wall right next to your front door. :-)
YoungHouseLove says
Oh yes still have to add art and a rug and a big buffet to the entryway! All rooms are far from done. We will be adding counter height stools to the peninsula as mentioned in the post (the chairs are just a placeholder to remind you where the seating will be!).
xo,
s
Katie K says
I know this is super random/kinda nerdy, but I just noticed in the photos of the view from the dining room how the new kitchen opening is shaped like a “P” for Petersik! :D
LeCheech says
I’m not sure if anyone else has pointed this out, but… Your new opening between the kitchen and dining room looks like a giant P. Congrats on the subliminal messaging!
YoungHouseLove says
Haha, and someone mentioned it resembled a 7 from the other side. Love it!
xo,
s
Monica W says
Is that a new dog statue?!
YoungHouseLove says
That’s my concrete greyhound. I’ve had him a few years now (just no longer have his ceramic brother, sniffle).
xo,
s
Sarah says
I have been wondering this for a while, sorry if you answered it!! Did you get something to go into the corner of your master bedroom where the leather chair used to be that is now in the office?
YoungHouseLove says
We have the rocking chair that I reupholstered in there now. It’s full of clothes. Haha.
xo,
s
Jennifer says
I am beyond impressed. Love checking in on your progress every day!
meg says
so detail oriented. my mom would be so proud of you guys :) just wondering if you ever thought of leaving one (or both) slips of space open for tall narrow kitchen items like cutting boards, cookie sheets, etc? obv finishing the backs of the little spaces and painting…
YoungHouseLove says
We have a cookie sheet storage cabinet already with little vertical slots, so we’d rather do the simple and cheap thing (add filler).
xo,
s
Eb says
Just wondering if you will leave the microwave so close to the top of the range. My knowledge of building codes is limited to what Mike Holmes teaches me, but I think the rule is nothing less than 18″ over the range top…
Anyway, it looks awesome…can’t wait to see the finished product. Also – we are looking at new houses and I went gaga for one with white Corian countertops and white cabinets. Wouldn’t have even noticed before but they really do look fresh and clean :)
YoungHouseLove says
We’ll be hanging a range hood at proper height and building in our new stainless microwave next to the pantry (like we did in our first house). More details as we go!
xo,
s
Katherine Victoria says
Love the final shot from the living room. There’s such great flow from the dining, kitchen, and living now!
Lyndsey says
You guys are true magicians!! Those pictures of your formal dining room/kitchen stool area are gorgeous, and the room isn’t completed yet! It’s such a nice flow you have–you can picture people chatting at the kitchen stools while someone works in the kitchen, kids running around, people talking at the dining table, what a great space. I’m so impressed.
When you moved in, I knew you’d transform your house into a total WOW like your last house, but I was like, I don’t know…it’ll be tough. Well, not so tough for you two. It’s really beautiful.
meg says
of course you already have a cookie sheet cabinet. oh, petersiks. you think of everything :)
Sarah Mc says
Maybe you already addressed this…but, are those the chairs you are planning on using at the peninsula? They look too short for the counter heighth. Maybe I just need to see a picture where one of you is sitting on the chair to imagine your chins not resting on top of the still-to-come counter?
Thanks!
YoungHouseLove says
No they’re just placeholders! We want acrylic or airy white counter height stools with backs (for kid-friendliness). Will keep ya posted!
xo,
s
Liz says
I have what might be silly question, and maybe you’ve answered it before. Are you concerned that all the new cabinets and wood you’ve used (like for the fridge surround and now for the filler pieces) are going to look different from the original cabinets after they’re painted since they appear to be smoother wood and the originals are grainy oak? I know from experience that the texture of the grain shows through when you paint oak cabinets. Are you going to try to fill in the grain somehow? Anyway, it’s looking so great!
YoungHouseLove says
We leaned from painting the office cabinets (oak to white) that certain primer and paint is self leveling so grain is no longer an issue. We’ll share those deets as we go!
xo,
s
mp says
It looks great! I’m really looking forward to the penny tile backsplash.