I was surprised how many questions I got about the little dollhouse sneak peeks I’ve shared on IG stories over the last few weeks as I fixed this up with the kids. And then I polled you guys to see if you wanted a post about it, and 91% of you voted yes, so here it is!
You can read more about how these came to be on this podcast from a few weeks back, but the gist is that the kids really wanted super detailed dollhouses to fix up, and we got two of them secondhand on Facebook marketplace to “renovate” together.
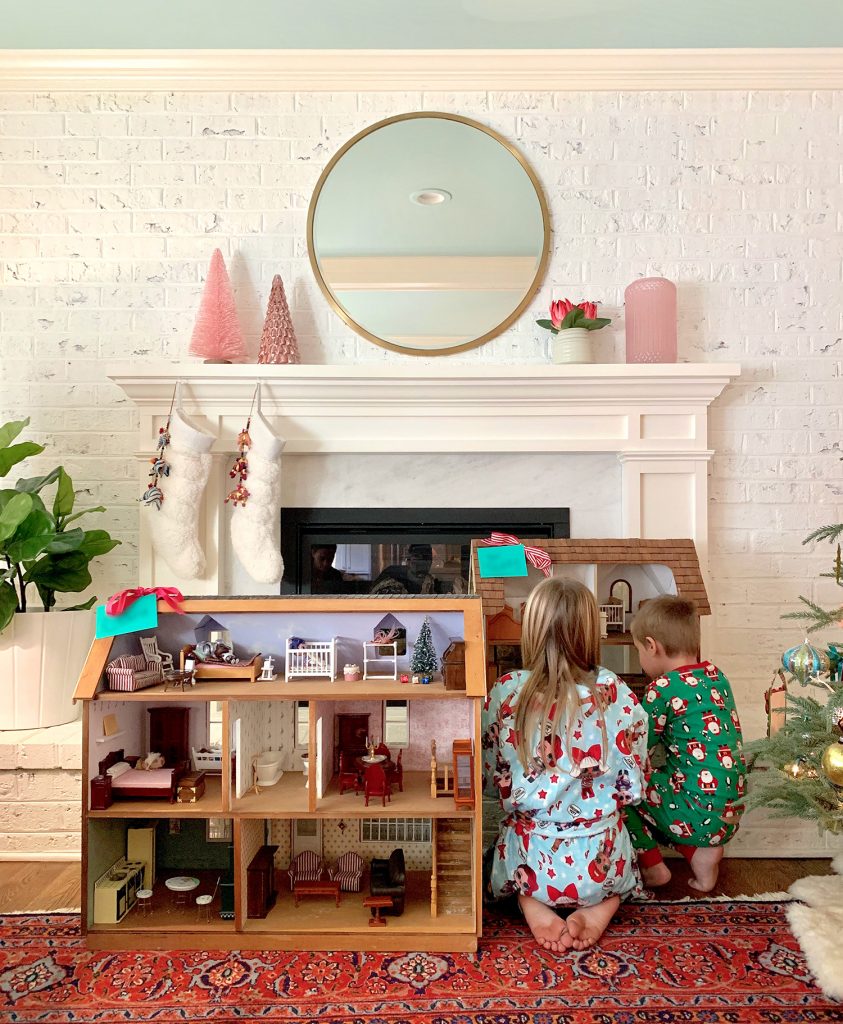
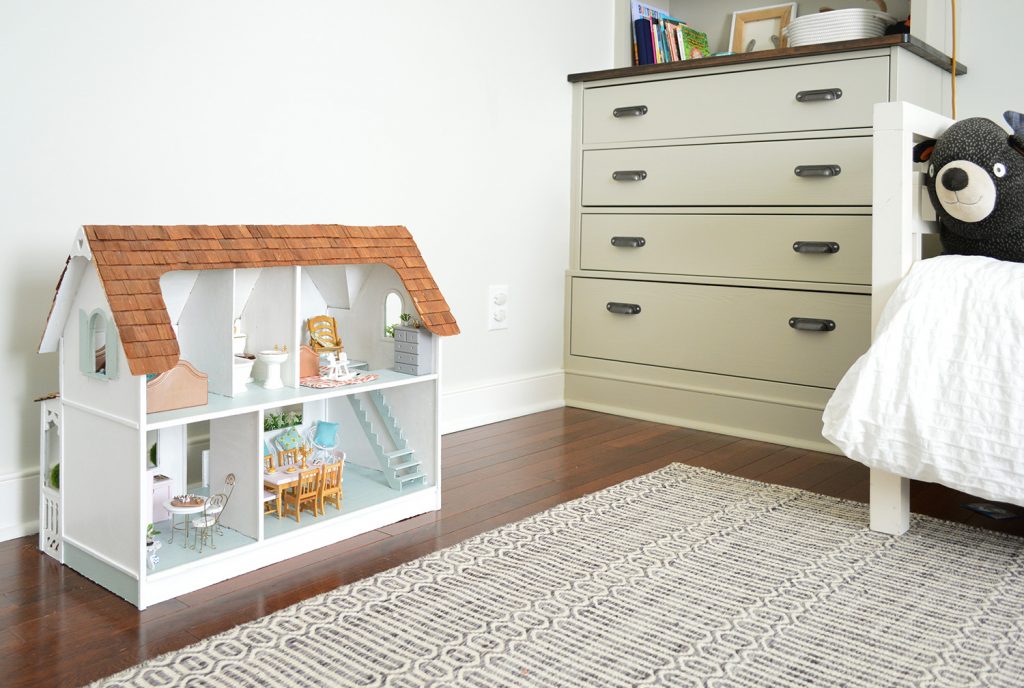
This little makeover was lots of fun for us all, since the kids were at the wheel picking all the colors and helping me paint and glue and arrange stuff, and although this technically lives in our son’s room, both kids definitely had a hand in making it over (we have another one that lives in our daughter’s room that we’re also working on together – which you can see below on the left of the photo). The lesson: even tiny houses take a village to fix up.
The quick pic I snapped below shows what this one looked like when we got it (I barely remembered to snap the before photo, hence that dash of white paint on the facade since we had already started painting).

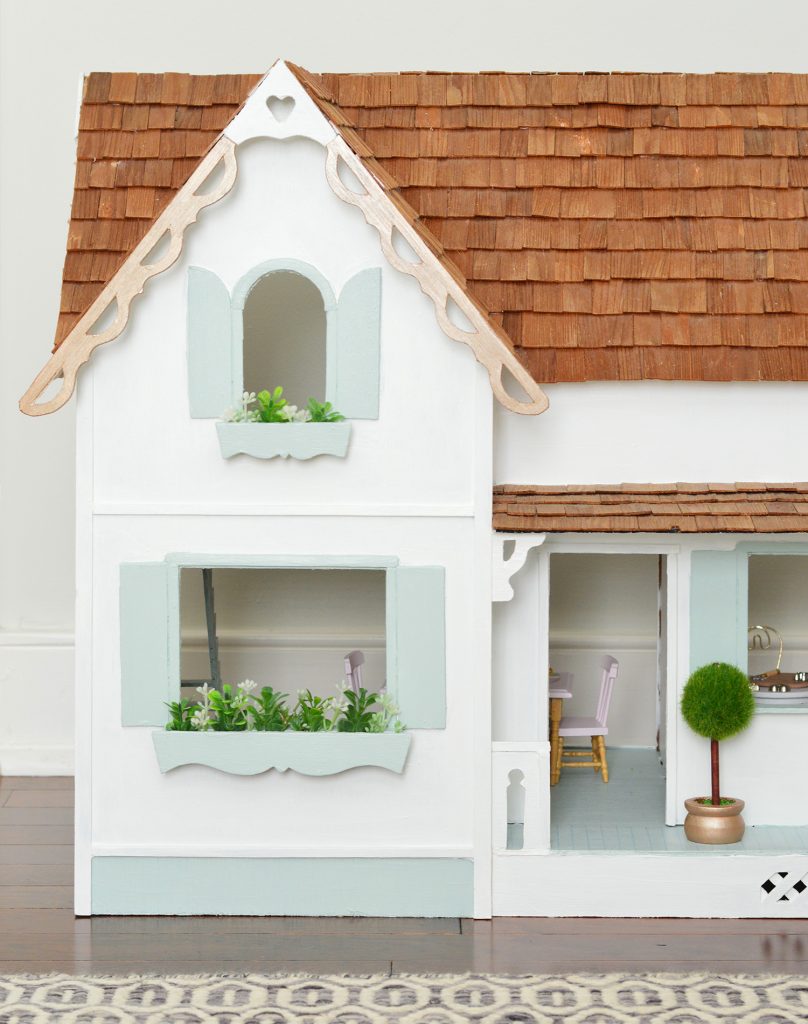
Our son was adamant that he wanted it to be white with light blue shutters and gold trim along the peak (this is the gold I used – be sure to shake this thoroughly for the best coverage). The kid knew what he wanted and was unwavering. Ha! So his vision came to fruition thanks to a whole lot of painting.
We just used simple craft paint from Michael’s and we all pitched in (we had the entire interior and exterior to do). The kids could easily do things like the floor, walls, and exterior house color and I helped with the more detailed jobs, like the trim (I just used a small craft brush). Also we made up a song as we went, which went a little something like this: “Ahh, don’t get paint on the roof! Go slow! Whew! We can do this! Ahhhh, avoid the roof!” Catchy, eh? If you’re super worried you can cover it with plastic and tape it off, but our song seemed to work for the most part.
Oh and that decorative trim around the peak came with the dollhouse, it just broke off and I re-glued it back on with wood glue (this glue works great – I just taped them in place while they dried so I didn’t have to stand there holding them for an hour).
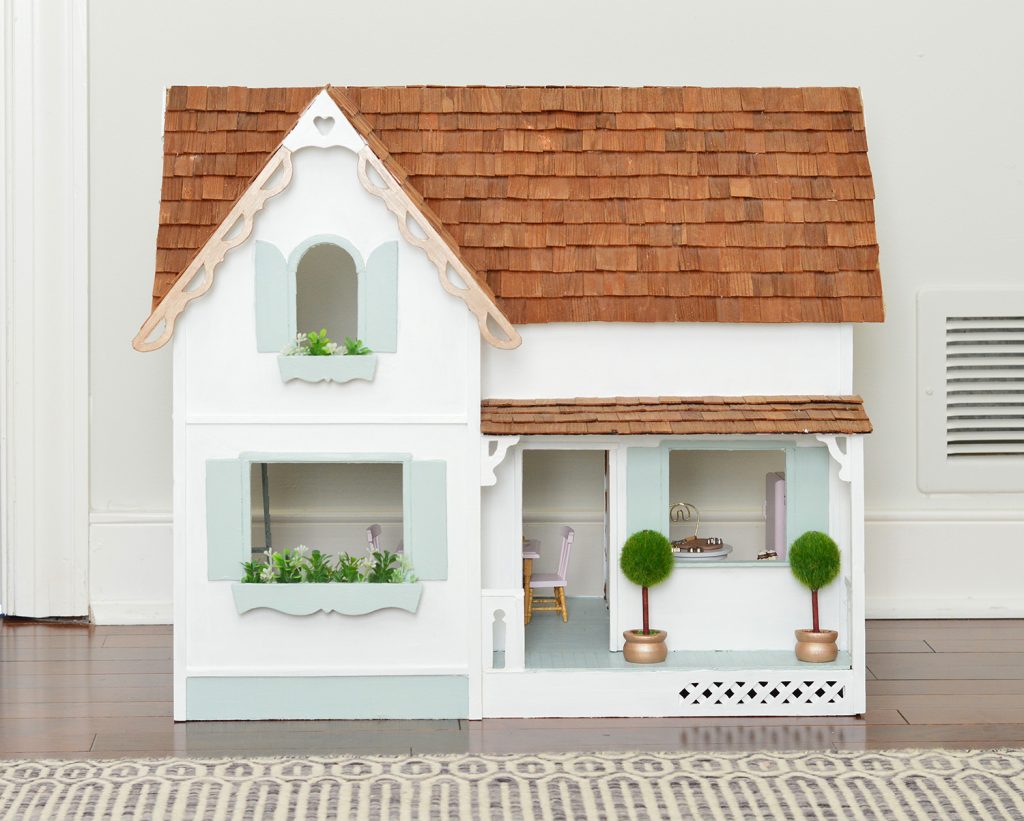
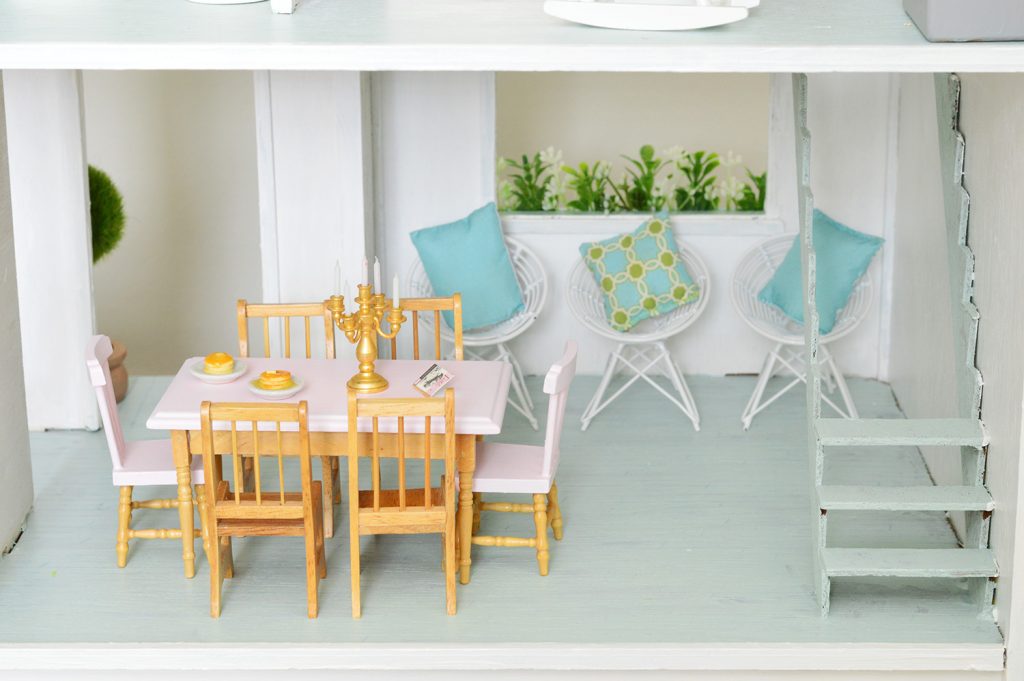
I loved getting to reuse some things we’ve had for ages (way back from our daughter’s first dollhouse), like those topiaries that you see on the front porch. The funny thing is that I found those in the wedding aisle at Michael’s 6 years ago, and they’re actually meant to be place cards (there’s a small wire loop at the top to stick name cards in). Cute miniature things are EVERYWHERE if you look close enough.
As for the “greenery” in the window boxes above, I just bought this small faux plant “mat” from Michael’s (don’t forget your 50% off coupons – they saved me so much money when I was grabbing the acrylic paint, craft glue, and the little faux green mat).
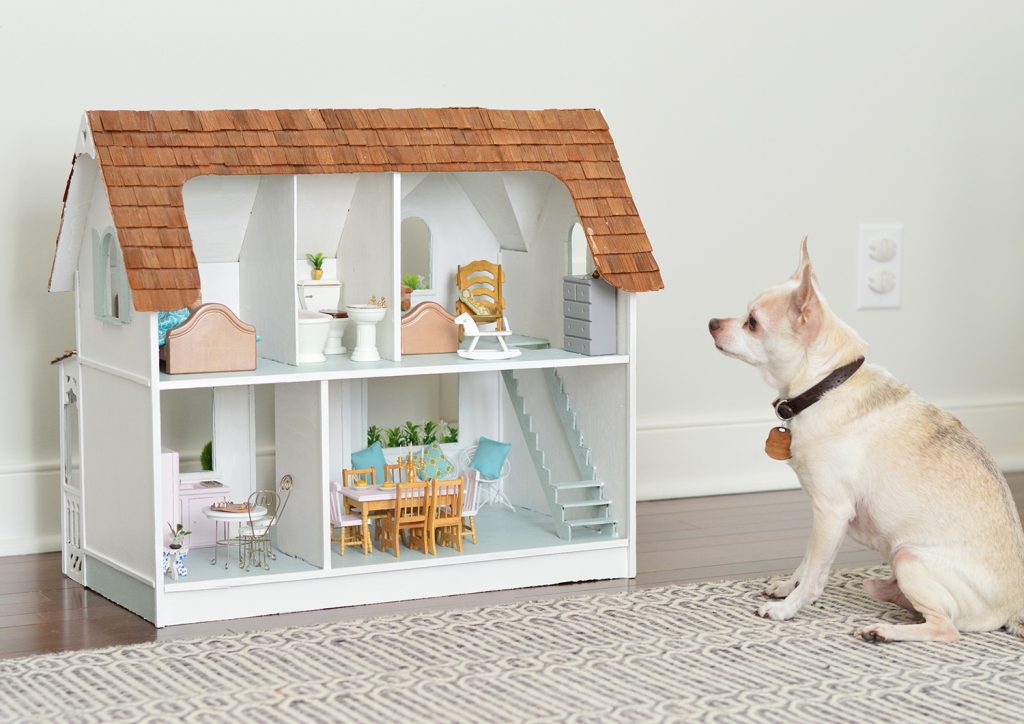
Here’s a Burger-for-scale shot for ya. He was VERY INTO trying to help, but sadly dogs can’t paint very well. Oh and we have since fixed the steps, so I’ll have to share a little update video on Instagram stories about how we did it. Super simple – you just slice thin craft wood (like this) with an exacto knife to make the steps, glue them into place with wood glue, and paint them to match. Truly so easy! Like 10,000% easier than building a human-sized staircase ;)
This is where this dollhouse lives, right in the corner of our son’s room. For those who listened to the podcast about “Operation Acquire Two Dollhouses”, you may remember that I thought this was a much smaller dollhouse (like shoebox sized) and was shocked when it was almost as big as his extra high dresser – and then we picked up the one for our daughter… and… well… it was massive. Ha! But they LOVE them, so I guess it all worked out. Even if dollhouses now make up 8% of our actual house’s contents now.
As for how we fixed things up inside, this is what we started with. All the furniture in each house was collected over two bulk purchases on Facebook Marketplace (we spent around $30 total for enough furniture to fill TWO houses!). This before shot of the back of the house and the furniture isn’t completely congruent with the next after shot since I took this photo on Christmas Eve, and then the kids came down on Christmas morning and had all sorts of furniture swaps and rearranging parties.
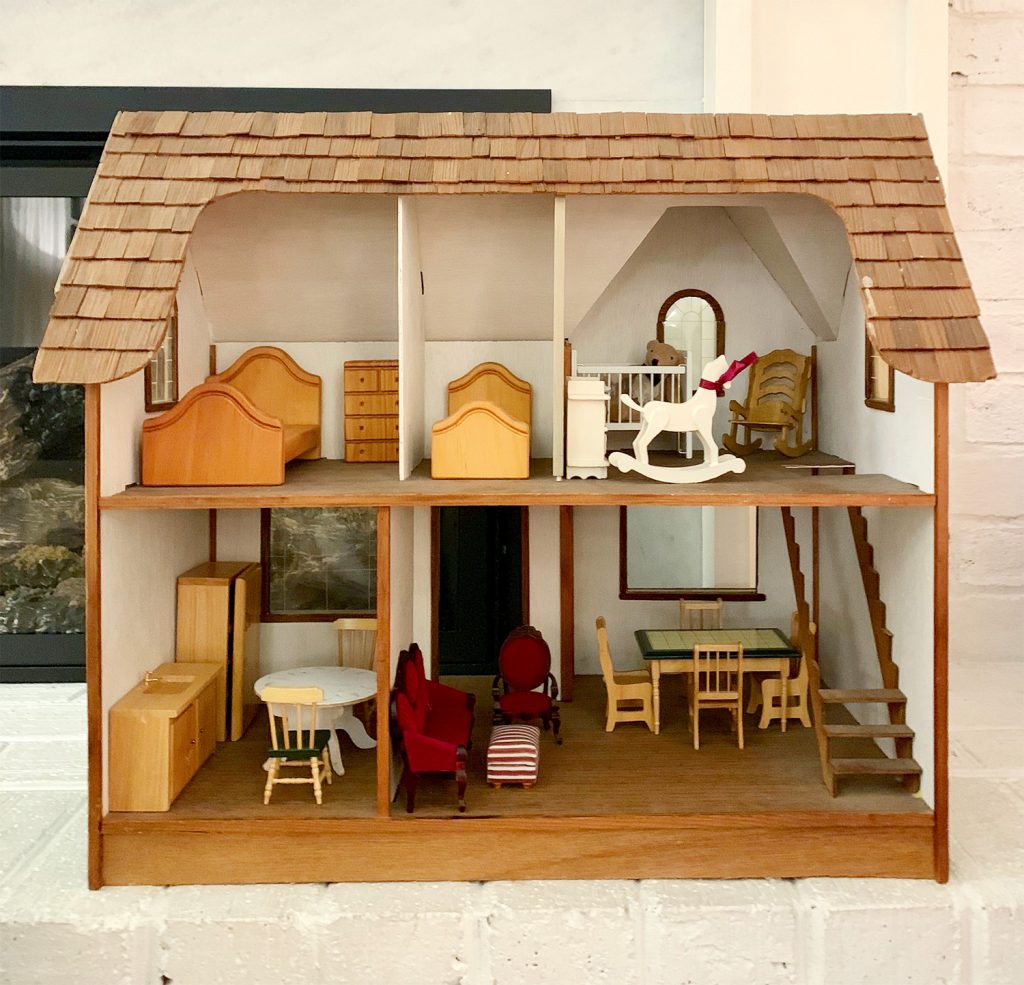
But you get the general gist that the floors were wood, the walls were sort of a cream-white color and a lot of the furniture was wood, deep red, green and cream, etc. Once again our tiny homeowner knew exactly what he wanted for the inside: white walls and light blue floors – just like the shutters and trim (this is the exact blue color we used by the way).
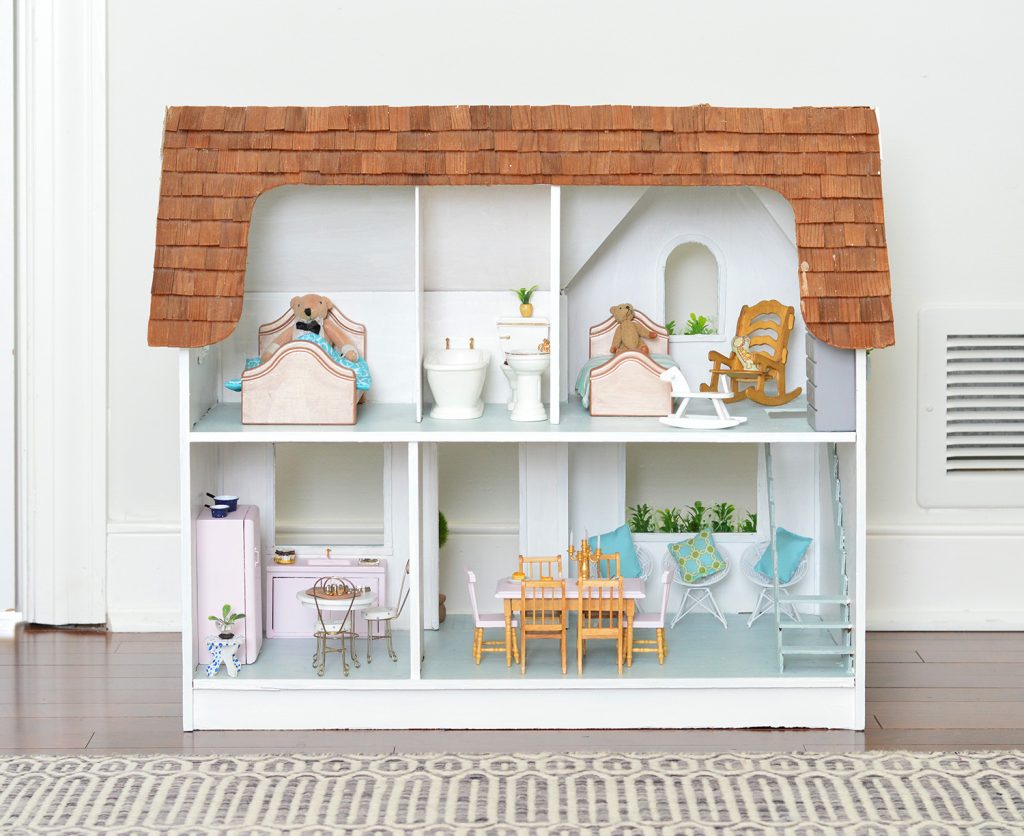
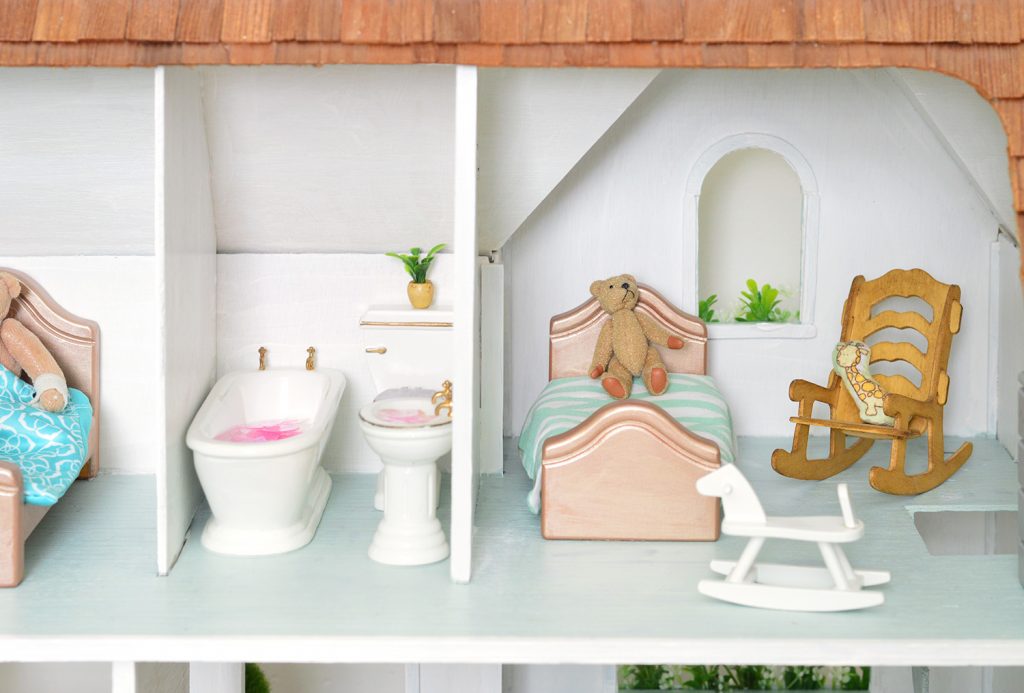
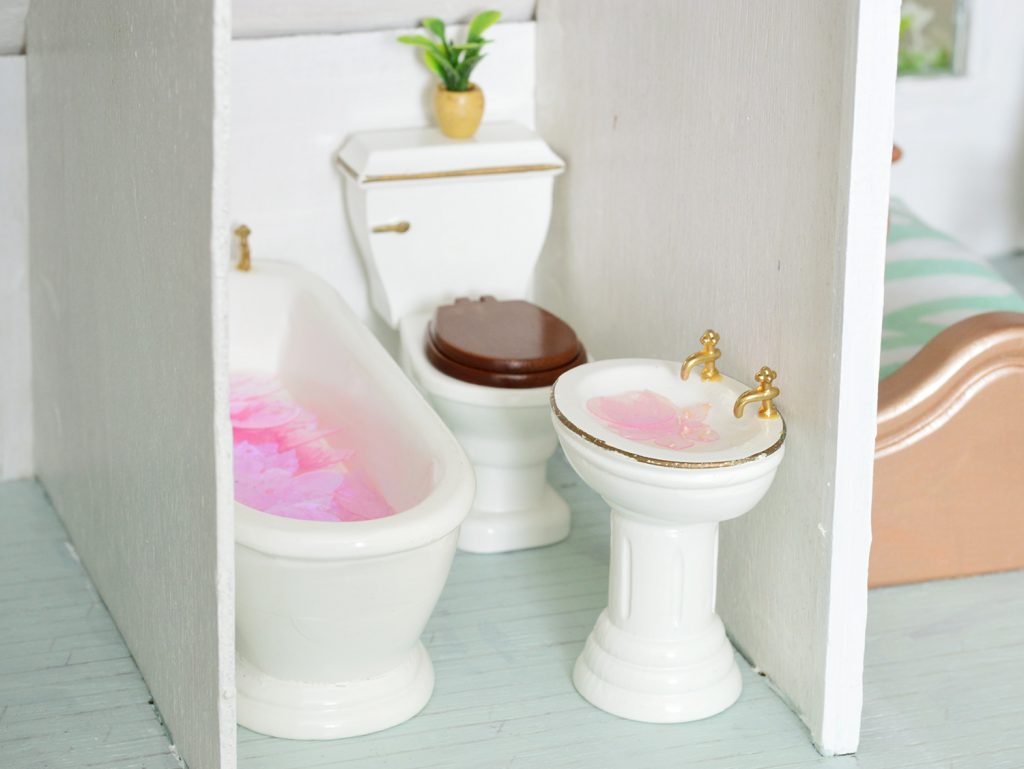
We all got to work painting those (again, just with craft paint from Michael’s) and once the floor & walls were dry we had some fun painting the beds gold, adding a pink top to the table and two of the chairs – whatever the kids wanted – we did! And the funny thing is that they both said the sink and the fridge had to be pink like the stove at the pink house! You know I didn’t argue with that ;)
The little pillows were things our daughter already had from a small doll she had gotten ages ago, and even the “bedding” on the two beds were cloth bags I had saved in our gift wrapping closet (one is from Kendra Scott jewelry and it’s the perfect “sleeping bag” size and the other is a plain blue cloth bag that something else came in).
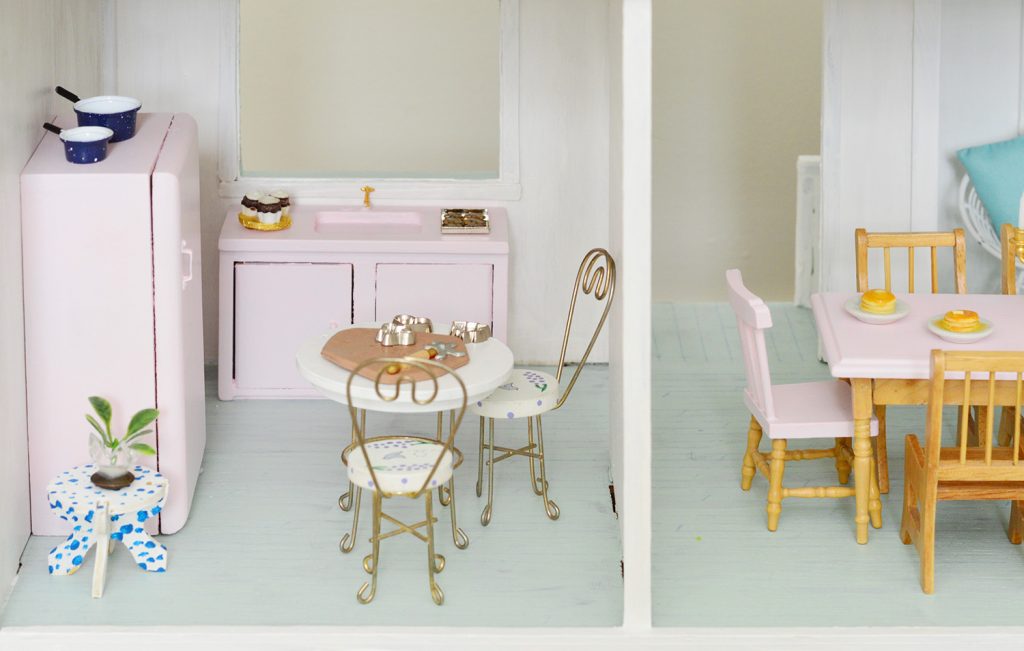
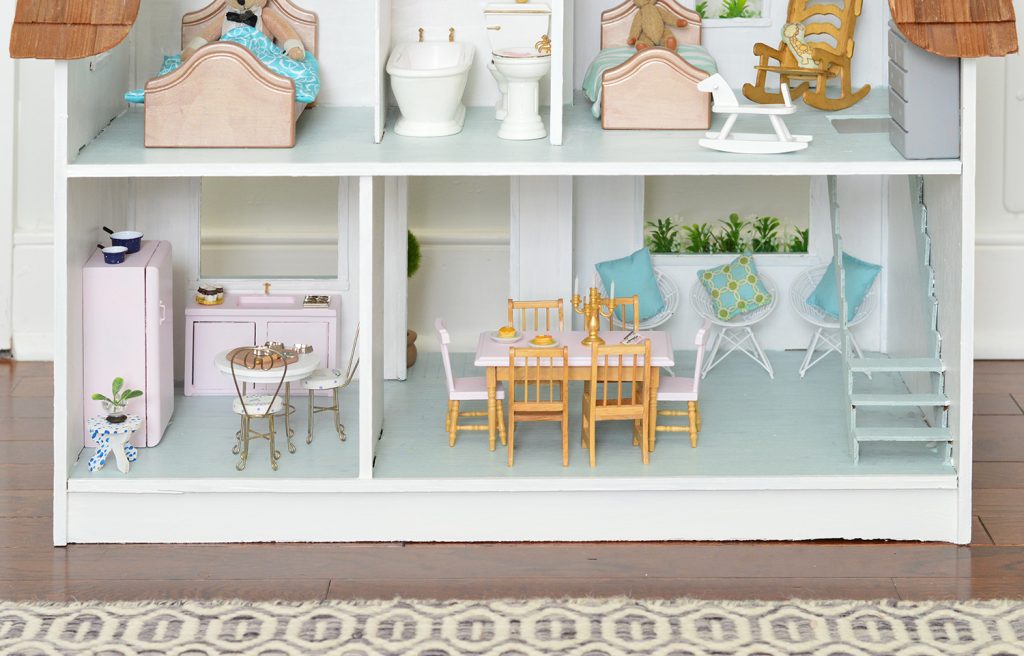
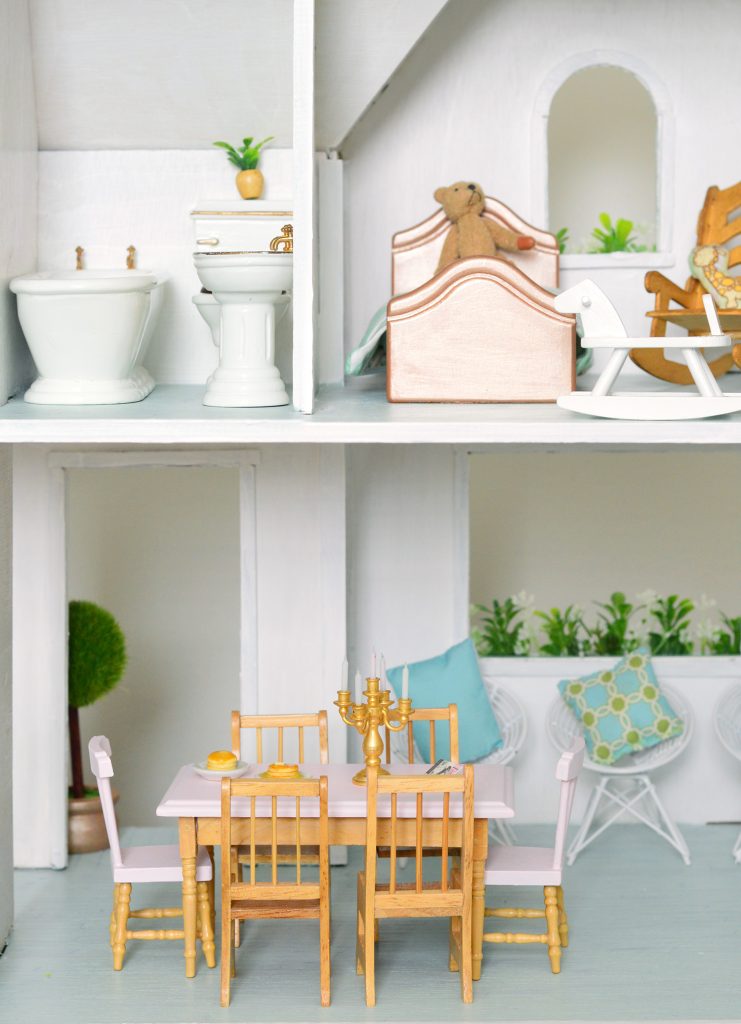
There were a few special purchases that we made with the kids. They had an Amazon gift card and some Christmas money to spend, so after a loooooooong deliberation they decided that two plates of pancakes (you can see those on the right of the photo above) and a little gingerbread making kit (seen below) were the best things to buy, along with this set of pots & pans (you can see them in the photo above on the fridge). They’ve never been so excited to check the mail every day until they arrived.

Oh and that little candlestick has real wax candles! It came with one of the sets of old dollhouse furniture we bought secondhand – and you might remember those round wire chairs from our daughter’s first dollhouse too (originally they were little decorative chairs meant as shelf decor from West Elm years ago).
You know it super bugs me that I took all these photos like a day before I fixed those stairs, right? #TypeA
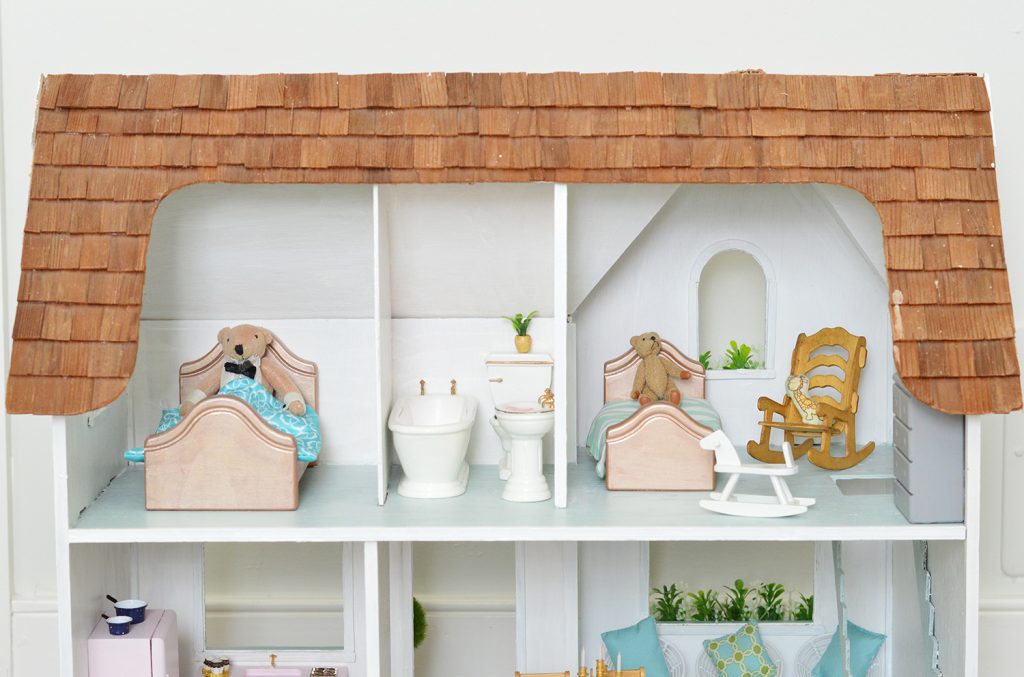
Along with DIYing the greenery in the window boxes, I also made a few house plants from scratch. It was really simple and fun, I just took small clippings from the same faux green mat thing I bought for the window boxes, and I glued them into various small things that look like pots. One was a wood bead (see that one on the top of the toilet in the picture below?) and one was a small white flowerpot I found at the craft store.
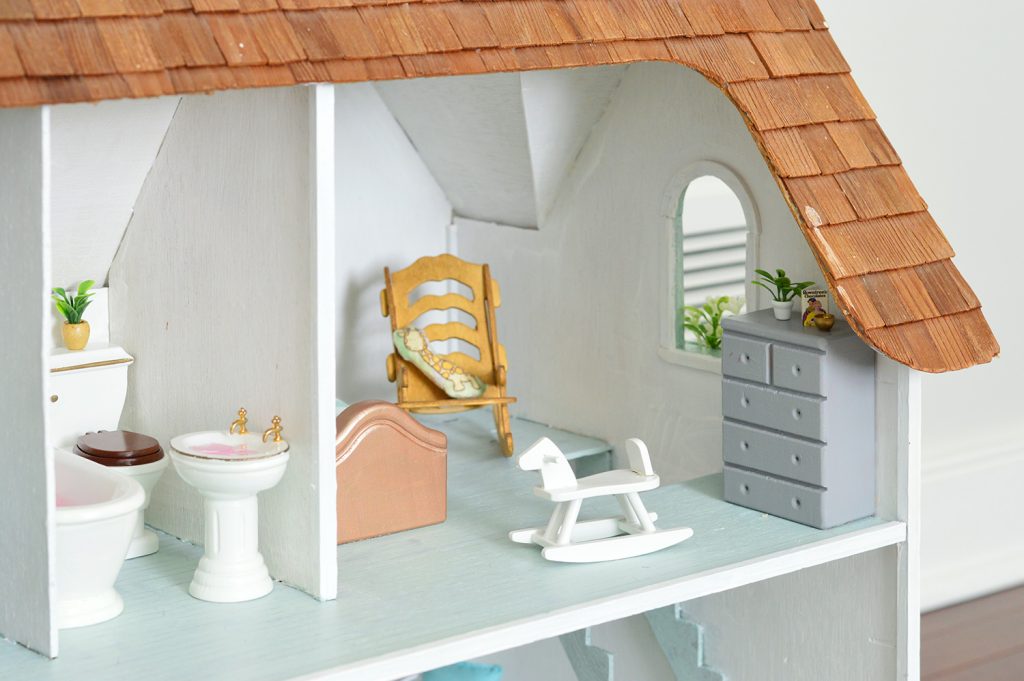
I also used a clear bead + a brown flat button to make the little plant you see in the photo below. Just glue the bead and the button together and it looks like a little glass vase sitting on a brown coaster – and then add the small clipping to the bead with another small dab of glue.
Another fun added touch is to dump some colorful beads or large sequins into the bath tub and the sink to create some “fake water.” I found some blue ones a little later on, but already had these pink sequin things from a jewelry kit we had around the house, so I tossed them in and the kids had a lot of fun “bathing” their little dolls and teddy bears in ’em. Much better than them putting real water in their tub and sink ;)
You can see it a little better in this photo below, along with my homemade potted plant.
The kids also especially like “interactive” additions to their houses, like the rocking horse & rocking chair, which both get a lot of use from their little figures. Our daughter’s house also has a Christmas tree and some tiny fake wrapped presents to go around the base of it – and they LOVE that too. Anything they can weave a story around seems to be a real hit – and stuff that moves like drawers that come out and chests that open add excitement-factor too (they also love that the toilet cover goes up and down).
So that rounds out the tour of House #1 for ya. We hope to eventually share our larger and more detailed renovation of the bigger house for our daughter’s room someday. She wants electricity and all that good stuff, so it might take a while, but hopefully I’ll be back with all the details in the next year or two. You never know how long these whole-house renos are gonna take ;)
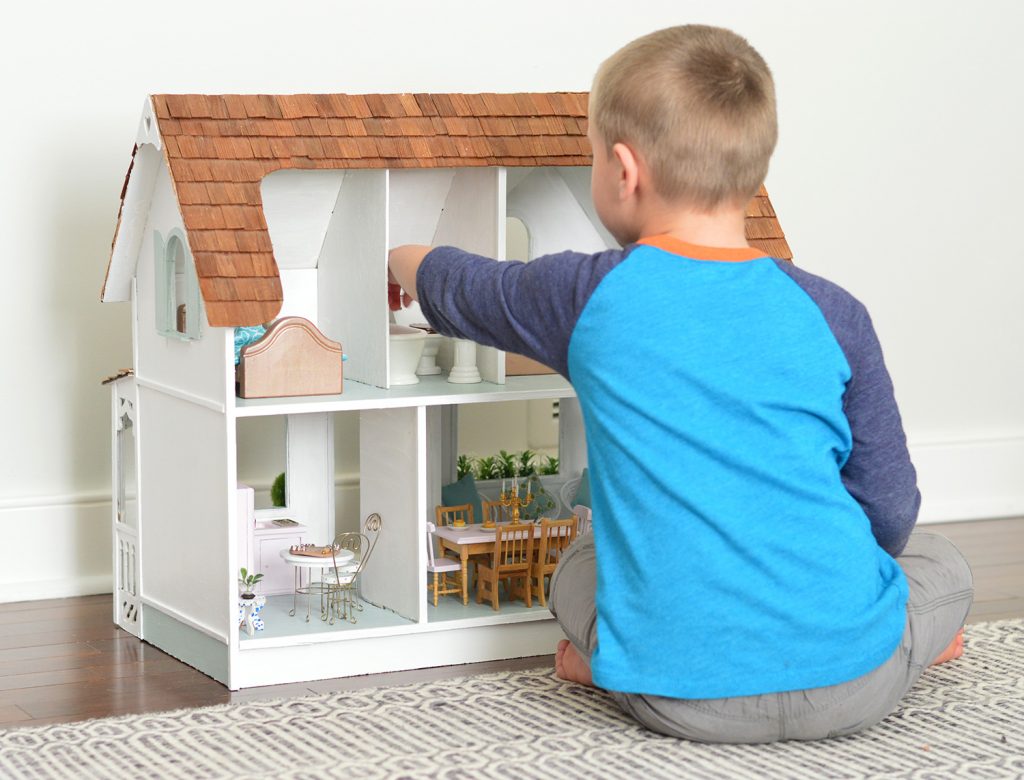
Also dollhouses are not just for girls. So many little guys who come over to play run right up to them and LOVE it.
Psst – To check out how to make a much less detailed dollhouse for younger kids, here’s how we built one, and how we decorated it. And to hear more of the story about how we came across these two dollhouses that we’re fixing up now, you can tune into this podcast (all the details are in the first 10 minutes or so).
*This post contains affiliate links*
