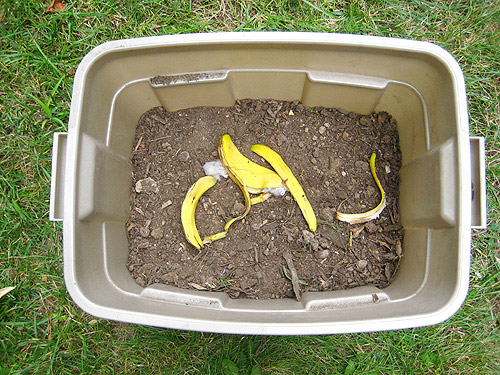
Ever since we started composting back in 2008 at our old house, we’ve enjoyed doing it (snaps for free fertilizer, reusing “trash,” and getting some subtle encouragement to eat more compost-able foods). But our composting adventures have been somewhat limited by the size of the DIY compost container that we made 3 years ago (we did eventually make a second bin, but it’s nothing like those bigger composting systems that we’ve seen at stores or in DIY magazines).
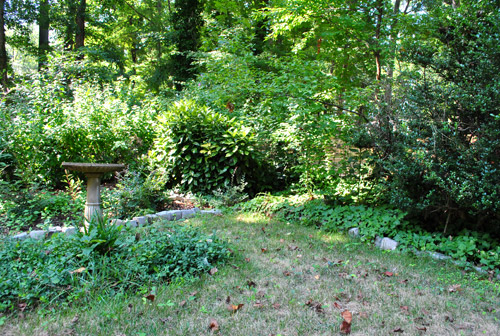
Even back in 2008 when we created our little bin, I initially wanted to make a more “legit” system out of shipping pallets (like I read about here and here) but hunting down and transporting a bunch of bulky pallets was a bit more than I was ready to sign up for. So I figured starting off with a bin and later graduating to something more built-in might be the way to go. And now just three short (ok, loong) years later, thanks to our patio supplies having arrived on pallets, I finally had my excuse to upgrade our compost system. It just took us a few months to decide where we wanted our new bin to sit. We finally agreed on this corner:
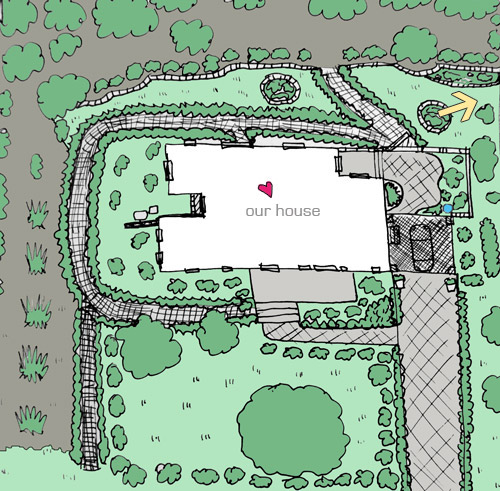
In case you need a clearer reference point, here’s that little not-at-all-to-scale map of our yard (the house is way too big and the almost-an-acre yard is much too small) that Sherry whipped up (marked with an arrow where we added our little “compost station”):
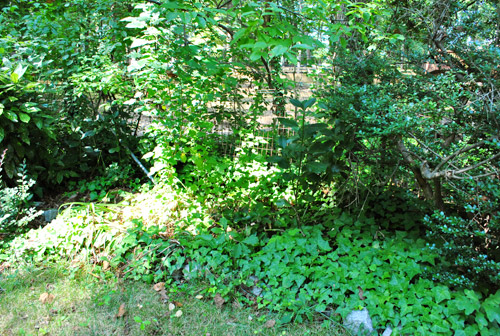
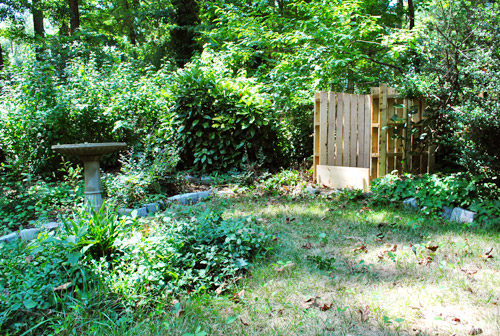
We picked that spot because:
- it was fairly hidden from view
- it didn’t disrupt the landscape very much (i.e. it wasn’t in the middle of the grass or anything)
- it was convenient enough to get to without being right against the house (we know compost isn’t supposed to smell – and our old bin never did – but we didn’t want to risk getting whiffs of nature’s miracle at work if this system was any different).
- the only “landscaping” that we’d be sacrificing was some ivy and a few weeds (how will we ever live with ourselves?)
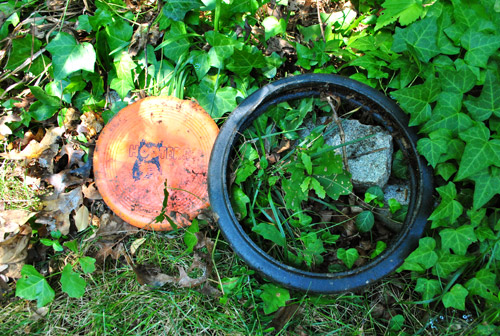
One perk to losing some of the ivy is that I uncovered some unexpected treasures in the process, like this ancient Hooters frisbee and a random plastic tire. Looks like this upgraded composting system is already paying off in major free-stuff dividends.
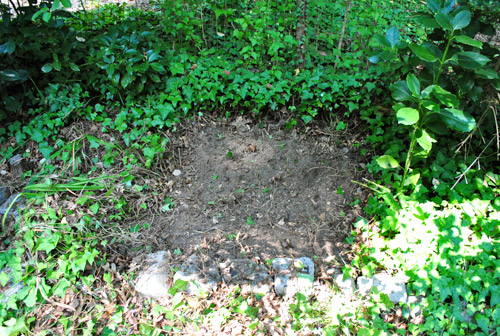
After a bit more work with my shovel and rake, I was eventually left with this clearing. Some of the online instructions that I googled around for suggested putting an extra pallet down for your base, while I read others who complained that a pallet on the ground made turning the compost a big ol’ pain (picture pitchfork tongs or shovels getting stuck between the slats). Some others even suggested a slanted base to help collect the tea (the nutrient-rich “run off” from your compost pile), but I just opted to keep things simple and make my life easy – at least for now. So this flat square of dirt did the trick:
With my area cleared, I gathered my supplies:
- Three shipping pallets (which I was thrilled to finally move out of our basement)
- A few 2″ wood screws
- Electric screwdriver
- Work gloves
- Shovel
Fortunately these were all things we already owned, so our project cost rang in at a big fat goose egg. Even better than a free project? The whole thing only took me about 20 minutes (not counting photo-snapping time). Which was a nice unexpected surprise. Remember, I go into all small projects expecting them to take forever and throw me ten curve balls so I don’t get my quick-project hopes dashed by an obstacle or two (which I’ve learned are par for the DIY course). So yeah, it was awesome that this quick and easy project really was quick and easy.
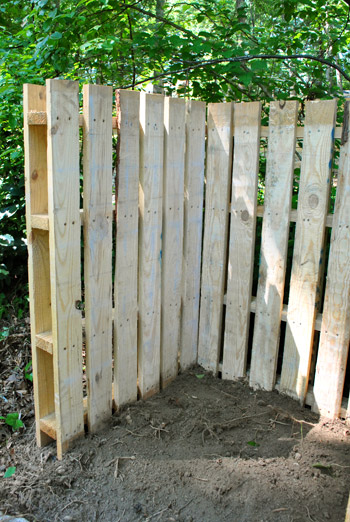
First I dug a small trench (about 4″ deep) at the back of the compost area so that my pallet had a little groove to stand in while I secured the other sides:
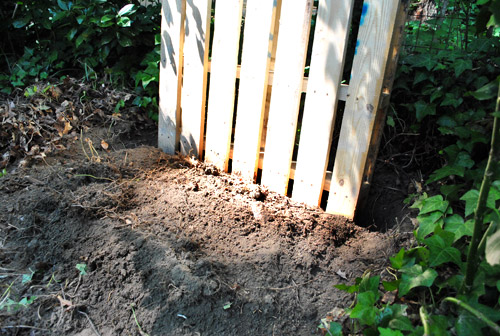
Then I put the second pallet next to it to create one side:
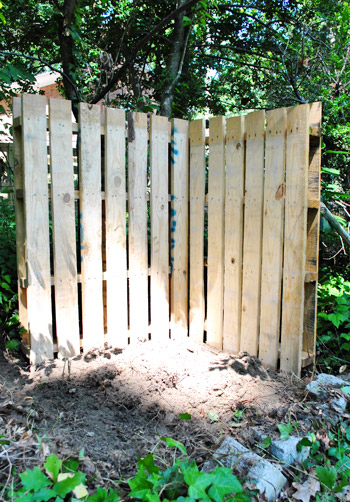
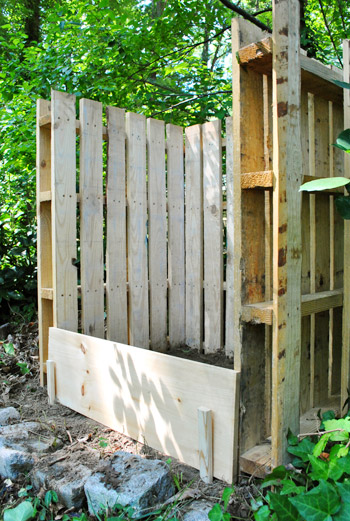
Notice how the side with the more closely-spaced slats faces in (otherwise we’d get lots of compost spilling through). But that doesn’t mean you should use a completely solid piece of wood (the slatted pallets help air circulate, which helps the decomposing process while also keeping odor down).

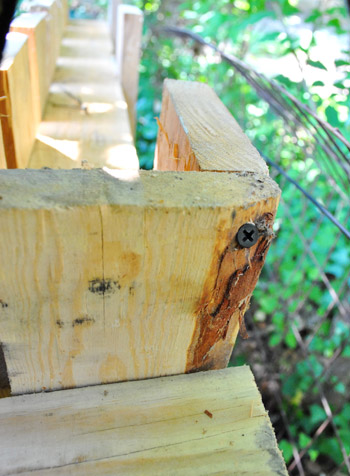
To secure the pallets together, I just drilled three screws (one in the top, middle, and bottom) to connect the two pallets. Some tutorials that I read called for zip ties instead, which I’m not surprised to hear (they, like duct tape, can accomplish almost anything). I just had screws on hand, and since that was another recommended method I went for it. I also enjoy projects a little more when I get to break out my power tools (I can almost feel Sherry rolling her eyes at this sentence). The funny thing is that the pallets were practically sturdy enough to stay together on their own so the screws kinda felt like a formality, but they were nice “insurance” so I’m glad I took a moment to add them (and say hi to my drill).
Then I rinsed and repeated the whole joining shebang with the third pallet on the other side.
Then, um… ta-dah? That was pretty much it. Some of the instructions that I read included using a fourth pallet to create a hinged door in the front (I guess a fifth if you added an extra pallet on the bottom). I wasn’t inclined to do this because (1) that seemed more complicated than I wanted to get into – at least off the bat, and (2) I didn’t have any hinges on hand. Initially I was just going to leave my bin open-sided and not stress if my pile started to migrate a bit beyond its three borders…
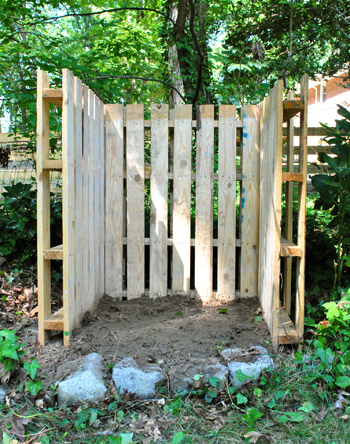
… but I realized it probably wasn’t the best idea in practice, especially since it was on a slight slope and one big rain could wash our pile-o-decomposition into the yard. Gross. So I improvised a bit and found a nearly-perfectly-sized piece of scrap wood that could act as a fourth wall (with the help of two leftover wood stakes). It stays in place just fine and can easily be picked up when it’s time to turn our pile (or grab a big heaping batch of nurtrient-rich soil when it’s ready).
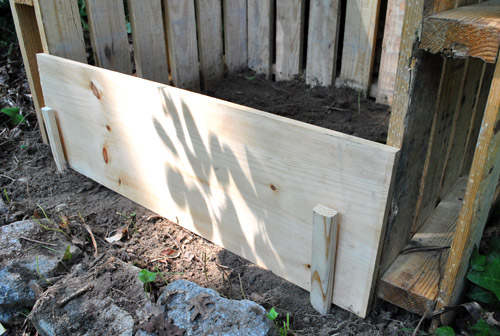
As the pile grows, I’m thinking I could easily upgrade my system with a few more boards stacked up or a taller piece of wood with taller stakes or poles to hold them flush against the pallets. But this’ll do for now:
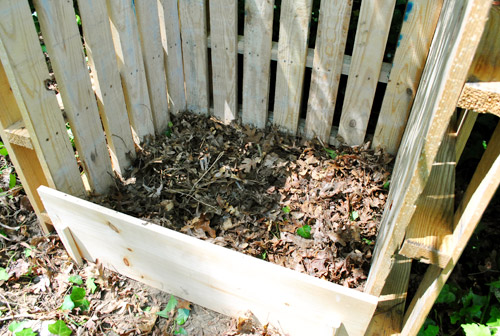
And to kick off the competition composition, I threw in a layer of nice brown leaves from the backyard. Ooooh. Ahhh.
Now we’re the first to admit that we’re still kind of novices at this whole composting thing. Even after three years of doing it. I’ve thrown out references like “turn the pile” as if I know what we’re supposed to do (and how often and why) but I’m really just going off of tidbits that we’ve picked up online. When it came to our old system we just stirred things when we tossed in a pile o’ stuff (we had a lidded plastic container that we kept under the sink for compost scraps and emptied that into the bin twice a week or so). And we printed out a list of compostable stuff and taped that to the inside of our under-the-sink door near the compost container so we could consult that if we didn’t know if something could be added. So admittedly I’m not quite Captain Compost yet (so if anyone has any pointers or resources for us, we’re all ears). The good news about compost is that it seems to just do its own thing for the most part (you can read about a few of our experiences with it over the years here, here, here, and here). We’ve never had any issues with smell or anything, so it’s a pretty painless auto-pilot process.
Oh, and I should mention that if anyone is hesitant about using wood that might be chemically-treated (like pallets) for their bin, you can limit your use of the resulting compost to non-edible plants (i.e. use it in your flowerbeds, not in an herb or veggie garden). That’s definitely what we’ll be doing just in case. We’re a bit late in the season to have much usable compost this year anyway (darn, no accidental pumpkin growing for me this Halloween) but hopefully next year we’ll have more free fertilizer than we’ll know what to do with. And maybe some of that ivy will have grown around the pallets to help it “blend” in a bit more. You know, so we end up with a charming secret garden compost situation. Of course we could also stain or paint the palettes to help them blend in (dark green, brown, gray, etc). We’ll keep you posted.
Do any of you have a pallet compost bin (or other composting system) going on at your place? How has it been working out? Anything you think we should know as we start this new chapter in our composting lives? Has anyone else accidentally grown a pumpkin? That’s my crowning composting achievement thus far.

Leave a Reply