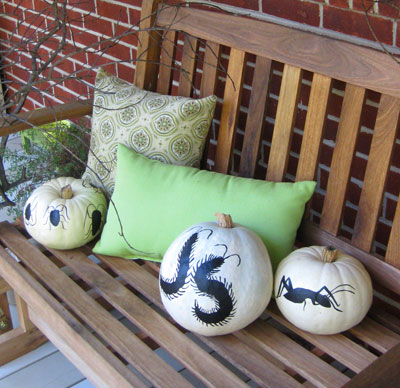
I know, I know. The idea of puffy paint in most craft projects makes you skeptical. Me too. But a few weeks ago John and I were brainstorming about what we should do to our pumpkins this year, after painting them last year:
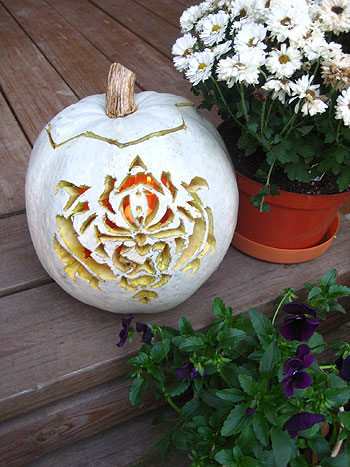
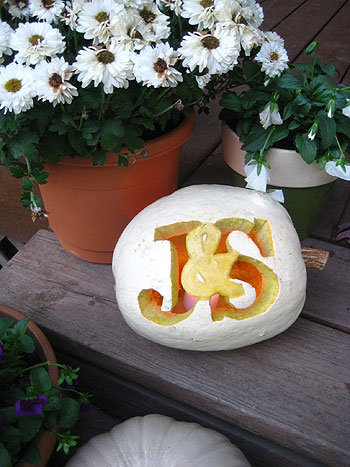
… and carving intricate designs into them the year before:
Anyway, so somewhere along the line John said “too bad we can’t use nail polish or something to build up shapes on the pumpkins.” I sort of looked at him sideways at the nail polish suggestion, but I liked the idea of somehow creating raised designs on them… and so the idea of puffy paint was born. We figured it was made for puffing (aka, building things up) and it’s super cheap so why the heck not. We even hoped that if we spray painted them after puffing them they might look sleek as opposed to cringeworthy and bad crafty. You know how there’s good crafty and bad crafty? We wanted to stay on the good crafty side of things.
In full disclosure, this was one of those projects where we had full expectations of failure. We could just picture the puffy paint sliding right off the pumpkins and creating a drippy mess (since pumpkins don’t exactly lay flat like paper or fabric). But we figured it was worth a try- and lo and behold it actually worked! Oh happy day.
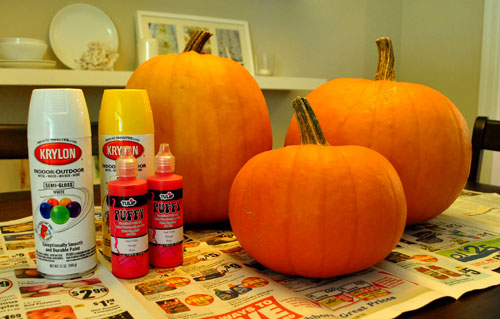
Here’s how it all went down. First we started with three pumpkins along with some puffy paint and some spray paint from Michael’s:
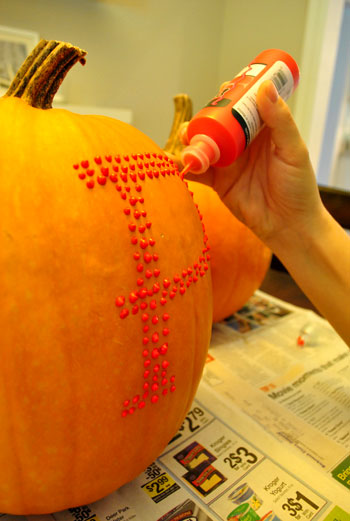
Then we just went to town on them with puffy paint. Here’s what things looked like in progress:
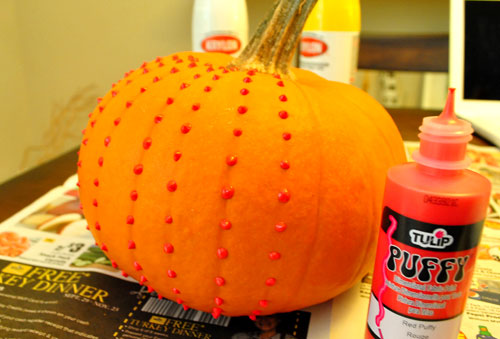
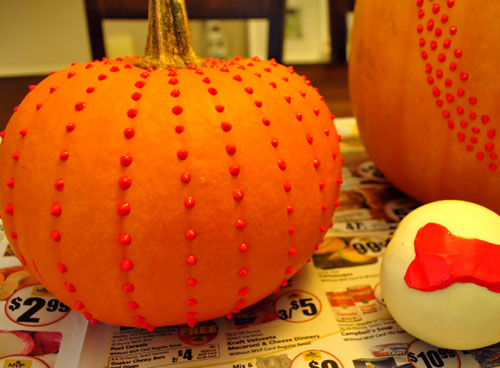
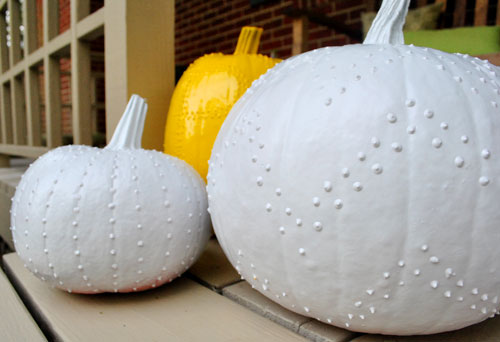
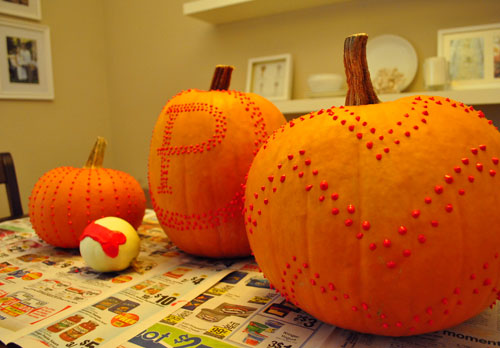
When we finally proclaimed them done (after about twenty minutes or so) here’s what we ended up with:
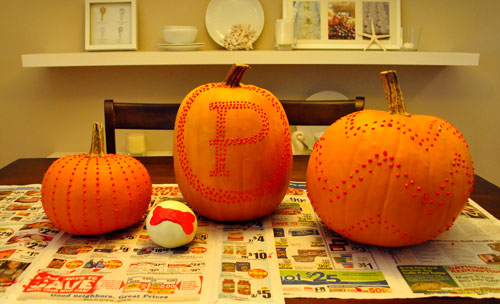
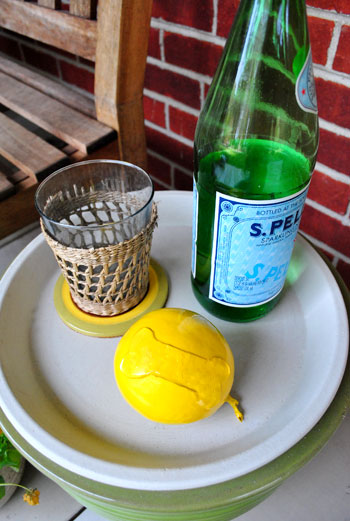
We decided to do a fun studded vertical stripe effect on one of them, a P monogram on the big tall guy, a chevron-inspired zig-zag pattern on the fat one, and a small bone on the tiny backyard pumpkin that we accidentally grew (you know, in Burger’s honor). We liked how everyone in our family of four was semi-represented thanks to ending up with four pumpkins- although I’ll be mad if you assume I’m the round one (even though John’s obviously the tall one).
Oh and I chose that reddish-orange puffy paint color because I thought it would most closely resemble the color of the pumpkins, so when we sprayed them they would hopefully end up with even coverage and a uniform look (which did seem to work for us). Here they are with a few thin and even coats of marigoldy-yellow and pure-white spray paint:
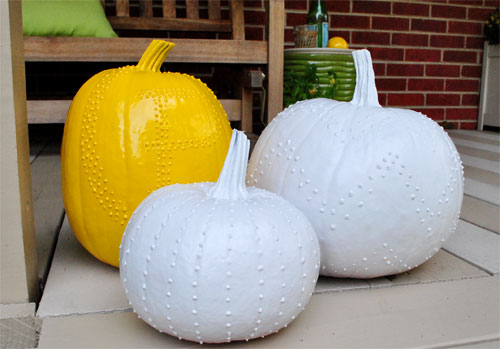
We went with those spray paint colors since we thought they’d work with the yellow mums and the light cream accents on our front porch.
Thankfully they fit right in.
Burger’s wee pumpkin is back behind them on the planter side table that we made a while back. I can’t believe John “farmed” that. It’s so round and perfect that it looks more like a superball than a pumpkin.
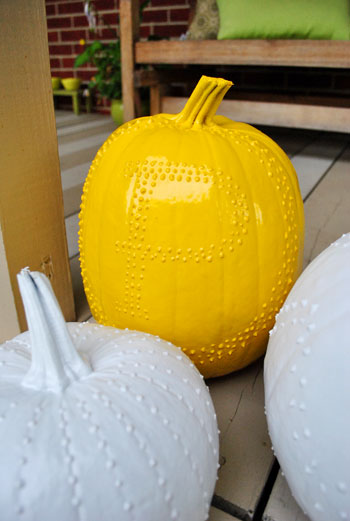
Oh and here’s a spray painting tip for ya: we balanced each pumpkin on an old quart-sized paint can before spraying them so we could get all angles of ’em except for the unseen bottom portion without having to touch them and ruin the finish. We used white semi-gloss and marigold yellow high gloss paint and we actually preferred how the semi-gloss looked a bit more. The more matte texture made the studs look cool – like hammered metal – as opposed to the slicker and harder to see high gloss monogrammed P. In fact if we were to do it all over again we’d suggest using semi-gloss or even satin paint for all of them instead of dealing with the super shiny stuff. Surprising, because going into it we thought high gloss would look better. Live puffy paint and learn I guess.
But we’re happy with how they came out for sure. And it was a really easy and fun project. Although we must admit that we’re craving pumpkin seeds so much that we might grab one more small pumpkin and get all traditional on it- you know, so we can scoop out the goop and enjoy the seeds for Clara’s first Halloween. What about you guys? Do you have any pumpkin carving or Halloween decorating plans? Were you totally cringing when we said we used puffy paint on our pumpkins? Admit it, you were.

Leave a Reply