This guy:
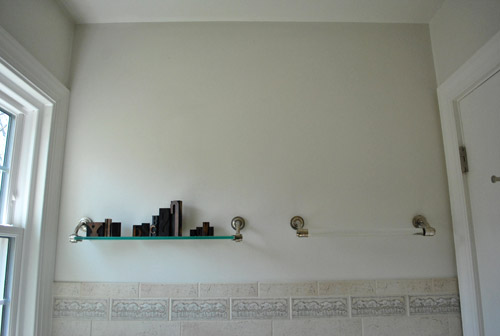
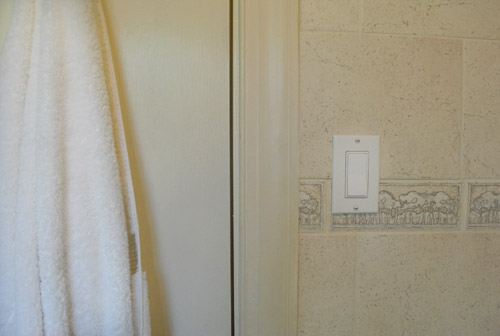
You saw the wall we were dealing with before we removed the not-very-functional shelf and towel bar here:
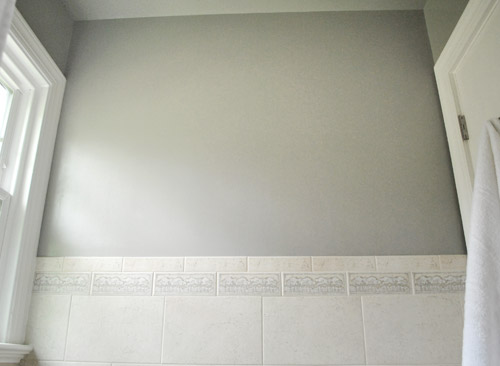
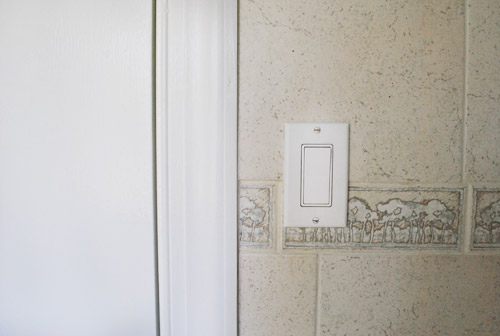
And you saw it again after we spackled and sanded those holes from the fixtures and painted:
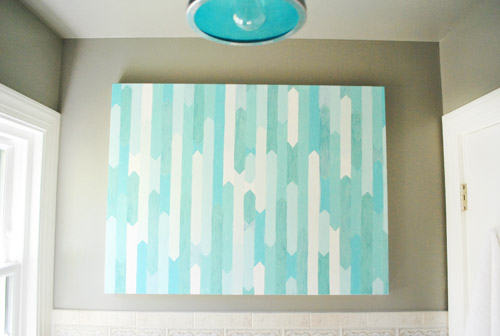
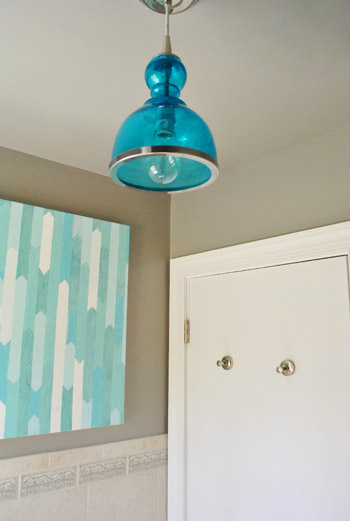
Well now, thanks to two nails (it’s a pretty light canvas), we hung up the DIY art that I made a while back (I originally whipped it up for the bedroom, but it’s nice to tie this color in here and it was aqua overload in the bedroom). Thankfully I used latex wall paint to make the painting (the same thing you’d use on the walls of a bathroom) so it should hold up well in here. It was a complete lucky break that it fits on this wall. And thanks to the ceiling-height shower curtain on the other side of the room, something over-sized on this side of the space actually adds balance, and feels less heavy or invasive than the shelf/towel bar that stuck out from the wall.
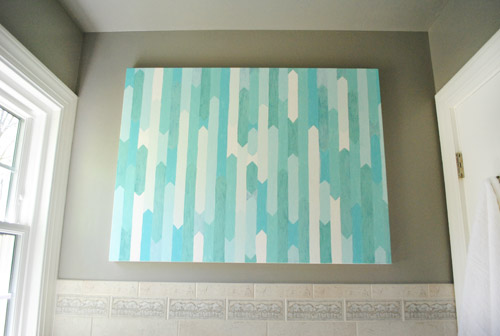
Admittedly, the pattern of the art isn’t perfect with the tree border tile that runs around the room since that’s pretty busy (see that up close here) but because we have a plan to redo that with soft frosted white or gray glass subway tile someday it should look nice and clean after Phase 2. It’s not that the tree tiles are terrible, they’re just not “us” if that makes sense. So we figure the room will feel more like our bathroom and not someone else’s when we put up accent tile that floats our boat.
And now for an art detail shot. Ooh. Ahh.
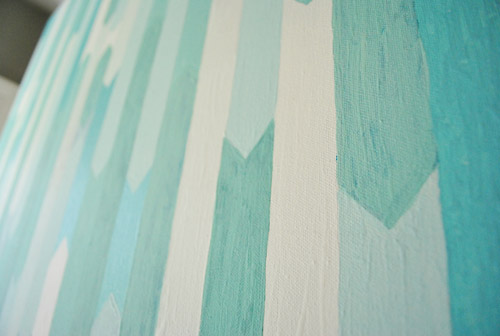
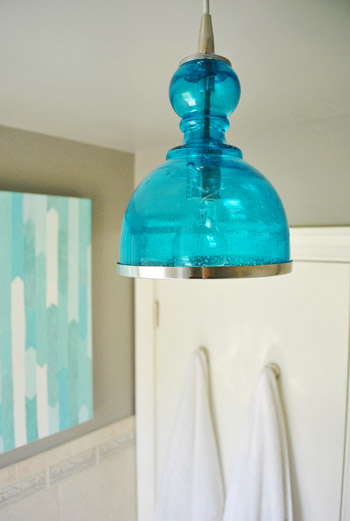
One of the coolest things about my homemade painting is how purty it looks with our blue light. The room just went from feeling beige and builder-basic to feeling like ours. Ya know?
And now for a light detail shot. Ooh. Ahh.
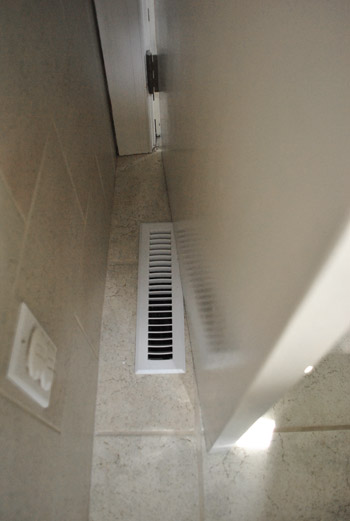
One issue in here that we haven’t explained is that the door is too tight to the floor, so it actually doesn’t open all the way since it gets stuck on this floor grate. So we have added “remove the door from its hinges and shave a sliver off the bottom so it opens correctly” to our to-do list. And then we can have a bath mat outside the tub since it won’t get scraped by the door. Hurrah!
Speaking of the door, the trim around the window, the trim around the door, and the door itself were originally a beige-y off-white color. So things like the bright white towels, shower curtain, and light switch made that feel a little… dirty. We’re crisp white trim folks anyway, so I got my paint on.
I used leftover semi-gloss paint that we’ve used for other rooms (it’s off-the-shelf white by Olympic Premium). And two coats later…
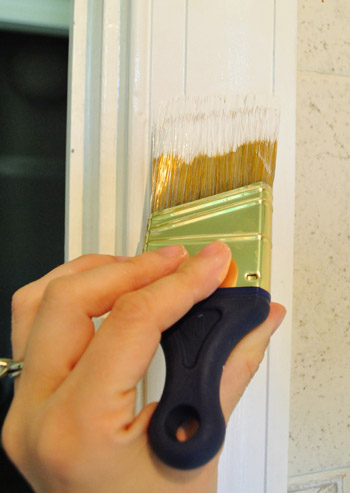
… it was white! Like the towels and the shower curtain and the light switch. Oh happy day.
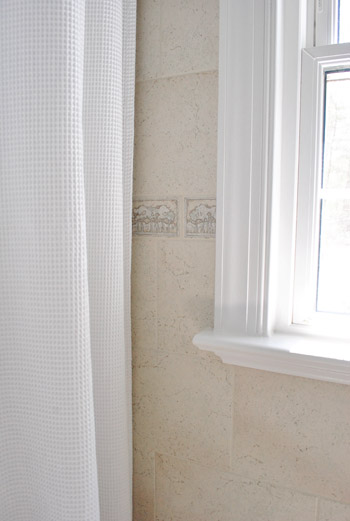
Here’s the window all glossy and refreshed.
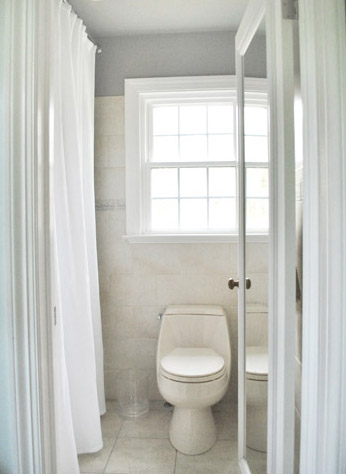
Pretty much still looks like this from the doorway since you can’t see the art behind the door. But once you go inside, bah-dow, art in yo face.
So that’s the latest with our cheap little bathroom update. We love that this step was f-r-e-e thanks to art we already had (sitting around in the playroom waiting to be hung – who’s surprised?) and leftover trim paint. And here’s what the ol’ to-do list looks like now:
paint the walls so they have some contrastreplace the boob lightpaint the cream trim whitehang some bathroom-friendly art- craigslist the toilet and replace it with a classic white one
- do something to add privacy to the window
- remove the door so we can shave the bottom to allow for a rug/bathmat (and add a door stopper so it doesn’t squash the art)
- replace the border tile around the room (maybe in phase 2?)
- move the blue pendant light to hang centered in front of the window
- replace the floor tile down the road (just to break things up since there’s so much of it)
So there you have it. Any trim painting or art hanging going on in your neck of the woods? Have you painted any giant canvases to add color to a small room? Or made some quick bathroom upgrades on the cheap?
Psst- To follow this bathroom sprucing project from the start, check out this planning post, this painting post, and this light-swapping post.

Leave a Reply