We did it. We tiled the entire back wall of our kitchen in a counter-to-ceiling backsplash move that we like to call Project Crazy, and we lived to tell the tale.
We still have to grout, add a big ol’ industrial range hood and chunky open shelves (those will just be screwed right through the tile with a special drill bit) but when we squint we can almost picture it…
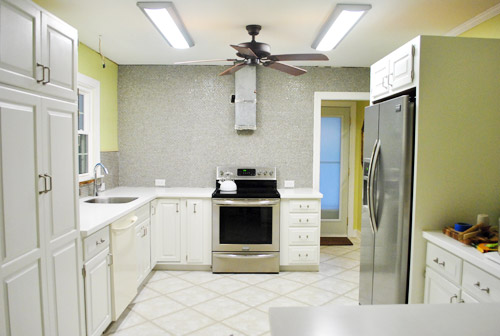
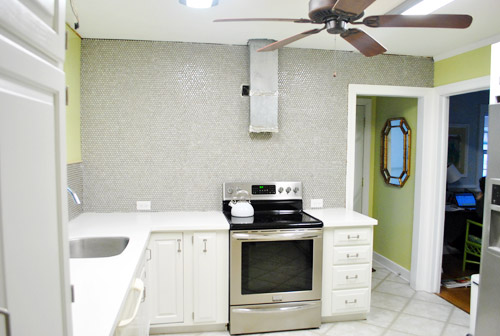
As for the top seam where the tile meets the ceiling, there’s crown molding that runs around the entire room (although we removed some of it on the window wall) so we’ll be adding that back around the whole room so the top of the tile will look nice and finished once we get to that step.

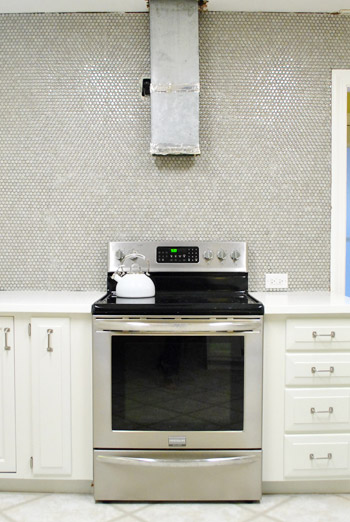
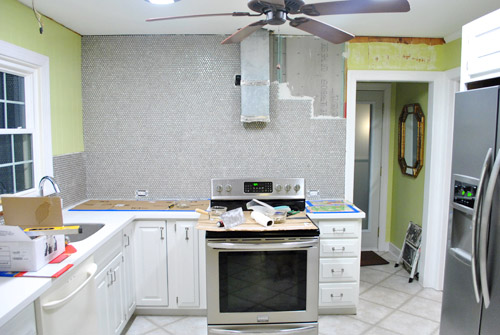
The black box next to the range hood is an outlet for our range hood, so that’ll be hidden once we install ours. We tiled a few inches behind the range hood duct, but didn’t remove it since once we install our industrial hood that area won’t be visible.
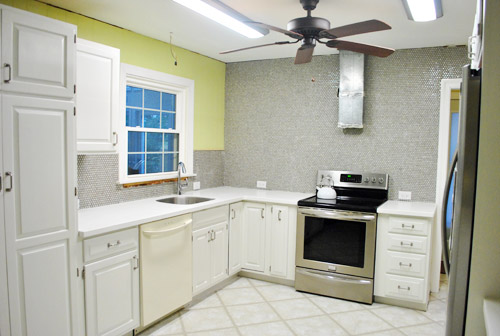
Once we add our floating shelves (which will be 12″ deep) along the oven wall, the space on either side of the window will be 14″ – so it’ll finally look balanced again! I mention this in every kitchen post because I. Can’t. Wait. For. That. Moment.
This entire backsplash process took us around 14 hours total. We tackled it mostly in 2-3 hour chunks in the evening after Clara went to bed or on weekends while she napped (so it’s a good indication of what anyone with a day job might be able to follow). That includes a few hours of figuring out how to cut the tile, which we summarized in this video for you (read a lot more on that process here).
We also shared an in-progress post about prepping the room for tiling, mixing and spreading thinset, and placing the penny tiles here. So that might come in handy if you’re at that stage of the project and could use some reassuring.
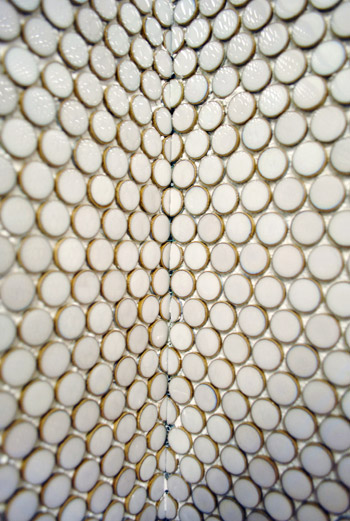
It’s really important to place penny tiles in a way that makes the line where each sheet meets less obvious, so we found that a staggered pattern was the best method for us to achieve a seamless result:

That way your eye doesn’t catch one seam and follow it all the way across the room (more on that here). We also played around with each sheet of tile after squishing them into the thinset, scooching them a bit to the left or the right or higher (since they were on a sheet of mesh it was pretty easy to manipulate them) until they looked evenly placed so the seams weren’t obvious.
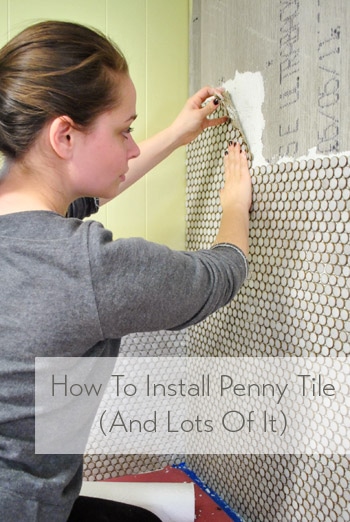
Just wanted to recap that stuff for a second so anyone looking for an exhaustive post about installing penny tile would have those pics and links all in one place. Anyway, when we last left you, we were just beginning the back wall, which we knew would be tedious (but hoped wouldn’t make us rue the day that we picked penny tile). The good news: it didn’t. We made it all the way across that wall, baby! Without wanting to poke our eyes out with penny tile once (well, maybe once…).
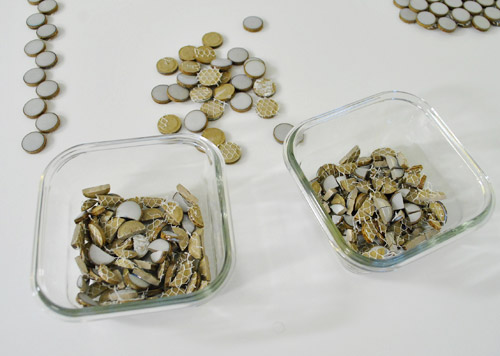
Thankfully, there weren’t many cuts since we could slap a ton of full sheets up in that giant expanse of wall, so although we took our time placing them to keep seams from showing up, we did move faster than having to cut a bunch of tiles. It probably took us three days of 2-3 hour sessions each time. We found it helpful to use little glass dishes to divide full tiles, half tiles, more than half tiles, and less than half tiles. That way if we needed to quickly back-fill an area, like the edge of the wall, with half-tiles or slivers or almost full tiles we already had a little dish of them separated out that we could dig into quickly.
Here’s a video about spreading the thinset and placing the tiles, complete with how to back-fill any tiles that you need to add and how we slid them around and adjusted them to look more seamless. Oh and in the video when I describe it as a brick-layers pattern, I create a horizontal one with my hands, but it’s really a vertical one (two tiles on top of each other and one staggered in the middle of that next to it). Oops. Hope that makes sense when you see it!
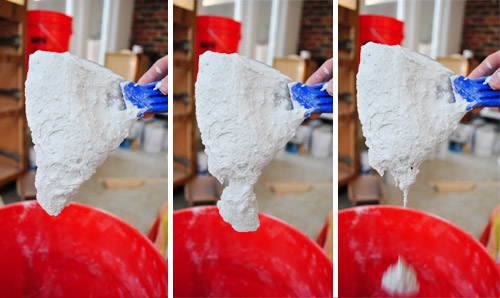
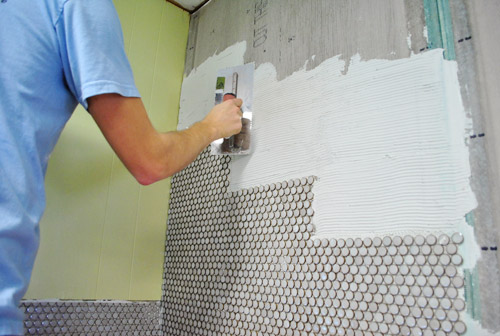
And here are some pics of us making our way across the wall. John applied the thinset with a putty knife (and sometimes a trowel). We mixed enough thinset to set about four to six tiles at a time (so it didn’t dry out before we could set the tile). You can see John applying the thinset in the video above.
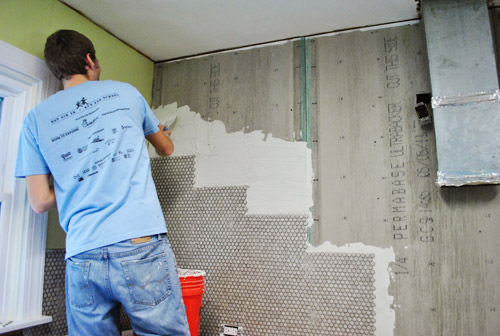
Then John scraped it with his trowel to make little ridges to help the thinset grab the tile and stick for good. Our trowel was a 3/16th notched trowel since penny tile is small, so we heard that smaller ridges were recommended (you can also see this in the video above).
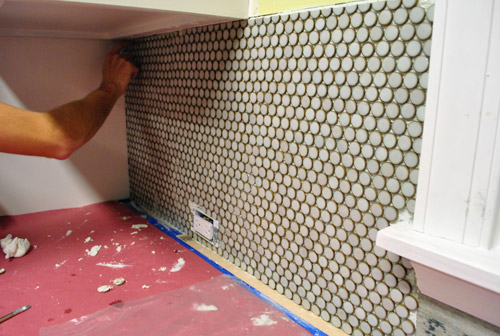
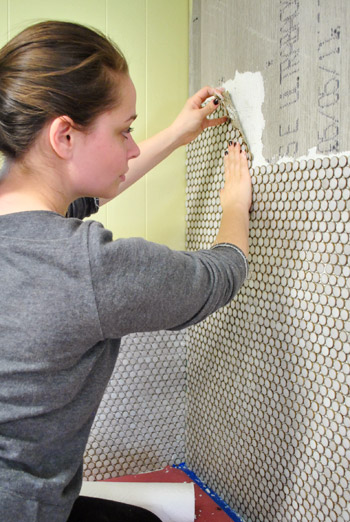
Here I am placing the top tile on the left side of the wall. John got a kick out of the fact that I could comfortably stand on the counter without having to crouch (oh the perks of Team 5’2″). You can see how we worked from the bottom left corner and went up and out to create a staggered staircase effect. This allowed us to build things slowly without having much of a problem with keeping things level since each tile interlocked down the staircase on two ends to keep it from skewing.
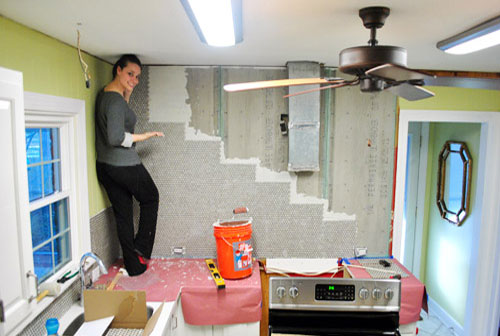
Day by day, we inched our way across…
Here we are in the very last corner, finishing things up. You can see that we scooted the oven out while we were working (to gain more access to the wall and keep from getting thinset on it).
Since a few of you have asked for a shot of the corner to see how the tile meets, here ya go:
Let’s get a little closer…
Basically whatever would be placed next to the last tile on the wall where the wall ends just wraps around and gets placed on the new wall. It’s not 100% perfect but once it’s caulked/grouted we think it’ll look pretty darn good (we’ll snap another pic for you then).
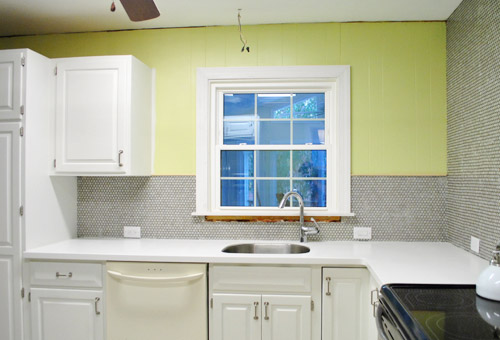
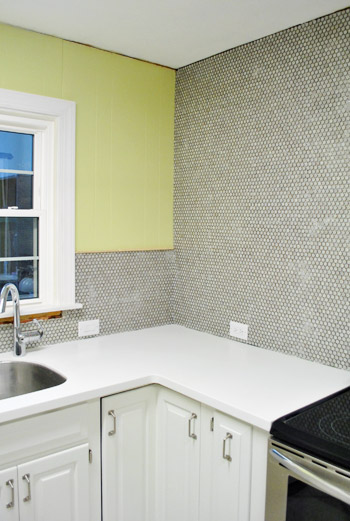
Oh and some other folks asked how we’d be “capping” the 14″ of tile that will be exposed on each side of the window wall, so here’s a detail shot for ya:
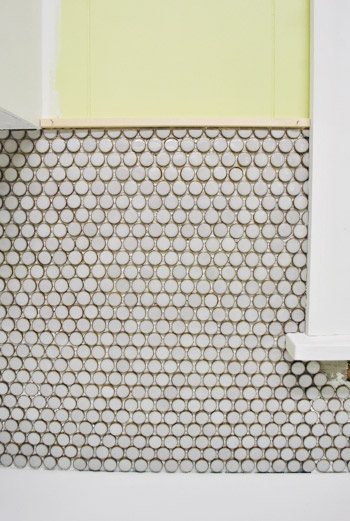
We actually got some thin glass tiles that we thought we’d like, but they just looked too brown and sort of competed with the penny tile, so we decided some thin thin thin pieces of craft wood will make great simple and clean little borders that don’t compete for attention. They’re not hammered in completely yet, since we’ll be pulling them out and painting them white like the rest of the trim in the room after grouting (just to avoid getting paint on the grout).
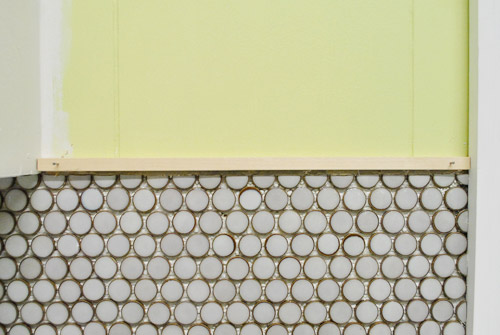
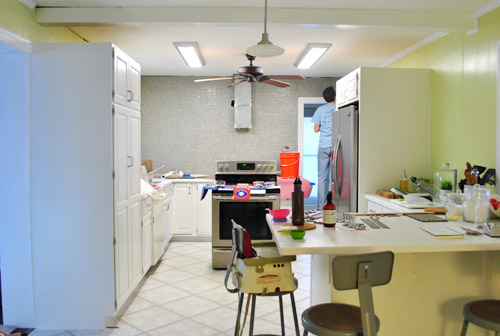
Grellow note: the picture above is probably the most true to life shot of our wall color (in some of the far shots it looks darker/greener/brighter than it is). In real life it’s a soft avocado color (although it can read quite differently on different computer monitors). Here’s a link to it on BM’s site if that helps, since the bad lighting in our kitchen hardly does it any favors. We think once we tackle the new lighting and add the open shelving and some pretty colorful accessories up there (and on the counter) it’ll all tie together really sweetly. You know we’ll share those pics as we go!
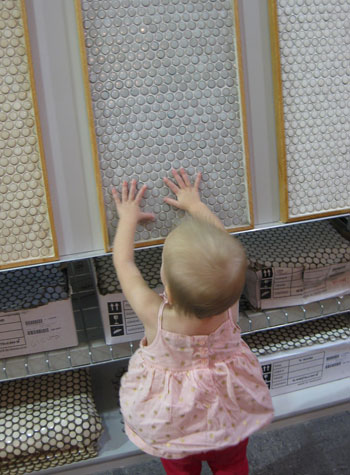
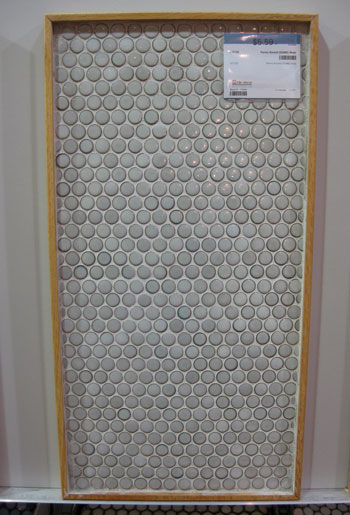
Obviously we still have to spread all that grout, but we’re giving our arms a day of rest before picking up the trowel again (well, I guess in this case it’ll be the grout float). As for the specifics, we picked a soft creamy-gray grout that’s a smidge lighter than the tile. You can see it in this sample shot snapped at the store back when we chose our tile (more on that here):
Oh and see how you can kind of see the seam in the picture above (there’s a horizontal line of grout in the middle of the photo that seems a bit thicker/bolder). That’s why scooching things around and stepping back to see how it all looks before moving onto the next tile is so important! We were sticklers about it, but we’re so glad we took the time to keep everything as evenly placed as possible.
Now we just need to grout, get new lighting (and kill that haven’t-used-it-in-13-months fan), add crown molding and some sort of decorative treatment and baseboard to the back of the peninsula, lay our cork floors, install our new dishwasher, and add shoe molding around the room. And probably some other stuff that our tile-drunk minds are forgetting. So we’ll be back with grouting progress in the next few days or so- probably on Wednesday. We’re hoping we can knock it out pretty quickly, but you never know until you’re knee deep in grout… we’ll keep you posted!
What did you guys do this weekend? Do you all have off today in honor of MLK?
Psst- Oh yes there is a Clara vs. Santa wrestling match going on over on Young House Life…

Leave a Reply