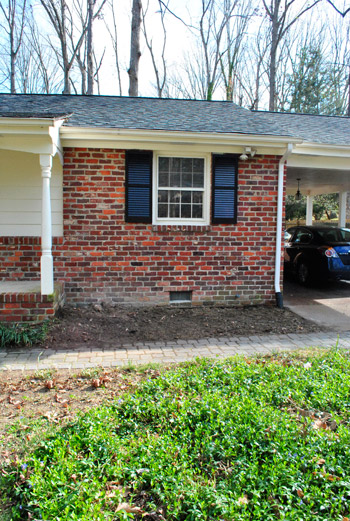
Yup, we’ve been digging. And my arms are sore. But they don’t look like Madonnas yet so it couldn’t have been that bad. We still have a ton of things to do outside, so this is one of those it’ll-take-years-things, and not a ta-da-here’s-the-after-by-the-end-of-the-post things, but it’s nice to focus on one small area at a time to keep from getting overwhelmed (last year we limbed up the magnolia, transplanted/removed a lot of the bushes, and painted the front door). And for this installment of Petersiks Vs. Wild, we tackled the sad little garden bed to the right of the front porch:
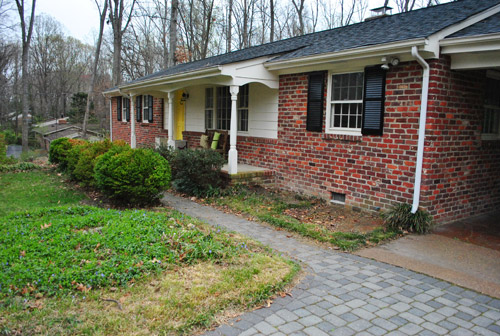
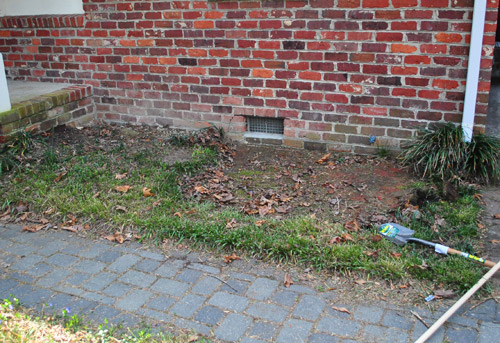
If you look closely, you’ll see what looks like a rectangular brick patio on the right half of the garden bed, which prevents us from planting anything there. But for reasons of balance, function, and curb appeal it had to go.
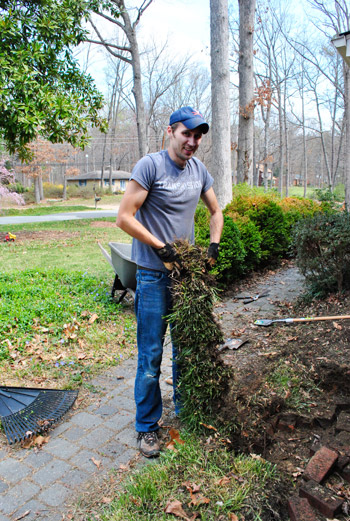
So $herdog got her shovel on:
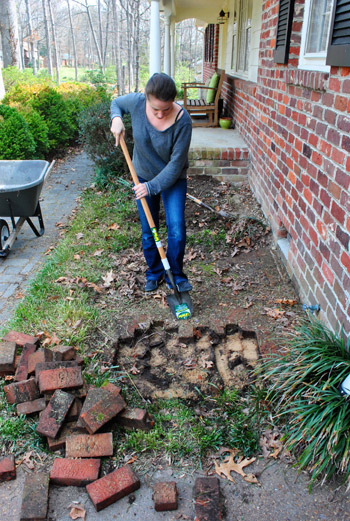
The brick wasn’t mortared together or anything, so it was easy enough to dig one out and free up the next brick, one by one. It wasn’t exactly quick work or light work (I must have carried 100 bricks to make a neat pile next to the carport) but it was nice to start clearing things out. As for what we’ll do with those bricks, we’ll either use them somewhere else down the line or craigslist them. We’ll keep you posted.
Meanwhile John started digging up the liriope on the side of the garden bed right next to the porch as Clara played with all of her friends nearby. No she doesn’t have invisible friends, the girl actually loves worms. She loves talking to them, waving at them, and crouching down to watch them wiggle. It’s weird yet hilarious and adorable. Whenever John or I found them while digging we’d just gently put them in front of Clara so she could watch them inch by (at this point we were both wearing gloves mind you, $herdog doesn’t palm worms).
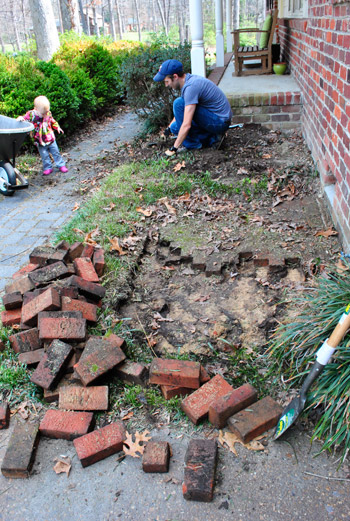
The liriope was a beast. Check out this sod-like run of tangled roots he dug up in a strip:
Then we found what we thought was the mother of all worms but actually was a tiny garden snake. So snake alert- don’t scroll down and look at John’s comical expression if you have nightmares about those guys. Although, if you’re gonna see a snake, this one’s pretty small. John was flashing a smile and I said “look scared” so he gave me one of these:

After about four hours we had our little 13 x 7′ zone stripped down and ready for some actual plant-life (it always looks less wide in photos for some reason- probably because I can’t exactly take aerial shots being 5’2″ and all).
It took us a while of hunting around at a bunch of nurseries and places like Home Depot to find two more things to add to this part-shade garden with the otto luyken laurels we planted here. We usually go for a group of the same thing (or at least try to repeat a few things), but we fell in love with the idea of a feathery little maple and a sweet white-flower-covered shrub (which we also planted around our first house’s perimeter) so we just went for it.
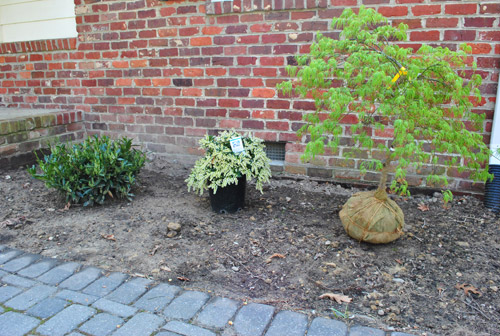
We looked at some red maples but thought they’d blend into the red brick too much (and some would get too big). But this feathery green one (a virdis laceleaf) had us at hello. It’s a small dwarf version that’s great for a 7 foot deep bed in front of a house (it will only get 6′ tall, and is often recommended for a house’s perimeter since it has a small root base and can easily be trimmed if it crowds the house). We planted it almost 4′ from the house, so although it looks more cramped in the pics, there’s lots of room for him to fill in.
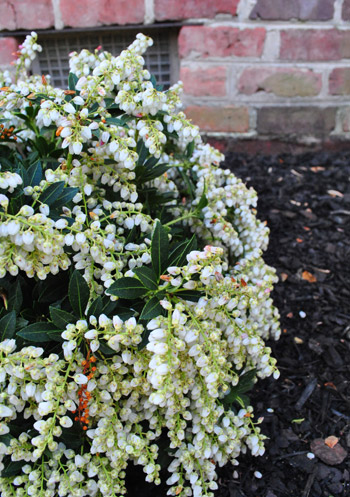
The small flower-covered bush in the middle is a Dwarf Pieris Japonica Variagated, which only gets to be 2 feet tall and 2 feet wide (so it’ll just get around 6″ wider on all sides). It’s covered in white flowers in the spring and is a pretty leafy shrub for the rest of the time. It also works in part shade like the maple so it just felt like they were meant to be. And they both have a one year warranty so we have high hopes for their survival.
So yeah, there are lots of rules of gardening (like “group a bunch of the same type of plants, repeated three or five times since odd numbers are great”) but in the end our two rules were: 1) pick plants you love – no placeholders allowed and 2) make sure they’re right for the spot and that you plant them with the recommended amount of room around them and sun on them – so you don’t end up crying over dead plants or having to dig them up to place them more thoughtfully
We remembered doing some yard work in the back yard at our first house and in the first few years we just bought whatever was cheapest or seemed like a quick fix instead of really thinking things through and holding out for stuff we loved. And it either ended up dying because it was wrong for the place we put it or we ended up wishing we had put the money/time towards something we actually liked a bit more. So we learned our lesson and course corrected just in time to redo the front yard there, which we really loved. But back to our planting project. We dug in our new tree and our bush following the directions on the tag (read them! they help you know how to space them, how big to make the hole, how to break up the roots, what to add to the soil, how often to water, etc).
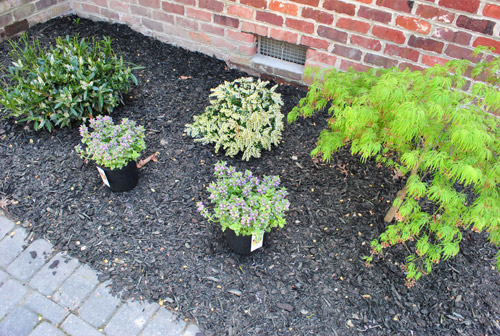
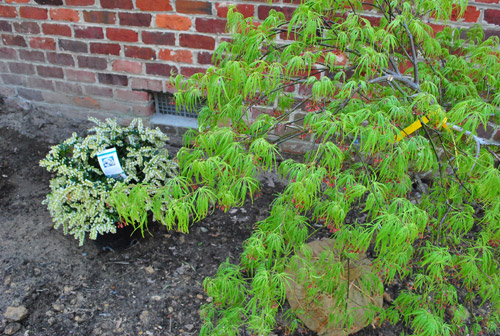
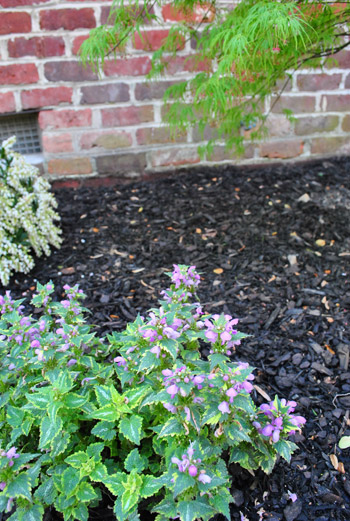
And speaking of spacing, we originally planned to pop two annuals in front while we wait for things to fill in (everything will grow a foot or two over time, but thanks to proper spacing it shouldn’t get crazy/crowded). But while we were at the nursery we saw these inexpensive perennials called Garden Variagated Dead Nettle. They only get 6-8″ wide and tall, so they won’t overwhelm our little garden- and they should be easy to dig up down the line if things fill in and we’d rather move them somewhere else. The great thing about these little purple flowering guys is that they bloom in the spring and summer year after year (instead of just for one year and die like annuals). And they work well in part shade. Holla!
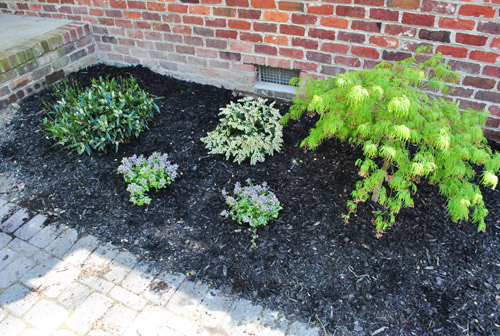
Once they were planted and everything was mulched to keep the weeds away (and keep them nice and moist between waterings), we were really happy with our small side garden.
And now for some plant-tastic detail shots. No allergy meds required:
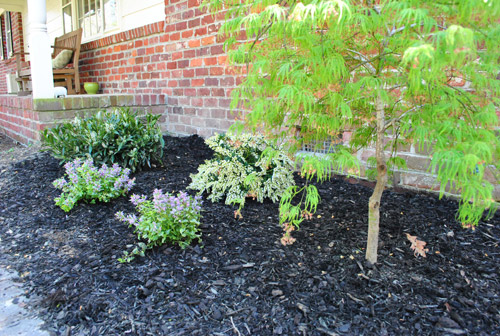
Shucks, they’re sweet. All told, it probably took us about seven total hours of work (done sometimes with Clara and her worm friends nearby and sometimes while she napped) to go from raw and bare…
… to this not-grown-in-yet-but-much-better result. But we hope these guys will fill in a bit more and live here for the next few decades, just doing their thing. So a little work up front will hopefully pay off. We’ll keep ya posted!

It’s funny how much smaller this planting bed looks in the pics. Doesn’t it look 4 feet deep in these shots or something? Meanwhile, all the plants in the back are almost four feet from the house and the whole bed is 13 feet wide by 7 feet deep. Oh and here’s a tip we learned in our last house from a master gardener: it’s always good to place things a bit further out from the roof overhang so roots don’t mess with your foundation, so runoff doesn’t flood your new plants, and so they get a bit of sun instead of always being in the shade of the awning.
Now the plan is to attack the garden on the other side of the porch while Clara’s out there whispering “wooooorms? where the worms go?” We’re also starting to plan our big deck project (we called in Miss Utility to make sure there’s nothing dangerous in the ground and then need to get a permit). So that’s on the docket along with finishing our bathroom and hopefully tackling more Dude Get On That Already things. Ah, spring. It never fails to get us excited to hop from project to project, Easter-bunny style. Speaking of which, what did you guys do this weekend? We got to see a bunch of our family (including Clara’s youngest cousin Ben who is just six months old) and had a grand old time. Lots to be thankful for. We owe you a Young House Life post about it soon. Hope you guys had the perfect mixture of family, food, and DIY fun.

Leave a Reply