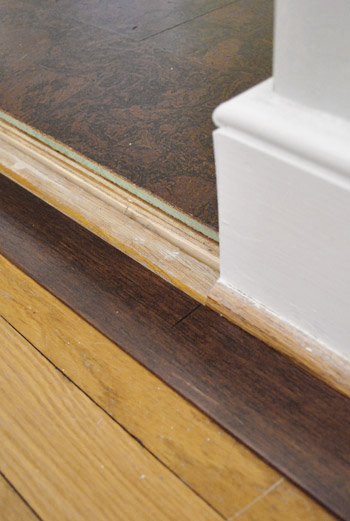
Since sharing this photo over a month ago, some of you have asked for more detail about putting the transitions around the cork floor in our kitchen (and around the fireplace’s floor surround).
Oh but remember we’re eventually going to be refinishing the rooms with the orange wood flooring to match the darker cork tone, so it should look something like this down the line (pardon the bad photoshop):
Finding the right thing for the job was a bit of an effort on our part since our Lisbon Cork doesn’t come with matching transitions. In fact, the guy at Lumber Liquidators recommended against any kind of cork transition because they’re not as durable as a harder wood when it comes to the kicks and bumps that transitions may have to withstand. Lumber Liquidators sold oak transitions that we could’ve stained to match (I think the price was around $45 for a 72″ piece), but I found an engineered option at Home Depot for $27 that was a pretty darn close match already. The only bummer was they only carried 48″ pieces in stock, so I had to special order the 72″ pieces (and then wait a few weeks for them to arrive at the store where I could pick them up) which is why only our shorter doorways got transition-ed back when we finished the floor in March. So yeah, it was about time we got on the rest of them.
When it comes to installing transitions on cork floors, there aren’t a lot of tutorials out there (at least not that I could find) so while I’d love to create one, I’m not sure I’d call my methods perfect – but I’ll tell you guys about my process so at least there’s something out there on the ol’ internet. Since I didn’t photograph the process of putting in the transition above back when we finished the kitchen, let’s follow the story of this guy instead (who we finally tackled last week).
![]()
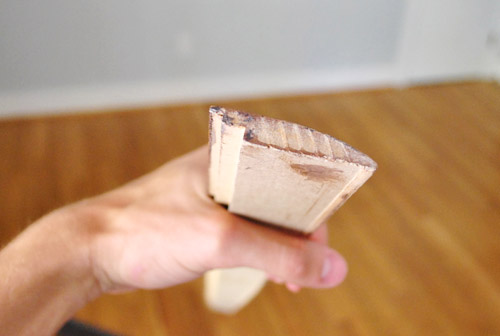
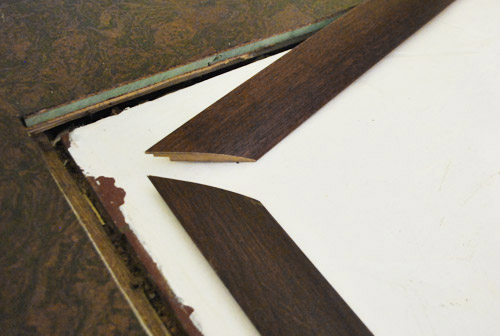
Since we installed our floating cork floor over an existing floor (due to an asbestos liner under our vinyl tile), our transitions have a smidge of a step down. Around 1/4-1/2″ because the existing floor was already a tiny bit higher than the original hardwood in the dining room (keep in mind these rooms didn’t connect like this until we made them). In instances where hardwood floors aren’t the same level, you need a transition piece called a “reducer.” I’m sorry the photo below looks like a hand puppet choking on a giant piece of wood, but you’ll see how one side slopes down and one side steps up – that’s how it connects a slightly lower floor to a slightly higher one without making a big bump that everyone trips over. The key to the most seamless look is to keep it gradual and not go for anything that looks crazy curved, like the letter C.
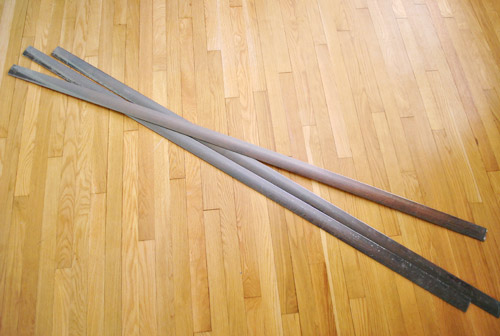
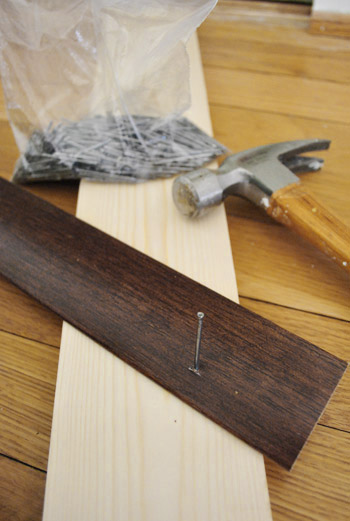
Once I stripped the plastic off of them (that’s what looks marked up in the third picture), I drew a line with a ballpoint pen where I needed to cut it in order to get a good fit. Then I made the slice with my miter saw.
Some of the tutorials I read suggested using adhesive to keep the transitions in place. All of the transitions in our house are nailed in, and that’s how the transitions were in our last house too – so I decided to go that route again. Since we haven’t purchased a nail gun (although we do plan to take that plunge soon), I pre-set the nail into the wood before putting it into place in the doorway by partially banging it in with a piece of scrap wood underneath to get it started (pre-drilling a very small hole could also work, especially if you worry about your transition splitting).
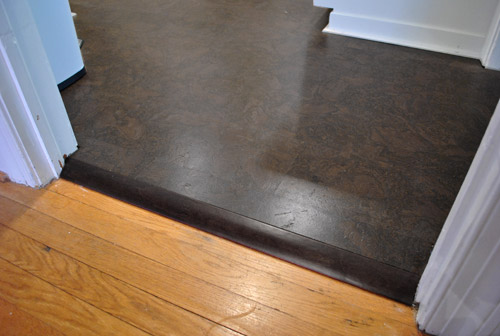
Here’s how I was positioning the transition along the doorway. Since this was the most drastic drop, I actually rested the small lip on the high end on the top of the cork to keep it in place.
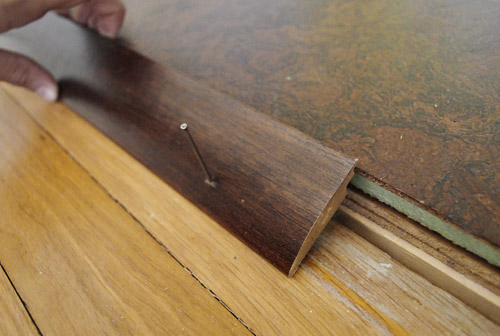
After banging it all in to get things flush (tip: we like using a $3 nail punch to avoid denting the wood), it actually came out looking pretty good. And now it’s no longer the toe-stubbing hazard that it’s been for the last four months, though we’ve somehow dodged getting tripped up on it (perhaps because the for-now floor color change makes it so obvious).
The transition along the hallway was pretty much the same exact process, so I’ll skip right to how we finally tackled the unfinished fireplace. It was an interesting case since it has corners that I had to miter, but I just cut 45 degree angles with my miter saw after measuring the length of each side. You might remember seeing the raw edge most recently in this post.
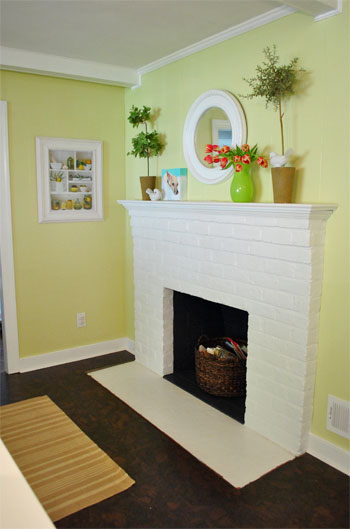
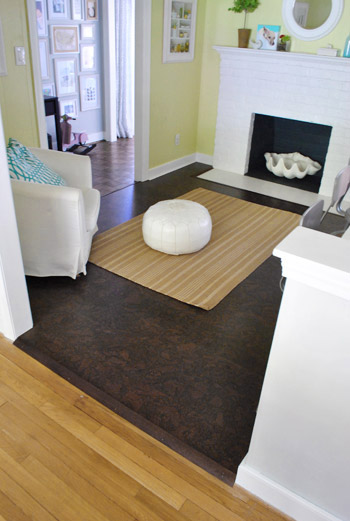
Right now the fireplace is lower than the cork, so we needed to use the reducers again. It’s kind weird, but it’s only temporary (once we find tile that we love enough not to feel like we’re settling, we’re planning to retile this area, which will raise things up so it’s all flush and we’ll scrap these tide-us-over-for-now transitions).
But for now, our transition trim actually works pretty well. It’s so funny how sometimes these little steps like trimming something out can make such a big difference when it comes to something looking polished and complete. Three cheers for no more raw edges!
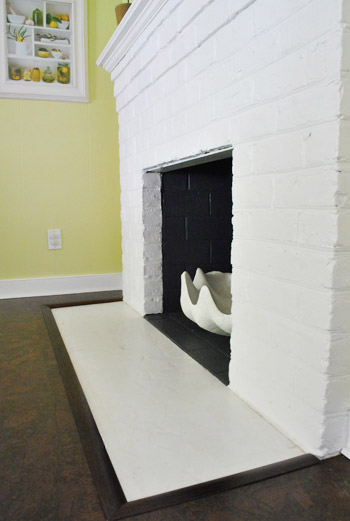
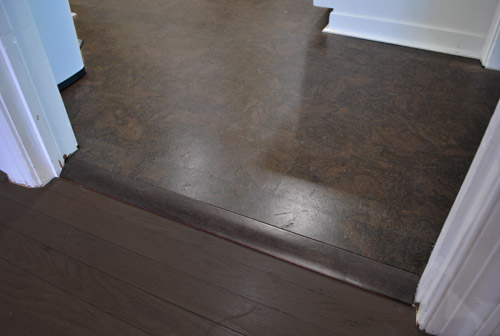
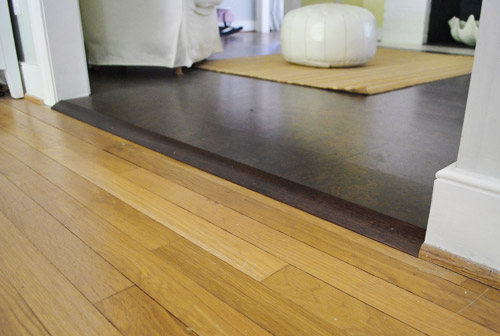
Here’s a view from the hallway of the new transition in that doorway (and the fireplace beyond it). Oh and yes, that is a giant faux clam shell in the fireplace. It was the item from our Joss & Main collection that we bought for ourselves (you know how Sherry is about giant fake clam shells…). It’s huge and probably weighs twice as much as Clara, but oddly enough at least five of our friends/relatives have asked where they can get one for their empty fireplace. Haha, let’s start a clam-shell-in-the-fireplace movement.
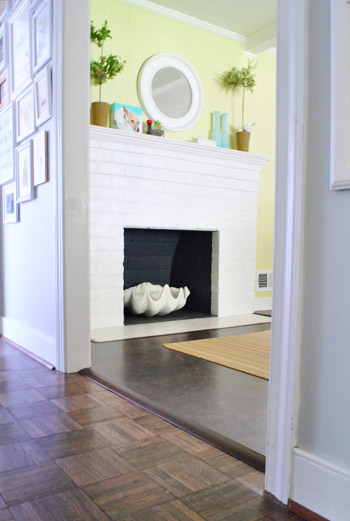
And now for a shot of all three freshly transitioned-areas at once. Ta-dah! We have officially trimmed out our way to a completed cork floor. Don’t mind the place-holder rug in there (it’s leftover from our first kitchen, but would love to replace it someday).
Anyone else have any transition adventures? Or need to take care of some doorways around their house? I was so surprised there weren’t as many cork transition posts on the interweb as I thought there’d be. In the words of Keenan Thompson: what up with that?

Leave a Reply