I’ve always thought that curtains are the unsung hero of room makeovers because everyone’s quick to talk about how paint can make such a huge difference (agreed, it totally can) but I’d argue that curtains can rival the whole “wow, paint totally changed that room” because they can:
- make a small window look twice as wide
- draw the eye up and make ceilings feel taller
- add a whole lot of color/pattern/interest (or not, if you just want something simple/breezy)
- make any room feel more cozy by adding softness
- add function (block light and drafts, provide privacy, absorb sound, etc)
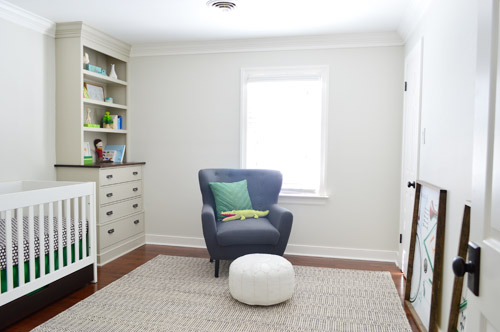
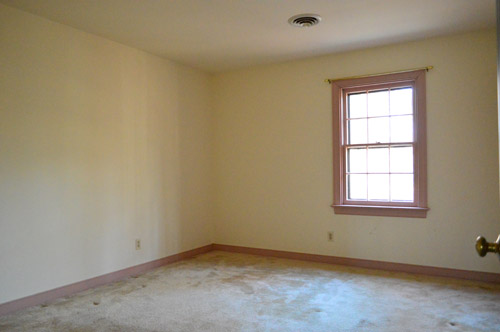
So there it is. My name is Sherry, and I’m a fan of curtains. Just look at the nursery wall without any:
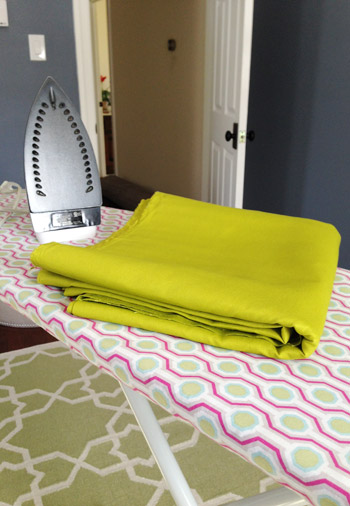
And here it is now with some happy green-apple deliciousness going on:
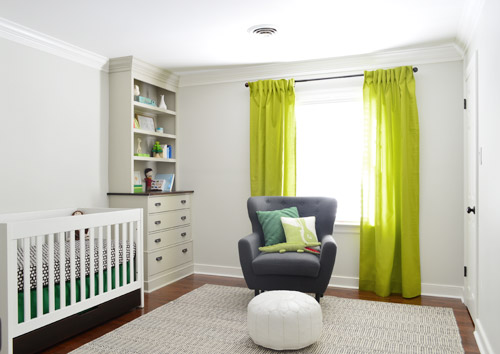
This room is still far from finished (we’re planning a colorful large-scale mobile for over the crib – maybe something like this – and the bare wall across from the crib still needs furniture and art). But back to the curtains. They make such a difference, right? I also tried a new pleated approach this time, along with an extra thick hem at the top and bottom to give them some added heft, and I’m a complete fan. It was really easy, so I’ll just stop yapping and dive into the details.
When it came to picking the fabric for the nursery, we knew we wanted something happy and colorful since the walls and built-ins are a neutral palette (Clara’s white-walled yet super colorful room has taught us that safer choices on those harder-to-change surfaces leave things wide open to layer in a lot more personality and color with other accents like textiles, art, and accessories). We considered everything from a bold pattern to a fun dip-dyed look or a band at the bottom, but thought one solid hue would be nice because we didn’t want anything that would look too busy next to our patterned rug and crib bedding.
We were actually really inspired by the different tones of green in the Target box that we recently grabbed for the built-ins, along with our old stacking tree game, which both showed us how great a vibrant apple green color could look with a darker kelly tone in the mix.

We hit up a local place (U-Fab) as well as JoAnn fabrics, and ended up falling for a cheerful apple green color at JoAnn. We thought it would layer in nicely with the kelly green bedskirt, bike art, and chair pillow without being too matchy or flat. I bought five and a half yards of fabric, which was listed at $6.99 a yard (it’s 100% cotton, and the color is Solid Apple if that helps you track it down at JoAnn) but I used one of those 50% off coupons so my entire purchase was $19.22, which means each of my panels breaks down to being under ten bucks.
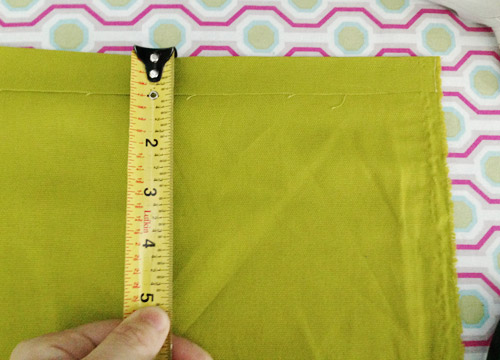
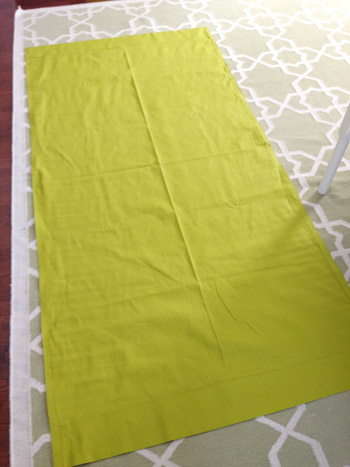
The first thing I did when I got it home was pre-wash it (this helps you avoid shrinkage on the back-end, which can result in highwater panels if you wash them later). Then I laid my fabric on the floor and folded it in half (length-wise, not width-wise) and cut along the fold so I was left with two equally sized 99″ panels. My desired finished length was 88″ so that meant I could have a nice weighty 5.5″ hem at the top and the bottom. First I hemmed the top and bottom of the panel just about an inch from the edge with hem tape, like so:
Heavy duty Heat N’ Bond is a favorite of mine, just because I’ve made a few curtain panels with my sewing machine and others with hem tape and find that hem tape is easier for me to get a nice straight seam instead of a slightly meandering one. I’ve also had luck with durability (and washability) in a nursery/kids room with it over the last 3.5 years (all of Clara’s curtains have been hemmed with the stuff) so that made it an easy choice.
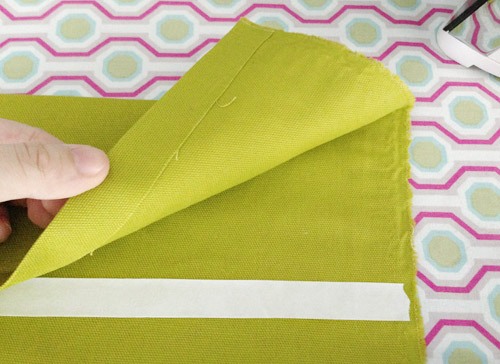
After making that first 1″ hem on the top and bottom of the panel, I folded each one of them over again to make a 4.5″ cuff, so I was left with a nice finished looking edge on each end (that’s why I did that little 1″ hem first). Even though it’s the back of the panel, it doesn’t take much time to make that extra little fold, and it ends up looking nice and clean.
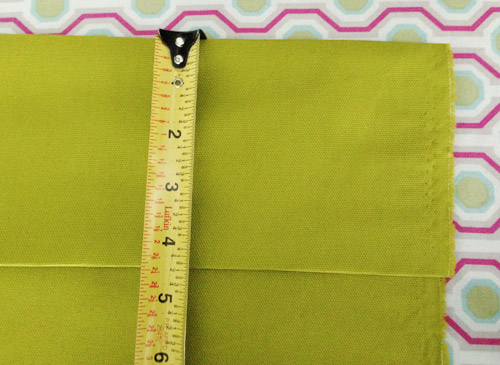
Again I used hem tape to secure that flap of fabric at that 4.5″ mark.
After securing each of those top and bottom hems, I hemmed the sides (just with simple 1″ one) to keep the panel as wide as possible, but give it a finished edge. Here’s what one panel looked like on the floor with the backside-up, wrinkles and all.
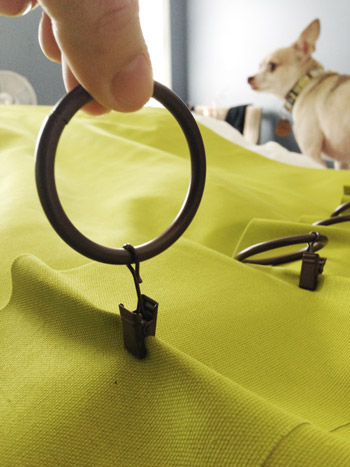
Next I ironed each panel to get a bunch of the wrinkles out (they honestly still could use a steam-session now that they’re hanging in place) and then it was time to give the whole “pinch-pleat effect” a try. Instead of my usual MO of clipping rings to the top edge of the fabric (so the curtains hang like this or like this), I pinched the fabric in ten equal increments and secured the clip to the back of the top hem, about 2.5″ from the top of the panel. Burger was intrigued.

Here’s a close up for you of that top hem along the back of the panel (again, I just used ten ring hooks and spaced them out by eye in as-equal-as-possible increments).
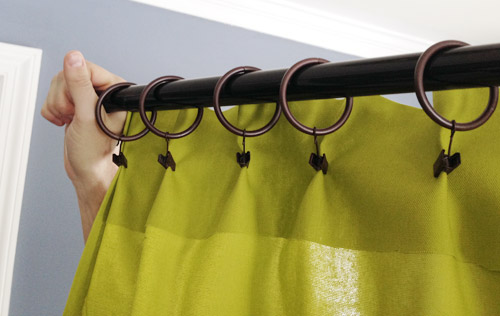
This is John holding up the rod after I strung one panel on so I could snap a picture of the back for you guys.
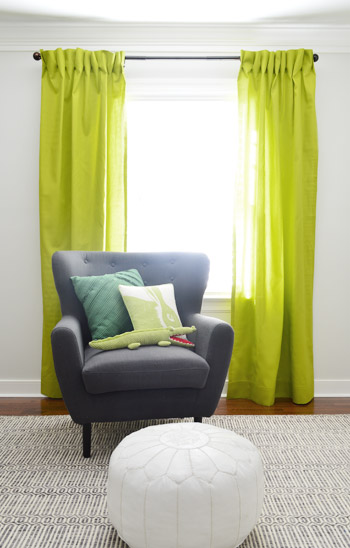
And here’s what they look like from the front after hanging them with the anchors and screws that came with the rod we picked up at Home Depot:
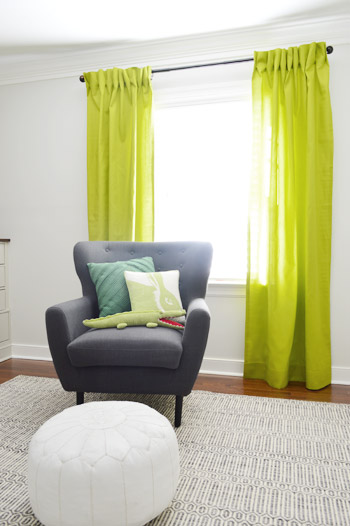
Don’t those pleats add a little something extra? I like that they’re not super perfect & uniform (it’s more of a casual pleat if that makes sense) but they still feel a bit more upgraded than the regular old ring-hook look that I’m used to. If you’re at home thinking “I’d make those, but I wish each pleat was identical and super uniform” – fear not. You could probably stand on a stepladder and tweak the clips in the back to even everything out. John and I just thought they looked sort of effortlessly cool this way. Either that or we’re too lazy to break out the step-ladder.
Update #1: We’re getting a bunch of questions about if we’re planning to use blackouts and/or if these curtains can close to block light. They can close (they’re each 56″ wide) but we have light-blocking faux wood blinds on all of the upstairs windows (more on those here) so we typically just close those instead of the curtains. Although I might add some blackout panels to the back of these panels like we did in Clara’s room if this guy ends up loving total darkness like her. Will keep you posted!
Update #2: Also getting questions about where the chair’s from. We bought that from Joss & Main a few years ago (it used to be in the corner of the kitchen across from the fireplace in our old house, and was in our office at this house until we realized it made more sense in the nursery). The white pouf is a sale find from J&M too.
It’s definitely feeling a bit more like home (and making this baby on-the-way thing feel a bit more real) to see how much this space has changed since we bought the house.
I’m telling you, curtains make the difference. Ok, and a new floor, some wall paint, a pair of built-ins, crown molding, and furniture help too.
So that’s what’s new in the nursery. And Operation Homemade Mobile is actually in progress, so I hope to share that with you guys soon – along with some updates to the completely blank wall across from the crib. Have any of you ever done pinch-pleats, either with the sewing method or the ring-clip method? Do they make you feel fancy? Was your dog super interested the entire time?
Psst- Wanna know where we got something in our house or what paint color we used? Just click on this button:


Erin says
The nursery looks incredible! Really love it. One question though, how do you guys decide where to hang the curtain rod? My husband and I just bought a home with a LOT of windows and I’m a bit baffled as to how far the curtain rod should be placed above and to the side of each window.
YoungHouseLove says
I like to cheat the rod so it’s around 12-18″ wider than the window trim and a few inches below the ceiling or crown. Makes the windows look nice and wide/tall.
xo
s
amy says
Mind. Blown.
I am honestly sitting here a little teary. I have had the curtains in my family room folded over and hanging from the actual hideous ring clips for over a year. I have intended to sew them directly to the rings and it hasn’t happened. I don’t even sew, so you can imagine why I put this off. I feel like a year’s worth of guilt has been lifted! I am headed to clip the stupid rings from behind right now and revel in my new fancy, pleated curtains. Wish me luck because DUDE, I’m getting on that!
YoungHouseLove says
Wahoo! Sending you tons of luck DUDE!
xo
s
Lauren says
I am wearing a pleated green top today, the same colour as those curtains. When I left for work my husband informed me I looked like Peter Pan. I am going to send him this post and tell him “FALSE. My top is FABULOUS and clearly Sherry would agree with me” (you’re already our barometer for home style and general coolness).
YoungHouseLove says
Hahah! False = hilarious. Reminds me of Dwight Shrute, forever and always.
xo
s
Lizzy says
Can they be closed all the way?
YoungHouseLove says
Yup, they’re each 56″ wide, so they can close but we don’t tend to close curtains. We have white faux wood blinds for blocking light in all of the upstairs bedrooms, so that’s what we typically use.
xo
s
keisha says
The nursery looks awesome!! And THAT RUG. It all just looks so perfect. Just the right amount of color and neutral, cozy and clean. Lucky baby boy.
rachael says
I missed it.. but where is that awesome chair from?
YoungHouseLove says
Just updated the post with that info for ya!
xo
s
Anastasia says
I love the pop of color these curtains bring into the room! Looking great :)
Will you be turning these curtains into blackout curtains like you had done for Clara’s nursery? Or does this room not get too much light? Just curious
YoungHouseLove says
We have light-blocking faux-wood blinds in each of the upstairs bedrooms, so we’re covered from light, but we might add blackouts to the back if any light sneaks in the sides or anything. Will keep you posted :)
xo
s
Casey @Waffling says
Are you going to line them with blackout fabric or put up a shade? They seem to let in a lot of light!
I really like the colour
YoungHouseLove says
Thanks Casey! I just added an update to the post with that info (lots of folks are asking :)
xo
s
Kati @ This Wandering Life says
I love the pleats. As a renter, I’ve learned that you can pull it off really, REALLY cheaply since they end up being hidden. I looped binder clips over cheap-o plastic shower curtain rings to make the clips, (The rings unsnap and fit through the silver metal of the binder clips, making it secure) and then used those to make the pleats. Since it’s hidden, it doesn’t matter what the clips are made from!
I should make some more for my living room. After getting our federal return, we decided to use $250 to o an apartment makeover – a huge sum of money for us, since we have spent almost literally nothing on our place since moving back to the states from Paris. Wish us luck!
YoungHouseLove says
Really smart! Never would have thought about shower curtain rings!
xo
s
Meg says
I’m a renter, too, and the binder clip/shower curtain ring thing is BRILLIANT! I’m totally going to steal that – thanks!
janice says
This is REALLY looking amazing. REALLY. I so want to kidnap you guys (in a good way!) and put you to work at my house!! LOL I feel like I’m getting closer to attempting some ‘bigger’ things (like some quasi-built-ins on each side of my fireplace) but I’m still a wee bit intimidated. I just need to get all methodical on myself and plan it out and measure etc and just DO it! Peterisk it!
YoungHouseLove says
Go Janice, go!
xo
s
Melinda W. says
These look great! But I’m curious, no blackout panel for the wee one? I thought I remember you being a fan…
YoungHouseLove says
Just added an update to the post about that for ya!
xo
s
Misty says
ohhh looks so good! I agree curtains make such difference! To be honest I am most excited about the bicycle print going up!!! I love it! PErfect for a little fella’s room!
Mel says
Love the burst of color those curtains give! It truly is beautiful.
And a side note, Burger’s collar totally matches the curtain panels. He makes the perfect accessory =)
YoungHouseLove says
Ha! He does. That sneaky little pup was just getting his model on.
xo
s
Teresa @ wherelovemeetslife says
Love that color and that chair looks pretty darn comfy. I hung curtains this weekend in our master bedroom.. it makes such a difference in the room!
Melanie says
I totally, 100% agree with you on the curtains! We had our bedrooms painted recently and I was a little disappointed with the boring end result (even though we picked bold colors). Then we hung curtains this weekend and we suddenly had cozy, pretty bedrooms instead of brightly colored boxes. It made a HUGE difference.
Also, I never would have thought to make pleats that way. You’re a genious!
Anne says
Love the color and the simplicity of the “pinch-pleat” is genious! I will definitely be using this trick. If I may ask, what are the room dimensions?
YoungHouseLove says
The room’s around 11 x 13.5′
xo
s
Diane says
MORE Burger!!!
YoungHouseLove says
Haha!
xo
s
Miriam says
Ingenious pleats, looks fun and interesting, but doesn’t seem to be too much work!
I was wondering how the curtains will work with the baby sleeping. I think I remember reading that Clara needed black out curtains to sleep? Will you be getting the big-box black out roller shades and installing? Purchasing blackout liners to hang behind? Do you think there’s a no-sew way to make lined curtains (I’m doubting it, but a yes! would make me attempt it . . . )
Thanks for inspiring
YoungHouseLove says
Just updated the post with an update about that. Since we already have light-blocking faux wood blinds in the room we think we’re all set, but if I end up adding blackout curtains I promise to share all the deets!
xo
s
Lauren says
In my son’s nursery, I couldn’t find curtains I liked, and didn’t really find material I liked either. I ended up using tablecloths! No need to hem, they were the perfect length. Then we got a glider but I wanted to recover the cushions. Same deal – couldn’t find fabric I liked. Ended up buying curtains and used the material from that.
So now I just need to find upholstery that I’d want to use as a tablecloth and I’ll come full circle. ;-)
YoungHouseLove says
That’s amazing!
xo
s
Aimee says
I am wondering, what do they look like when closed? Are you going to put a blackout curtain behind for nap time?
YoungHouseLove says
Just updated the post about that since so many folks are asking! Because we already have light-blocking faux wood blinds in the room we think we’re all set (we’ll close those and leave the curtains open, although they do close since they’re each 56″ wide) – but if I end up adding blackout curtains I promise to share all the deets!
xo
s
Samantha @ Fabulous Fabris says
I don’t think you guys can do anything wrong.
Seriously, I would look at the colour and think it would look atrocious, but it looks so absolutely fabulous! You guys rock.
AlisonG says
WOW, that’s bright. Doesn’t seem like it goes with the green in your bicycle pictures. I think I would have added a Kelly green stripe into them, like the bed skirt. Guess the middle makes no sense. You are probably going to make them tie in together with the mobile and accessories.
YoungHouseLove says
Yup, we’re hoping to layer, layer, layer instead of just doing everything in kelly green (like the Target box and the stacking tree which have both colors looking sweet together). Hope it works!
xo
s
Susan says
Those look great! I’d love to add some grey ribbon of some sort at the bottom to tie to the chair.
YoungHouseLove says
That’s a fun idea!
xo
s
Paula says
I agree. A ribbon stripe somewhere toward the bottom to tie in with the chair. What a great idea!
Jenna says
Hi guys,
LOVE your blog! Long-time reader, but only a recent DIY’er myself since we finally bought a house instead of renting. So fun, but scary too! Couple questions for you… when you added light blocking panels behind Clara’s curtains and if you do it for this baby’s room, have you had any problems with the added weight on the clips? Also do you sew them to your main curtains? Lastly, where did you get that awesome chair??? (Tried to search for it in past posts, but didn’t find anything although I’m sure it’s somewhere). THANKS! Hope your pregnancy is going well!
YoungHouseLove says
Just updated the post (towards the bottom) with both of those things since a bunch of people are asking. I’m not sure how I’d add blackout fabric (in Clara’s room they’re just clipped together, so I could try that) but I’ll report back on whatever I try if we go that route :)
xo
s
Emma says
I love curtains too! Usually when something about a room just isn’t right, you add some curtains and voila! It feels like home!
I love this nursery- can’t wait to see what else happens in here!
Mandy Jean says
Love the idea and the color is so pretty!
Marianne in Mo. says
Those came out great, love the color! I agree about how you mount the rod with the drapes on, I learned that the hard way, after either having to move the rod (and patch holes) or re-hem the drapes. Be aware (for future) some fabrics will “stretch” after hanging, and it’s advisable to wait a few weeks after they hang to put in the hem. This is usually loose weaves, not tight weaves such as cotton.
Can’t wait to see the mobile, and the barnacle in his room! :-)
YoungHouseLove says
So smart!
xo
s
Wendy says
Seriously? Will you guys ever stop amazing me? I followed your instructions for curtains a few years back. My house has super low ceilings – about 7’6″, unfortunately. I fell in love with some fabric and made the curtains extra long since I know I won’t be in this house forever, and I figured they’d just be too long here but could be perfect in my next house. Well…. 3 or 4 years later and they are just way too long in this house. I even hung the rods all the way up to the ceiling. I will try the pinch pleat hang this weekend, and it just may solve my problem! You rock!
YoungHouseLove says
Good luck Wendy!
xo
s
Taya says
Love how the nursery is coming together for Barnacle! It’s so fun, and cheerful, and has so much room to grow for your little guy!
Meredith says
https://www.etsy.com/listing/120258927/kite-tails-geometric-paper-garland-10-15?ref=shop_home_active_2
Have you seen this? Could be cool mobile inspiration. Especially the kite thing.
YoungHouseLove says
Super cute! I love that!
xo
s
Amanda says
Can I just rent out my house to you two for a year or two then move back in? I’d fund the projects and things would actually get accomplished!
YoungHouseLove says
Haha! Sounds like fun!
xo
s
Joe Faraoni says
That’s it… we are making our own curtains for the kid’s room. This sealed the deal for me. We can’t find what we want anywhere. I was thinking this was what we needed to do and you just made that decision for me.
Our kids room is now one step closer to being complete.
Thank you.
YoungHouseLove says
Wahoo! Good luck Joe!
xo
s
Hollie says
Some might consider this to be a bit of an overstatement, but, seriously, your idea for pinch-pleating no-sew curtains has changed my life today in a significant way! :)
J says
These look to me so much like your original curtains in your second bedroom (can you tell I’ve been reading your archives lol). Are those still in your posession and were they ever a consideration for this room?
YoungHouseLove says
John and I were laughing about that! We still have those old panels folded in the storage room, but when you hold them up, the nursery ones are a lot more muted in comparison (these are a lot brighter/peppier and more apple green, while those other ones are sort of a muted pea-green).
xo
s
Tara says
Hello! This is such a great idea and I really appreciated your step-by-step instructions. Curtains can be so expensive (even from Target) so this is a great alternative! Just curious though – where is the charcoal chair from? I have been searching for a nice chair of similar size and this one looks perfect!
Best wishes to you and the baby, Tara
Tara says
Nevermind! I found my answer in the previous comments!
Teri says
So I may have missed the post but where did you get that chair??
YoungHouseLove says
Just added an update in the post for you about that!
xo
s
Meaghan says
PLEASE share where you found the alligator in the bookshelf. I have a little boy who would love to add that to his menagerie.
YoungHouseLove says
Oh man, he was a gift. Maybe from Target or Barnes & Noble?
xo
s
Sheila F says
Our Linus is the same way. (His Momma was a pure breed Chi and she was a bit of a fluzzy with the neighboring Dachshund dude so he came to us as an adoption, LOL) Anyhoo, he is all over anything I do, until the vacuum, drill or mixer is turned on. Or the mailman dares to attack us with bills. Then he is a rabid bear trying to eat the door to get to the mailman. LOL Sherry I love the idea for pinch pleating! Never thought of that. I love that you could change up the look with some trim and take the clips off iron and hang with the pocket for a whole new look, very inexpensively! Gonna copy this idea! Thank you!
Maureen says
Ok, soooo am I the only one who is so excited about how you did the pleats? My curtains in my kitchen would be too long if i used the clips as is, but now, with the way you just showed them, I can have easy gliding curtains. Thank you, thank you. (Sorry for the dramatics. lol)
YoungHouseLove says
So glad! It’s a great way to cheat too-long curtains!
xo
s
Gaidig says
Just wanted to give you a sewing tip, since you mentioned wonky hems: to ensure a straight hem, iron it down to the size you want first. This may not be something you care about doing for curtains, since you’d already be done with the heat-n-bond, but for clothes or things that take a lot of abuse or a lot of washing, it’s a big help.
YoungHouseLove says
SO smart! Thanks for the tip!
xo
s
Georgia says
Wow they make a huge difference!
Initially i didn’t think I’d like the green theme, but im loving it!
I would be really tempted to paint the wall between the built in’s an accent colour, im eager to see the mobile your making.
Good Job so far ! :)
YoungHouseLove says
We have debated that too! Will have to see how the mobile looks (if it’s enough color or needs a little backdrop, haha!).
xo
s
Mellisa says
I think those curtains are glorious! They add so much spunk and personality to the space, and I am completely enthralled with your pleat technique.
tia says
I need curtains!
Kelcey says
I love the color of the curtains! They really make a huge difference in the feel of the space. My family just recently moved and I have been stuck on whether or not to put up curtains in my daughter’s nursery (right now we just have roman blinds), and I think you just convinced me I need some colorful curtains. Her room is mostly neutral too, so I think it will make a huge difference. You got me all excited! :)
-Kelcey
hellokelcey.blogspot.com
BrocanteuseRose says
My Saint Bernard, Moose takes a supervisory position when it comes to my projects, normally from the couch. :) I love the pleat top curtains and so clever to do it with curtain rings. Thanks for the idea!
Jess says
I love the room, but this curtain project has me confused. I mean, isn’t the least little tug going to yank the fabric from the clip? They make actual tape with gaped pockets for exactly this purpose, it’s like cheater pleats:
http://www.beaconfabric.com/vindex.html?cat319.htm
You could totally stitch witch it onto your panel. Then you just insert the hook ends into the eyes on the ends of the rod rings.
YoungHouseLove says
We actually like ring-clips for the easy-release safety of them. If a kid yanks hard enough on the curtains they’ll fall but the rod stays in the wall instead of crashing down on them (it’s why we chose them for Clara’s room over panel-topped curtains that could rip or yank the whole rod out of the wall with them if they fell). I love the link you shared for gaped pocked tape, though! Might be fun to try in the dining room, office, living room, or kitchen (we need a whole lot more curtains for this house).
xo
s
Meg says
The curtains absolutely make a difference — and I love yours! That pop of green is fantastic, and completely livens up the space. What a difference from the beginning . . . so impressive!
Samantha says
Hi Sherry
Am so in love with the curtains! The room is coming on fabulously. Makes me want to whip up some curtains for my daughter’s room. Might go & have a look in Spotlight tomorrow for some fabric. Also am whipping up a designer pin up board this weekend to go above the study desk. Also nearly finished a Paris themed cross stitch wall hanging to go in her room too. Then I’m going to make a designer memo board for her room & a door plac & some nail art. Then get onto some diy art for my room.
YoungHouseLove says
Sounds exciting! Best of luck with everything Samantha!
xo
s
Keri says
Love your blog!! You guys are amazing! I was wondering if any of the past owners of the houses you have lived in have ever contacted you? It must be crazy for them to see all the changes if they follow your blog.
YoungHouseLove says
We’ve heard from the previous owners of our first and second houses (it was so AWESOME) and hope to have the same experience at this one!
xo
s