If those three things don’t sound like a great time, then I don’t know what does. Amiright? Anyway, we’ve shared a few peeks at the ceiling progress in our sunroom, but have yet to explain how we got there. Hold on to your hats and break out your graphing calculators!
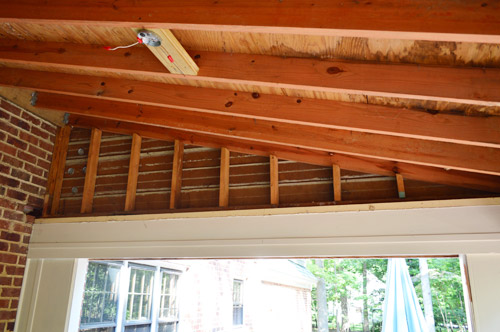
Just kidding about the calculators, because we actually left the engineering part of this job to a professional. The pro we referenced in this post was the builder we’re working with on the show home. He offered to pop by to give us his expert opinion, which boiled down to “those cross beams aren’t supporting the roof, they just created the framing for attaching the ceiling.” That’s exactly the news we were hoping to hear.
The news we didn’t want to hear were the tedious instructions that he gave for removing them and reinforcing the rafters up top (since the ceiling we were removing wasn’t load bearing but the rafters above it were a few decades old, a few additions would make it a lot stronger). It involved adding a lot of new hangers, ties, and bolts, which meant lots of nailing and drilling and ratcheting. Totally doable, just time consuming.
He recommended that we call one of the contractors that he uses a lot and get an estimate, just to weigh what it might cost to have a pro do the work (it would be faster since they’re more well practiced and already have the right tools). That contractor, David, said he could come by the next day and knock out the job with a second guy in 2 hours for $200. Um, SOLD. So within a few days of posting this update, this was happening outside our living room window.
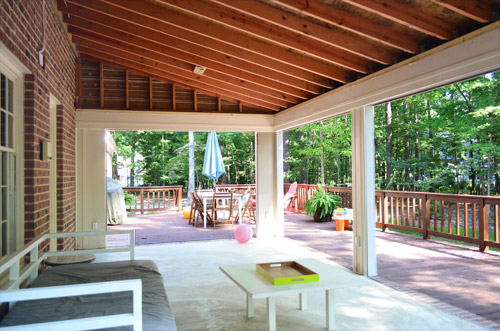
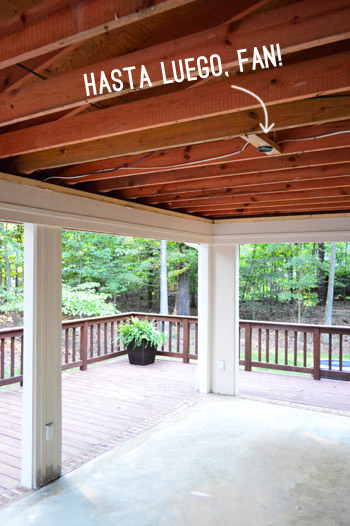
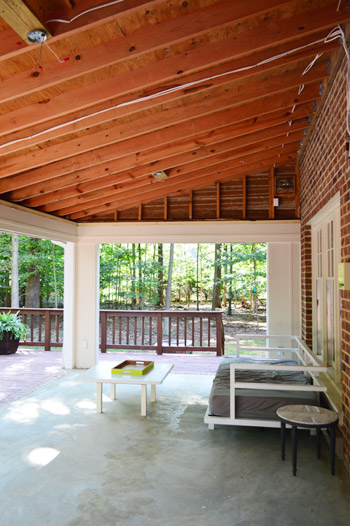
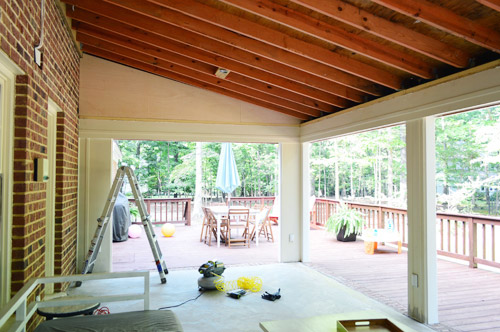
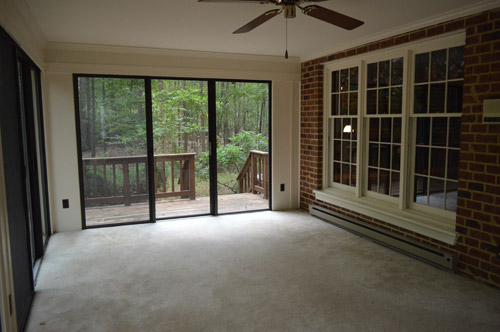
The difference was awesome. The room may have only gained about 4 feet of height on one side, but it feels so much more open compared to the before. Well, except for those dang fan wires ruining the view.
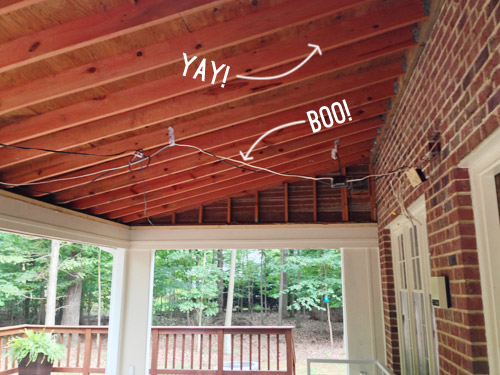
So we put a call into our favorite electrician and got his crew to not only extend the wires so they could be attached to the new/higher ceiling, but also to turn our one fan box into two so we can stay cooler in there (and to hopefully bug the bugs enough that they won’t want to fly into the room at all). We haven’t received the bill from them yet, but we’re guessing that it’s in the $250 range.
Going into this lofting project, we assumed it could be around 1K if we needed to make structural changes (like enforcing things with more beams, getting a permit, etc) not even including any electrical work that we might need to hire out – so it was definitely a lucky break to find out the ceiling framing was just cosmetic and wouldn’t require any extensive restructuring or even a permit to remove it. And getting those two pro-worthy jobs knocked out for around $450 while doing the initial drywall removal ourselves, as well as our plan to re-insulate, hang the fans, and install all of the ceiling beadboard ourselves means we’ll hopefully save a good chunk of change when this is all said and done.
The funny thing is that we realized a few months after moving into our second house we embarked on another outdoor project (laying our stone patio) which came in around $1,200 when we were finished – and with the cost of the tile and the beadboard added onto the expenses out here so far, it looks like this project could end up being right in the same ballpark. Dare I call it an exterior project tradition?
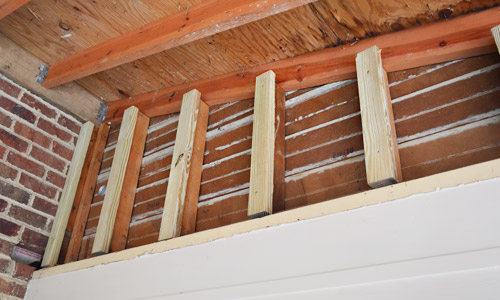
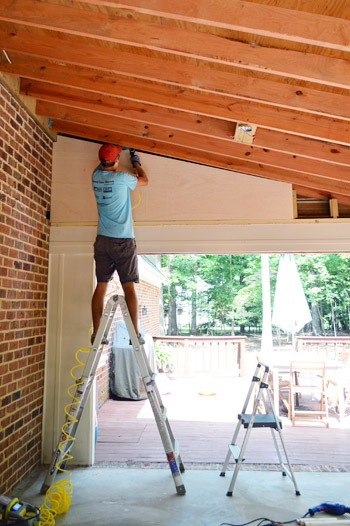
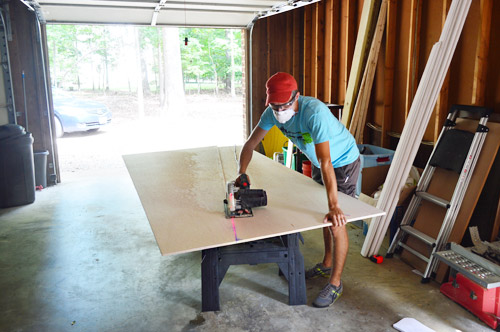
Anyway, with those two tasks taken care of, we could finally turn our attention to rebuilding our exposed ceiling. We decided to start with the two empty triangles on either end of the room, which we opted to cover with plywood that we could paint to match the rest of the room (since the rest of the space is framed out with plywood already).
Dealing with a triangular space sort of sent me into a mathematical tailspin. My brain immediately grasped for every bit of 9th grade geometry I could remember and I found myself furiously measuring angles, calculating hypotenuses, and trying to decide if I needed to remember what a cosine was.
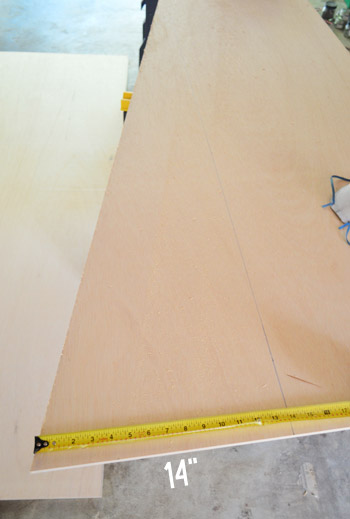
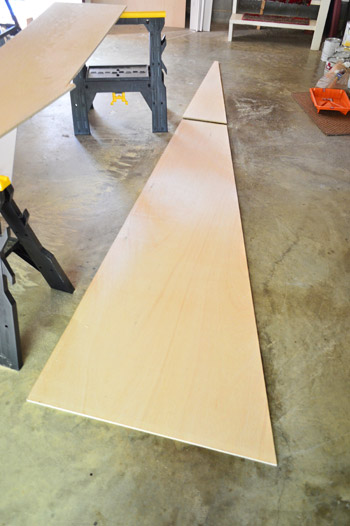
But soon enough I realized I was waaaaay over complicating things. All I needed to know was a few length measurements and I’d be fine. Since my plywood piece was only 8ft long (i.e. 96 inches) I knew I’d have to cut two pieces to fill the space. So I measured the height of the gap at one end (against the brick wall – 40.5″) and 8ft away from that end (17″), which you can see in my sketch below.
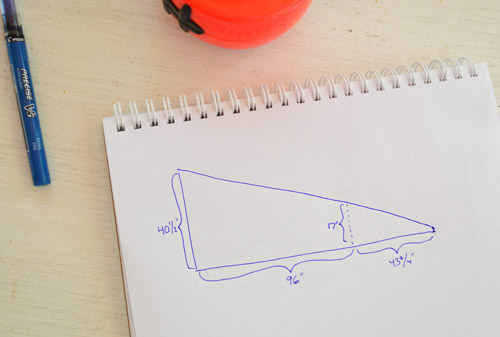
Since those two measurements went all of the way to the ceiling (and I didn’t need my board to go all of the way up thanks the beadboard ceiling that would eventually polish off the edges) I trimmed 3″ off those two numbers and marked them on either end of my plywood sheet. Then I snapped a chalk line to connect them.
And just like that the angle of my cut was determined for me. Time to break out the circular saw.

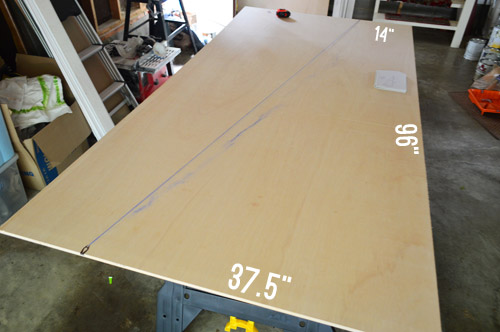
To cut the second piece, I took advantage of the fact that the “scrap” side of the plywood featured the same angle as the good side. So knowing that it needed to match up with the 14″ side of the first piece, I marked that on one side and drew a perpendicular line from there to the angled edge.
Once cut, I had my two pieces ready to be hung.
Well, not totally ready. First I had to build out the studs a bit so that my new pieces of plywood would sit flush with the existing wall. For this I just cut up a spare piece of 2 x 6″ and screwed them into place.
I was a a little nervous when it came time to actually test the fit of my board (such a big piece of plywood wasted by a bad cut would have been a big bummer).
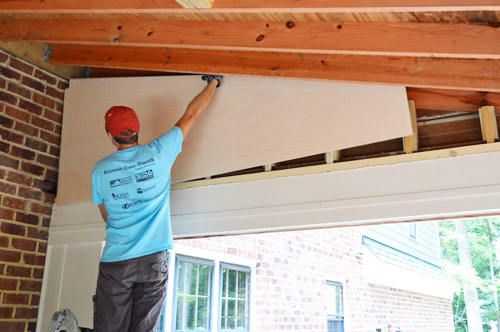
But luckily it went up like a glove (victory!) and I was able to temporarily nail it into place with some brad nails before going back and hammering in some more heavy duty nails by hand.
So here’s one side up (after having put up the small triangle too). You can’t see it here, but it’s not 100% seamless. There’s a line where the new plywood meets the old wall, along the bottom, which we plan to caulk and then cover with trim. And I’ll probably use Bondo or wood filler to try to make the small vertical line where the two pieces meet less visible too.
As much as I wanted to celebrate my geometric accomplishment, I had another side to take care of. Back to the drawing cutting board.
So here’s the other side done. It had the slight added challenge of having to cut a hole for an electrical box (something the electricians had to install to corral some of the wires and, for code reasons, it needs to be visible and accessible). Fortunately, once the plywood gets primed and painted white, we think it’ll blend in pretty well.
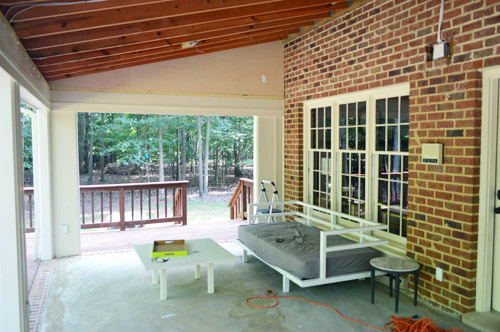
It’s amazing how much more open the room feels now that we’ve removed the doors and popped the ceiling. It doesn’t even feel like the same room.
Now that the boring/mathy part is out of the way, we can finally turn our attention to the light blue beadboard ceiling that we’ve been psyched to install. It’s going to involve pricing a few things out, measuring, priming, and painting before it’s ready to hang – so we’ll probably be back with an update on that early next week if all goes well. What did you guys work on this weekend?

Leave a Reply