Okay, let’s get some open shelves up in this mother.
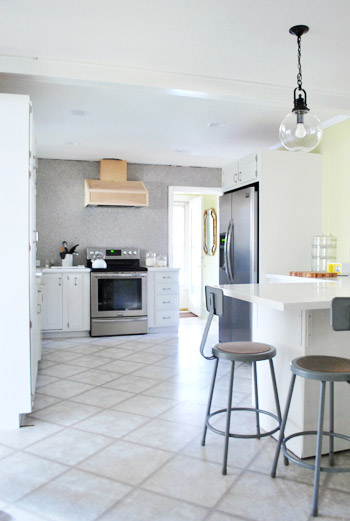
With the hood cover now built, we could finally put the shelves in around it. We were originally going to build true floating shelves (maybe even breaking out Ana White’s instructions) but after looking at some of our inspiration pics again, we decided to open ourselves to the idea of using brackets instead. Note: For anyone wondering how the whole dust/grease situation is with open shelves, check out this post (we’re crazy so we did our research). Apparently the consensus is that if you have a great range hood (check!) and put dishes you use often up there (soon-to-be-checked!) it’s all good. Rarely used items stored inside of cabinets get dusty too, so the key seems to be to have a good hood and to rotate things and use them a lot when they’re out in the open. We’ll definitely tell you how it goes for us.
Besides just liking the look of them, brackets would also make us less concerned about things ripping out of our wall o’ tile (and you already know that stresses us out). Plus, we had heard that Home Depot had some pretty good and affordable options for brackets. Here are the ones I found – actually this is the photo I texted to Sherry to ask which one she liked best since she was at home with Clara and the photoshoot crew.
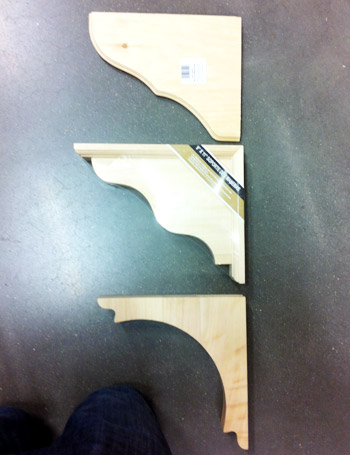
We both agreed the last one was BY FAR our favorite, so I picked up 12 of ’em along with some 12″ framing lumber to act as our shelves. A few of you had said this 12″ framing lumber + brackets system worked well in your kitchens (and we had good luck with them making our office desk) so why not, right?

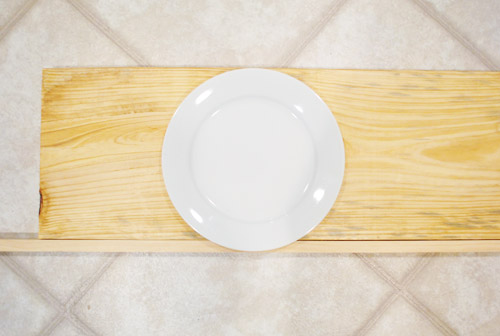
Well, one “why not” would be that they’re not wide enough for our plates. We have 12″ dinner plates and since 12″ in lumber terms is really closer to 11.25″, we realized we’d have some plate overhang-age. Which is never a good look:

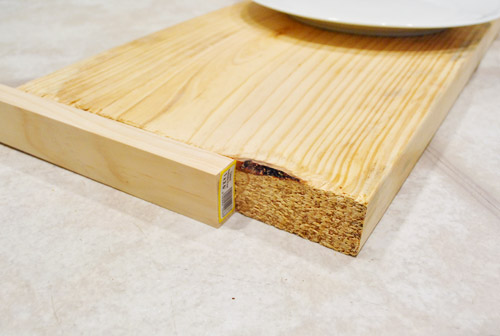
After briefly contemplating getting smaller plates, we devised this solution instead: adding some 1 x 2″ trim around the end (just like we did to finish the top of our homemade console table in the living room).
Not only would it solve our shelf depth issue, but it’d also mean I could cover up the rough end of each board with a nice smooth piece of wood. A win-win, dontcha think?
With all of our materials purchased our total came to about $116 (for brackets) + $15 (for the shelf boards) + $10 (for the smaller boards to frame out the larger shelves) = $141. Which isn’t exactly cheap, but we knew we’d essentially get four shelves worth of storage (two big and two smaller ones) which is about the equivalent of three upper cabinets (which usually go for around $300+ total). And thanks to saving money with things like reusing our original cabinets, building our fridge cabinet, our self-installed wall of tile, and our craigslist range hood we were ok with a semi-splurge in the shelving category (plus we already have the paint and primer we’ll be using).
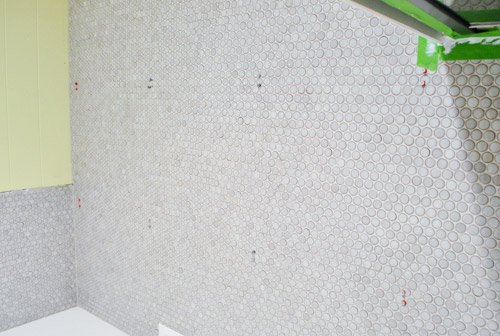
Next we began marking and measuring everything. We used the same weighted-thread-hanging-from-marks-on-ceiling method for indicating where my studs were (which we used here to hang our range hood). Ends up they’re pretty awesomely placed to get even looking brackets – except for the two on the end of the long side (that stud is being used by the hood, remember?). But we figured we’d just use heavy duty anchors on the other two (sunk into tile we knew they’d be nice and strong).

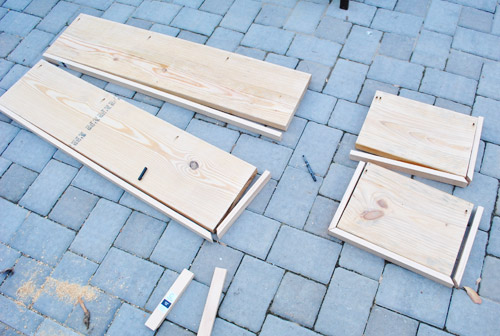
We also used this moment to measure and cut our shelves too. I know it may look short on that one end, but remember we’re gonna trim it with a 1 x 2″ board, so that’s intentional. Oh and see those subtle gray lines in the photo above and below? Those are our hanging pieces of thread to mark the studs. Just didn’t want anyone to wonder if we drew on the tile or anything.

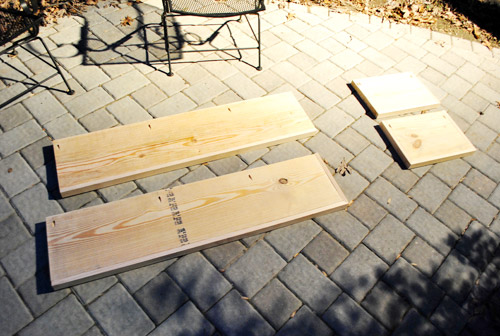
We decided to just trim the exposed sides so each shelf had a slightly different configuration. The long shelf on top would have the wall and hood on both ends, so it only needed trim on the front. But the short shelf on the bottom would be exposed everywhere but the back side (the one on the top right would run into the hood and the one on the bottom left would run into the wall). I know it might seem strange not to just trim them all out in the same way, but we knew from building our console table that once it was all put together and painted it would look great this way. And of course we cut the framing lumber to different sizes to account for the trim, so they’ll all be the same finished length and depth.
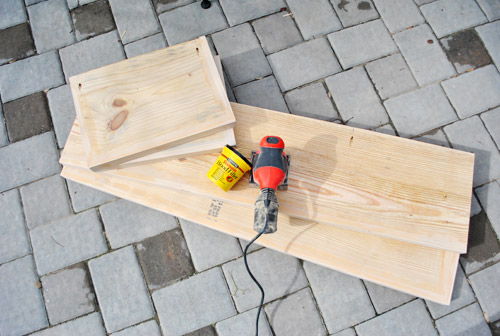
We attached the trim with some wood glue and finish nails. You’ll notice we also have some pre-drilled pocket holes on the top. I was thinking it might be nice to screw the shelves directly into the wall (in addition to screwing them to the brackets).
That night I also broke out the wood filler to make the thin seam between the trim and 12″ board completely disappear. It was a small detail, but we thought once primed and painted it would really help make it feel like one solid board. See how even in the photo below (without primer and paint) you can’t tell that some are trimmed out on one side while others are trimmed out on two? We’re actually glad our plates didn’t fit on the boards alone since the trimmed out result is so much more finished looking.
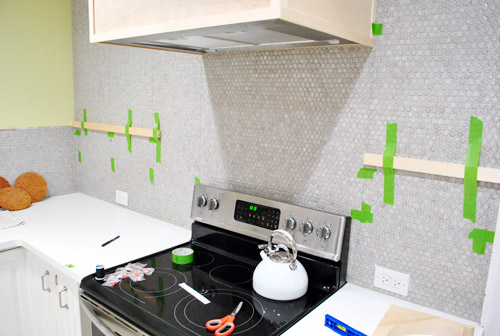
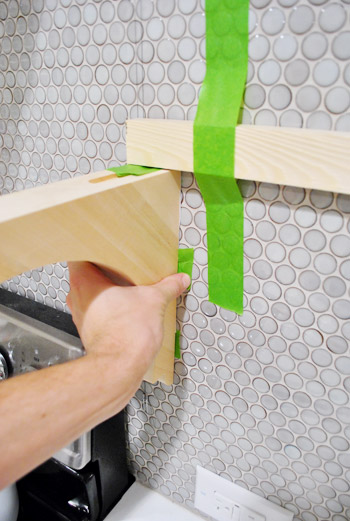
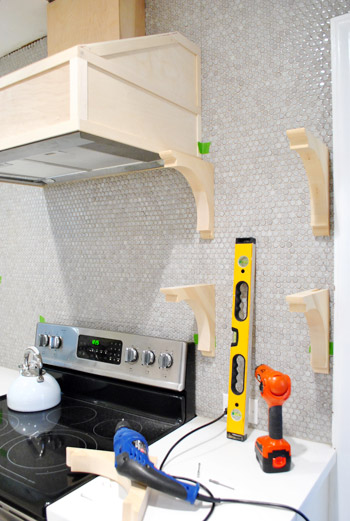
While all that was happening, we also started getting ready to attach the brackets to the wall. We leveled and taped up some 1 x 2″ scraps to act as our placeholder shelves so that we’d know exactly where the top of the bracket needed to sit.
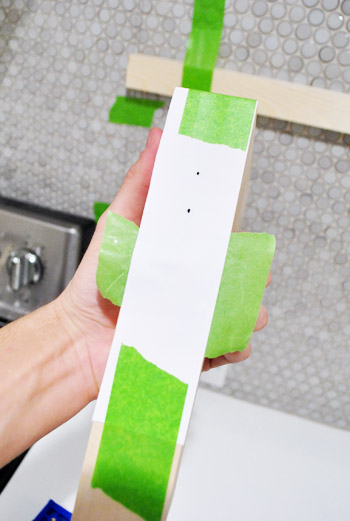
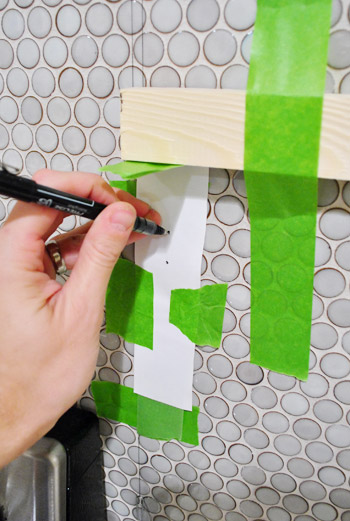
The brackets came with two metal hooks on the back, so I used my favorite paper template method to help figure out where I needed to drill corresponding holes on the wall. The strip of paper is taped to the bracket on the top and bottom, but the tape on the sides is facing out to stick to the wall. And the two holes are punctured right where the notches are.
Then I put it in place on the wall, pressed the side pieces of tape against the tile, and carefully peeled the bracket away…
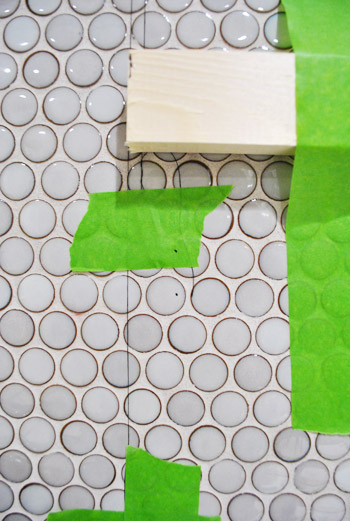
…leaving my paper template in place so that I could mark through the holes.
See? Easy right? Now just pretend it wasn’t super tedious to do it 11 more times.
And since I still cringe at the sight of our tile getting drilled into (especially 24 times!) I couldn’t bear to photograph it again, let alone share it here. But here’s some of the final product – a dozen pairs of screws waiting for brackets to be hung on them. That my friends, as subtle as it may look, is the look of progress.
Here’s a sense of how everything will hang. We did a test run of hanging one side to make sure the screws weren’t in or out too far, and to make sure they felt secure. They did! Phew. True to form, Sherry can’t wait to load them up with dishes and plates galore.
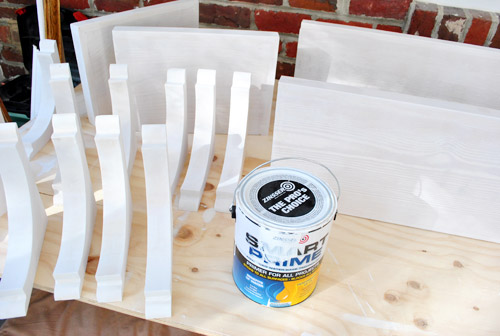
But as excited as we were to just get the darn stuff hung, we knew it would behoove us to do all of our priming/painting beforehand – (that way we wouldn’t have to worry about taping off the wall or getting paint on our grout). So this is where our shelf-hanging tale ends for now. Waiiiiiting for our primer to dry so we can apply two coats of paint (the same color that we used for our cabinets) and then hang it all up once it’s nice and cured. Oh yes, and we’re priming and painting the hood too, so that should look nice and crisp the next time you see it.
Once dried, it should be pretty quick to get everything hung so we should should have “after” pics for you by Wednesday, barring any unforeseen craziness (who are we kidding, it’s week two of three for our in-home book shoots and we live in Crazyville, but it would take a pack of wild boars running through the house for us to slow down on our shelves). What did you guys do this weekend? Any lumber stuff? Priming? Drilling through tile? Prepping 35 more secret projects to shoot for your book while your daughter ran amok and your chihuahua ate various crumbs leftover from the past week of visitors?

Leave a Reply