Archive for June, 2011

June Superlatives

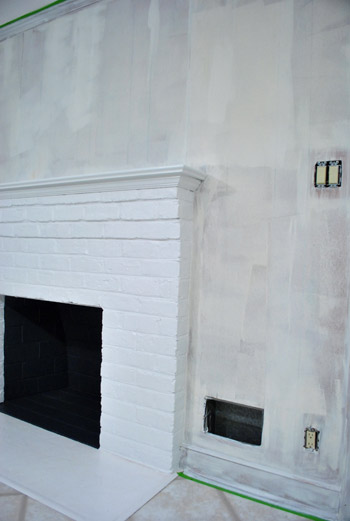
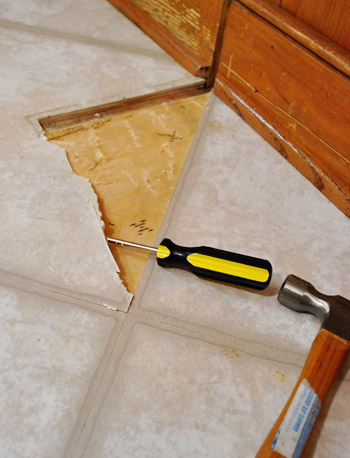
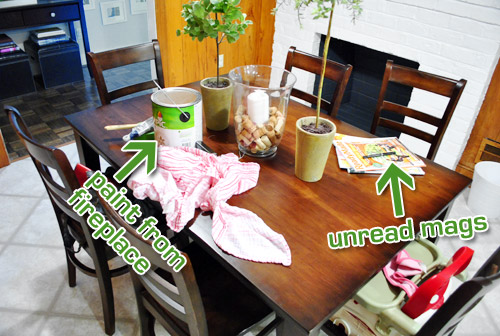
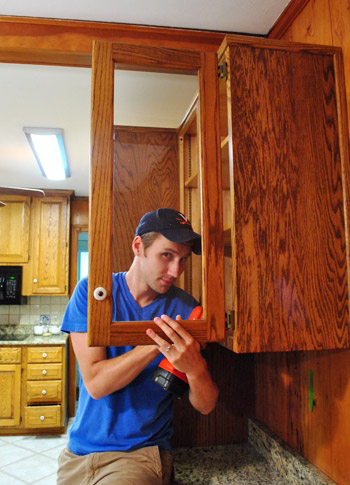
Note: This is a retroactive post that I cobbled together in December of 2011 so I could make this page full of monthly recaps for the entire year (our first in our new house!). Yup, I’m just a bit type A. So here’s what we tackled throughout the month of June – high school yearbook style.

Most Improved: Finally painting our kitchen paneling

Most Annoying: Priming the paneling (which took more than a few tries)

Most Destructive: Removing a few cabinets & patching the floor (to make way for our impending paneling makeover)

Most Goal Oriented: Announced a new initiative to clear the kitchen table of miscellaneous clutter every night before bed (we’re still hit or miss on this).

Most Snow White-esque: Planting some fast-growing evergreens while making friends with a frog & a duck (to add some much-needed privacy to the side of our house)

Most Gifted: Commissioning (that sounds so fancy) a sketch of our first house for our hallway frame wall as John’s Father’s Day gift

Most Organized: Relocating and organizing the junk drawer

Most Likely To Get Dirt Under Our Nails: Weeding, landscape-fabric-ing, planting, mulching, & removing/relocating a few signs on our horrifically overgrown mailbox

Most Edible: Making a little container garden for our farmer’s market herbs (with a galvanized tin and a drill)

Most Desperate: Making eight curtain panels for our living room (by halving and hemming some no-longer-sold Ikea ones)

Biggest Heart Hearth: Painting our fireplace

Class Hothead: Removing an old wood stove (that Clara was unsafely enamored with)

Most Circus-esque: Sharing a really (really) weird elephant-related dream

Most Incoherent: Going thrifting in Georgia with Katie B (and getting waaay too hyper, as usual)

Most Colorful: Sewing curtains from imperfect discount fabric for the dining room

Class Nomad: Relocating a dresser and a mirror to the guest room

Most Superstitious: Making some “lucky seven” art (with painters tape and a scrap of wood)

Most Likely To (Not) Succeed (At Least The First Attempt): Dyeing some inexpensive slipcovers (a few times) for our dining room chairs

  Leave a comment

Make It A Double?

As our arms continue to recover from our recent kitchen priming and painting marathon (shared here this morning) we thought we’d take it down a notch or two with a post about sinks. That’s right, it’s like a slow jam following a spirited chicken dance or an energetic Macarena.

One thing’s that been fascinating about owning our second home is comparing its features to our first home and noting pros and cons (especially as we think about what improvements we want to make). There are many things that we prefer over our previous digs – like the larger rooms, opens hallways, en suite master bath, etc. And of course some things that make us miss our old set-up, such as our former more open laundry area, enclosed garage, etc. But when it comes to some things, we’re still unsure if they’re upgrades or downgrades… like our kitchen sink.

It’s a deep single sink (call me Captain Obvious). I like it. No, wait, I love it. I think. Okay, no, it’s probably just a like. Honestly I can’t decide whether or not I prefer it over the double sink that we had in our last kitchen (seen below).

Why do I love the single sink? It fits everything. Okay, not literally – but at least I finally can get my pots and pans (including handles!) fully in the sink to clean them. Seems silly, but the double sink we chose for the last kitchen did get on my nerves sometimes. Pan handles would protrude over the countertop. Water would splash everywhere during half-submerged rinse sessions. Frustrated husbands would curse the act of doing dishes. So this new situation is a welcome relief (the pan shown is 22″ including handles).

Some of the few of you who were reading way-back-then even questioned our double-sink decision. But despite my affection for the our single sink, I don’t completely regret choosing a double. Here’s why:

Now that I’m without a “Washing Side” and a “Drying Side” my pans end up on the counter post-wash. Yes, I realize it looks lame and messy (and that our pans are definitely past-their-prime). I know we could get a drying rack, but (no offense drying rack makers of the world) it’s hard to find something that looks good enough to earn a permanent spot on the already-limited counter space (my crazy pot drying method above only means that the side of the sink is occupied for an hour or two after dinner as opposed to hosting a drying rack 24/7). This is where my parents would probably tell me just to buck up, dry them by hand, and put them away immediately. But yeah, that’s not going to happen.

The other thing that makes us indecisive about this set up is the faucet placement. Usually we’re fans of a centered faucet, but such a square shaped sink must have required it be nudged to one side (it doesn’t look like it would have fit in the center). But in a surprise turn of sink-related events I’ve been enjoying the ability to fill up a pot while it rests on the counter (rather than having to hold it as it grows heavier with water in the sink). Life’s small pleasures, ya know?

In the end, we’re not planning to replace this sink and I’m still not sure which I prefer – though I think I now lean towards the single sink camp. What about you guys. Are you on the fence too? Or do you feel passionately about one set up over the other?

  Leave a comment

Woot. It’s done.

About a week ago (after we painted our brick fireplace) our kitchen looked like this:

Then we removed the desk and upper cabinet (that will be in the way of our big future doorway to the dining room) and after one coat of not-covering-at-all primer it looked like this:

Then we finally got the primer thing right after dealing with maddening bleed-through issues thanks to two days of applying coat after coat and three different types of primer (more on that here):

And now it looks like this, although it reads a bit more yellow in these photos than in person (it’s a smidge greener in real life).

It’s definitely a warm golden green tone (aka: grellow). Sort of like the color of an artichoke heart.

There’s definitely a lot more to do in there, but we’re so glad to have the whole prime-and-paint-the-paneling thing checked off. Here’s a fun little video that encapsulates the entire process in three short minutes. Which is more than a little ironic because it took us just a wee bit longer in real life (you know, just a smidge). Just convert those minutes to days. See it below on YouTube or here on Vimeo.

As for the paint color, after a decent amount of debate (and some pretty thorough consideration of the adjoining rooms that will be seen along with the kitchen) we opted for our new favorite color, which turned out to be Sesame 381 by Benjamin Moore (color matched to Olympic No-VOC paint in semi-gloss).

We were inspired by this kitchen (found here via Pinterest) since our cabinets will eventually go white, possibly along with our backsplash:

We chose this warm yellow-green color because we want the kitchen to be bright and happy (there aren’t any windows to the outside world – just one that looks into our sunroom) and it was suuuuuuper dark before we painted that paneling. We also knew the room could take a decent amount of color because:

When it came to our swatch-selecting technique we just hung up a ton of them and looked at them at all times of day to see which one we preferred. As for why we chose this swatch specifically, we decided:

Here’s how it looked with the first coat going up around the fireplace (thanks to all that primer prep- we had really awesome coverage). Again, it’s looking more yellow and less green than it does in person in these photos, but you can really see how the white pops and how it turned a dark and brown-everywhere space into a sunny and bright room in the middle of the house.

We also decided that it was high time we switched out all of the “bisque” colored vents, outlets, and light switches.

So we grabbed a bunch of crisp white ones from Lowe’s, turned off the power, removed the old ones, connected the new wires the same way they were connected to the previous switches, added the outer switchplates, and turned the power back on. The whole switch swap took about twenty minutes. So much better:

Some people opt to paint their vent covers so they blend in more, but for now we’re happy to leave ours crisp and new since we’re so used to old drippy painted-over covers (clean paint-free ones kind of feel like a luxury). Who knows if we’ll decide to add a few thin and not-drippy coats of paint to blend those vents in later though. We’ll keep you posted.

Oh and it’s really fun to go back and look at our fireplace, which originally looked like this:

Then we removed the old unused wood stove and painted the brick, and it looked like this:

It’s amazing how much painted paneling can freshen things up even more:

And we love how things like the white frames and the round mirror above the fireplace layer right in with the glossy white trim and beams:

Burger likey (he knows how to work that runway):

Oh yeah and see those pink hydrangeas? I wish I could say that we grew those, but they’re from the store. We figured to celebrate all that priming and painting we could spring for something soft and sweet, so these little pink snowball-looking-guys had me at hello (that’s an old vase from Target btw):

As for the opening to the dining room, here’s where it’ll be (it will line up exactly with the dining room window on the other side for balance):

We learned that we’ll need a permit to knock out so much of that load bearing wall, so it sadly won’t be anything we can do very quickly (and we’ll definitely be leaning on some pros for help). But we can’t wait to tackle it as soon as we can get through all the permit business and hunt down the right expert for the job.

Now for some before & after bid-ness. Just because that’s my favorite part. Here’s the kitchen as it looked on moving day about six months ago:

And here it is now (still can’t wait to add that island, paint those cabinets, and upgrade the floor & appliances someday though):

Moving day again (yes, one of those lights was out):

And now:

The crazy thing is that these photos were taken around the same time of day so it definitely demonstrates how much lighter and more cheerful the space feels now that the dark paneling is a thing of the past. Oh and here’s the budget breakdown:

So there you have it. The kitchen madness has officially begun. As we mentioned here, we’re definitely going to do this in phases (gotta save our pennies and just take things on as we can afford them). But it should be a whole lot of fun. As in, more fun than a barrel of monkeys. And definitely more fun than priming that paneling five hundred times. Do any of you guys have long term kitchen plans like painting the cabinets or adding an island or upgrading the flooring or making some overhead lighting switches (we’re definitely in need of some of that too)? Oh the possibilities…

Psst- We announced this week’s giveaway winner. Click here to see if it’s you.

  Leave a comment