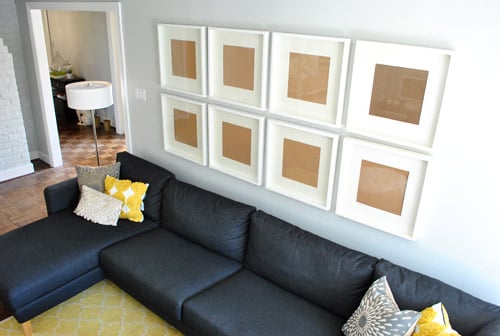
Archive for March, 2011

Petersik Hotel & Conference Center

We finally scored some chairs for the dining room, thanks to this craiglist ad emailed to us by our friend Sandra (muchas gracias!).

You’re probably thinking: what are they thinking?! Parsons chairs? Yup, that’s exactly what we’ve wanted since day one. Thirty bucks? Yeah baby. Weird green and blue swirly pattern? Um… no comment.

But since the price was right (we actually bargained them down to $25 per chair, coming to $200 total for all 8) and the shape/lines were right (they’re solid and very well-made) we figured it was time to pounce (with some reassurance from a few online tutorials about dyeing fabric, making slipcovers, or reupholstering parsons chairs). So in the end we hope to end up with eight affordable and well made parsons chairs without this… uh… “unique” fabric. Hopefully sooner rather than later…

As for how we got them home, I borrowed my sister’s Explorer (since I knew we couldn’t fit them in our Altima without making at least three trips) and drove 90 minutes round trip to Mechanicsville to pick up the chairs. I wish I’d brought the camera (or was fancy enough to have a decent cell phone cam) because the guy selling them lived on a giant horse farm, so the scenery was beautiful. And since Sherry and Clara stayed at home (to make room for more chairs in the car) I wished that I could have taken some photos so they could see it.

The guy selling them was a real character. I expected to pick up the chairs from his dining room, but instead he led me back to a bunch of large storage crates in his backyard (I must admit this is where craigslist horror stories started flashing through my mind and I wondered if I was being kidnapped). Then he rolled up the door to one of the storage crates to reveal that it was FILLED TO THE BRIM with these chairs. I never got the story behind how he ended up with so many, but my guess is that they came from some hotel auction or something. All that mattered is that they were in good condition (solid, sturdy, clean, no pet/smoke odors, etc) and that he was happy to let me put a dent in his collection and leave with eight of those babies.

Here I am back home with my booty (that’s not a butt reference, I mean the chairs), cheesy pose and all (sometimes I defer to cheesy poses when Sherry runs towards me with the camera, you know, just to humor her). And yes, I was extremely proud of fitting all eight of them into my sister’s car in one trip. There was even a call to Sherry where I told her I could only fit six so I needed to make two trips with a big fat “just kidding!” at the end.

As a reminder, here’s what the dining room looked like back when it was chair-less…

…and here it is now with eight new occupants. Actually only seven are pictured because Sherry likes that more breathable look for “everyday” (we can easily add in the eighth one when we need it – until then it’s hanging out in our chaotic playroom with 99% of our other “extra stuff”).

We keep having to remind ourselves to look past the crazy pattern and enjoy the fact that we scored a serious deal on the exact style of chair (with clean lines and solid construction) that we’ve been eying.

The best price we’ve seen so far on any new parsons chair is around $85 (Pottery Barn sells similar ones for $299!), so as long as we can correct the swirly fabric for less than $60 per chair, we made the right call. Even if it means that our dining room looks a bit like a hotel conference room for the time being…

Sherry found a few online tutorials for dyeing fabric directly on furniture that we might try (although dye = scary, so we might skip right to the next step, which would be to make slipcovers or reupholster them in the crisp apple green color that Sherry has been dreaming of from day one). So that’s the story of driving out to a farm and squeezing eight $25 chairs into my sisters car. Maybe you guys have recent craigstlist deals to share? Or an “I can’t believe I got that to fit into my car” tale to tell?

  Leave a comment

Monster Eyeballs

Three cheers for a $12 fifteen minute project that makes us giggle. Because sometimes you just gotta laugh. We switched out the old knobs on our dining room built-ins.

The first step is to put on your safety goggles and protective gloves. Kidding. The first step is to unscrew the old ones and the second step is to screw in the new ones. So easy. Here’s a little in-progress action shot for ya:

And here are the new ones all “installed”:

But back to the whole monster eyeballs thing. When I fell in love with these greeny-yellow knobs at Hobby Lobby (for $1.50 a pop thanks to a 50% off sale), it never crossed my mind that they’re a bit similar to the eyeball-esque hardware that we inherited with our kitchen. Remember this weird (and wonderful?) post about that?

Anyway, somehow we missed that they might look like monster eyeballs (you know, because some monsters have yellow ones instead of white ones) until we got them home and screwed them in and John started laughing about the obvious (but not to us until that moment) similarity. Although somehow in yellow and oil-rubbed bronze they feel a bit less eyeball-y and more playful and eclectic than the more cartoon-ish black & white ones in the kitchen. At least that’s what we’re telling ourselves.

We love them anyway. Monster eyeballs be darned.

Especially with the teal backing of the built-ins above them – such a fun color combo.

Thankfully from most vantage points they look more like fun yellow knobs than body parts of any kind (but from Clara’s line of sight they might continue to look like monster eyeballs for a while, which she might get a kick out of). Either way, once the walls go soft gray and we add curtains and art and chairs and a big opening to the kitchen we’re sure the knobs will hardly be the focal point. We could probably get little alien butt knobs and no one would notice.

So that’s a little $12 makeover that makes us smile (and makes our built-ins feel fun and kinda funky). Sidenote: I hate the word funky. It always makes me think of smelly feet or old cheese.

New theory: every house needs at least a few monster eyeballs. We have nine thanks to the one on the closet door in the guest room.

Methinks that’s just enough.

  Leave a comment

Three Months In…

We finally got around to updating our House Tour page with some progress pics and it dawned on us that we haven’t really done a progress report about the new house since this one at Day One and this one at Day Fifteen, so here’s where we are at a little over three months in (Day 101 or so).

Here’s the house’s original formal living room that looked into the original dining room on moving day (which we decided to turn into an entryway/dining room that looks into a home office because that better suits the way we live):

Here’s the dining room looking into the converted office now, thanks to arranging those shelves and painting the built-ins (who knew an $11 change could make such a difference). Oh and we added a giant 70″ table that will easily seat 8 (once we get chairs for it, haha).

Here’s a before look from the other direction of our future dining room/entryway :

And here’s the future dining room/entryway now:

Other than bringing in our table, not much else has gone on. Yet. But we can’t wait to knock a 6′ opening in the wall on the right that will connect our newfound dining area to the kitchen. Then we’ll make a nice little defined entryway behind the table so it doesn’t feel like you’re stepping right into the dining room from the front door.

Here’s the long eat-in kitchen on the day we moved in. We’re planning to prime & paint the paneling, as well as the cabinets and add a giant island to make the most of the fireplace. The opening to the new dining room in the front of the house will be on the right wall in the picture below. We’re hoping to get at least a 6′ pass through so it feels really airy and inviting.

Here’s the kitchen now. Nothing has changed except it’s messier and we have a too-small table where our island will someday be. But as we mentioned above, we have big plans. We’re just building up the funds & energy. Haha.

Here’s the hallway before (with my back to the master bedroom facing the front door, and then with my back to the front door facing the master):

Here’s the hallway now, after hanging a ton of frames on the left side (as you face the bedroom). You can see that we still haven’t hung the frames on the right side yet (hence all of the paper templates). Soon hopefully.

You can also view the hallway from a wide doorway in the kitchen. Here’s what it looked like when we moved in:

Here’s the view of the hall through the kitchen doorway now that we’ve hung those frames and brought in our console table (don’t mind that it looks like the kitchen floor has changed, that’s just the wood tabletop in the foreground of this picture):

Here’s the living room on the day we moved in. We’ve already done a lot in there, but one major project that we can’t wait to tackle is making the fireplace double-sided someday.

This is the living room now, after painting the walls, painting the trim, painting the beams, removing the fans, hanging some art, and adding a larger area rug among other things. We still want to build a console table for behind the sectional, hang curtains on the window & sliders, bring in table lamps and maybe some new ceiling fixtures, add a larger/deeper media cabinet, and someday refinish the wooden parquet floors in a deep rich tone. Should be fun…

Here’s the sunroom on the day that we moved in (it was added on around 15 years ago). The challenge in there is making it feel more integrated with the rest of the house since it’s so modern and the rest of the rooms were built half a century before.

Here’s the sunroom now. Not much of an update other than putting some already-owned furniture in there. But we plan to paint the entire room (the bricks, the ceiling, the off white walls) to unify the space so it feels less broken up and more airy & open. And bringing in some breezy window treatments will add ambiance, while art for that brick wall will help balance to the awkward off-centered window that looks into the kitchen.

Here’s the master bedroom as it looked on move-in day:


And here’s the master bedroom now:

After getting a new bed and duvet, I whipped up some no-sew curtains with some discount fabric. We also switched out the light fixture and got a new rug. There’s still a lot to do in there (we’re not sold on the art above the bed and want to add built-ins to the nook on the left of the bed and introduce a bench at the foot of the bed and more art), but it’s coming along.

Here’s the sink nook as it looked when we first moved in. It’s actually located on the far side of the bedroom (with a shower and a toilet in a room to the right and a walk-in closet to the left). It’s definitely a challenge to make a sink that’s visible from the bed feel integrated (let alone romantic) but we do love a challenge…

Here’s the sink nook now, after we removed the bi-fold doors, demo’d the backsplash around the sink (to make it look more like a piece of furniture and less bathroom-y) and switched out that awkward medicine cabinet to the right of the sink (neck-cramp anyone?) for a mirror that hangs right over the window. Now we can actually look straight ahead while we brush our teeth or do our hair. Amazing. But we definitely have more plans for transforming the vanity.

Here’s the master bathroom before, which is located right off of the nook with the sink above:

Here’s the master bath now. It still looks the same except for the higher shower curtain but this is another one of those rooms that we have big plans for, we just haven’t gotten to them yet.

Here’s the hall bath as it looked on move in day. We love that it’s so similar to the original full bath in our first house (and the tile is luckily in much better shape, so we can’t wait to work with it).

Here’s the hall bathroom now (we remembered to white balance the camera, hence the brighter pic). So far we’ve removed the weird off-centered bar under the window, added some window trim for balance, and raised the shower curtain for some extra drama and height. Can’t wait to get some color on the walls, add art, DIY a window shade, and bring in some accessories.

Here’s Clara’s nursery on the day that we moved in (it’s almost exactly the same size as her old one):

And here’s Clara’s room now (after we painted the walls a soft lavender-pinky-gray tone and hung all of her art):

Here’s the middle bedroom that we’re calling the playroom as it looked when we moved in (it’ll become another kids bedroom when our fam grows someday):

And here’s the playroom now:

How’s that for keeping it real? Haha. Yeah, that room is the dumping ground for everything from extra bedding and pillows to art and broken ceramic animals. Should be epic when we finally pare down and organize stuff so we can see the floor again. Until then we just choose to close the door and live happily ever after in denial. Haha.

Here’s the guest bedroom that was sorely missing a bed when we moved in:

Here’s the guest room now, after adding some bold peacock blue paint on the walls along with some curtains, a bed, bedding, colorful accessories, and a DIYed luggage rack side table (more on that here). Still on the agenda: adding crown molding, hanging art, etc.

And here’s the funny little yellow-beige guest bathroom which is attached to the guest bedroom (it used to be the master before they added the new one along with that spacious living room behind the kitchen as an addition in the 70′s, so it has its own bathroom). We definitely want to work with the vintage tile but lose the dated and dingy look.

Here’s the guest bathroom now, after switching out the old medicine cabinet for a mirror, hanging some towel hooks the door (which used to have a large mirror that reflected whoever was on the toilet- ack), bringing in some art, and introducing a bright shower curtain (that ties into the adjoined guest bedroom) along with a graphic hotel-ish bath mat. Still more to do, but it works for now.

And here’s the little laundry room as it looked on move-in day. We want to pack it with storage and function to create a mini mudroom as well as a place to wash clothes.

Here’s the laundry room now, which we’ve upgraded with energy efficient front loaders (scored at one of the deepest discounts we’ve ever found). But we still have a lot to tackle. Like adding some storage-friendly built-ins to fill that gap between the washer/dryer and the wall, among other things.

Here’s the separate entry basement under the living room, all nice and nearly empty on move-in day:

Here’s the basement now. Full o’ junk. We’re even storing some stuff for John’s parents since they’re in the process of downsizing now that their nest is empty. Should be quite the project to get this room in order. Luckily I’ve only been down there three times in the past three months so it’s an easy mess to ignore. Haha.

Although there are rooms that we haven’t touched yet, we’re actually surprised at how much we’ve accomplished in a little over three months. It’s like we sprinted out of the gate and are just stopping to see what we’ve done as the dust settles around us. Exhausting but exciting. As any DIYer knows, this stuff tends to happen in waves. Sometimes you’re flying along, ticking things off the list left and right. And other times you aren’t. Sometimes you hit a wall or get burned out. Sometimes you run out of money (and have to wait for the reserves to build back up). Progress definitely happens in fits and starts. So going from “renovating rockstar” to “lazy, uninspired, tired, broke, crazy person” (and back) is totally normal. And yes, it even happens to us (spoiler alert: we’re not robots).

So although we shot through lots of stuff since moving, it’s completely possible, make that probable, that this pace isn’t sustainable. And some weeks we’ll be moving as slow as molasses. Just gotta catch your breath from time to time, you know? All we know is that we have a thousand things on our to-do list and we’re guessing it’ll take us at least several years (our first house took us four and a half). So it’s definitely going to be an unpredictable, crazy, boring, exciting, goofy, and insanely fun journey. You know, depending on the day. Haha. And we wouldn’t have it any other way! Glad to have you along for the oh-what-the-heck-let’s-just-see-what-happens ride.

Psst- Here’s a floor plan for anyone who wants to wrap their mind around the layout after scrolling through the pics. And here’s an old video house tour that might help orient you (or further confuse you, haha).

Pssssst- We announced this week’s giveaway winner. Click here to see if it’s you.

  Leave a comment