In the words of Carla from Top Chef: hootie hoo! Our counters are ordered (more on what we chose and why we chose it here). They came in at exactly $38 a square foot from Home Depot (no hidden/added charges, which was nice) which added up to around $1700 (ouch, good thing we’ve been saving for this kitchen a while). We also priced them out at Lowe’s and a couple of local retailers and none of the local retailers could do better than $55 a square foot (huge difference, huh?) and while Lowe’s and Home Depot both had the same $38/square foot price, Lowe’s charged more for the sink cutout and a few other add ons that HD didn’t. The deal was sealed when Home Depot agreed to match a 10% off Lowe’s project coupon that we got in the mail AND the 5% off that we’d get if we used our Lowe’s card (our local Lowe’s stacks those discounts although we’ve heard some others around the country might not). So we’re happy to have saved a good chunk of money shopping around and price matching coupons.
Another way that we’re saving money is by reusing our existing sink:
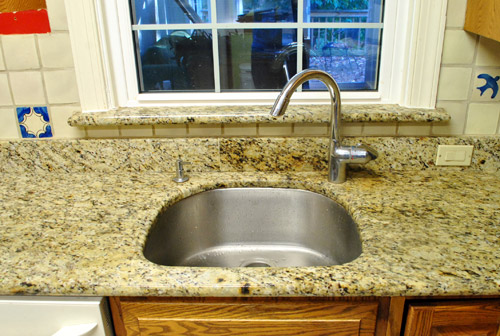
We really like our sink, and obviously wanted to save a couple hundred bucks or so by not buying a new one (as we mentioned here, we’ve heard many times that seamless Corian sinks can be a lot harder to care for than Corian counters – so most folks prefer stainless undermount). But we learned both from Lowe’s and HD that for the Corian fabricator to accurately plan for our sink… they’d need to take it with them when they came to template for the new counters (aka make precise measurements to design the countertop). And that meant removing the rest of our granite to free up the sink.
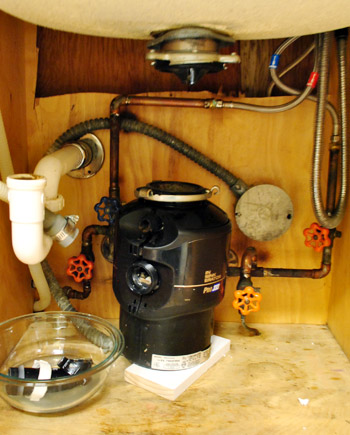
The process started by disconnecting the disposal and the plumbing underneath the sink. Don’t interpret only having one photo of this process to mean it was quick. It should’ve been (according to all of the how-to‘s I googled and watched beforehand) but the mounting ring on mine was jammed and it took me about 45 minutes to finally get it free and spin it off. On the bright side, I am now very familiar with my garbage disposal. Maybe that should have been on my Things To Accomplish Before I’m 30 goal sheet (get that reference here).
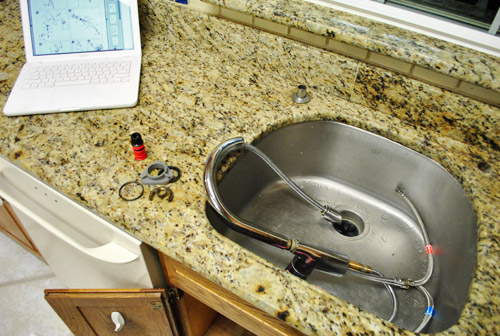
Next I wanted to remove our faucet, which we also plan to reuse (at least in the short term – later upgrading to another one-hole faucet won’t be a big deal). Fortunately this went faster, thanks to digging up the installation manual online and reversing the steps.
With all of the fixtures detached, it was granite removal time. Having already done this once in our kitchen (we removed the first half of the granite to make room for the stove), we knew the process wouldn’t be too hard. It’d just require some muscle. So we warmed up by prying off the backsplash with a crowbar.
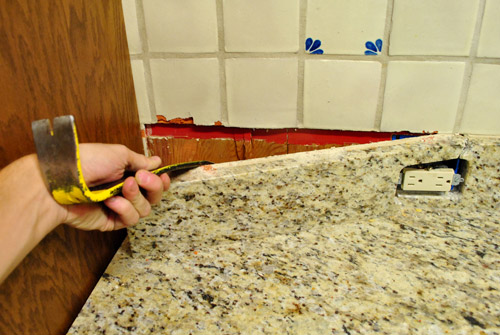
No sweat.
Then we made a couple of slices along the glue that held the counter to the cabinets and got to prying. It lifted up remarkably easily.
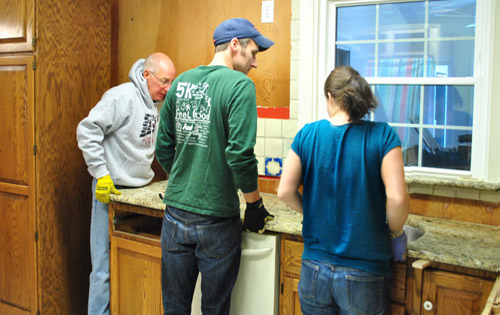
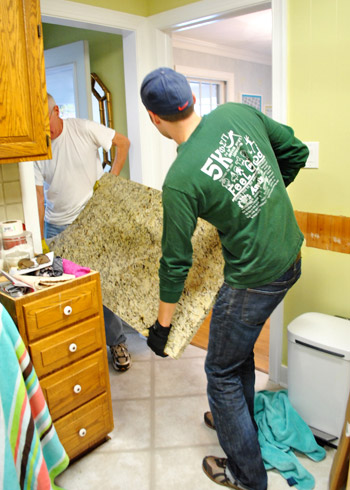
Then came the muscle-y part. Which is why we recruited my parents to help again (mom to watch Clara and take pics, dad to lift). But it quickly became apparent that this slightly larger slab of granite was more than slightly beyond our lifting abilities – especially since we would’ve had to lift it up high enough to get the sink out without damaging it (if the granite slammed down on the sink while it was halfway over the cabinets it would have meant $200+ to buy a new one and potential cabinet damage as well).
We had been trying to get it out with the sink attached because the folks at both Lowe’s and Home Depot thought we’d be able to better cut the sink free without warping or tweaking it that way (therefore saving us the loot to buy a new one). But that method wasn’t going to work here. That long slab of granite was way too heavy. As in, we probably couldn’t have lifted it with two more burly men present. So we regrouped and came up with the idea to try to remove the sink first, by freeing it from the glue that held it to the granite.
We began by gently sliding a spackle knife into the space where the sink was undermount-glued to the counter. Once Sherry (she’s the boss of the group) broke the seal in one spot, we were able to tap it around the perimeter with the help of a hammer. I say “we” but my dad ended up doing most of this for some reason – although Sherry did the first edge of four. Not sure how I got out of it but… thanks Dad!
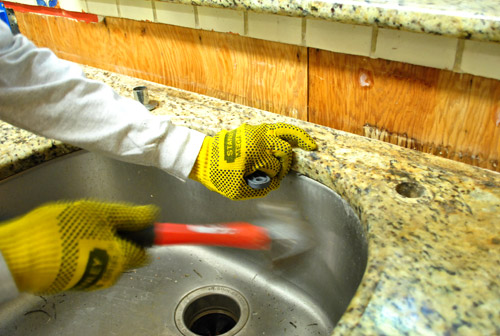
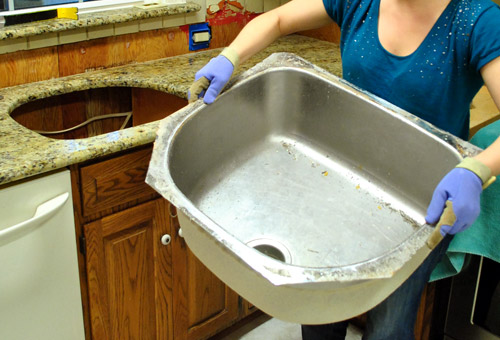
Eventually all of the glue was gone (this took about 45 minutes) and we were able to tilt and raise the granite up just enough to lift the sink out from under it (we kind of hinged the granite back like the top of a trunk or chest so we weren’t supporting all of the weight ourselves). The best part? The sink was unharmed… just a little dirty. So we get to save 200 beans and reuse it! Oh happy day. And you can see just how big our sink is in this shot with the wife around for scale. Note: Sherry wants me to clarify that’s not dandruff or debris on her shoulders, it’s gold beading that apparently reads more clearly in person. Gotta love a gal who rips apart her kitchen in fancy beaded clothing.
At this point I guess we could’ve left the granite in place, but we knew the installers either preferred no counters or all counters when doing their measurements (not half and half, since it could throw them off) – and we also wanted to use my dad. Wait, that sounds bad. But we could definitely use the extra strength, and he was standing right there in our kitchen, so…
With the sink safely set aside in the other room, we just lifted the granite up slightly on one end and this quickly showed up:
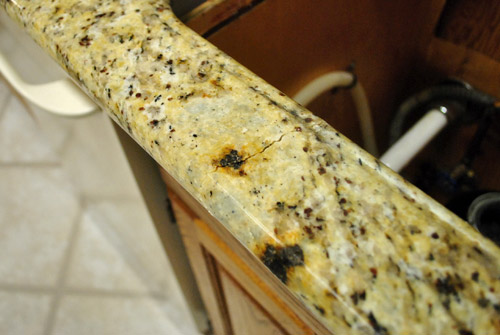
Never did I think I’d be so happy to see a crack in my granite. See, we knew that if it cracked in half around the sink (which is pretty hard to avoid anyway) we could lift each side of the slab separately. Which we definitely could handle because it was the same size as the granite piece that we removed when we added the stove a few weeks ago.
But we were less happy to find this beneath the crack – some sort of metal rod that must’ve been installed to keep the granite strong across the sink hole. Boo for unforeseen metal rod-like obstacles.
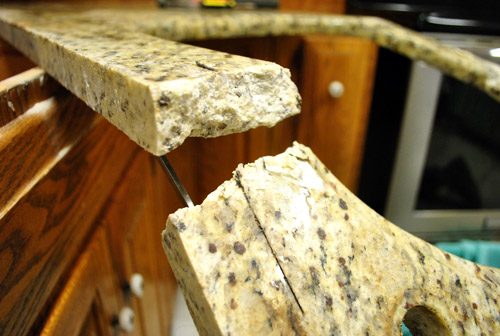
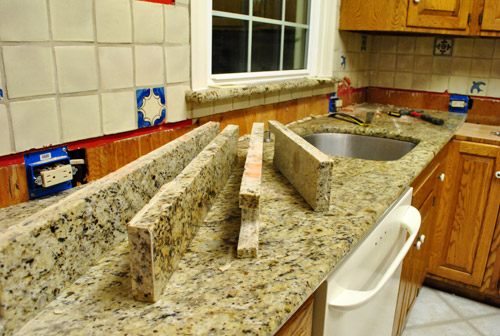
But after we slid half of the granite off onto the floor, the rod was bent enough that we could use a screwdriver to pry it loose and completely separate the now two halves of granite… which were each light enough to be carried out by just two of us.
Here’s sort of what the aftermath looked like before we got the other half out. Note the construction-grade beach towel that we used to protect the new stove. I’m kidding about the construction grade thing, just in case my sarcasm wasn’t clear. Don’t want you guys to waste too much time googling “construction grade beach towel.”
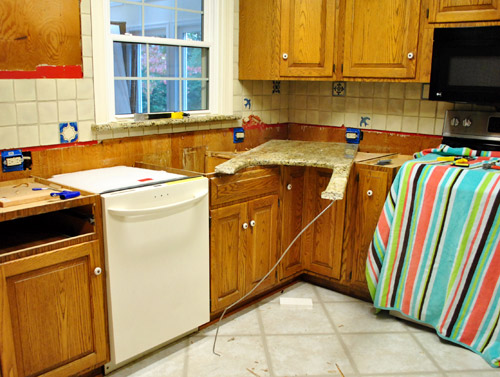
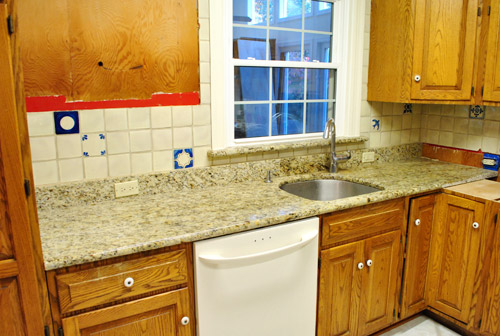
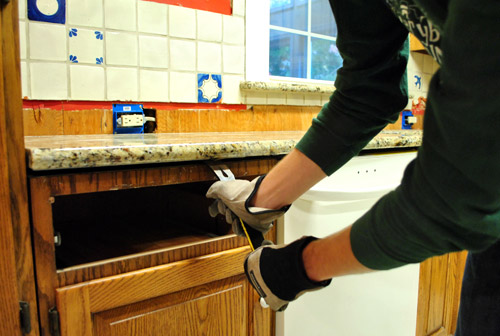
Now that all of the granite is removed and residing safely (and somewhat junk-ily) in the carport to be craigslisted, our kitchen is looking something like this. Yup, it’s safe to say we’re 100% sinkless.

According to the counter fabricator, we’ll be sinkless for about three weeks (maybe four, considering Thanksgiving is thrown in the mix). But I did reconnect the drain on the dishwasher so at least we can still use that (and therefore maintain a smidge of civilized living around here). I try to remember that while I rinse non-dishwasher-safe pots in the bathroom sink. But we definitely have it better than we did in our first kitchen (which was a full gut job – so we didn’t have a stove, fridge, microwave, and dishwasher to use at all for months).
Has anyone else foolishly believed they could lift an eight and a half foot hunk o’ granite with two other people? Have you ever seen rods around the sink while removing or installing granite? Have you kept/reused an existing sink? Did it take you a second to disconnect your garbage disposal like it’s supposed to? If so, consider me a jealous man.

Amanda says
Ah! Know how you feel! We’re redo-ing our kitchen right now and we haven’t had a sink for two weeks so far! It’s sort of annoying washing dishes in the laundry, but at least we have a sink in the house!!
We’re also missing out oven and stove, which means we are seriously over having microwave food… I never thought i would say that!! Haha
Oh, and the kicker? We had twins on the 6th of November… Nicely planned renovation for us!!
Also, if you guys are getting a new tap, try out the site aliexpress.com. It has tons of mixers at wholesale prices!
YoungHouseLove says
Holy cow! Twins + renovation = crazy! Hope it’s good crazy though! And that it all comes together quickly! And thanks for the recommendation on aliexpress. Off to check it out!
xo,
s
Jackie says
I can’t wait to see what this is going to look like once it’s all done. AHHHHH!!! Excited much? That I am. Keep up the good work guys!!
Lucy says
There are a ton of reasons why I love your blog, among them are the great DIY advice, decorating tips, etc., but SENSE OF HUMOR is right up there: Don’t want you guys to waste too much time googling “construction grade beach towel.”
Thanks for another great post!!
Diane says
You are not sink-less. You are sink-free. There could be a difference! You always look on the bright side, so ….
YoungHouseLove says
Haha- nice! Glass half full!
xo,
s
Shannon Rosan says
Being sinkless is just awful!! But will be well worth it in the long run as you know. Good luck!
Robyn says
I am glad to see Captain Careful was wearing shoes for this demo project :)
cindy says
wow!!! what are you guys doing for thanksgiving now that your sinkless?
YoungHouseLove says
Haha, we’re just doing a little dessert thing but we can totally handle it!
xo,
s
Bamboo says
Two kitchens ago we were without a sink over Christmas. We went to a re-use center and bought a stainless steel used one for $10, including a faucet. Installed in a temporary plywood counter, we used it for a few months until we installed the real one. When we were done with the old one we re-donated it back to the re-use center, basically renting it for $10.
YoungHouseLove says
That’s such an awesome idea! If we get desperate we’ll definitely try that out!
xo,
s
Christina says
I can’t help but giggle every time I see the ‘eyes’ on your kitchen cabinets… it’s so funny!
You guys are the best! : )
YoungHouseLove says
Oh yeah, lately they’ve been looking worried. I think they know I’m coming for them!
xo,
s
Bex Crowell says
My new (almost 10 years old now!) sink is exactly like yours and I love it to pieces.
Waynette says
I see some red on the walls behind the tile backsplash. Is that fire engine red Formica-like substance? I have that in my kitchen! The countertops and the entire backsplash is covered with it.
I’ve been wanting to redo the kitchen since we moved in a few years ago. You guys inspire me, and make me believe that even we can do it!
YoungHouseLove says
It’s actually just red paint that used to be the backsplash apparently! So crazy to pair that color with the dark wood paneling and wood cabinets! Must have been a very brown and red room!
xo,
s
Callina Johnmeyer says
My husband and I went sinkless when we redid our kitchen. We took an old double drainboard sink that was hooked up in the basement and put it in our kitchen because we liked the vintage look and utility of the big basin and two drainboards on either side. But we were without a usable sink for several weeks while we worked on getting the counters and everything else done, so I know how it feels to rinse dishes in the bathroom sink (and we only have one bathroom on the main floor). Good luck!
drew says
Those pieces of granite will make great tabletops down the road. I had saved pieces from a redo. I fabbed legs out of 4×4’s and 2×4 cross members. Had the granite recut and edged to match the previous look. Have been using them for years on the patio.
YoungHouseLove says
My mom just got a table with granite cut to fit on top and it got my wheels spinning. Definitely cool for an outside area!
xo,
s
Drew @EpicFinances.com says
Looks great, I personally did granite tile in my home. Granite tile is dirt cheap, but the edging (that makes it look like solid granite) is little expensive. I probably have about $1000 in my counter, but I have much much much much more counter than most people. (2 counters + giant island)
sigari says
Thank you for all that you do: remodeling, rethinking, using Habitat’s ReStore, being loving husband and wifey, baby and Burger parents, and all-around inspiring creative DIY thrift-a-buck peeps. Thank you for doing the real deal play by play.
YoungHouseLove says
Aw shucks, thanks!
xo,
s
Jeff says
I only made it through the first page of comments, so I don’t know if someone’s already mentioned this, but with all of the stuff you guys do, you SRSLY need to invest in a Sawzall. You could have cut that little metal rod in a few seconds, or started cutting the granite top with a different blade (luckily it cracked – that’s a weird thing to say about a granite top, hey?).
YoungHouseLove says
We actually have a reciprocating saw! Haha. Just didn’t think to drag it out since it was in the separate entry basement and the hack saw was in the tool drawer (in the kitchen, haha). Would have been much faster though!
xo,
s
Jenna l Homeslice says
Wow, three weeks! I guess it’s good you have water elsewhere. This kitchen is going to fabulous, can’t wait to see it all done!