Okay, let’s get some open shelves up in this mother.
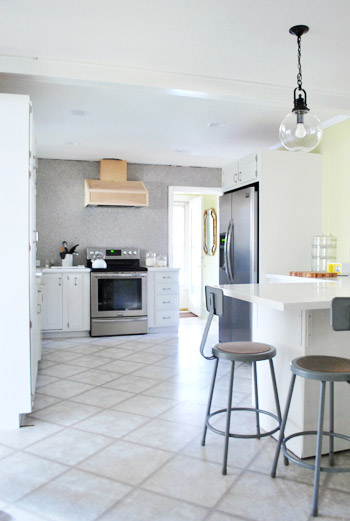
With the hood cover now built, we could finally put the shelves in around it. We were originally going to build true floating shelves (maybe even breaking out Ana White’s instructions) but after looking at some of our inspiration pics again, we decided to open ourselves to the idea of using brackets instead. Note: For anyone wondering how the whole dust/grease situation is with open shelves, check out this post (we’re crazy so we did our research). Apparently the consensus is that if you have a great range hood (check!) and put dishes you use often up there (soon-to-be-checked!) it’s all good. Rarely used items stored inside of cabinets get dusty too, so the key seems to be to have a good hood and to rotate things and use them a lot when they’re out in the open. We’ll definitely tell you how it goes for us.
Besides just liking the look of them, brackets would also make us less concerned about things ripping out of our wall o’ tile (and you already know that stresses us out). Plus, we had heard that Home Depot had some pretty good and affordable options for brackets. Here are the ones I found – actually this is the photo I texted to Sherry to ask which one she liked best since she was at home with Clara and the photoshoot crew.
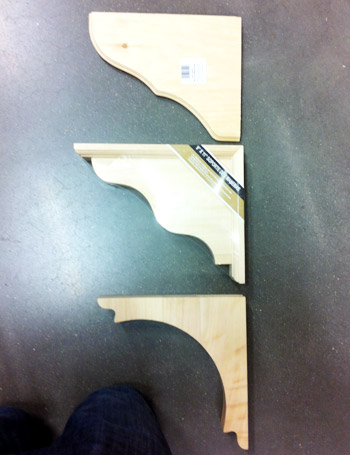
We both agreed the last one was BY FAR our favorite, so I picked up 12 of ’em along with some 12″ framing lumber to act as our shelves. A few of you had said this 12″ framing lumber + brackets system worked well in your kitchens (and we had good luck with them making our office desk) so why not, right?

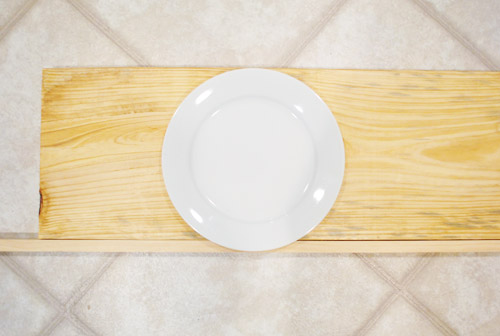
Well, one “why not” would be that they’re not wide enough for our plates. We have 12″ dinner plates and since 12″ in lumber terms is really closer to 11.25″, we realized we’d have some plate overhang-age. Which is never a good look:

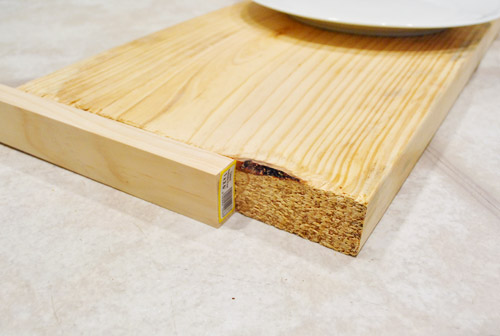
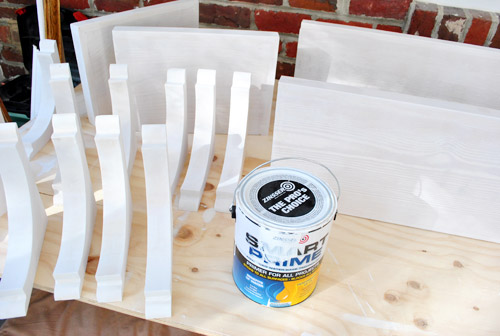
After briefly contemplating getting smaller plates, we devised this solution instead: adding some 1 x 2″ trim around the end (just like we did to finish the top of our homemade console table in the living room).
Not only would it solve our shelf depth issue, but it’d also mean I could cover up the rough end of each board with a nice smooth piece of wood. A win-win, dontcha think?
With all of our materials purchased our total came to about $116 (for brackets) + $15 (for the shelf boards) + $10 (for the smaller boards to frame out the larger shelves) = $141. Which isn’t exactly cheap, but we knew we’d essentially get four shelves worth of storage (two big and two smaller ones) which is about the equivalent of three upper cabinets (which usually go for around $300+ total). And thanks to saving money with things like reusing our original cabinets, building our fridge cabinet, our self-installed wall of tile, and our craigslist range hood we were ok with a semi-splurge in the shelving category (plus we already have the paint and primer we’ll be using).
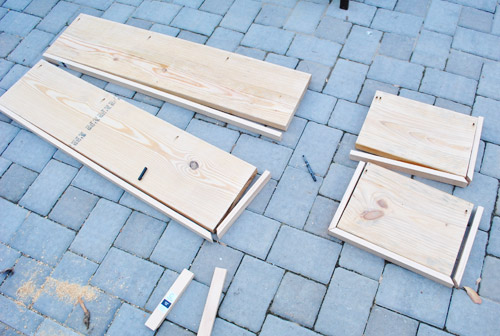
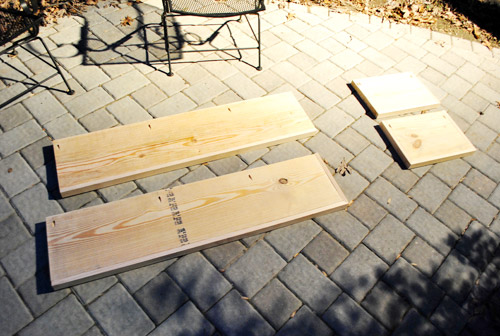
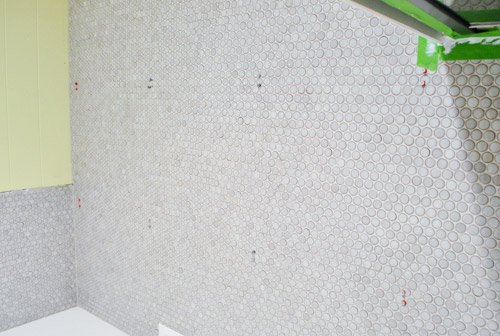
Next we began marking and measuring everything. We used the same weighted-thread-hanging-from-marks-on-ceiling method for indicating where my studs were (which we used here to hang our range hood). Ends up they’re pretty awesomely placed to get even looking brackets – except for the two on the end of the long side (that stud is being used by the hood, remember?). But we figured we’d just use heavy duty anchors on the other two (sunk into tile we knew they’d be nice and strong).

We also used this moment to measure and cut our shelves too. I know it may look short on that one end, but remember we’re gonna trim it with a 1 x 2″ board, so that’s intentional. Oh and see those subtle gray lines in the photo above and below? Those are our hanging pieces of thread to mark the studs. Just didn’t want anyone to wonder if we drew on the tile or anything.

We decided to just trim the exposed sides so each shelf had a slightly different configuration. The long shelf on top would have the wall and hood on both ends, so it only needed trim on the front. But the short shelf on the bottom would be exposed everywhere but the back side (the one on the top right would run into the hood and the one on the bottom left would run into the wall). I know it might seem strange not to just trim them all out in the same way, but we knew from building our console table that once it was all put together and painted it would look great this way. And of course we cut the framing lumber to different sizes to account for the trim, so they’ll all be the same finished length and depth.
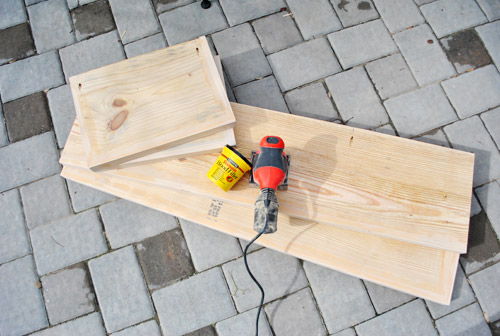
We attached the trim with some wood glue and finish nails. You’ll notice we also have some pre-drilled pocket holes on the top. I was thinking it might be nice to screw the shelves directly into the wall (in addition to screwing them to the brackets).
That night I also broke out the wood filler to make the thin seam between the trim and 12″ board completely disappear. It was a small detail, but we thought once primed and painted it would really help make it feel like one solid board. See how even in the photo below (without primer and paint) you can’t tell that some are trimmed out on one side while others are trimmed out on two? We’re actually glad our plates didn’t fit on the boards alone since the trimmed out result is so much more finished looking.
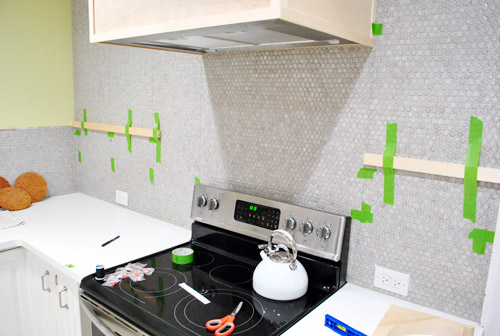
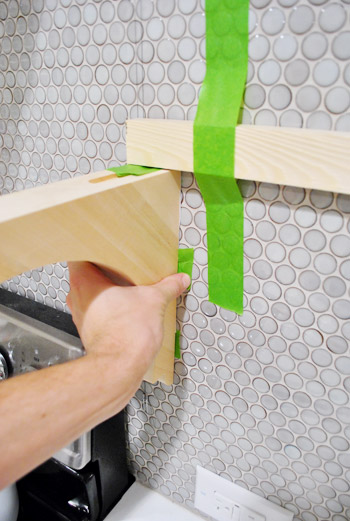
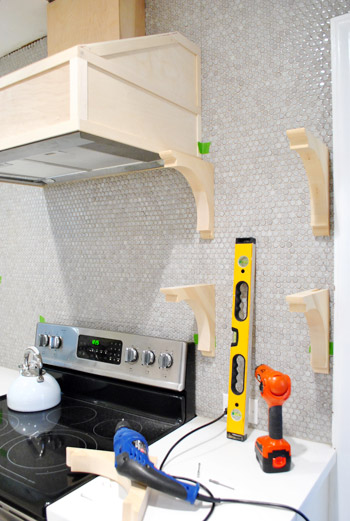
While all that was happening, we also started getting ready to attach the brackets to the wall. We leveled and taped up some 1 x 2″ scraps to act as our placeholder shelves so that we’d know exactly where the top of the bracket needed to sit.
The brackets came with two metal hooks on the back, so I used my favorite paper template method to help figure out where I needed to drill corresponding holes on the wall. The strip of paper is taped to the bracket on the top and bottom, but the tape on the sides is facing out to stick to the wall. And the two holes are punctured right where the notches are.
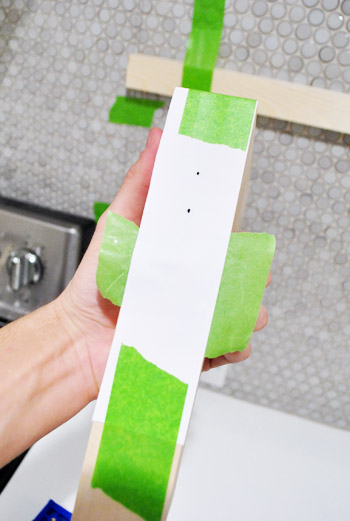
Then I put it in place on the wall, pressed the side pieces of tape against the tile, and carefully peeled the bracket away…
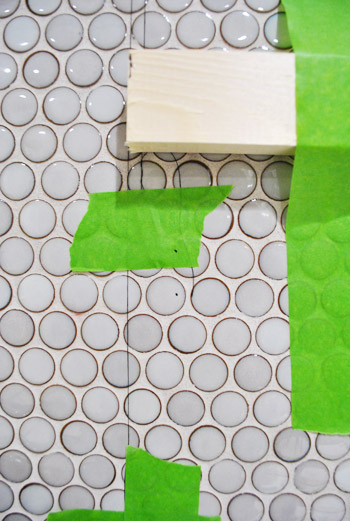
…leaving my paper template in place so that I could mark through the holes.
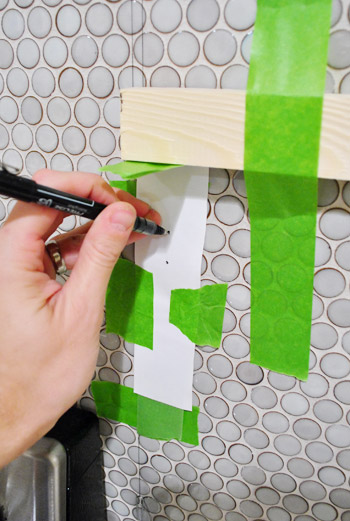
See? Easy right? Now just pretend it wasn’t super tedious to do it 11 more times.
And since I still cringe at the sight of our tile getting drilled into (especially 24 times!) I couldn’t bear to photograph it again, let alone share it here. But here’s some of the final product – a dozen pairs of screws waiting for brackets to be hung on them. That my friends, as subtle as it may look, is the look of progress.
Here’s a sense of how everything will hang. We did a test run of hanging one side to make sure the screws weren’t in or out too far, and to make sure they felt secure. They did! Phew. True to form, Sherry can’t wait to load them up with dishes and plates galore.
But as excited as we were to just get the darn stuff hung, we knew it would behoove us to do all of our priming/painting beforehand – (that way we wouldn’t have to worry about taping off the wall or getting paint on our grout). So this is where our shelf-hanging tale ends for now. Waiiiiiting for our primer to dry so we can apply two coats of paint (the same color that we used for our cabinets) and then hang it all up once it’s nice and cured. Oh yes, and we’re priming and painting the hood too, so that should look nice and crisp the next time you see it.
Once dried, it should be pretty quick to get everything hung so we should should have “after” pics for you by Wednesday, barring any unforeseen craziness (who are we kidding, it’s week two of three for our in-home book shoots and we live in Crazyville, but it would take a pack of wild boars running through the house for us to slow down on our shelves). What did you guys do this weekend? Any lumber stuff? Priming? Drilling through tile? Prepping 35 more secret projects to shoot for your book while your daughter ran amok and your chihuahua ate various crumbs leftover from the past week of visitors?

Cathy says
Love those brackets. I was planning to use them in my laundry room for some open shelves. Im assuming the screws are not in the studs since you used anchors. Are you concerned about the weight of the dishes eventually loosening the screws from the drywall? That was my only concern about open shelves on those brackets. I was thinking i wouldnt be able to put anything too heavy on them. Would appreciate your opinion! Thx. Cant wait for the book!
YoungHouseLove says
We only had to use anchors in 2 sets of brackets (on either end of the long shelves) so most of the screws actually are in the studs. I always feel MUCH better when things are in studs (you can feel the screws really take hold of the frame) so we might’ve been hesitant about it had we only be relying on anchors.
-John
Cathy says
Ok. That makes more sense to me. Thx for the reply:)
Cathy says
I LOVE what you’ve done with your kitchen! We are re-doing ours ourselves and I want to do some open shelving like this. I just found your site today and I have to say it’s absolutely wonderful! I love looking through all the home DIY stuff and I used to live in Richmond so your blog is just singing to me. I can’t wait to read through more older posts when I have the time. Thanks so much!!!
Juliette @ Laguna Niguel carpet cleaners says
Wow, looks amazing the before and after pics. With all the little bit of color that you put on those shelves it will look awesome against all the white. The colors just pop out. Great job! Running my own business doing Carpet Cleaning Laguna Niguel we are in peoples homes every day and i get lots of ideas seeing the way people decorate, its fun getting great ideas. I like your work!
aml says
i’ve got the same problem with the plates. denby right? (looks like it)…. ours only fits in a pot drawer =(
YoungHouseLove says
Aw man! Ours are from Linens N Things a long time ago. They’re just basic 12″ plates so we didn’t really think they’d be hard to store by they didn’t fit in our first house’s kitchen until we redid the cabinets either! Who knew dishes could be such a challenge?
xo,
s
Katie A says
You referenced the lumber + bracket system for your office desk. Looking at the desk project (and it looks spectacular I might add!) I don’t see how brackets got used. I’d like to attempt a desk with shelving above it and am searching for ideas. Love how you’ve used the brackets in your kitchen!
YoungHouseLove says
Sorry if that was confusing – we just used the same framing lumber, not the brackets, for the office desk. But you could certainly do this same sort of bracketed shelves in an office.
-John
Matthew Richardson says
My wife convinced me to go with open shelving, and I have to say, I was a little worried about looks and space, but now that it’s up, it’s really really great looking and an instant conversation piece:) You guys are gonna love it, once it’s up. We actually looked at some of the same brackets you did, but picked the middle style and attached them to 2 white floating shelves from Ikea. Feel free to take a look! http://greyandyellow.com/?p=84
YoungHouseLove says
Gorgeous! I love it!
xo,
s
Matthew Richardson says
Thanks:) You guys have inspired us to go with penny tile for a partial back splash, so here’s hoping I’m happily surprised again:)
Brooke says
Where did you get your wood brackets?
YoungHouseLove says
They’re from Home Depot!
xo,
s
Jesse says
OK – so I’m totally nerding out, and being obsessive.. but I CANNOT find the bracket you chose at home depot! not even online.. I must be missing something.
I love that one, and I am adding brackets to my house and that is by FAR my favorite too! But seriously, any info that could help me on my quest would be outstanding. I can only find spindles and curlies, which are great… but.. ya know… not what I’m looking for
:)
Thanks! Long time reader & lover,
Jesse
YoungHouseLove says
So sorry! Think it’s a regional thing? Can you find the brackets in general and it’s just not there among them? Or can you not find any brackets at all? In our store it was right next to all of them in the wood aisle. I don’t think it’s online though. Maybe go and ask someone to walk you and show you exactly where all the brackets are in case it’s hiding at the end of an aisle or something? Good luck!
xo,
s
Jesse says
OMG! I found it. I mean, I think. I woke up this morning determined, and I found that some people/places call them corbels. I didn’t see them in the section of the store, but… drumroll please… here’s the link!
http://www.homedepot.com/h_d1/N-5yc1v/R-202287727/h_d2/ProductDisplay?catalogId=10053&langId=-1&keyword=corbels&storeId=10051
I know other people were looking for them too, so hope they see this!
Jesse says
PS they look beautiful, I love open shelves!
YoungHouseLove says
Yay! So glad!
xo
s
Jesse says
Sorry for the comment bombard – there is this one too, hard to tell which exactly it is in pics. http://www.homedepot.com/h_d1/N-5yc1v/R-202819941/h_d2/ProductDisplay?catalogId=10053&langId=-1&keyword=wood%20corbel&storeId=10051
YoungHouseLove says
Thanks Jesse! So helpful!
xo,
s
Cheryl says
You must have a way better Home Depot than out here. I have been to two Home Depots and Lowe’s and still can not find a good selection of wood brackets. They only have the first ones in your photo. Time for internet shopping!
YoungHouseLove says
Oh man, so sorry! Here’s hoping you can find those soon!
xo,
s
Jesse says
Cheryl – I think you can order them on home depot.com, i put a link above. I was on the prowl too!
Cheryl says
Jesse – Thanks so much! I didn’t even see that. Of course it wasn’t at the two Home Depot’s I checked, but it is at many others near me. Thanks again!!
eusc says
love your kitchen. how did you drill into the tile backsplash? we have subway tile and i am thinking of taking down two cabinets to put up open shelving. help please
YoungHouseLove says
We just used a bit made for tile and had at it. There’s more info in this post for ya: https://www.younghouselove.com/2012/01/hows-it-hanging-2/
xo
s
Stephanie says
This may sounds like a dumb question but I have a hard time keeping curtain rods up – what kind of screw anchors do you recommend? I’m putting up shelves in my daughter’s room and I don’t want them falling on her! Thanks!
YoungHouseLove says
We just use a container from Home Depot, I think they’re 2″ anchors that come with the screws for them all in the same container :)
xo
s
Aliza says
So I am doing this exact same shelf, exact same brackets from Home Depot, in my office. I’m mounting the brackets into the studs, my question is should I still use the red drywall anchor that came with the bracket if I’m going into a stud? I assumed those anchors were just in the case of mounting it to drywall, but I noticed in one of your pictures it looks like you used them. Do I need to take out my screws and put the anchors in? Thanks!
YoungHouseLove says
Nope, no need to use the anchors if there’s a stud, just use the screw into the stud. Good luck Aliza!
xo
s
Aliza says
Ok, another question =/ I’m a little nervous about the weight of the shelf, those framing boards are heavy!! My board is 5ft long, I have it supported by one bracket near each end, and a 2x2in board screwed into the studs running between the brackets to support the back of the shelf. Is that enough? I want to be able to put scrapbooks/photo boxes/files on the shelves, so semi heavy stuff. Any thoughts? Thank you so much for your help!!!
YoungHouseLove says
It sounds like it should be enough to me! Just use long screws into those studs and keep an eye on it over time for bowing. Studs are super strong though so you should be set!
xo
s